Sep. 26, 2018
Optimising images for the web and performance
Reduce filesize with jpegoptim, optipng, pngcrush and pngquant
One way to make your website faster is to make it smaller. Not with tiny fonts, but with less bytes! More than half the weight of an average website is because of images. Yet very few people optimise their images for the web and performance, time to find out how much bytes you can safe!
Optimise your website
If you optimise your website it will load faster. Because many people prefer fast websites, search engines like Google began measuring page speed to determine the ranking of your website in the search results.
Average page size
Although many web builders focus on HTML and scripts first, the majority of the weight of an average website is comprised of images (Source HttpArchive page weight September 2018).
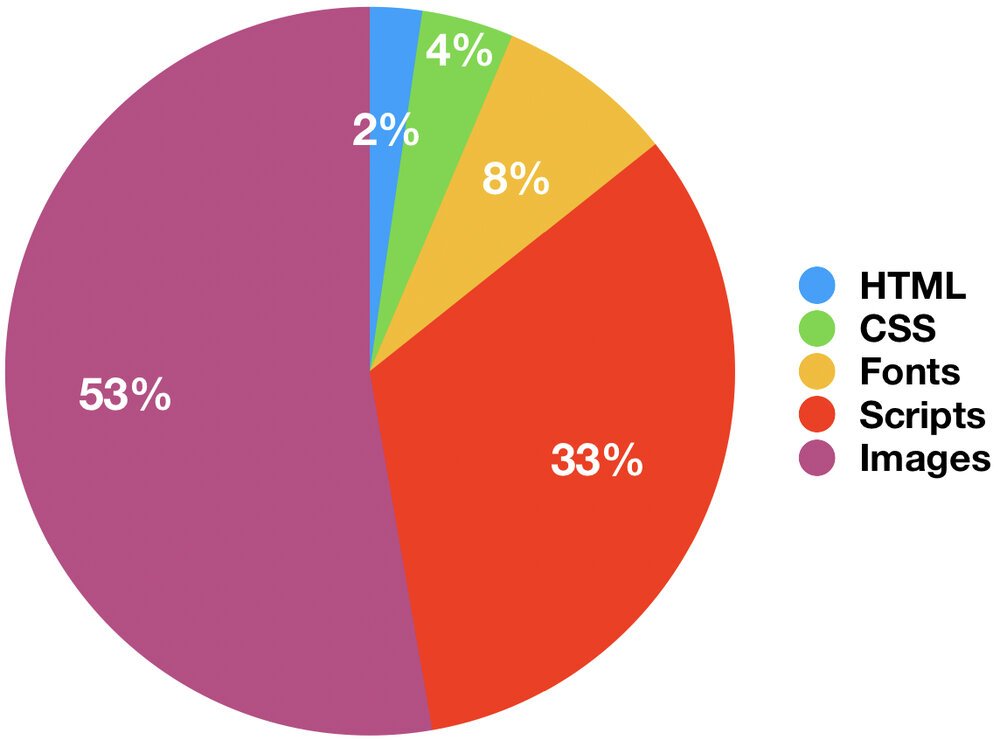
An effective image optimisation can therefore have incredible effects on the speed of your website.
What is image optimisation?
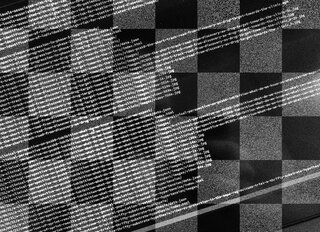
A digital image is like a chessboard, a rectangle with 8x8 black and white squares. If you would save the chessboard uncompressed, you would write down the colour of each square individually ("square one is white, square two is black, square three is white, square five is black, etc"). It would take 64 lines to describe the entire board, although accurate this is not very efficient.
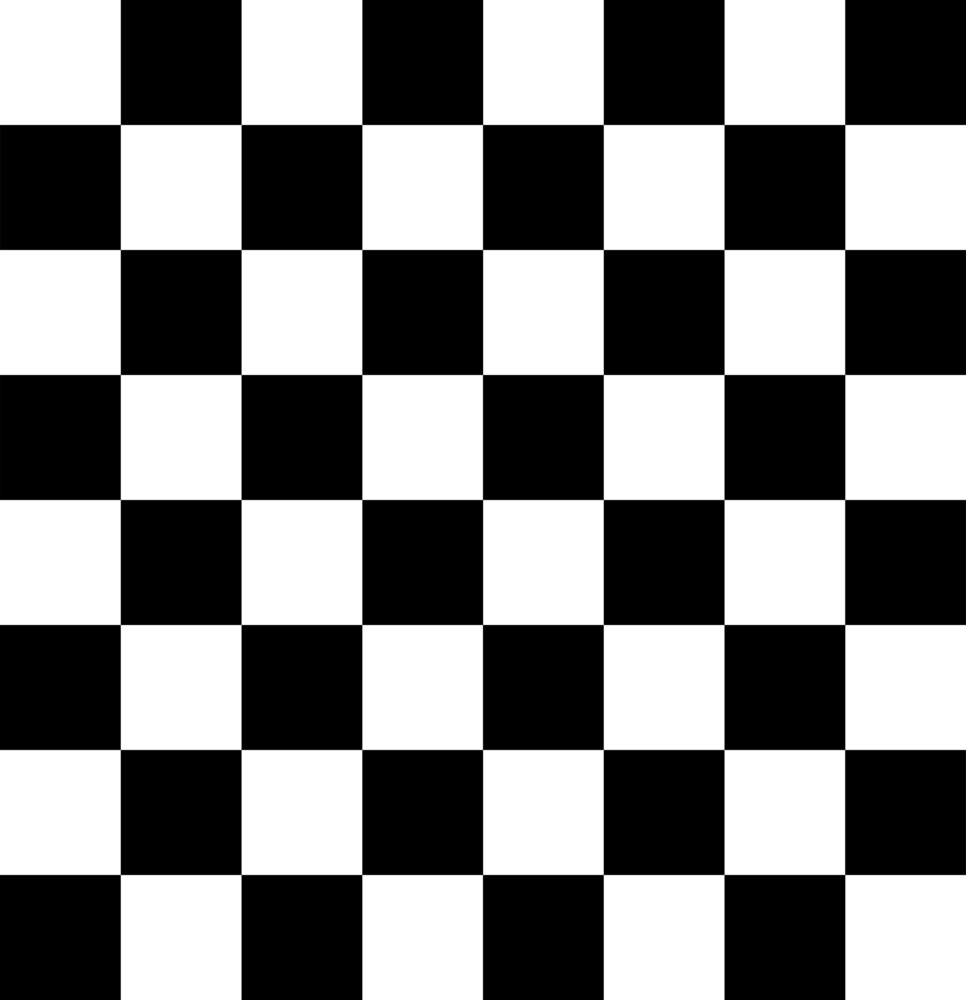
Image optimisation is finding more efficient ways to describe the colours of an image. You could describe the entire chessboard in one line of text: "alternate between black and white, start with white", or even more efficient: "repeat white, black". With digital images this is called compression, the algorithm tries to identify sequences of reoccurring colours.
There are different algorithms that all have their strengths and weaknesses. Some perform better on photos (with millions of colours), while others perform better with images with fever different colours (like a PowerPoint slide). Choosing the right algorithm is your first performance boost.
Common image formats
- JPG is a very common image file type with effective compression for images with lots of different colours, like photos. This image format has been around since 1992 is is supported on almost any device.
- GIF is another old image file type that was developed in 1987. It's popular because it supports animation. Technically it is very limited to just 256 different colours per image.
- PNG was developed in 1994 as replacement for GIF because of controversy about the GIF's compression algorithm. It is popular because almost any device supports it and PNG has support for millions of colours including transparency. It allows for lossless compression, guaranteeing sharp text and lines, making this format perfectly suitable for graphs and logo's.
Recently new image formats where introduced by Google (webP) and Apple (HEIF), that offer even better compression compared to JPG, GIF and PNG. But these formats have yet to be widely adopted.
Choosing the right image format
What format is best for your image depends on the actual contents of your image. There is no universal rule that determines the best format for a given image. You could best try it yourself, see what happens to file size if you save your image in different formats. Many desktop programs offer the option to choose a format when you select "Save as".
You could start with JPG for photos and PNG for images that have fewer colours, like a logo, graphic or PowerPoint slide. Formats like JPG offer different compression quality settings that effects image quality and file size. A lower quality setting will decrease image quality in favour of a smaller file, you should try to find a sweet balance between quality and size.
Lossy and Lossless compression
Compression algorithms that trade quality for file size are called lossy compression algorithms. Alternatively, algorithms that preserve the original image quality are called lossless compression algorithms.
How to optimise images
Once you have your JPG or PNG image, you can optimise it by selecting the right settings for the compression algorithm. Don't worry, you don't need to do this manually: you can use automated optimisation software to find the optimal compression settings for a given image.
Optimising JPG images
If you use Photoshop you could use its build-in feature Save for the web to have a reasonably optimised JPG image.
Alternatively, you can use a command line utility like jpegoptim. This tool shrinks JPG files by optimising the internal Huffman tables - effectively improving the compression algorithm's performance. On average you can expect an improvement of 10-15% without the loss of image quality.
Another way to optimise JPG images is to use an online optimiser, like TinyJPG or ImageOptim.
If you use WordPress you could consider using a plugin to do image optimisation for you, like Imagify from xtremerain.
Optimising PNG images
PNG files can be optimised with Photoshop using the Save for the web feature. To optimise your PNG files even better, you can use a specialised app, like ImageAlpha for Mac or PNGGauntlet for Windows.
There are online optimisers available for PNG files, like TinyPNG and Compressor.io.
Alternatively you can use command line programs like optipng, pngcrush or pngquant. It's worthwhile to dig into these PNG tools a little deeper.
Testing optipng vs pngcrush vs pngquant
For my work as web developer I integrate image optimisation in content management systems, making it easier for my customers to have their images optimised automatically. As the number of customers have grown significantly I ran into performance problems.
In order to find more performance I decided to test optipng, pngcrush and pngquant. I hoped to find good image optimisation with less processing power from the server. This would improve performance for my customers.
PACE-CME
One such customer is PACE-CME, a website with resources for cardiovasculair education for physicians. This website contains thousands of PowerPoint slides saved as PNG files.

To test performance I used a special test image that is bigger and heavier than a typical PowerPoint slide. This test image is a high resolution image with mixed content, consisting partially of photo's, text and solid colours.
Method
I ran tests on a Quad-core Intel XEON server with 8GB of ram. Per PNG-optimisation tool I used both the most extreme settings (to see what it could do to file size), and its default setting (to see how much faster the default settings are, and how their output compare to the best compression settings).
Results
- original test image 2897KB
- optipng extreme (-o7): 2510KB in 2 minutes 36 seconds / default: 2536KB in 4.9 seconds
- pngcrush extreme (-brute): 2510KB in 1 minute 42 seconds / default: 2531KB in 9.2 seconds
- pngquant extreme (-s 1): 744KB in 5.2 seconds / default: 746KB in 4.2 seconds
The performance of pngquant is amazing, it is much faster while also delivering much smaller file size. This is no magic however, as it uses a different, lossy compression algorithm. This means that images optimised through pngquant lose a little image quality. I compared them closely and could not notice the difference.
Conclusion
Optimising images for web and performance is really important. As my tests have shown, choosing the right algorithm can make all the difference.
For me this meant choosing pngquant, but your decision may be different depending on the type of images you want to optimise.
The key then to take away from this blog post is to care about images. Your website will be much faster - and who doesn't love a fast website?
Download
If you enjoy reading offline, this article is available for download:
Translations
This article is available in the following languages:
RSS / Atom
Grab one of the feeds to stay up to date, the feeds contain the full posts:
