Aug. 18, 2019
Creating a minimal road bike
Recombining and refinishing old parts into a new bike
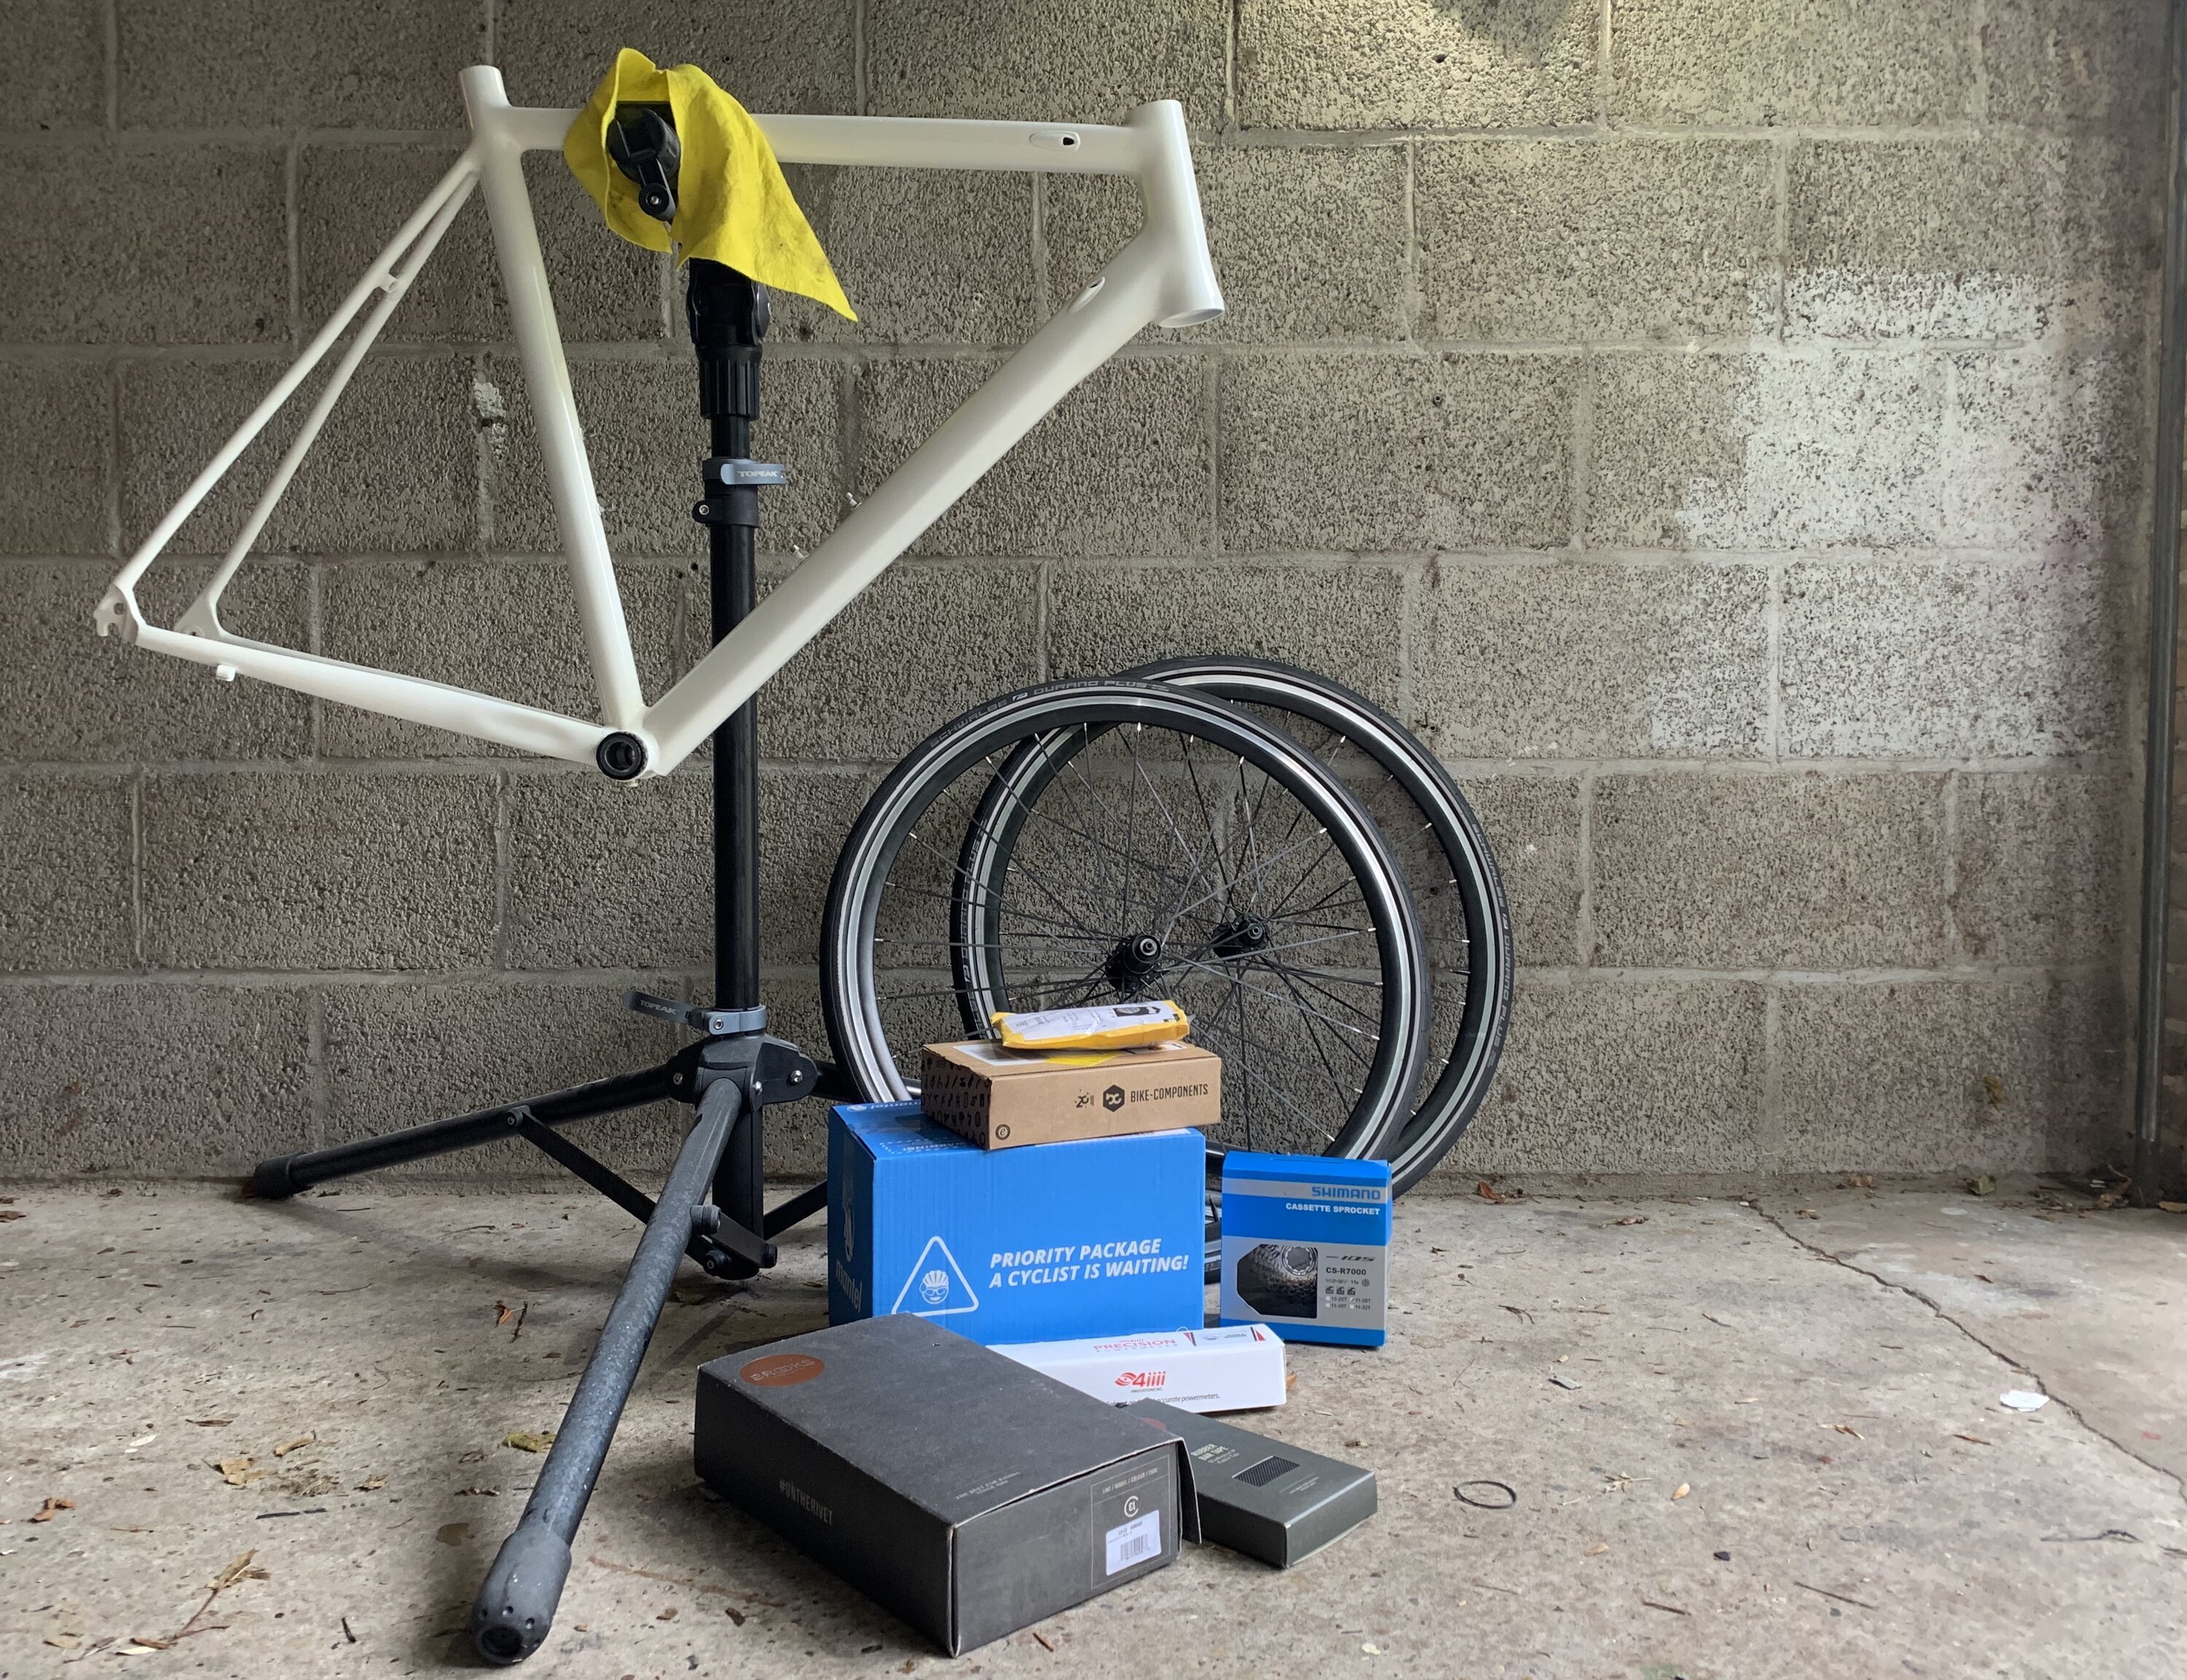
Over the past months I have worked on different bikes, leading to an accumulation of spare parts in my garage. I wondered how hard it would be to make a new bike using these spare parts. I decided to take advantage of this moment to refinish some parts, removing excessive decals in order to create a minimal looking road bike.
Make a plan
Before you start working on building your (new) bike you should make a plan. Create a list of parts you have and what parts are missing. For me this meant I had a nearly complete group set, but I missed brake/shifter cables a saddle and rubber.
Cleaning is half the work
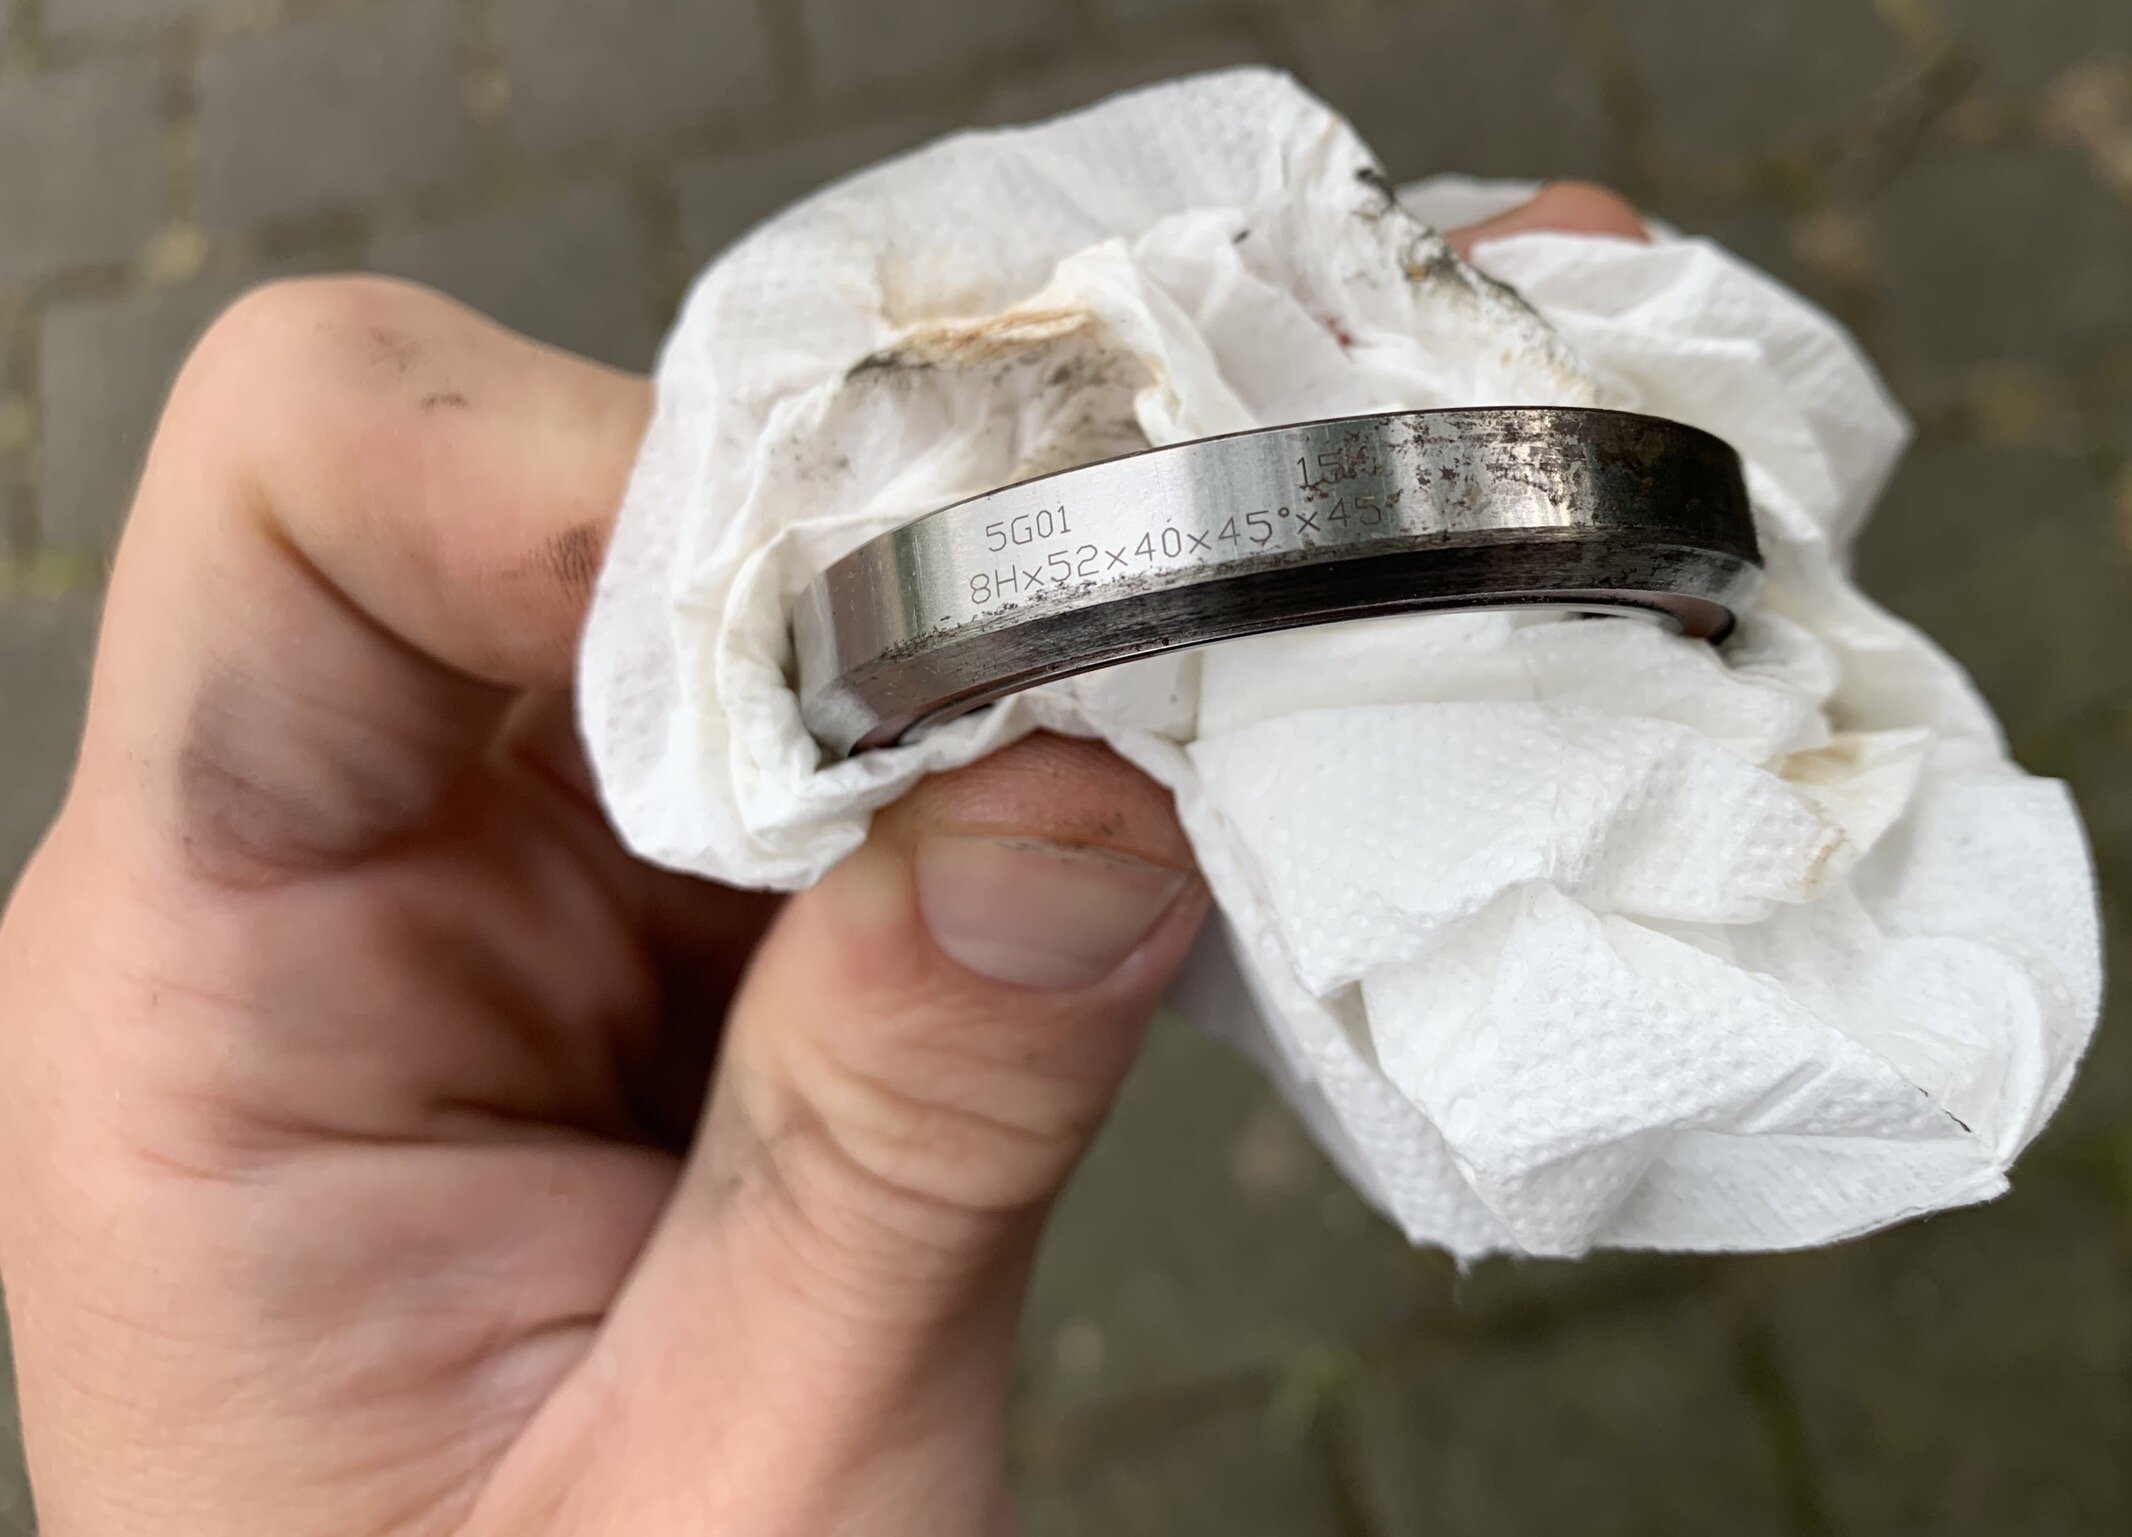
If you work with old parts, make sure to clean them thoroughly. If bike parts are used they collect dirt that affect performance over time. You'll be surprised how beautiful old bikes and parts are when you clean them.

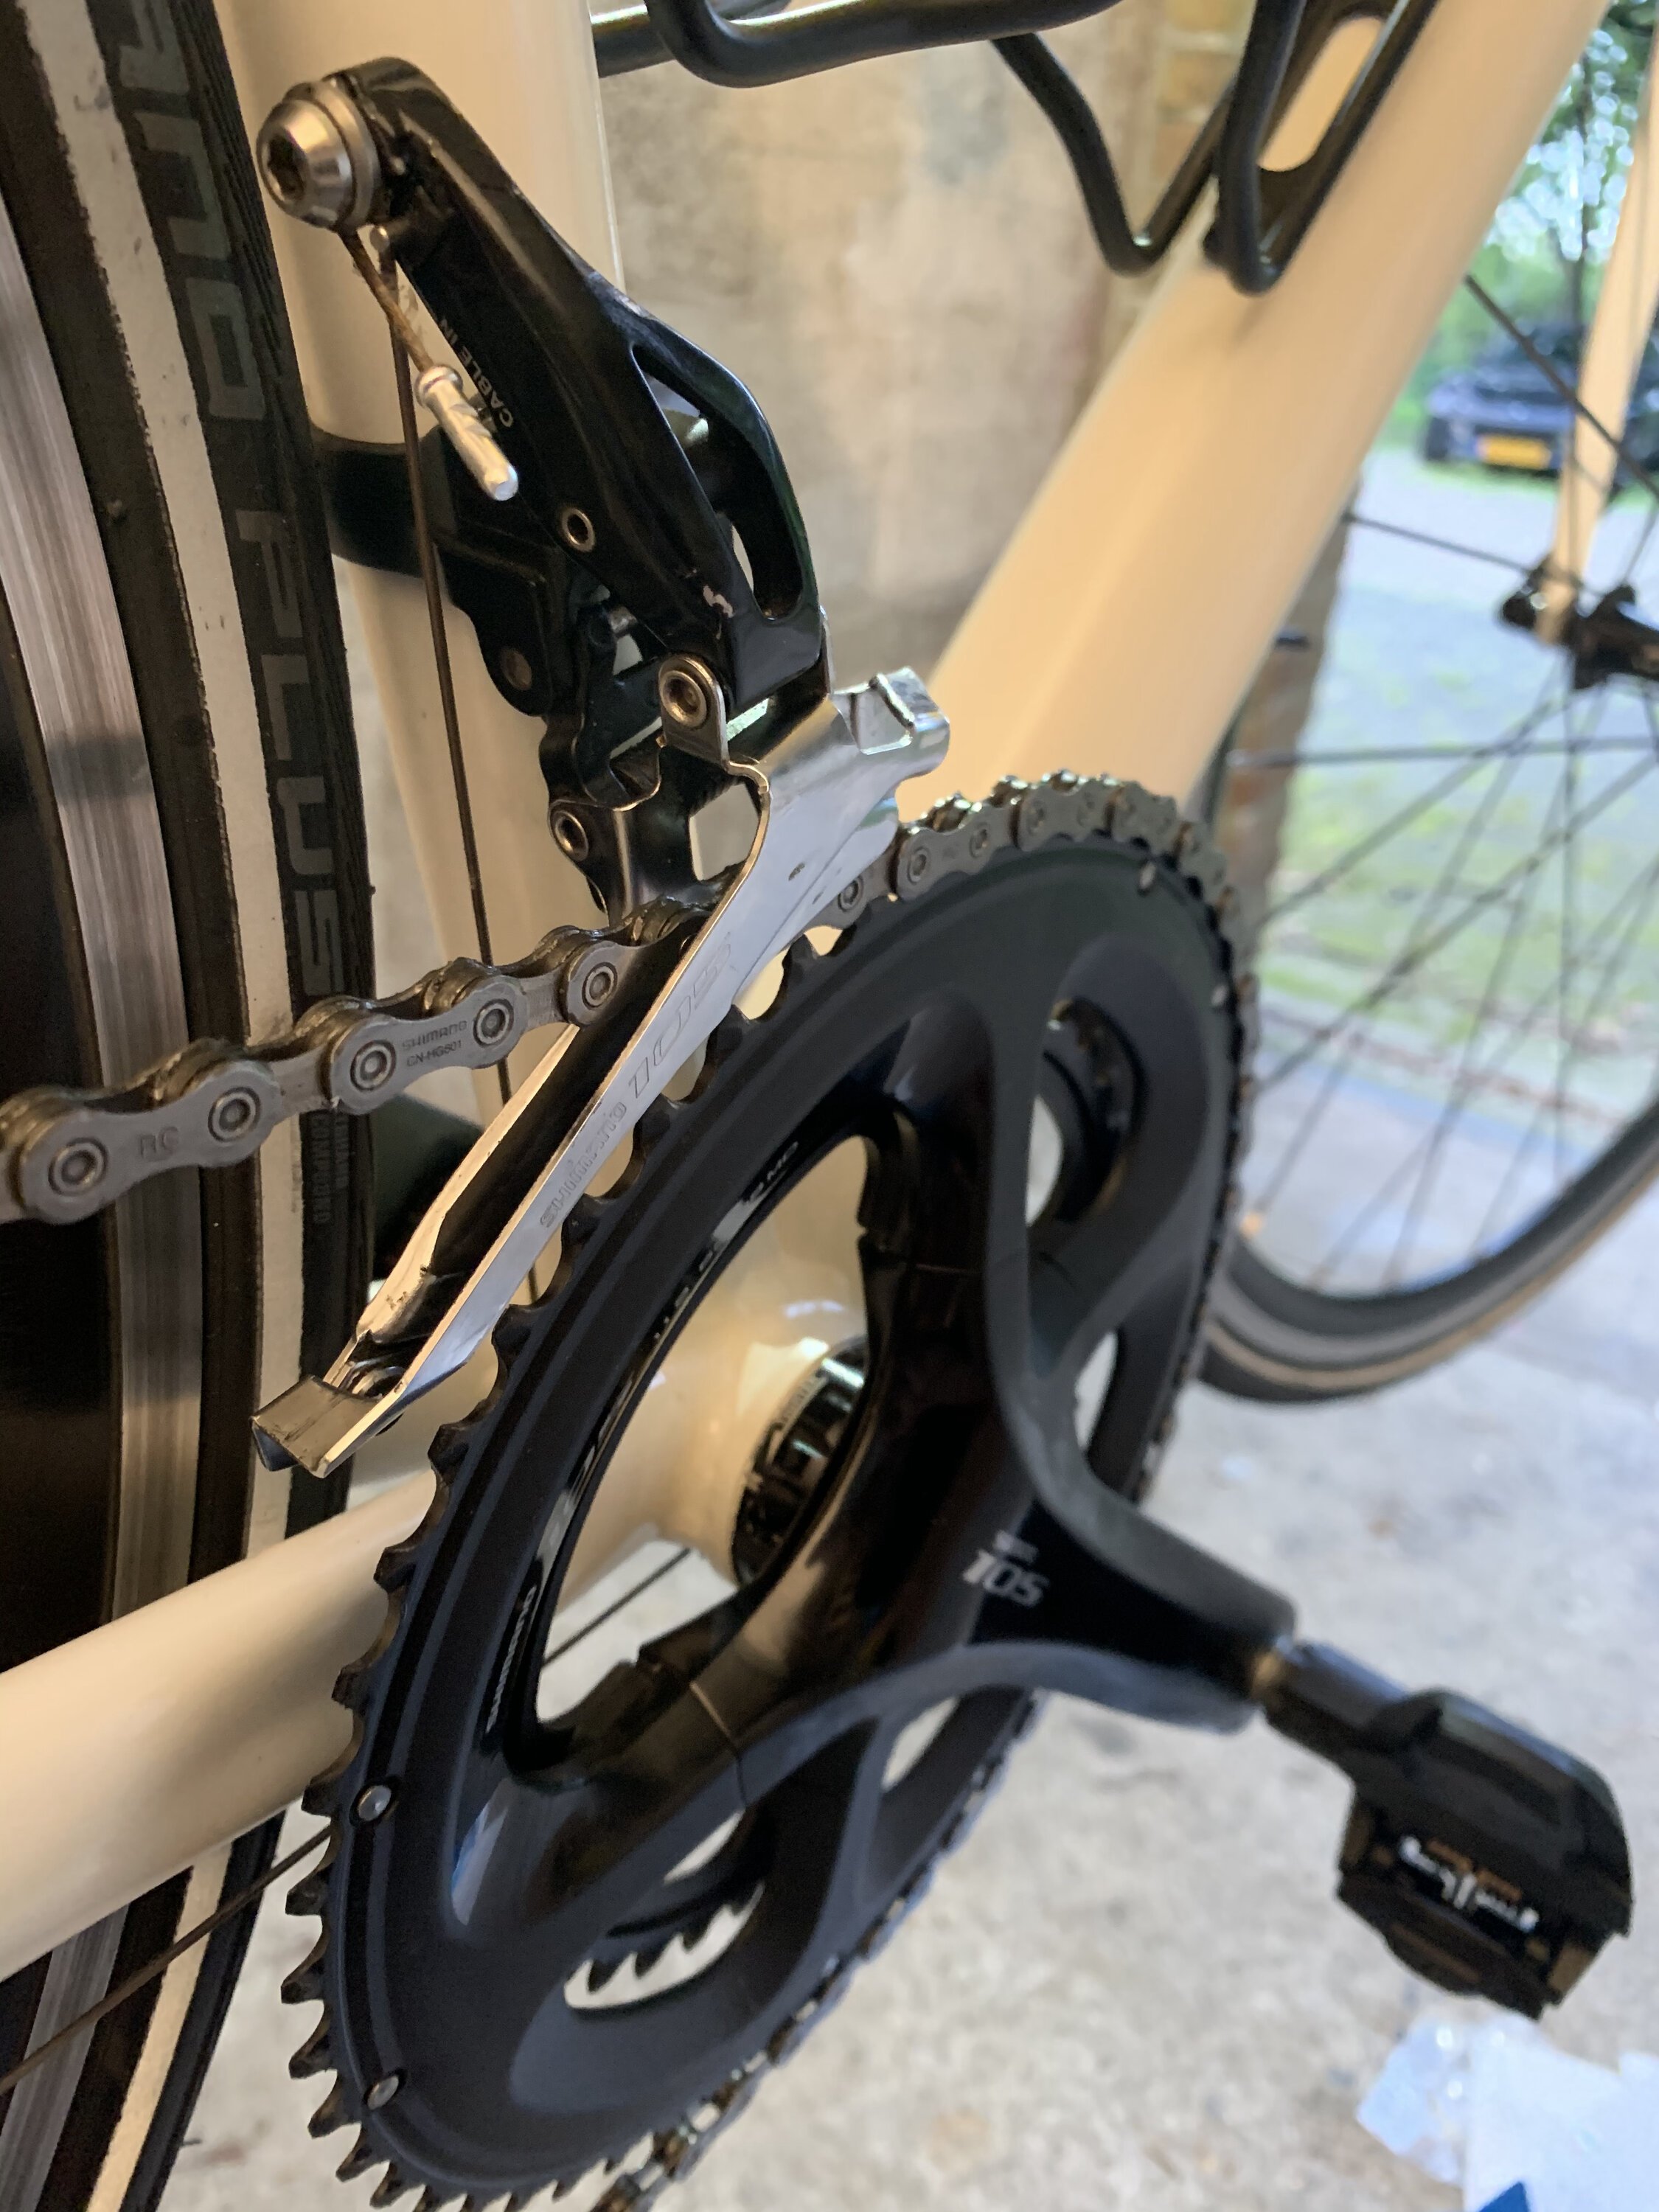
Most bike parts, like a rear derailleur, can be taken apart using standard tools like a torx wrench or allen key. You can (and should) replace bearings when you're at it. It's easy to do and will make the bike feel like new; most bearings have their exact specification written on them.
Refinishing parts with paint
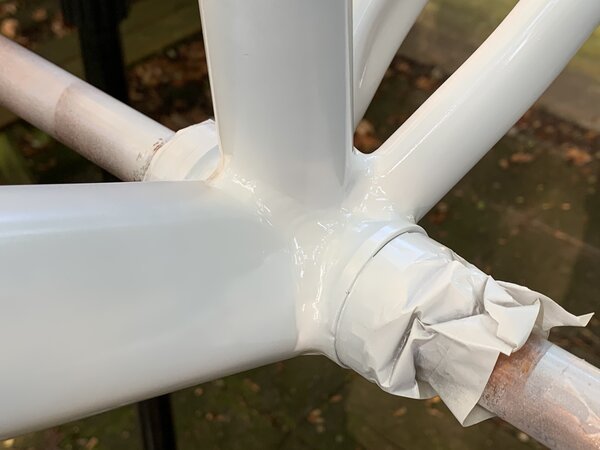
After you've cleaned all the parts you plan on using, you can consider refinishing them with a fresh layer of paint. Earlier I removed all paint from a bike frame, but this time I wanted the new bike to have a fresh, minimalistic paint job.
Some of the parts had signs of wear on them, while others had (excessive) decals. I selected a black/white colour scheme in order to create an uniform clean look. The risk with putting all kinds of parts together is that you'll end up with a Frankenstein-ish creation.
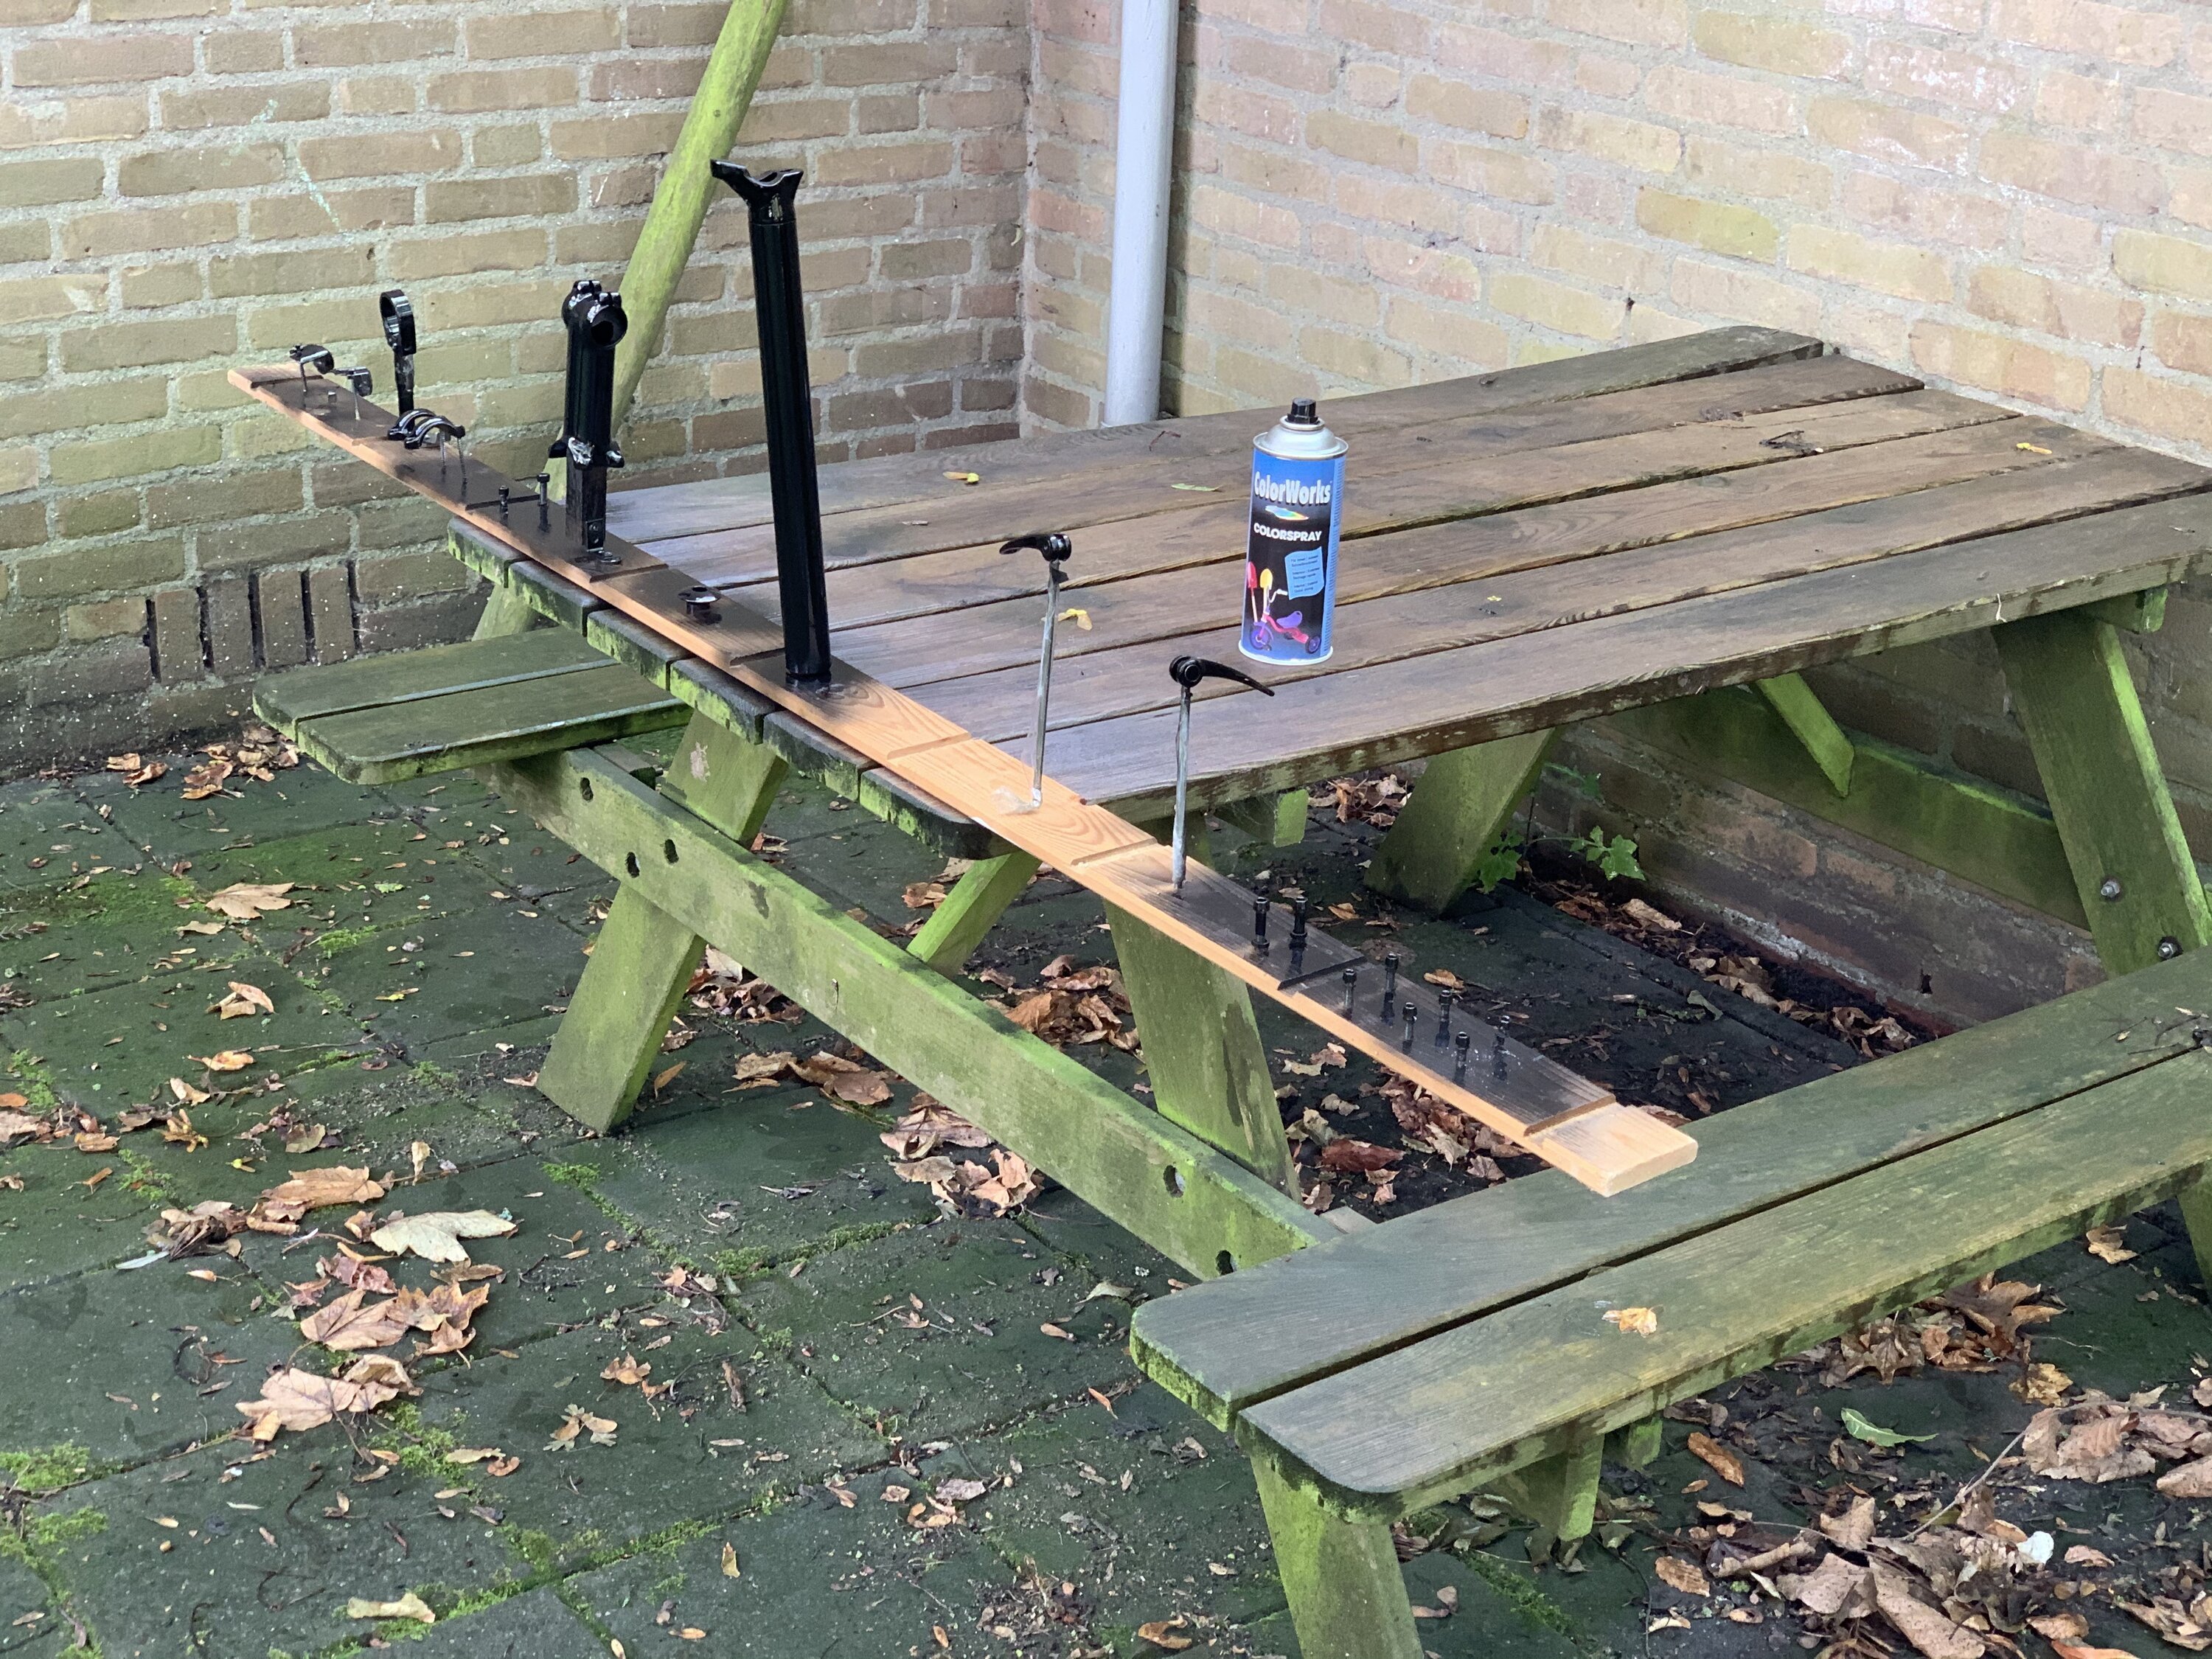
I spray painted the various smaller parts after I've fixed them on a piece of wood. The piece of wood allowed me easily take them outside to apply (thin) layers of paint. Once painted I simply put the entire piece of wood back into the garage to let it dry. I repeated this proces about three times.
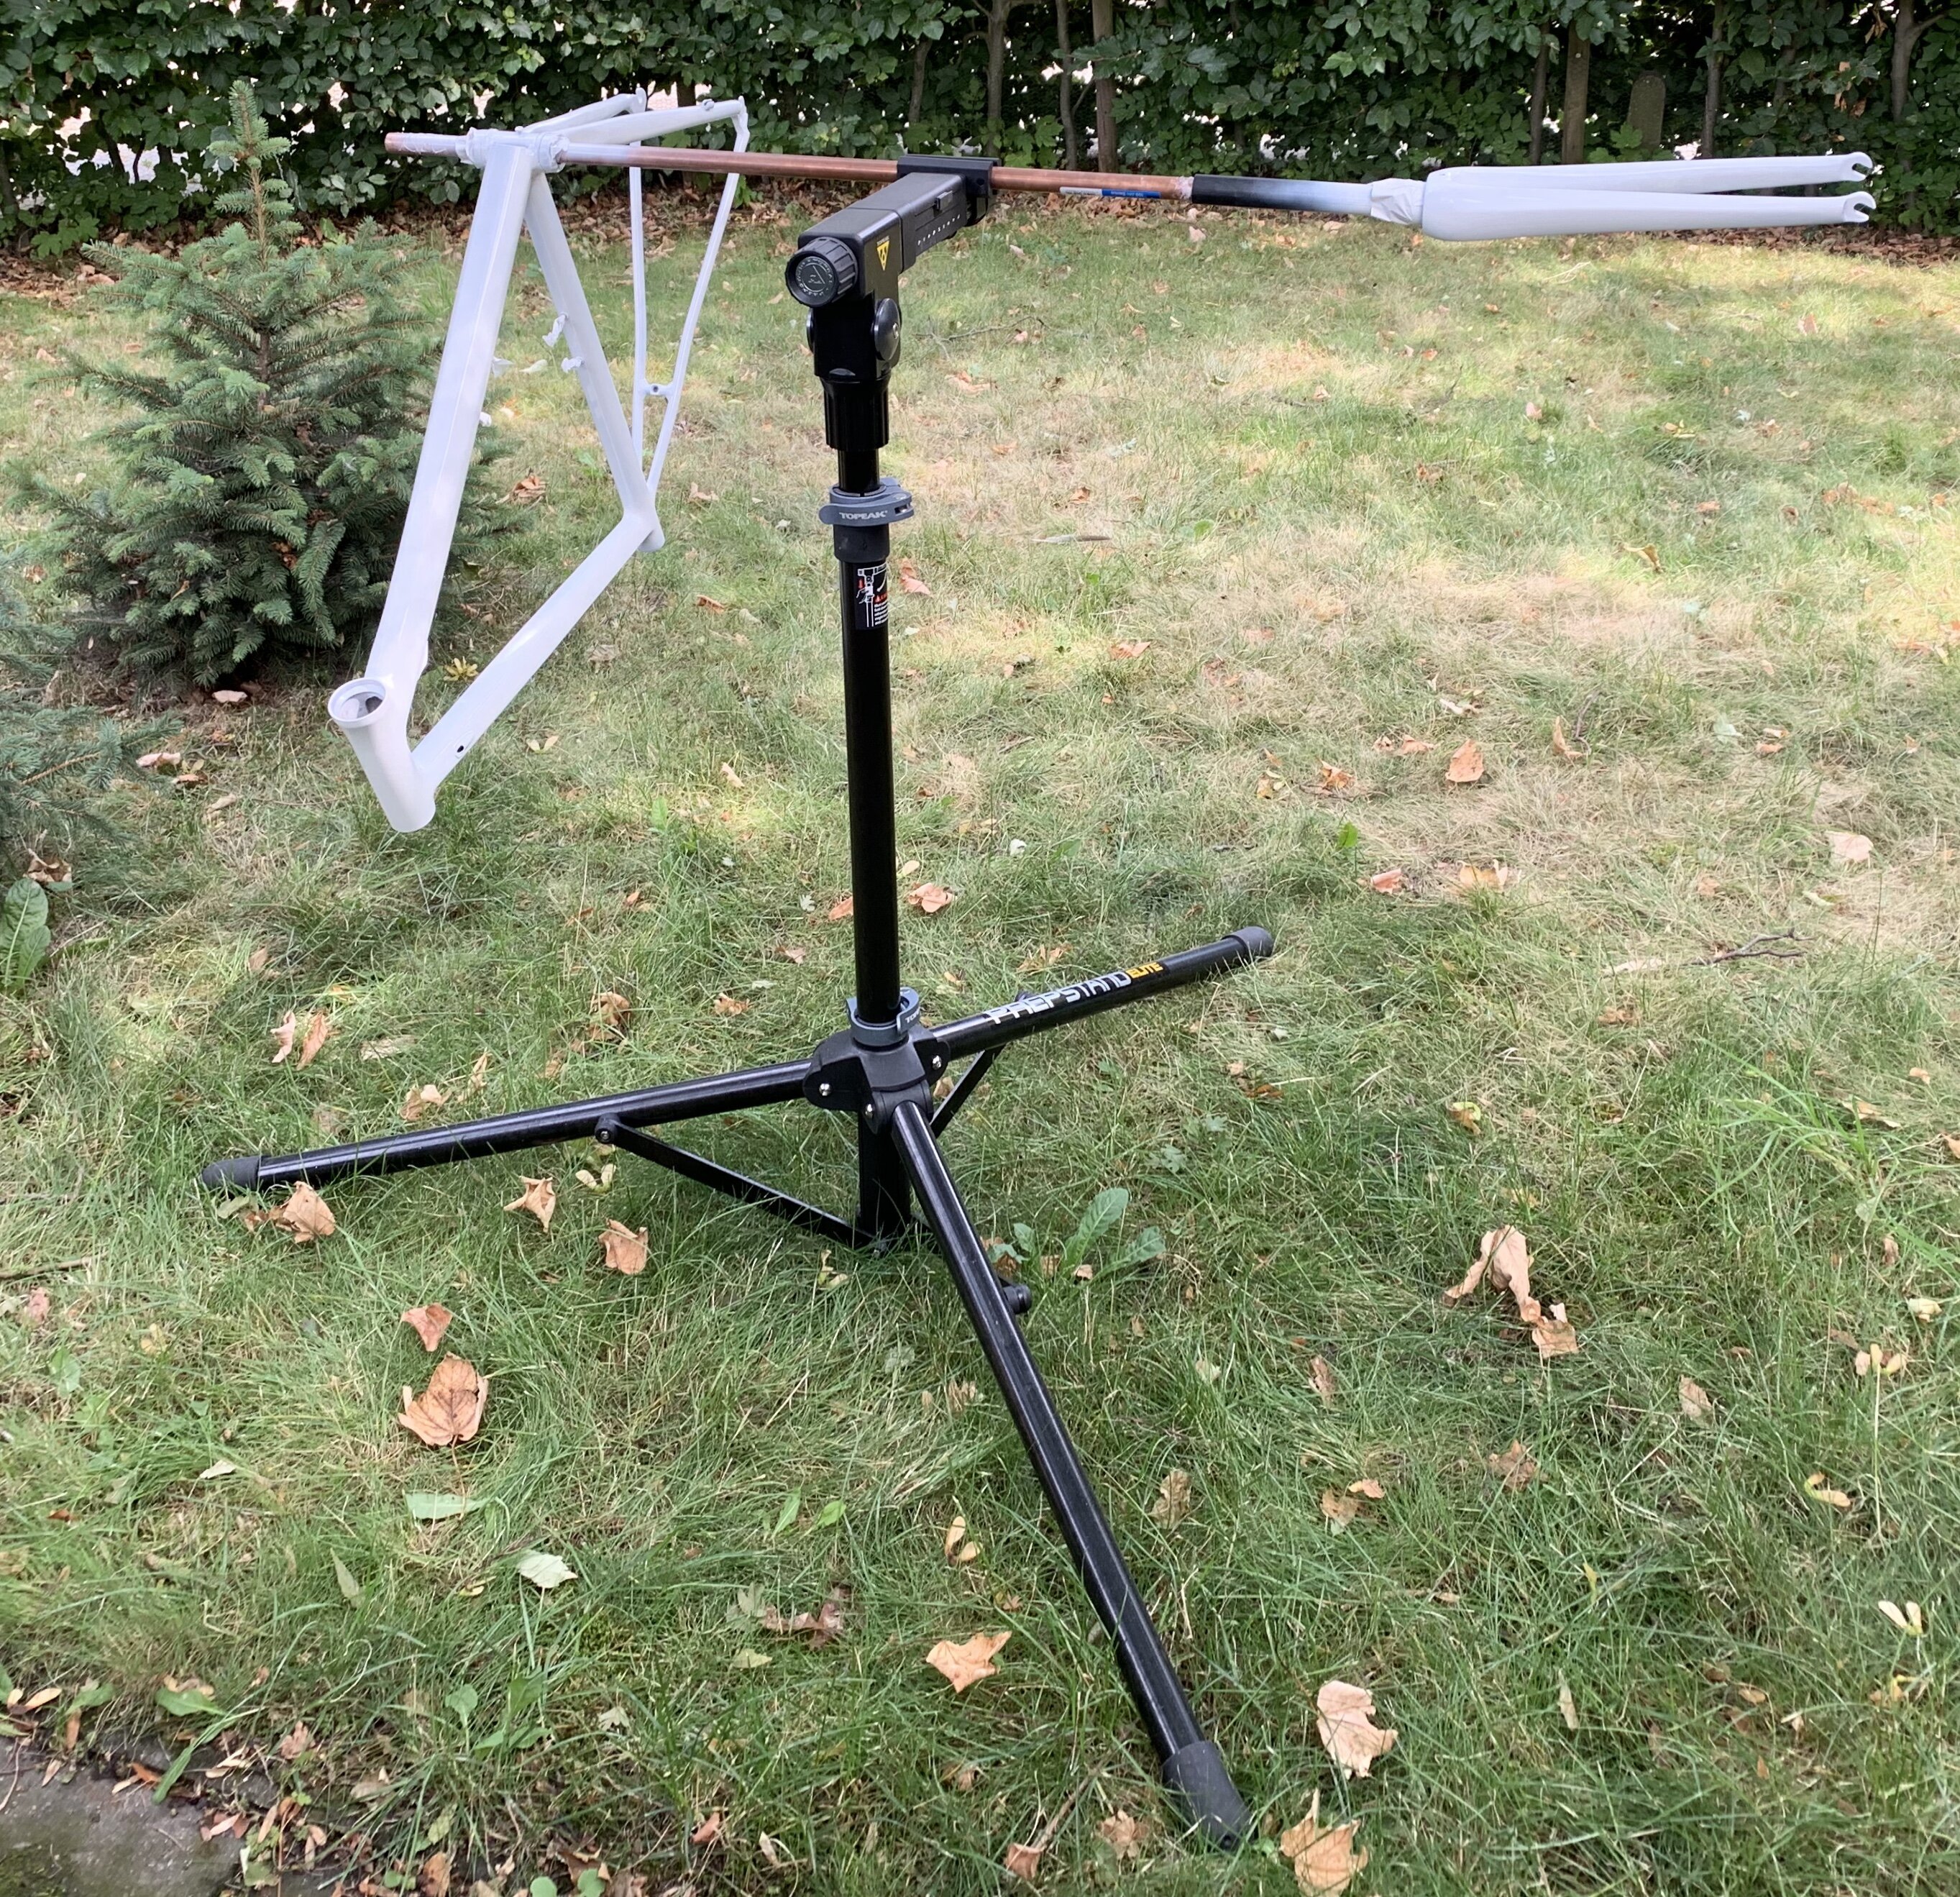
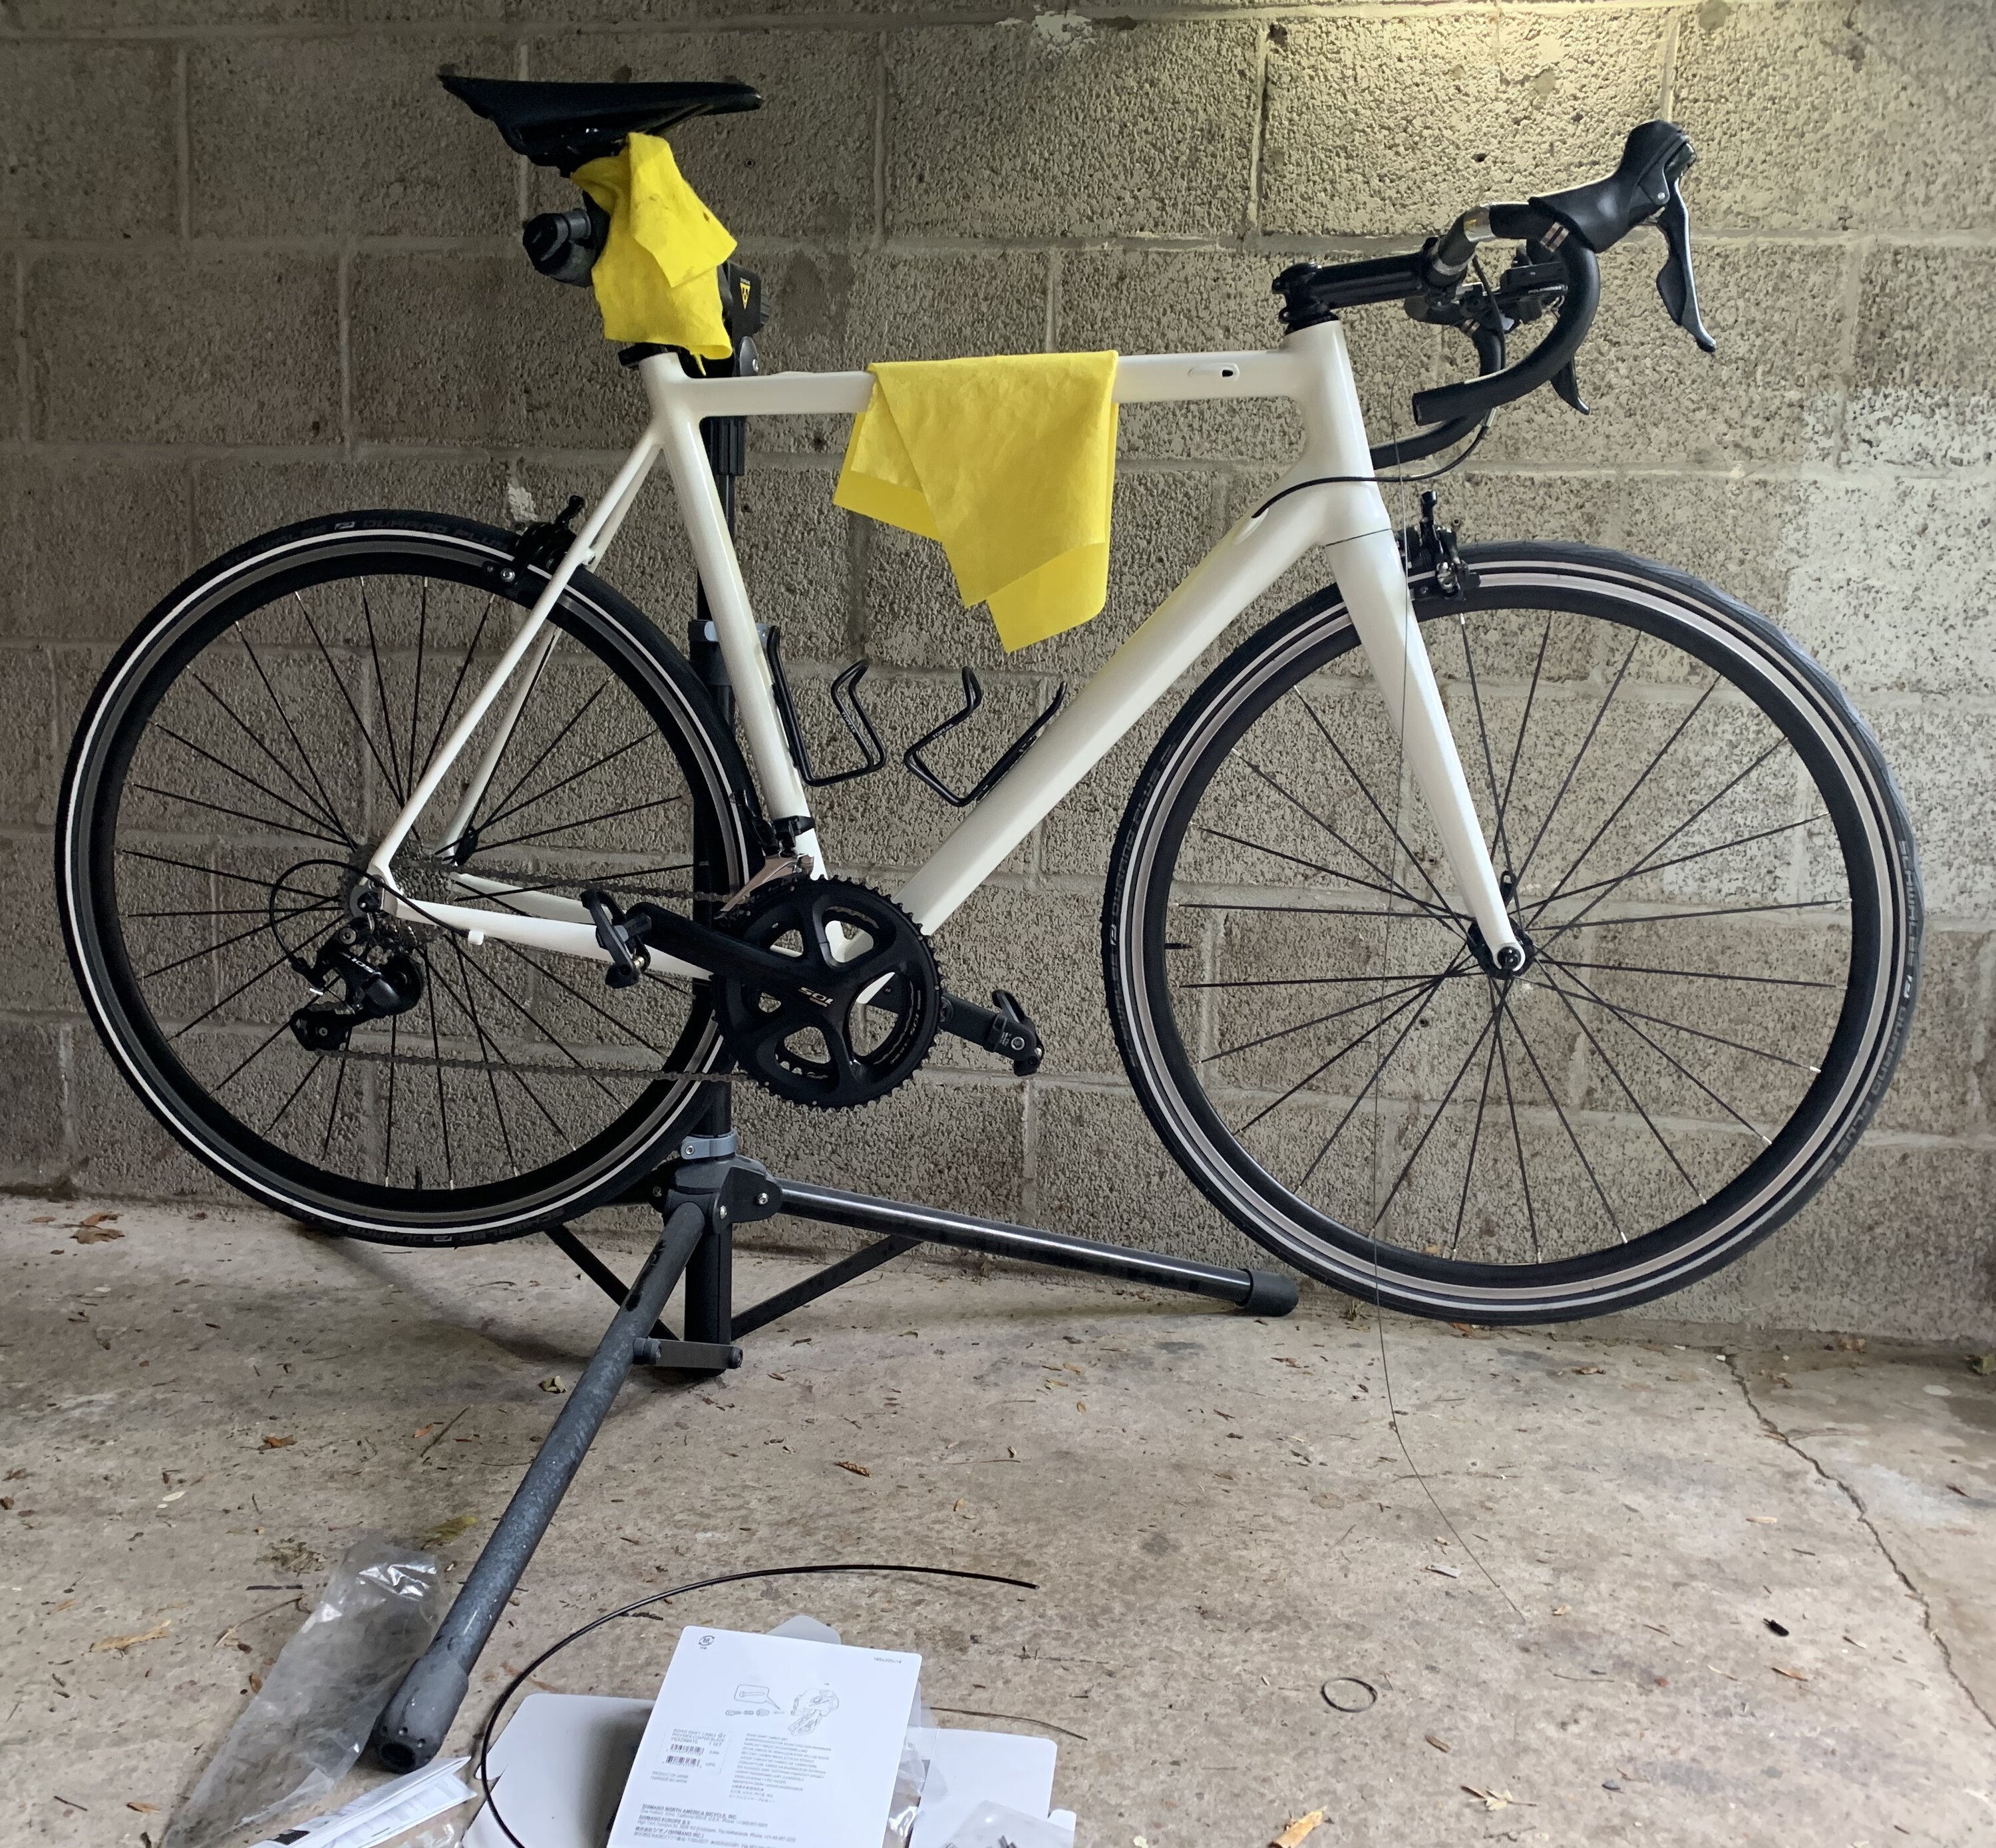
To safe yourself from a painful back, you should consider getting yourself a work stand for your bike. It makes servicing bikes a lot easier as you can adjust the angle and height of your bike (parts). I used my bike stand to paint both the frame and fork. I fixed the frame to the stand using a piece of copper pipe - allowing me full access to all parts in need of a fresh layer of paint.

For best spray paint results, you should really (really!) take your time. It's better to apply multiple thin layers of paint rather than one single, thick and drippy one. I applied about four or five layers of white paint and finished it off using two layers of transparent lacquer.
Putting it together
Once you have collected, cleaned and refinished all the parts nescesary, it's time to put them together. It's a fun job to put your own (new) bike together as you'll gain an understanding of all the different parts that is impossible to equal when buying a bike from a shop.
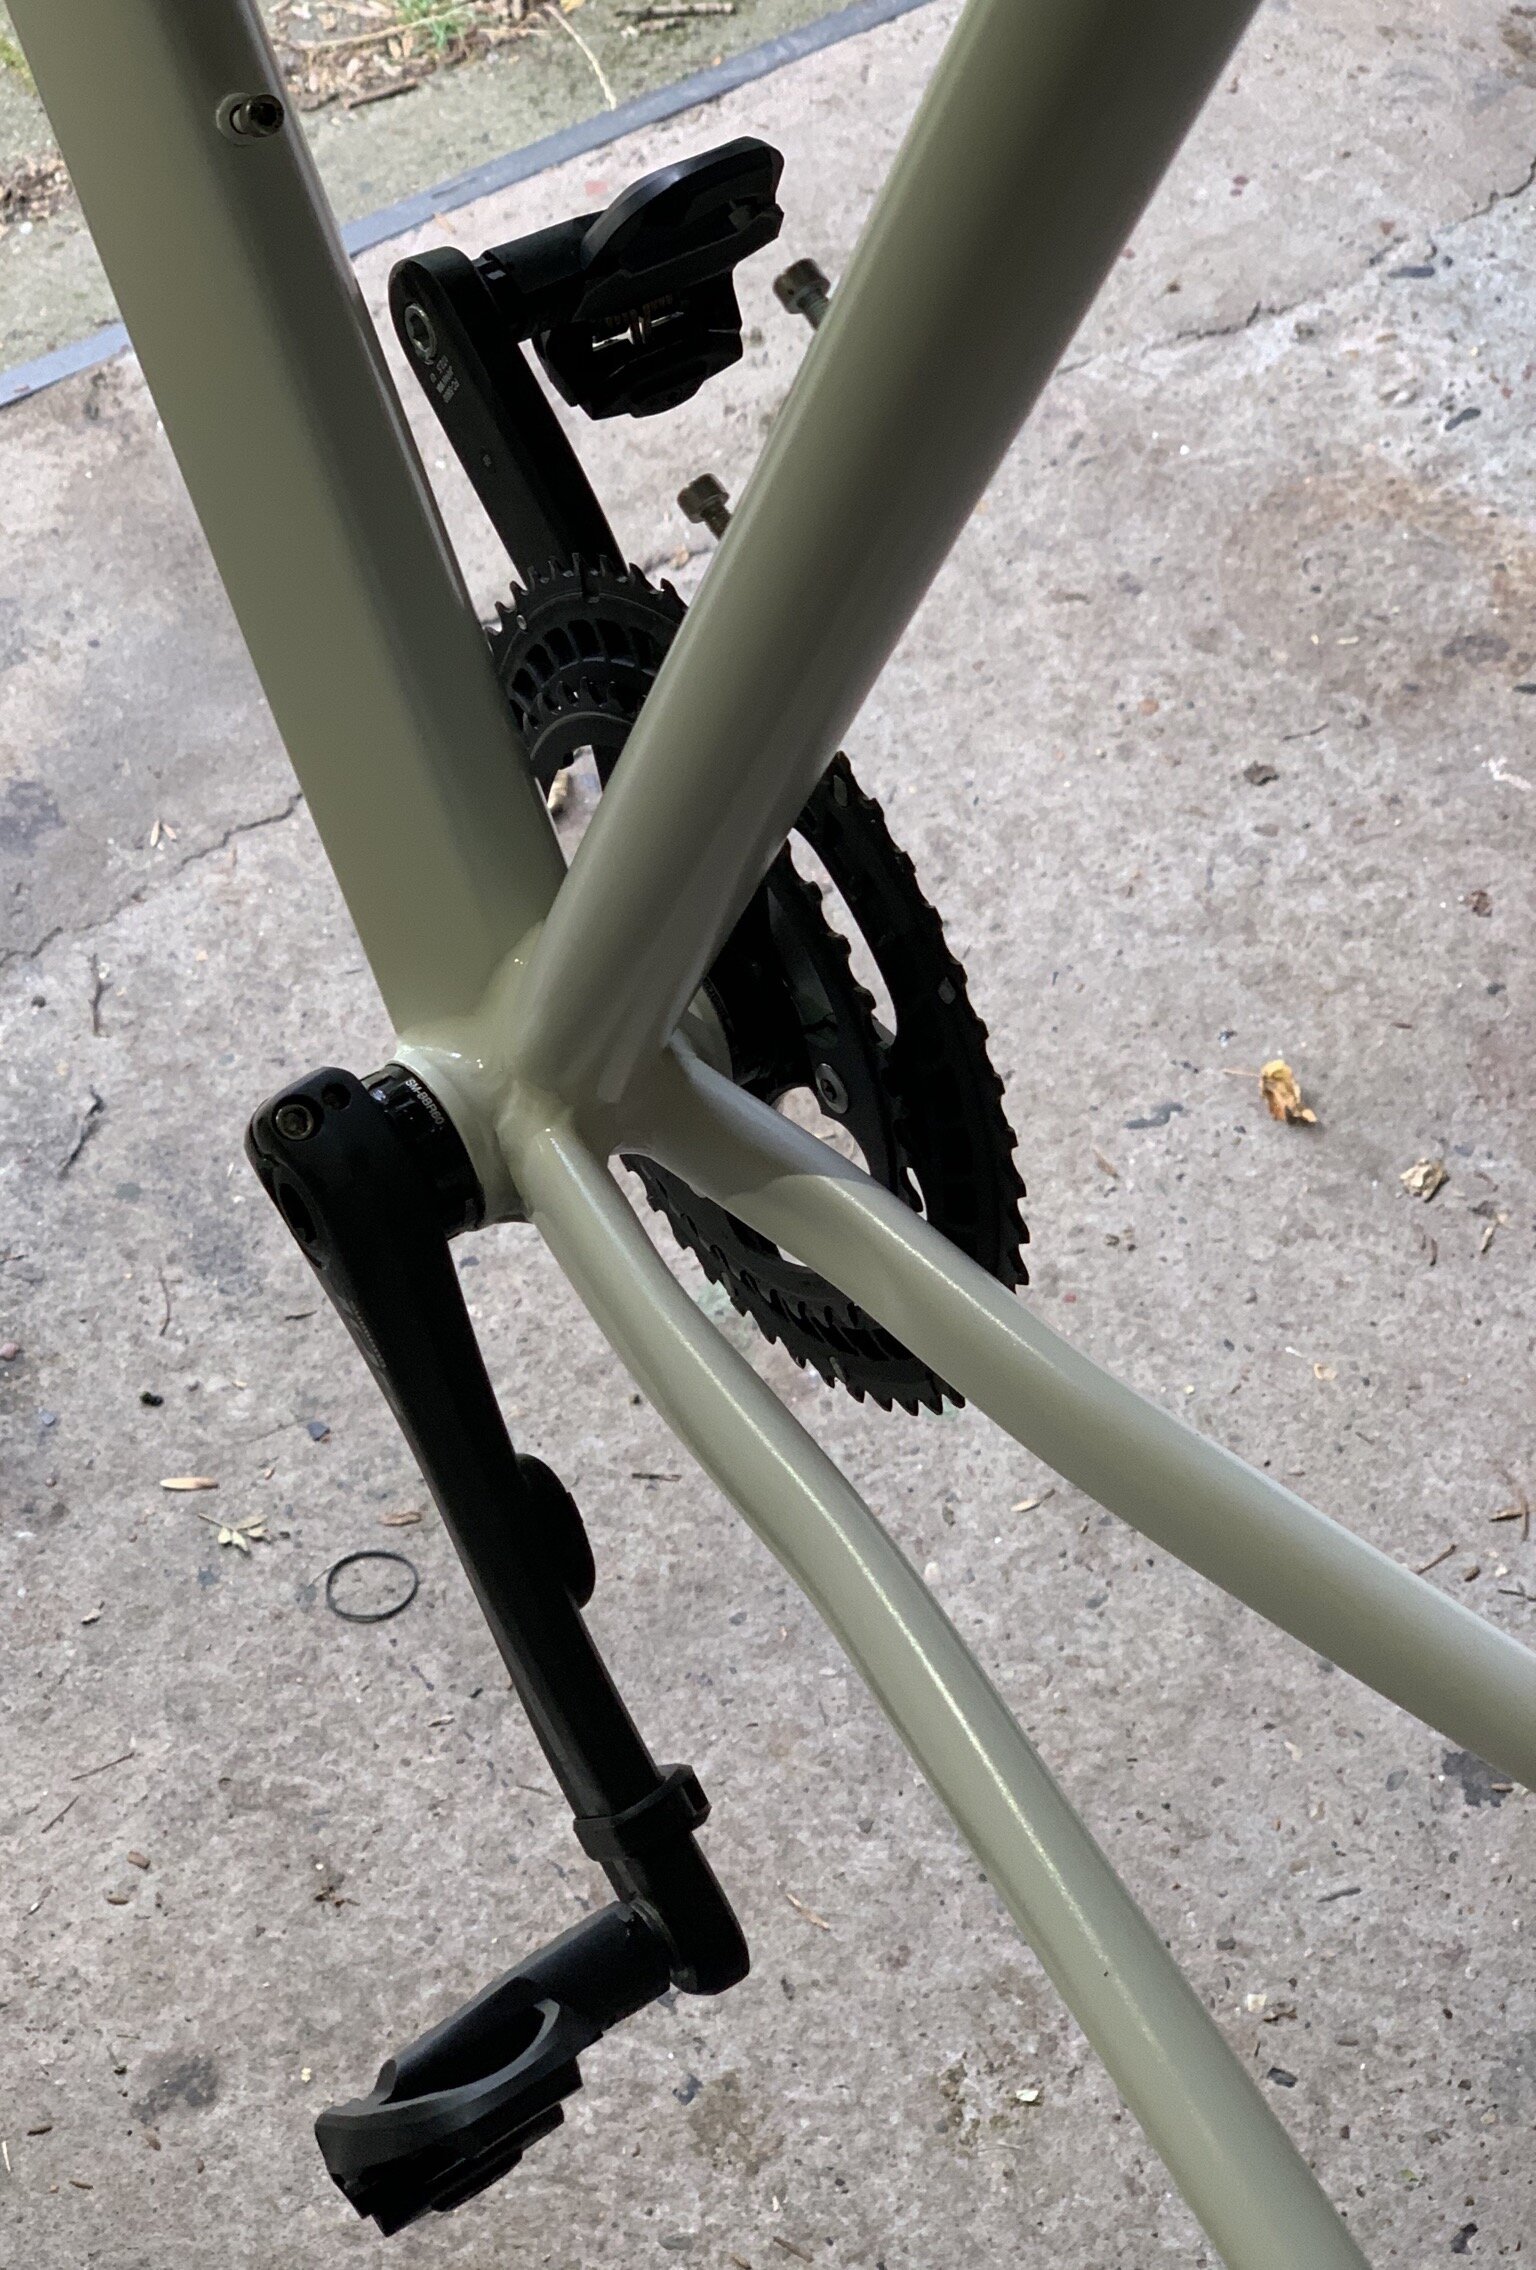
It's a good idea to install the seat post first, allowing you to fix the bike frame in the work stand. The seat post tube is often (by far) the strongest tube on the bike, much stronger than the top tube which often is the weakest!

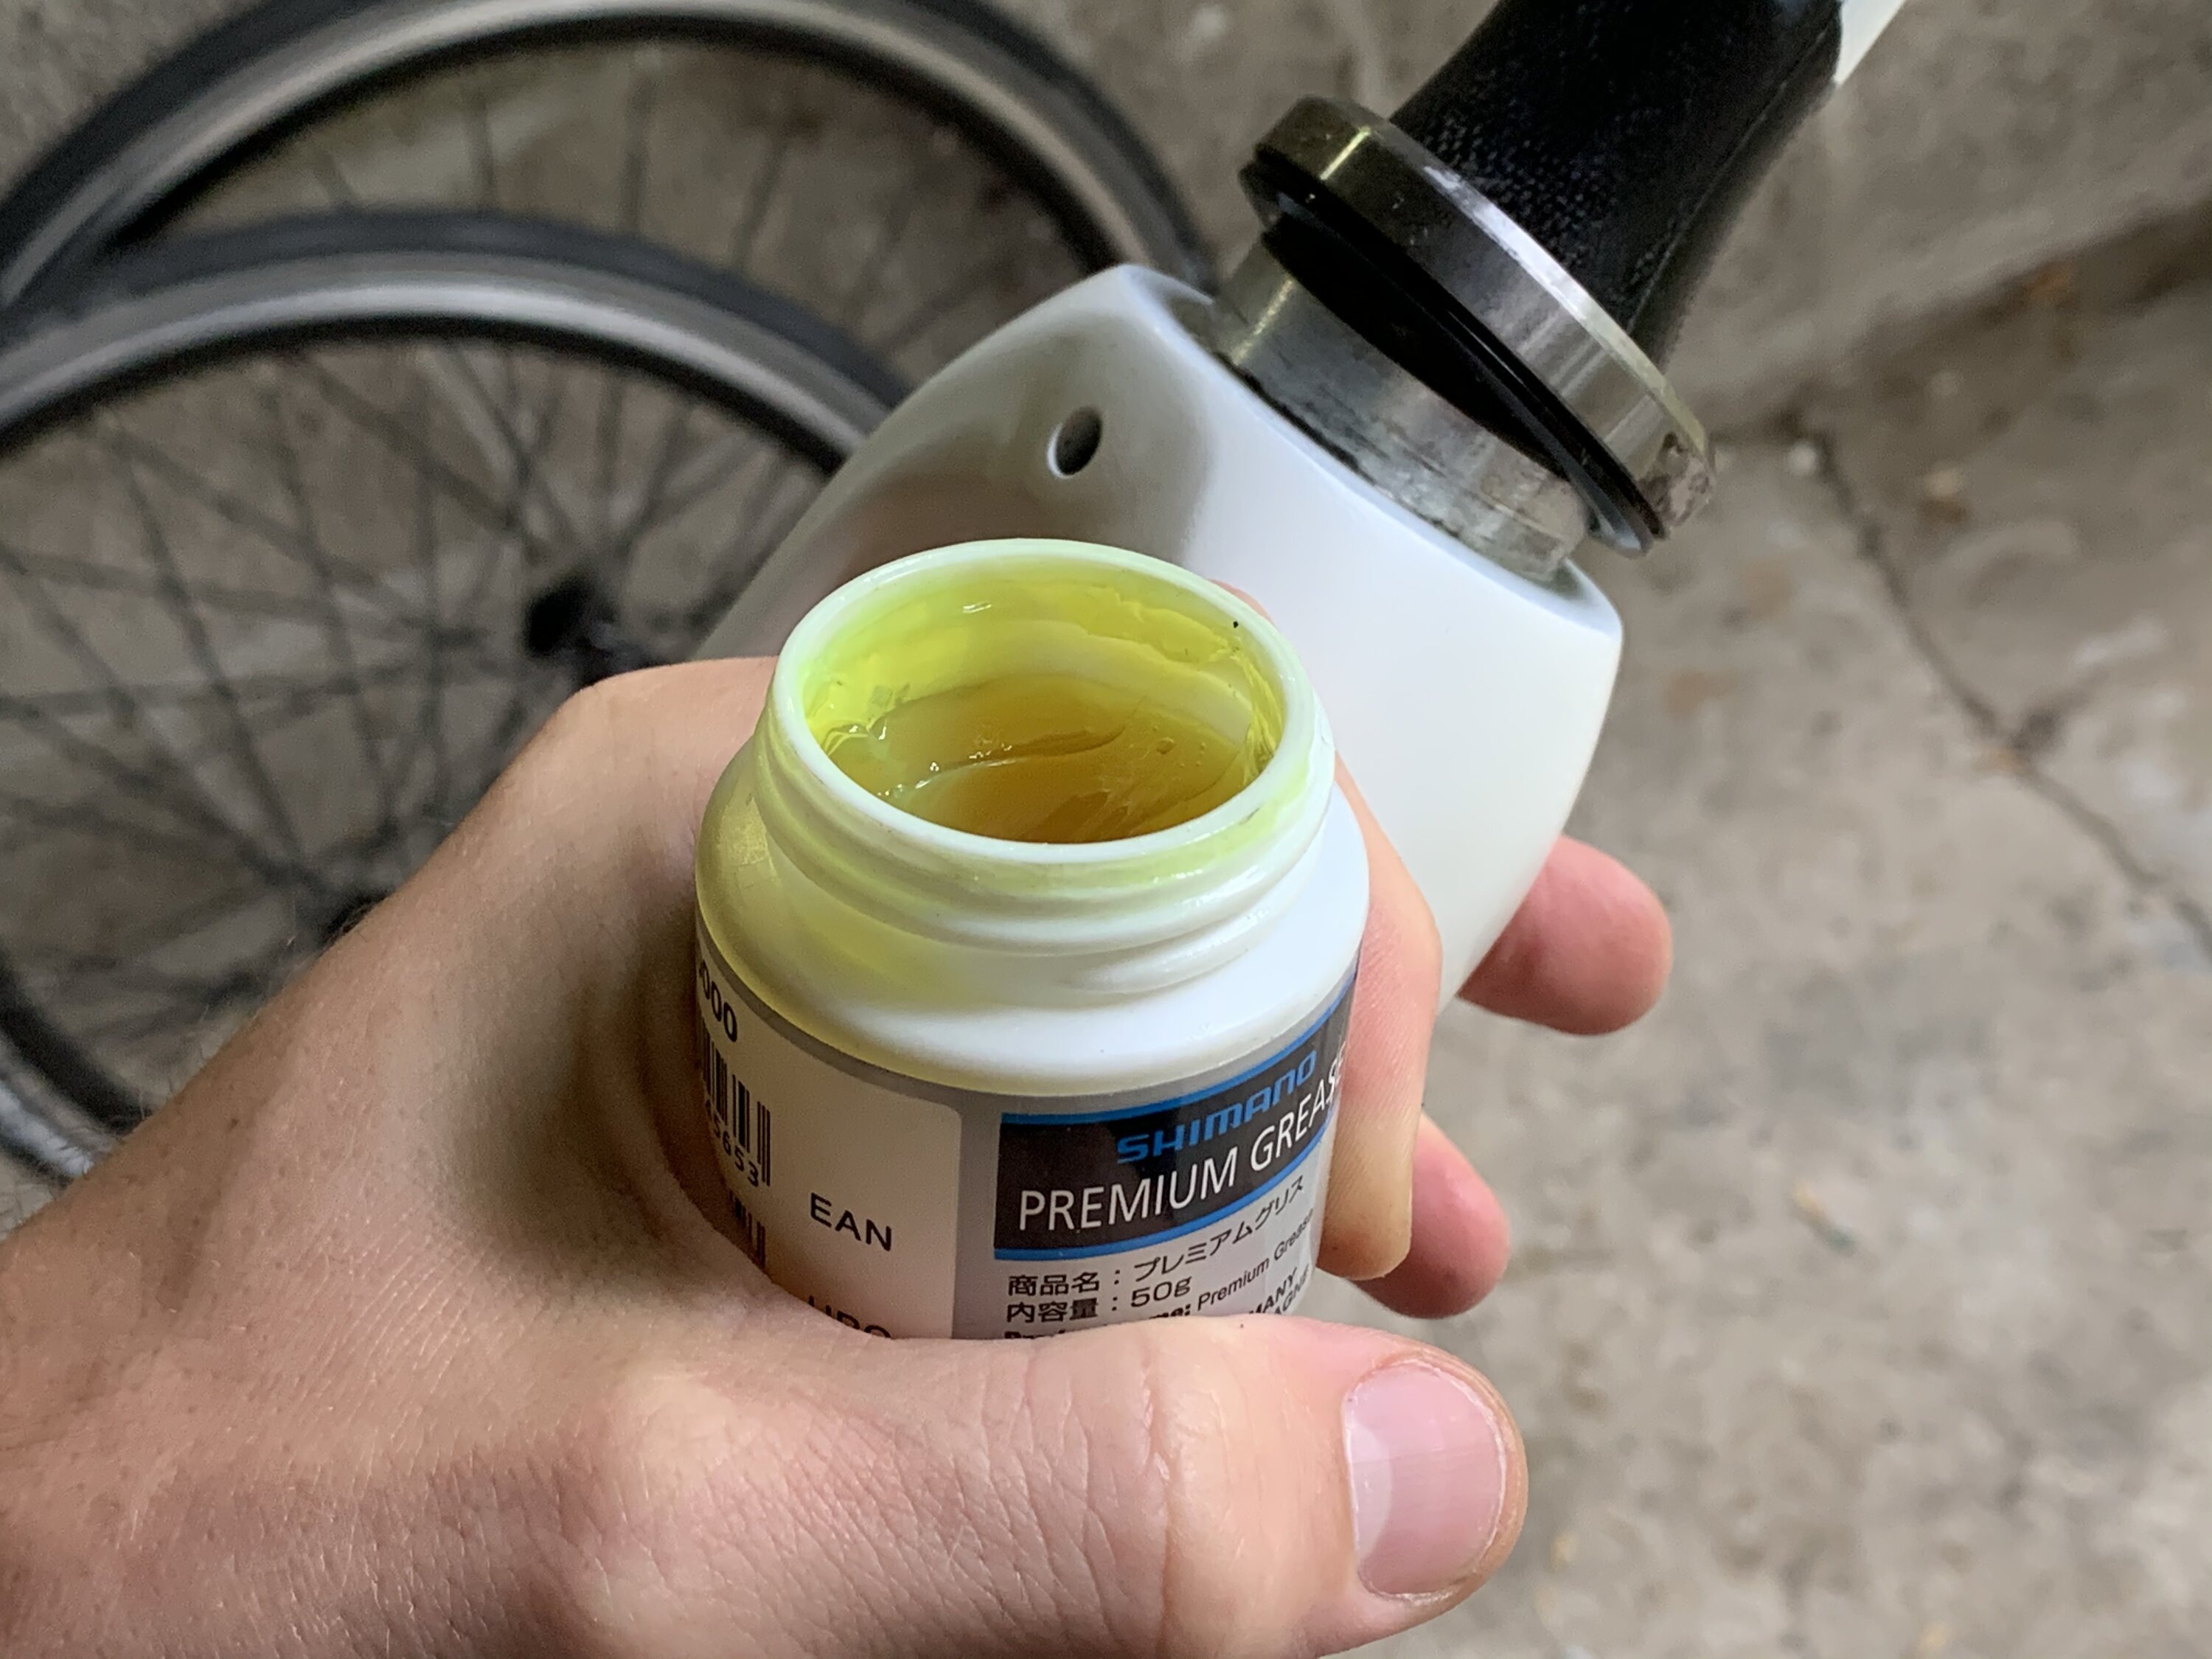
Make sure to apply fresh grease because you probably removed existing grease when you cleaned the bike. The main function of grease is to keep water away from bearings, in addition to prevent squeaky and ticking noises.
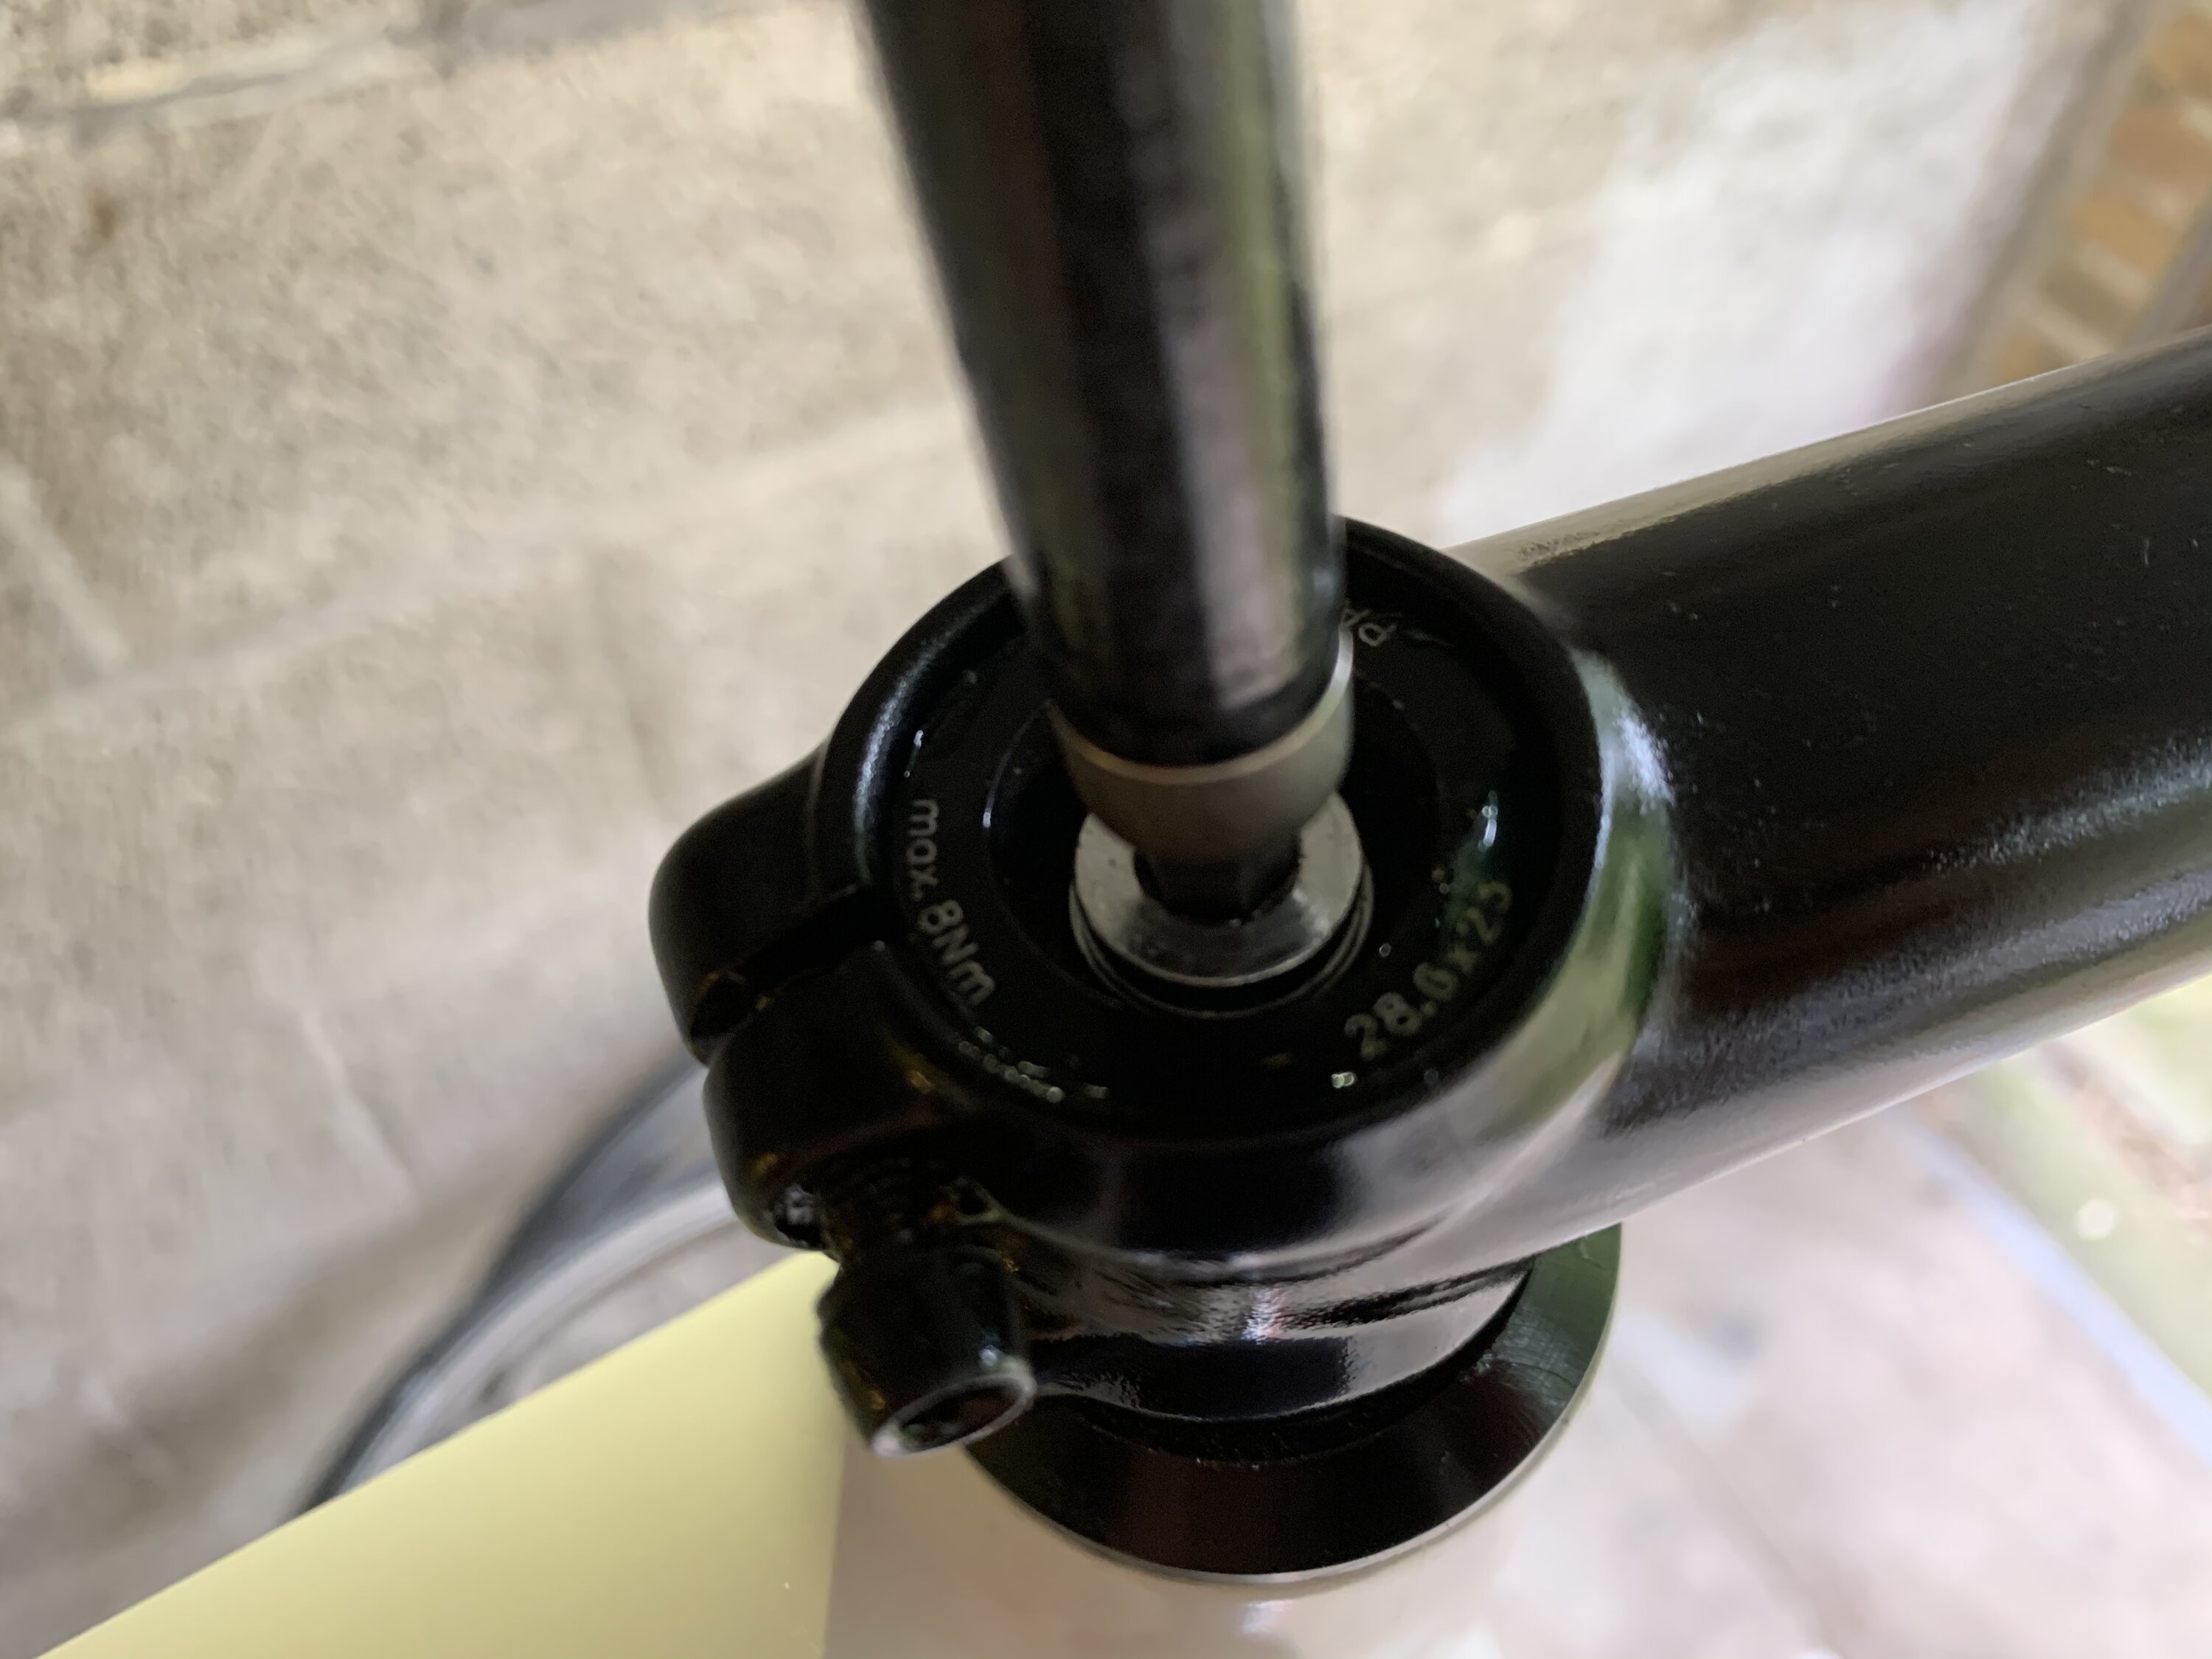
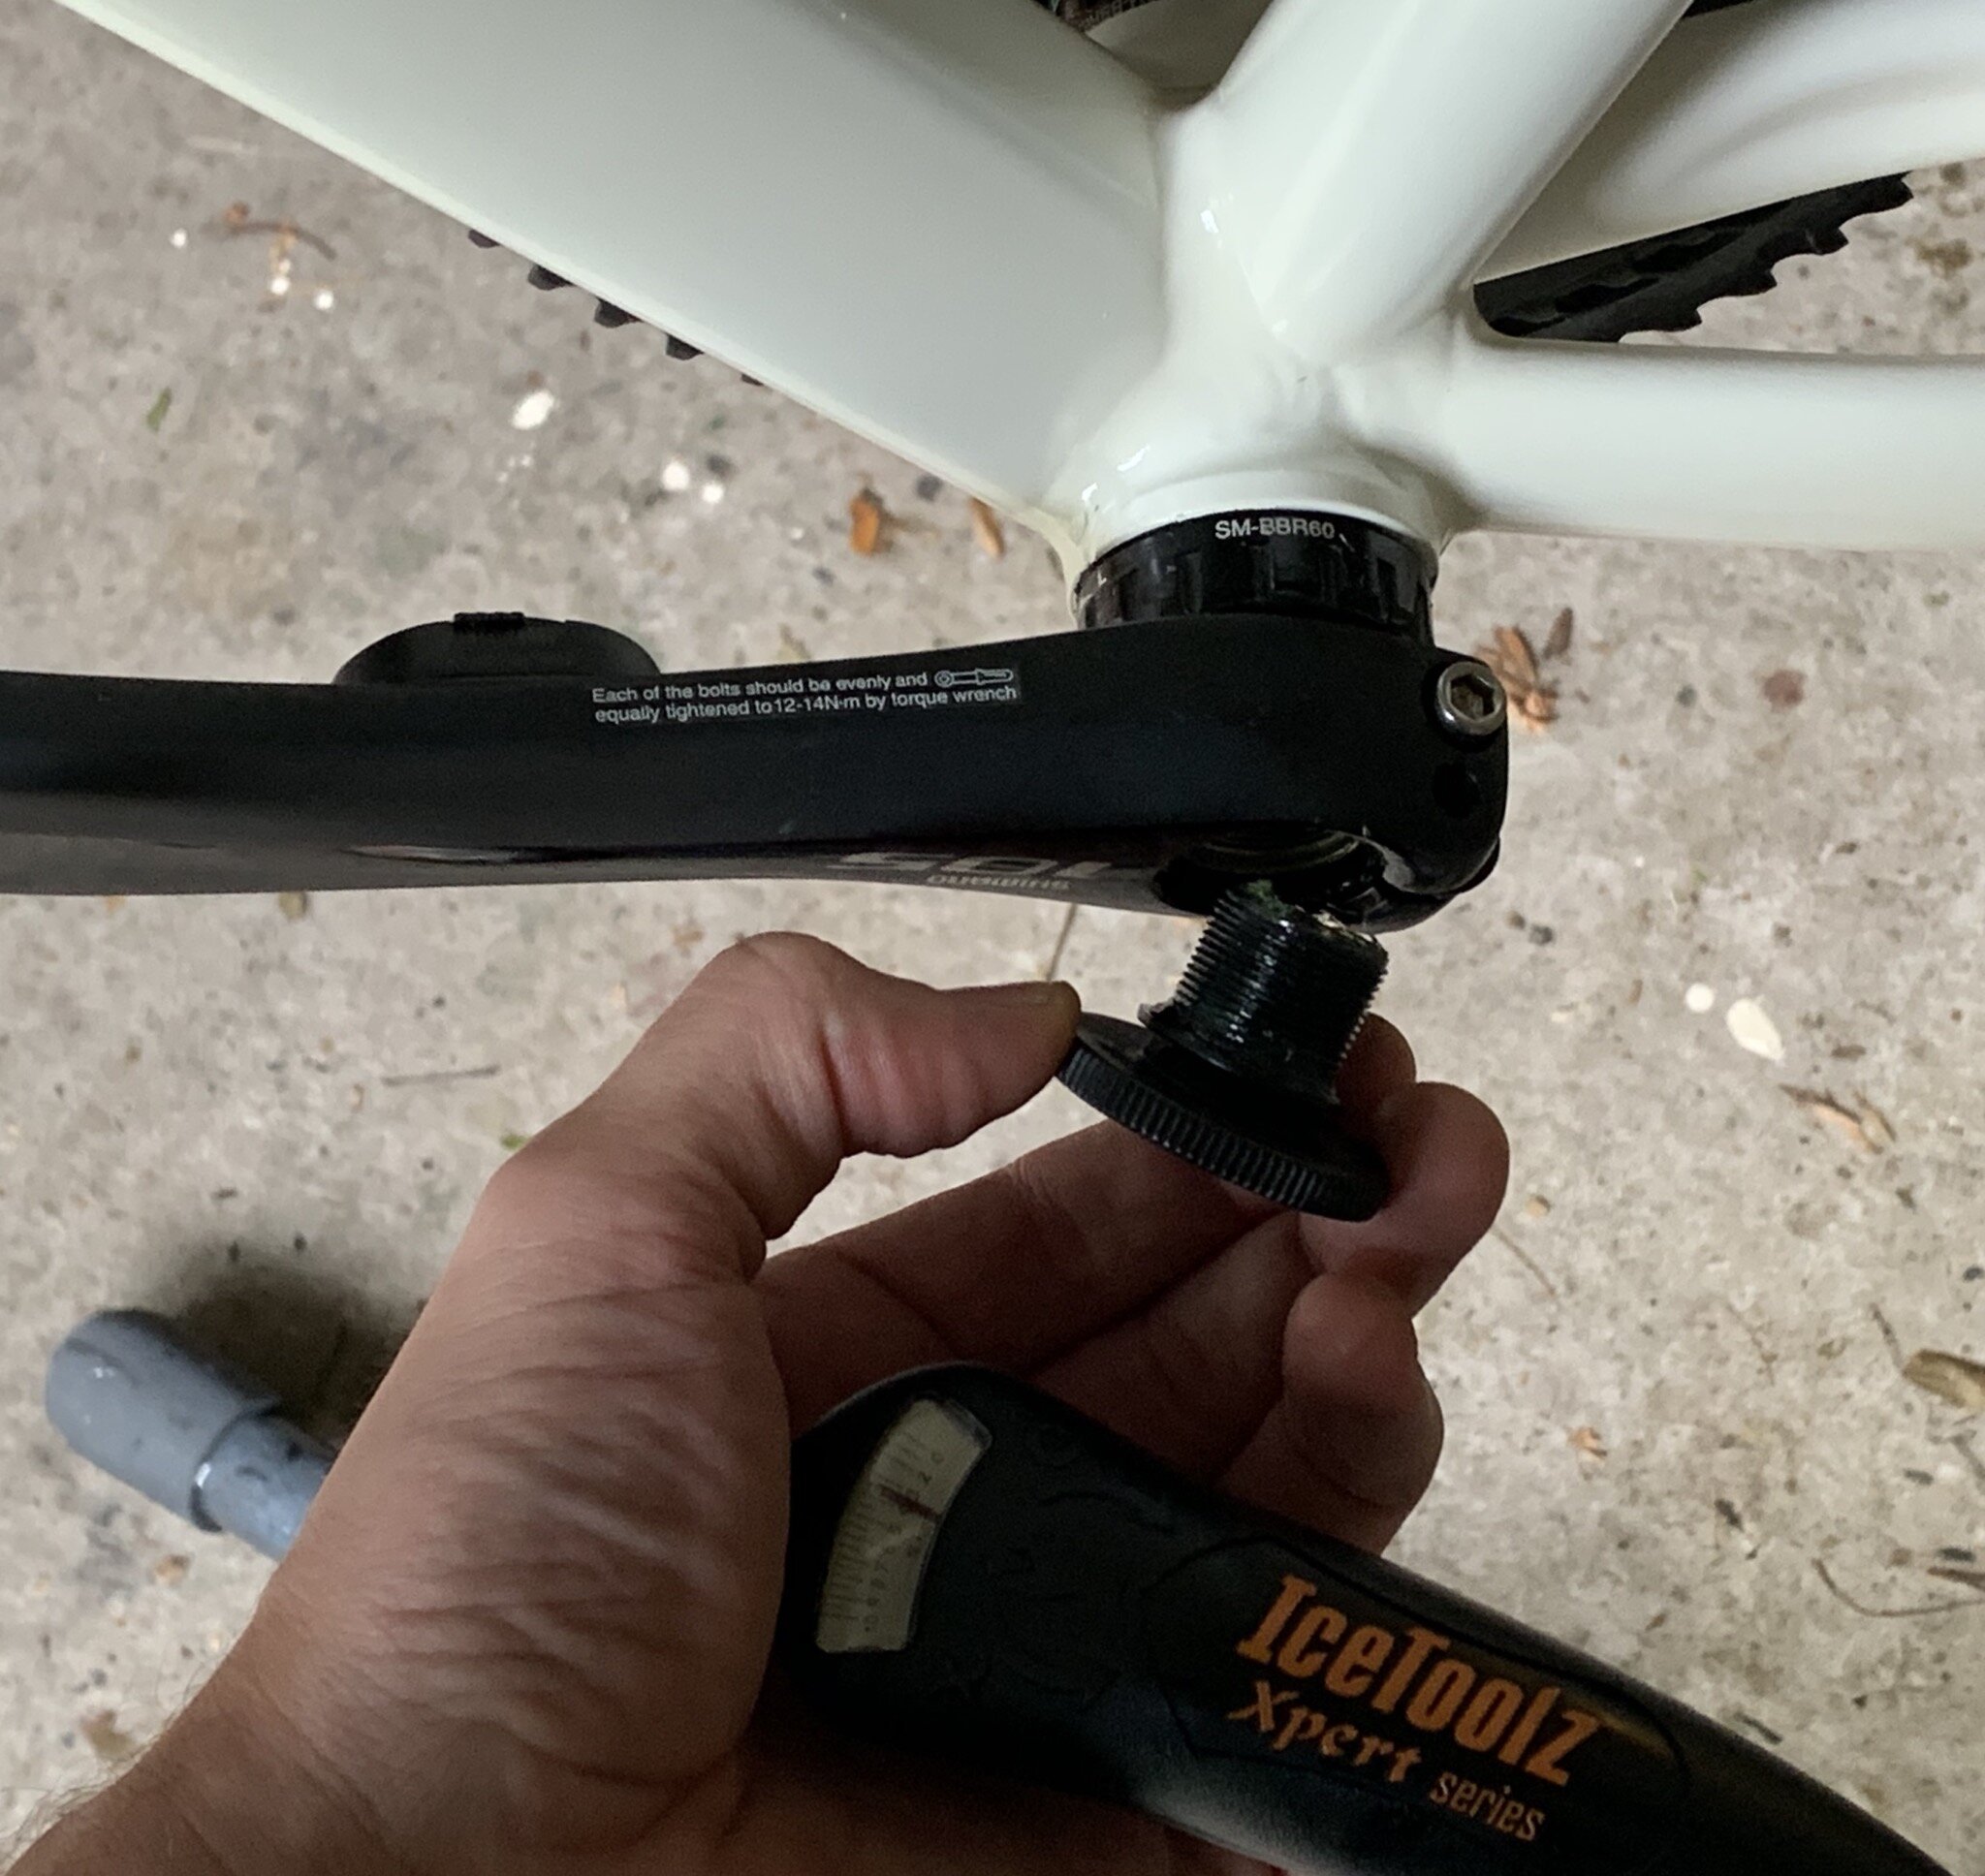
Another very important thing to keep in mind is that you can easily apply too much pressure on bolts. You should really invest in a (good) torque wrench to prevent excessive powers on bolts, junctions, bearings and tubes.
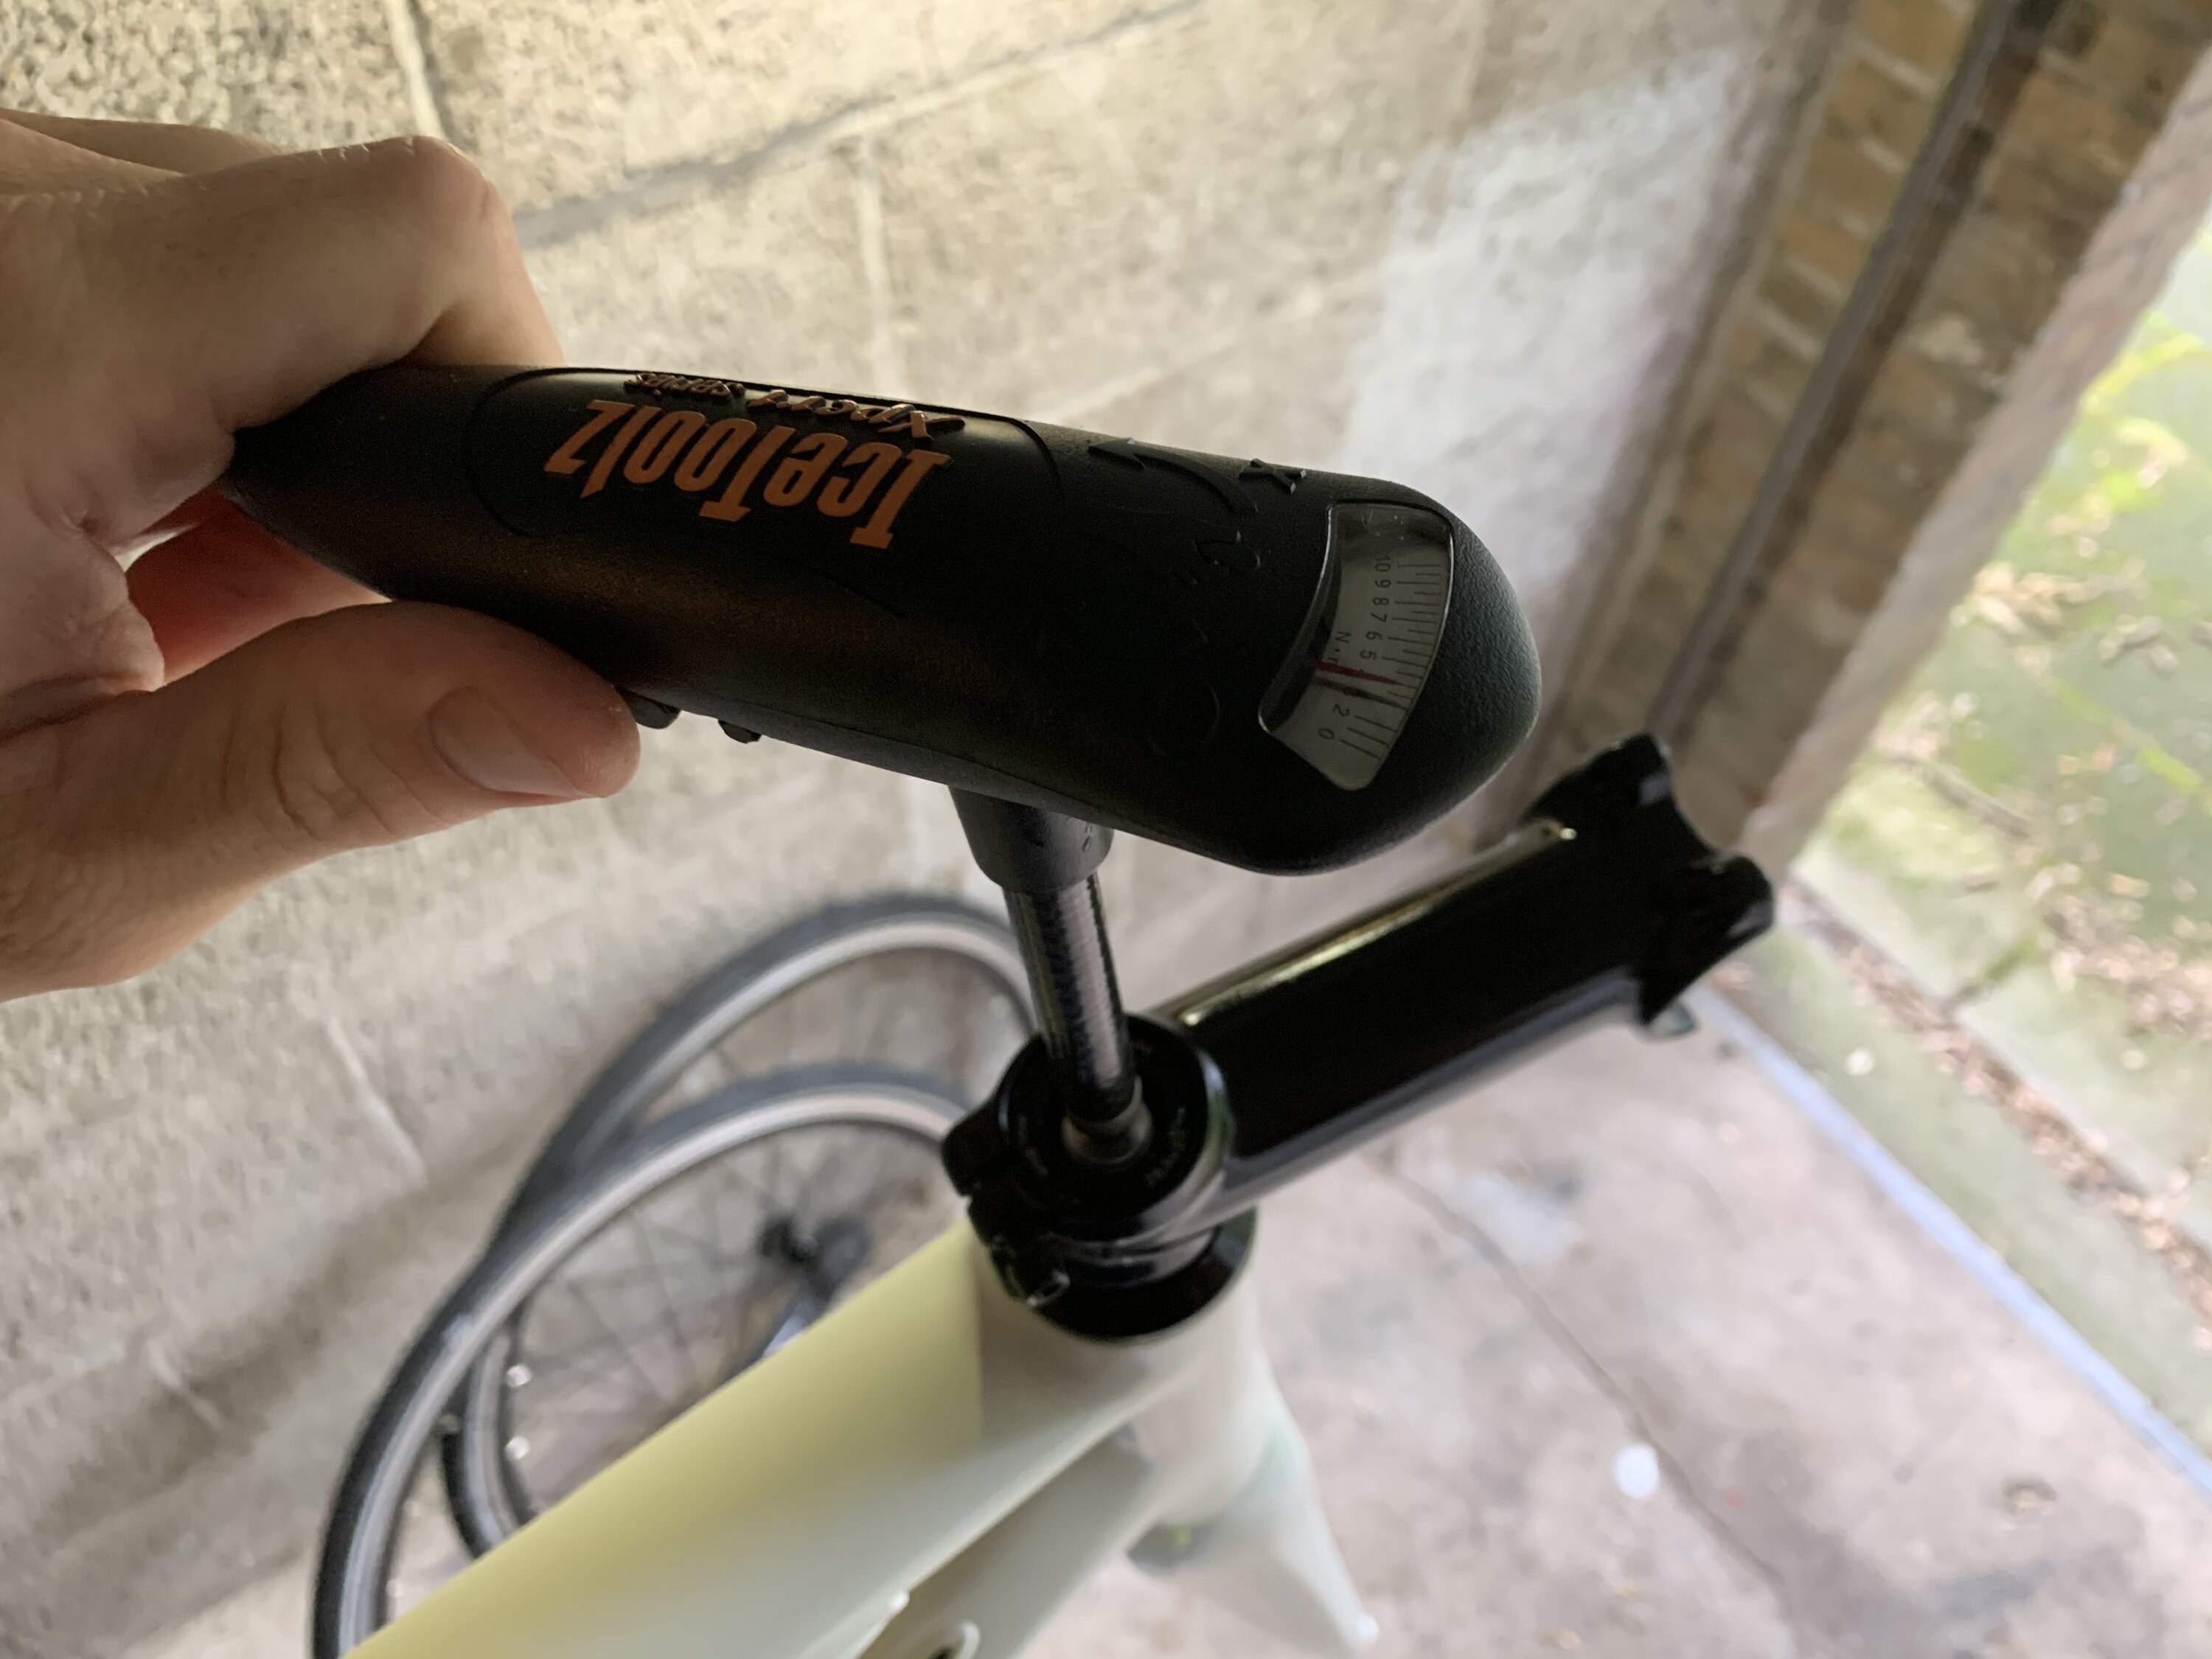
Many bike parts have a maximum torque value written on them in Newton Meter (Nm). If you cannot find a value on your bike part, you should look it up online. Don't guess or pick a random value: your life depends on your bike staying together when you're cycling on it!
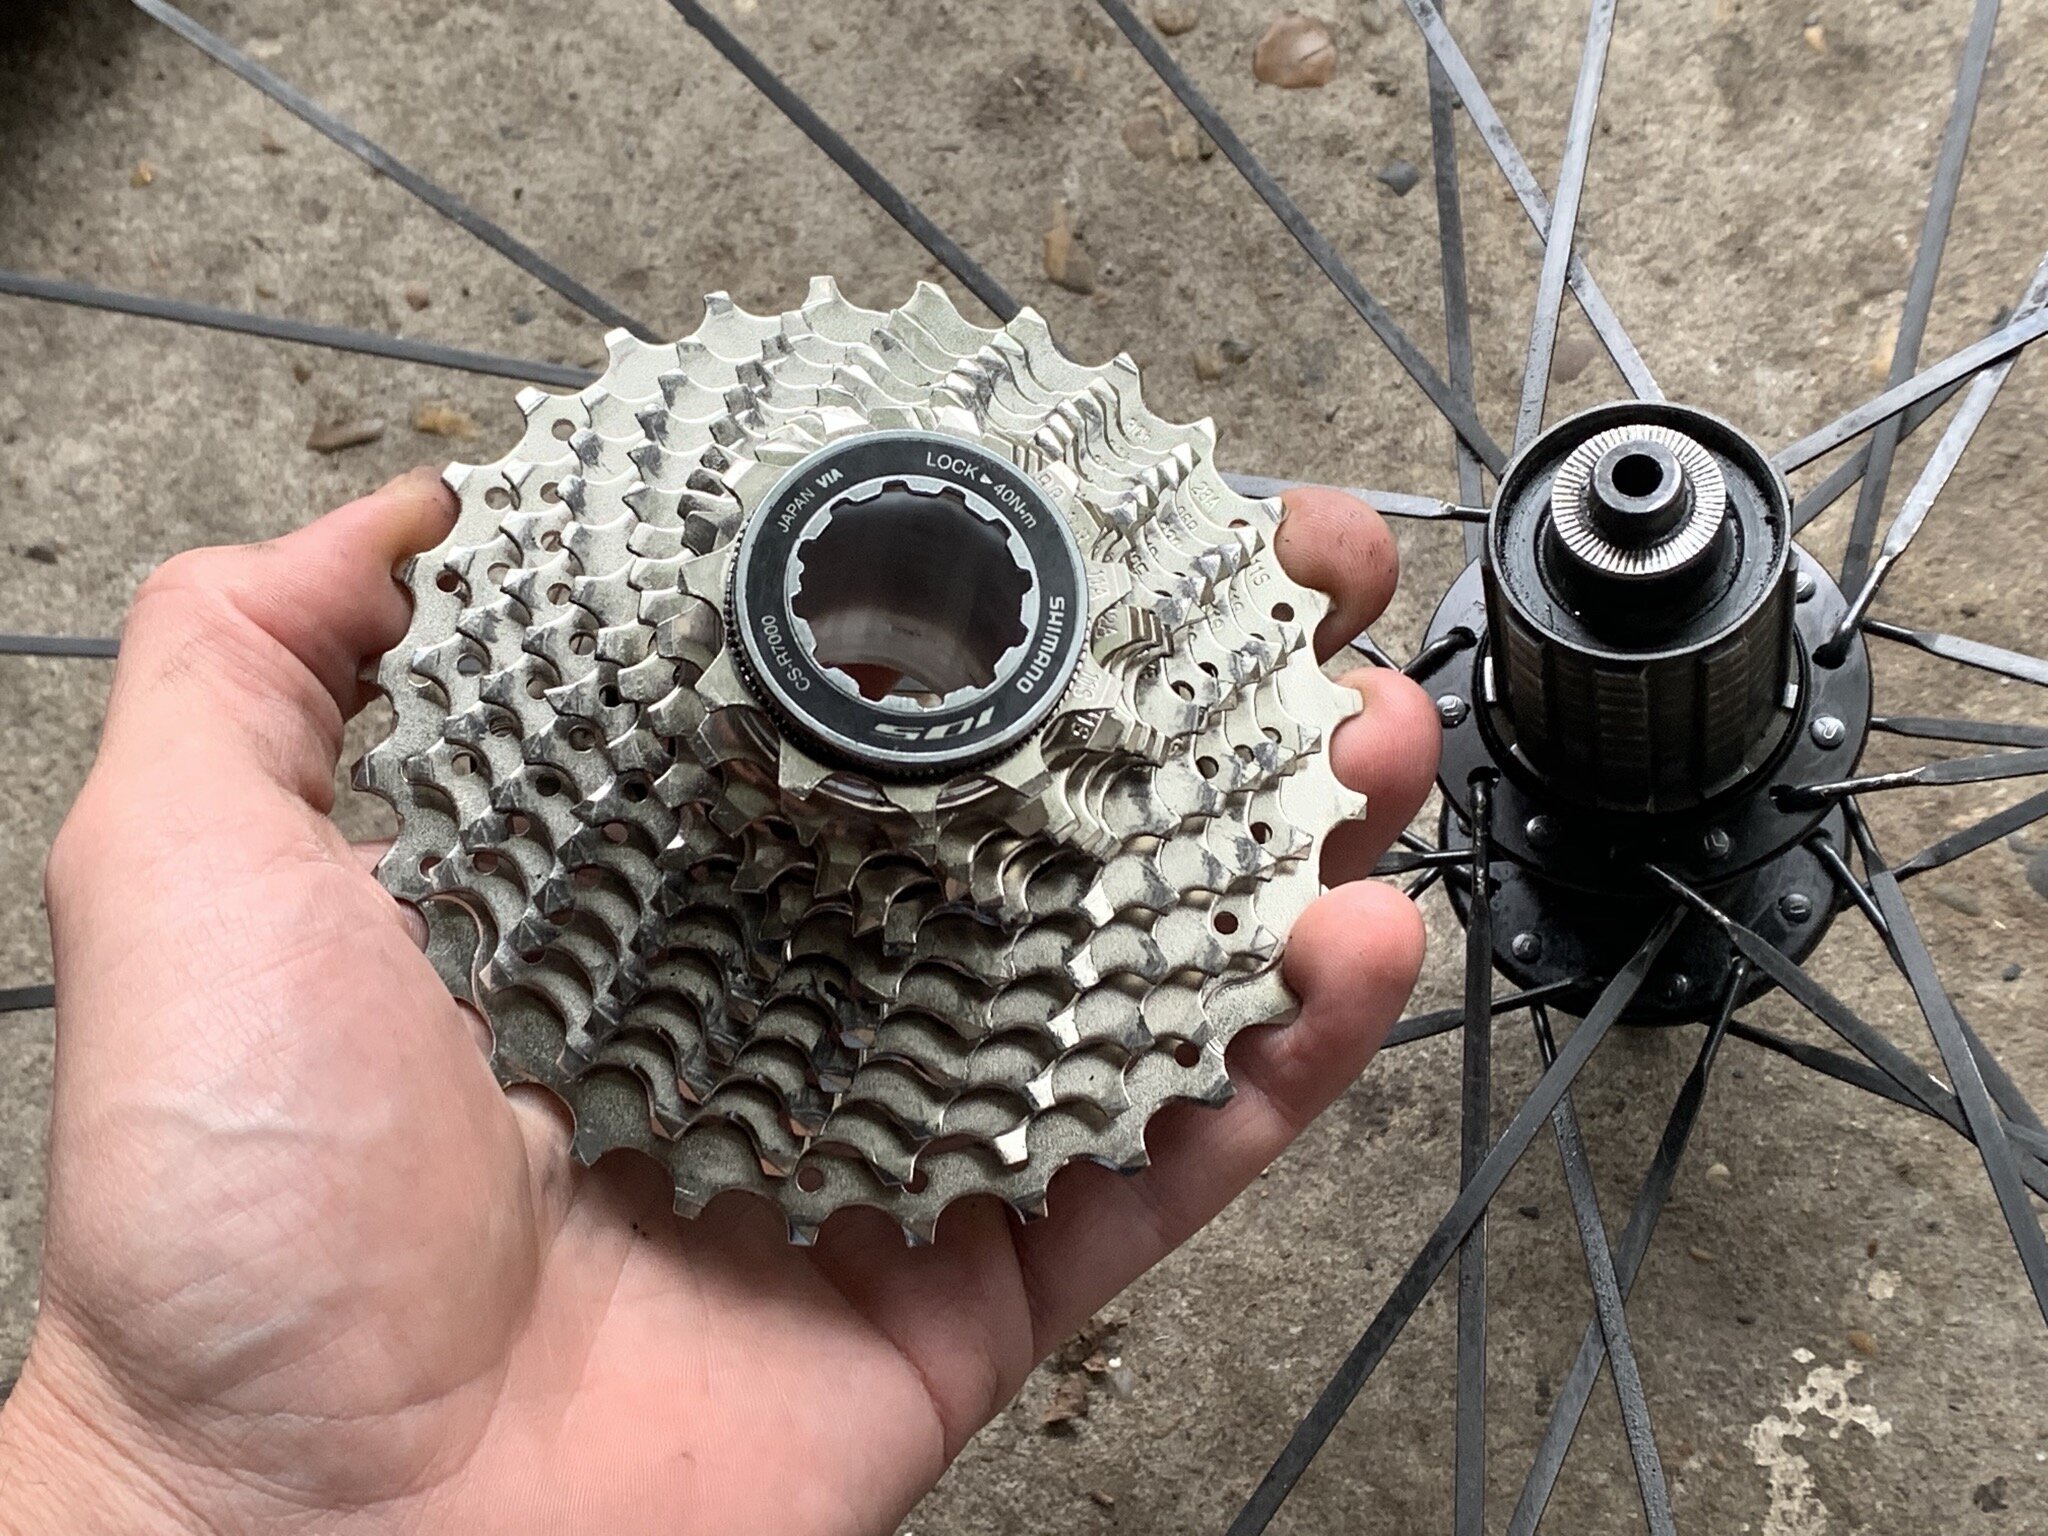
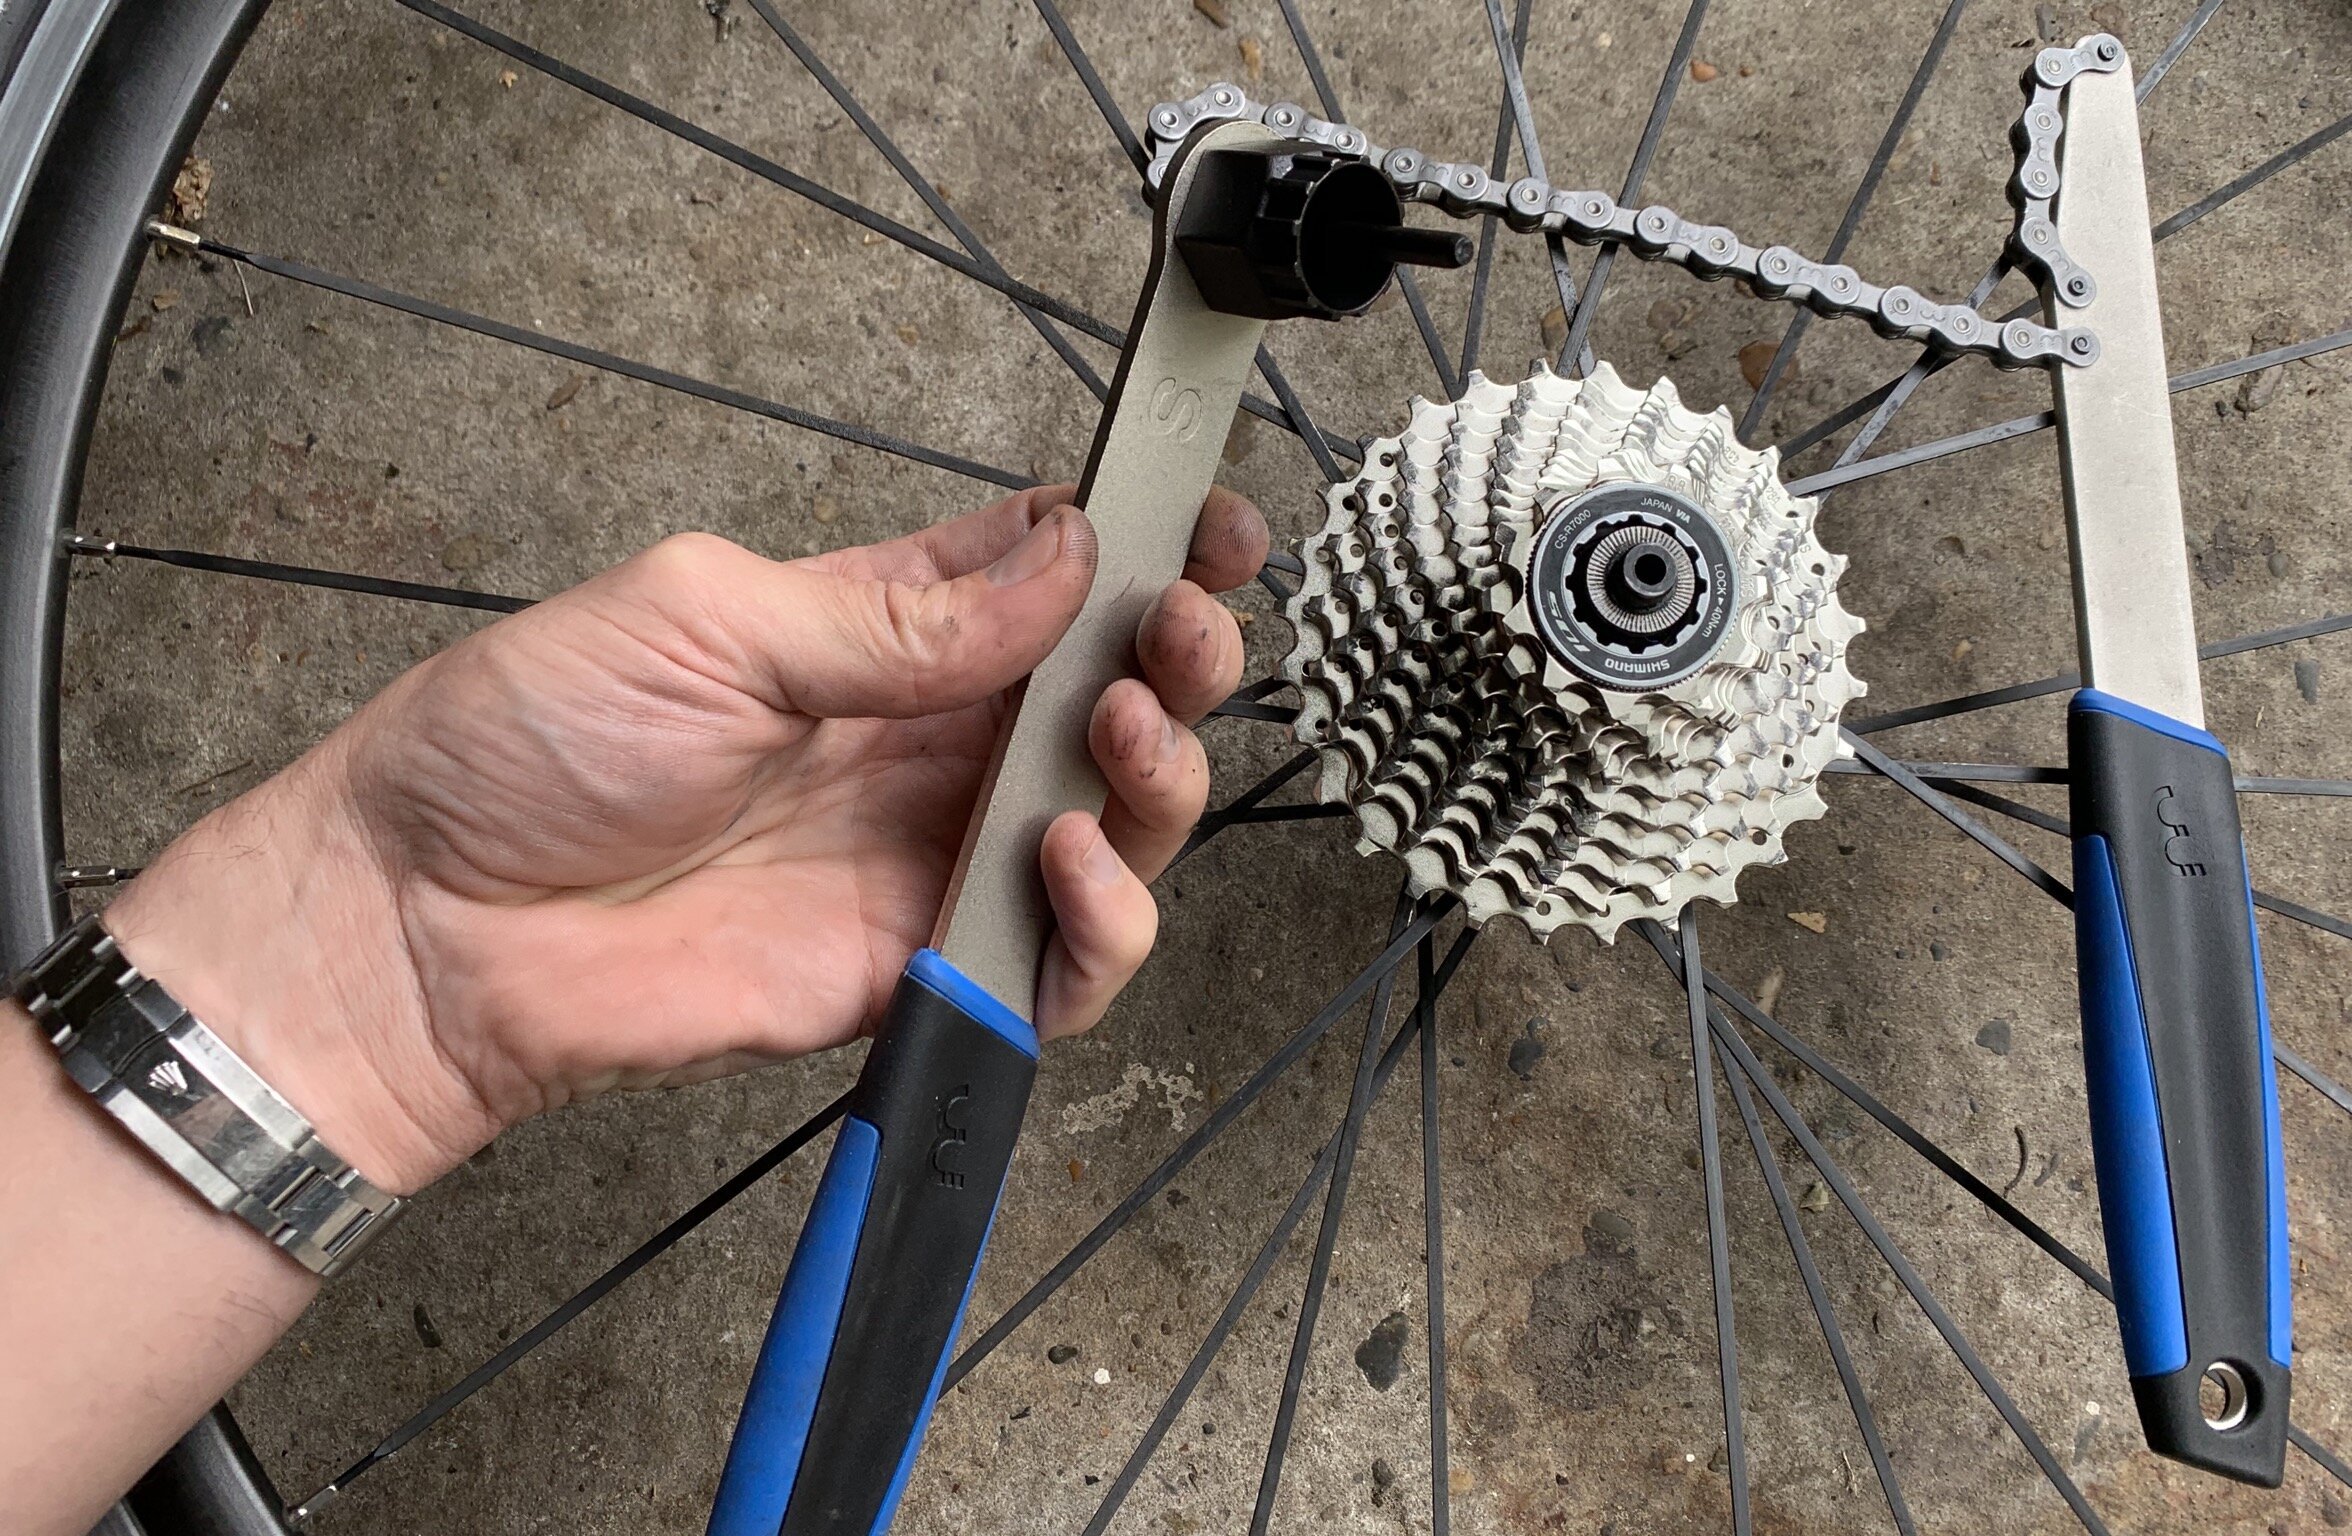
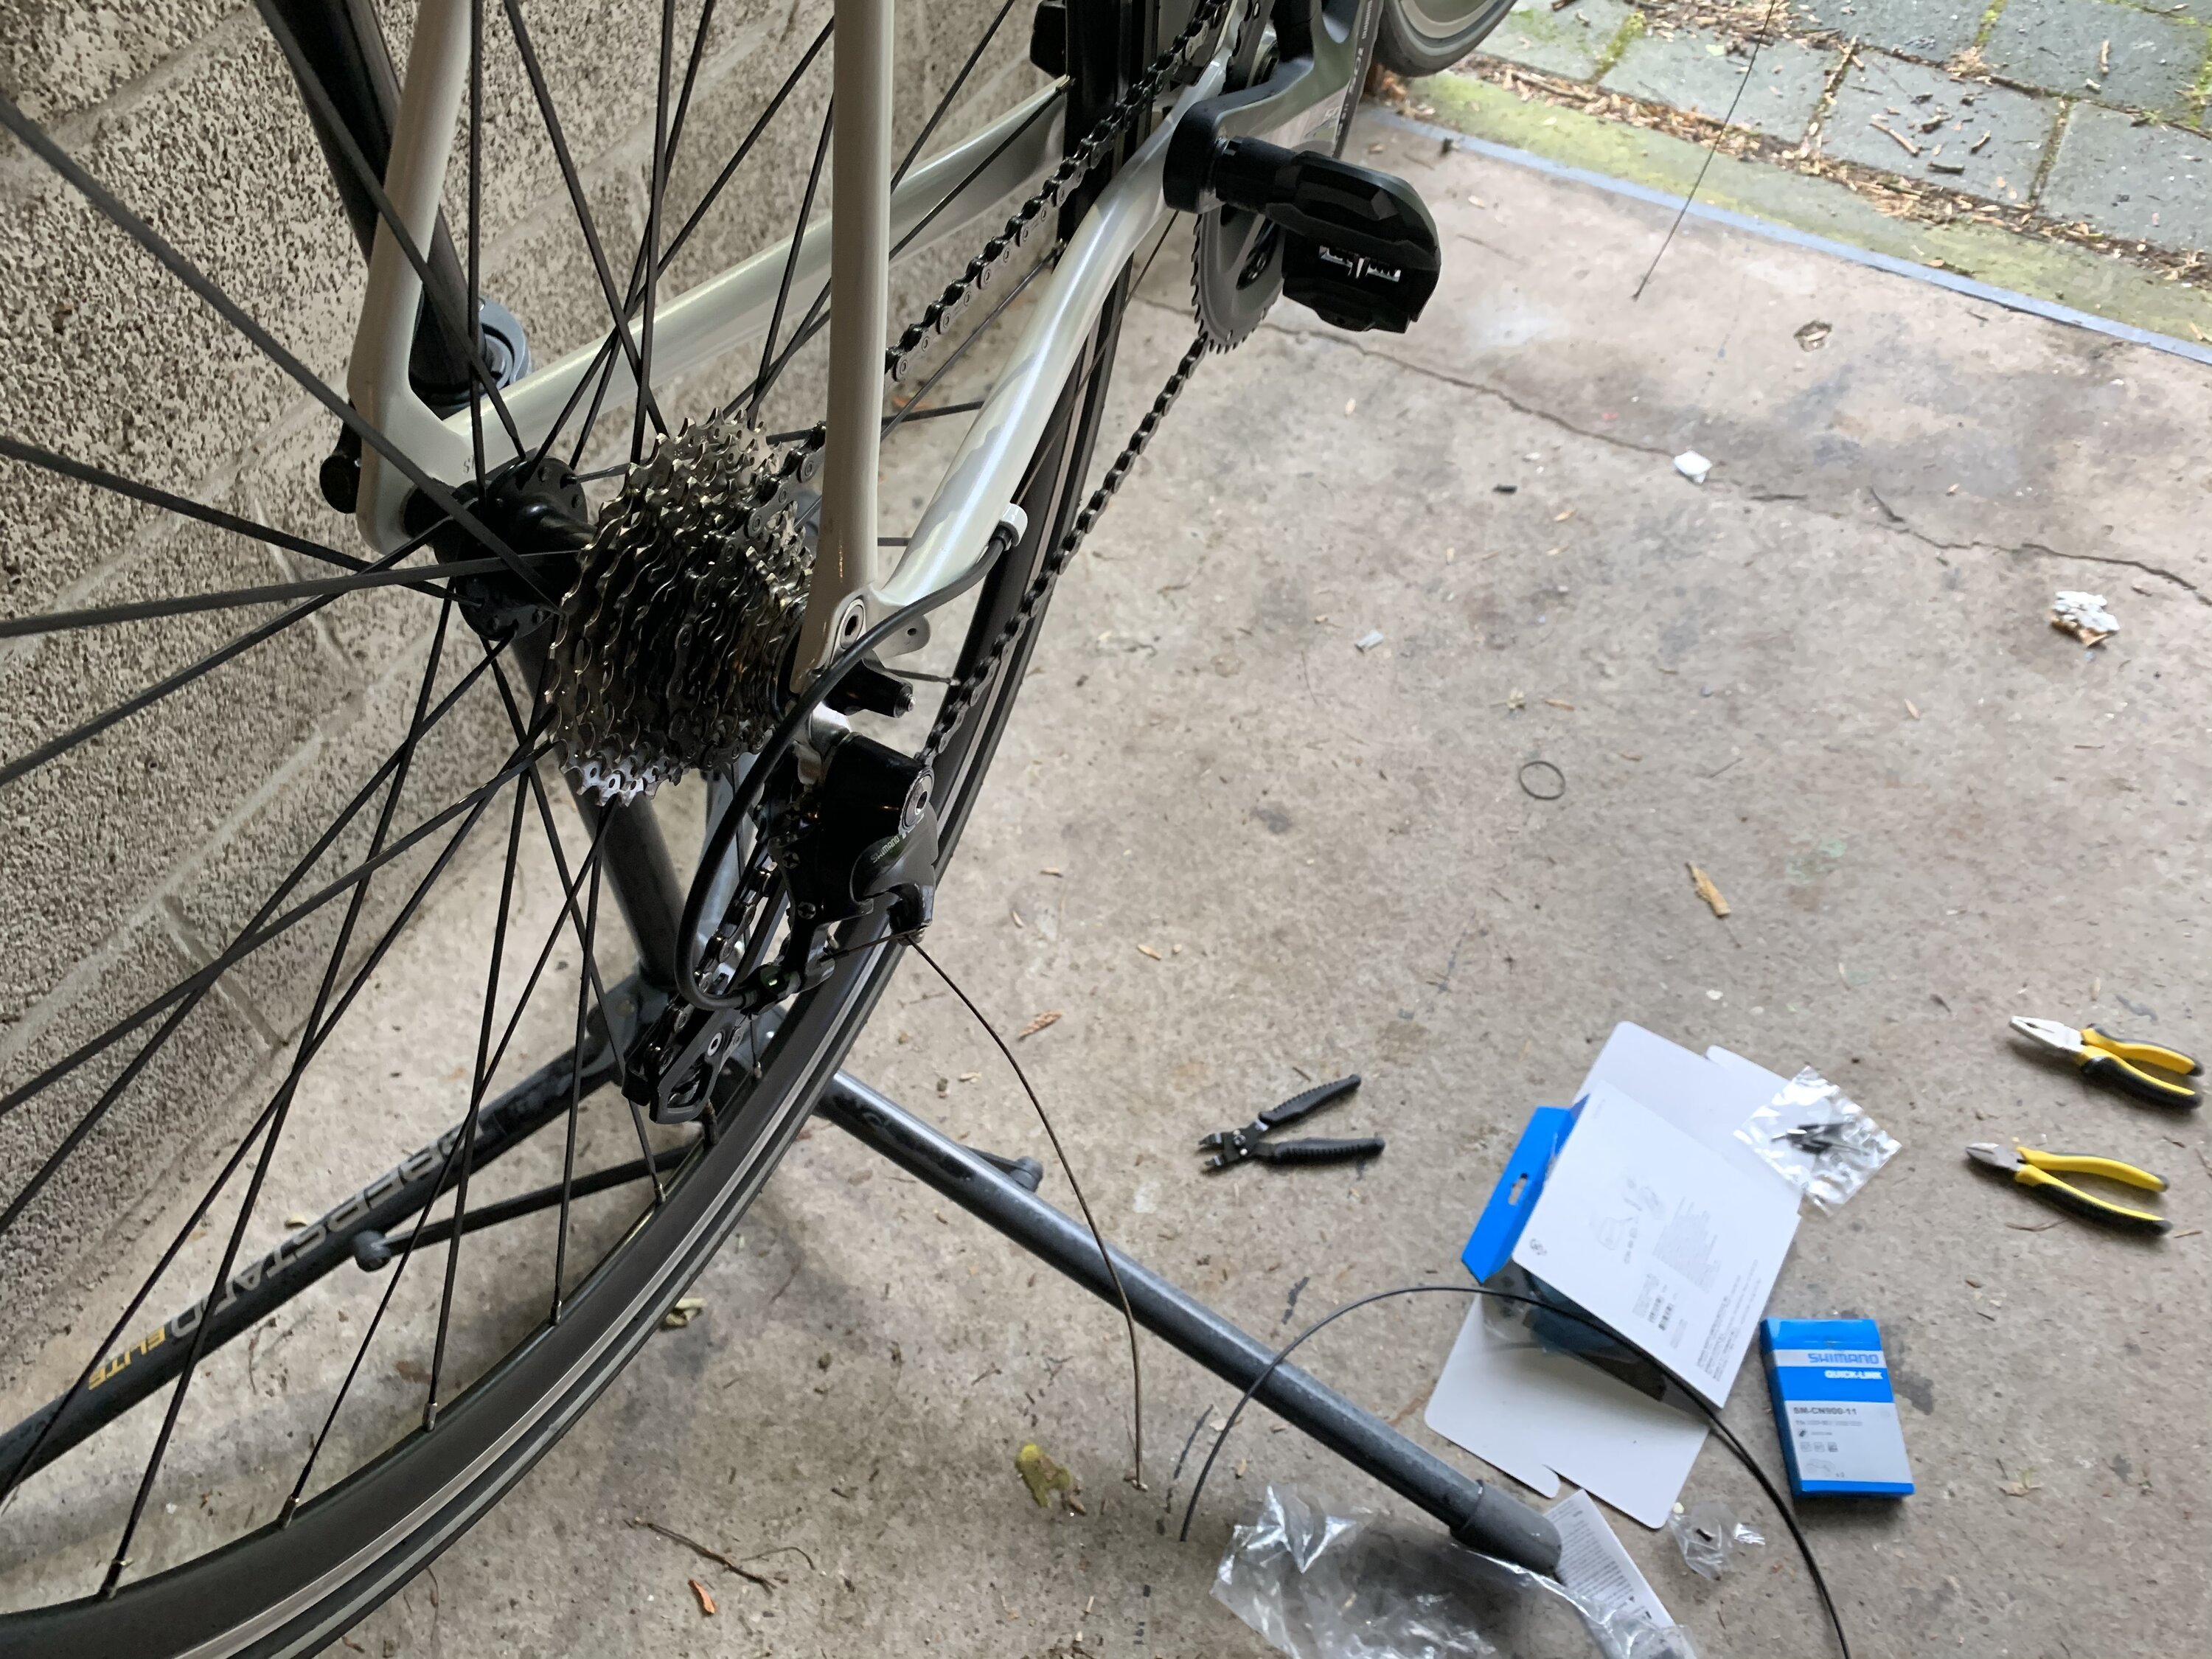
Installing the cassette is easy with the right tools. Use a cassette tool and chain sweep to install or remove a cassette. Make sure to align the individual sprockets as they have specific teeth that enable smooth shifting. This is easy because the axle has a specific pattern allowing just one way for the sprockets to be installed.
Once the cassette is installed, you can put the wheels in the bike frame. This is the moment when you realise you've created a bike (and it's no longer just a bunch of parts).
One of the last tasks is to install the cables and connect them to the derailleurs. Depending on the frame it can be difficult to get the cables through (internal) guides and holes. Take your time to do this, as the alignment and length of the cables greatly affect the shifting and braking smoothness.
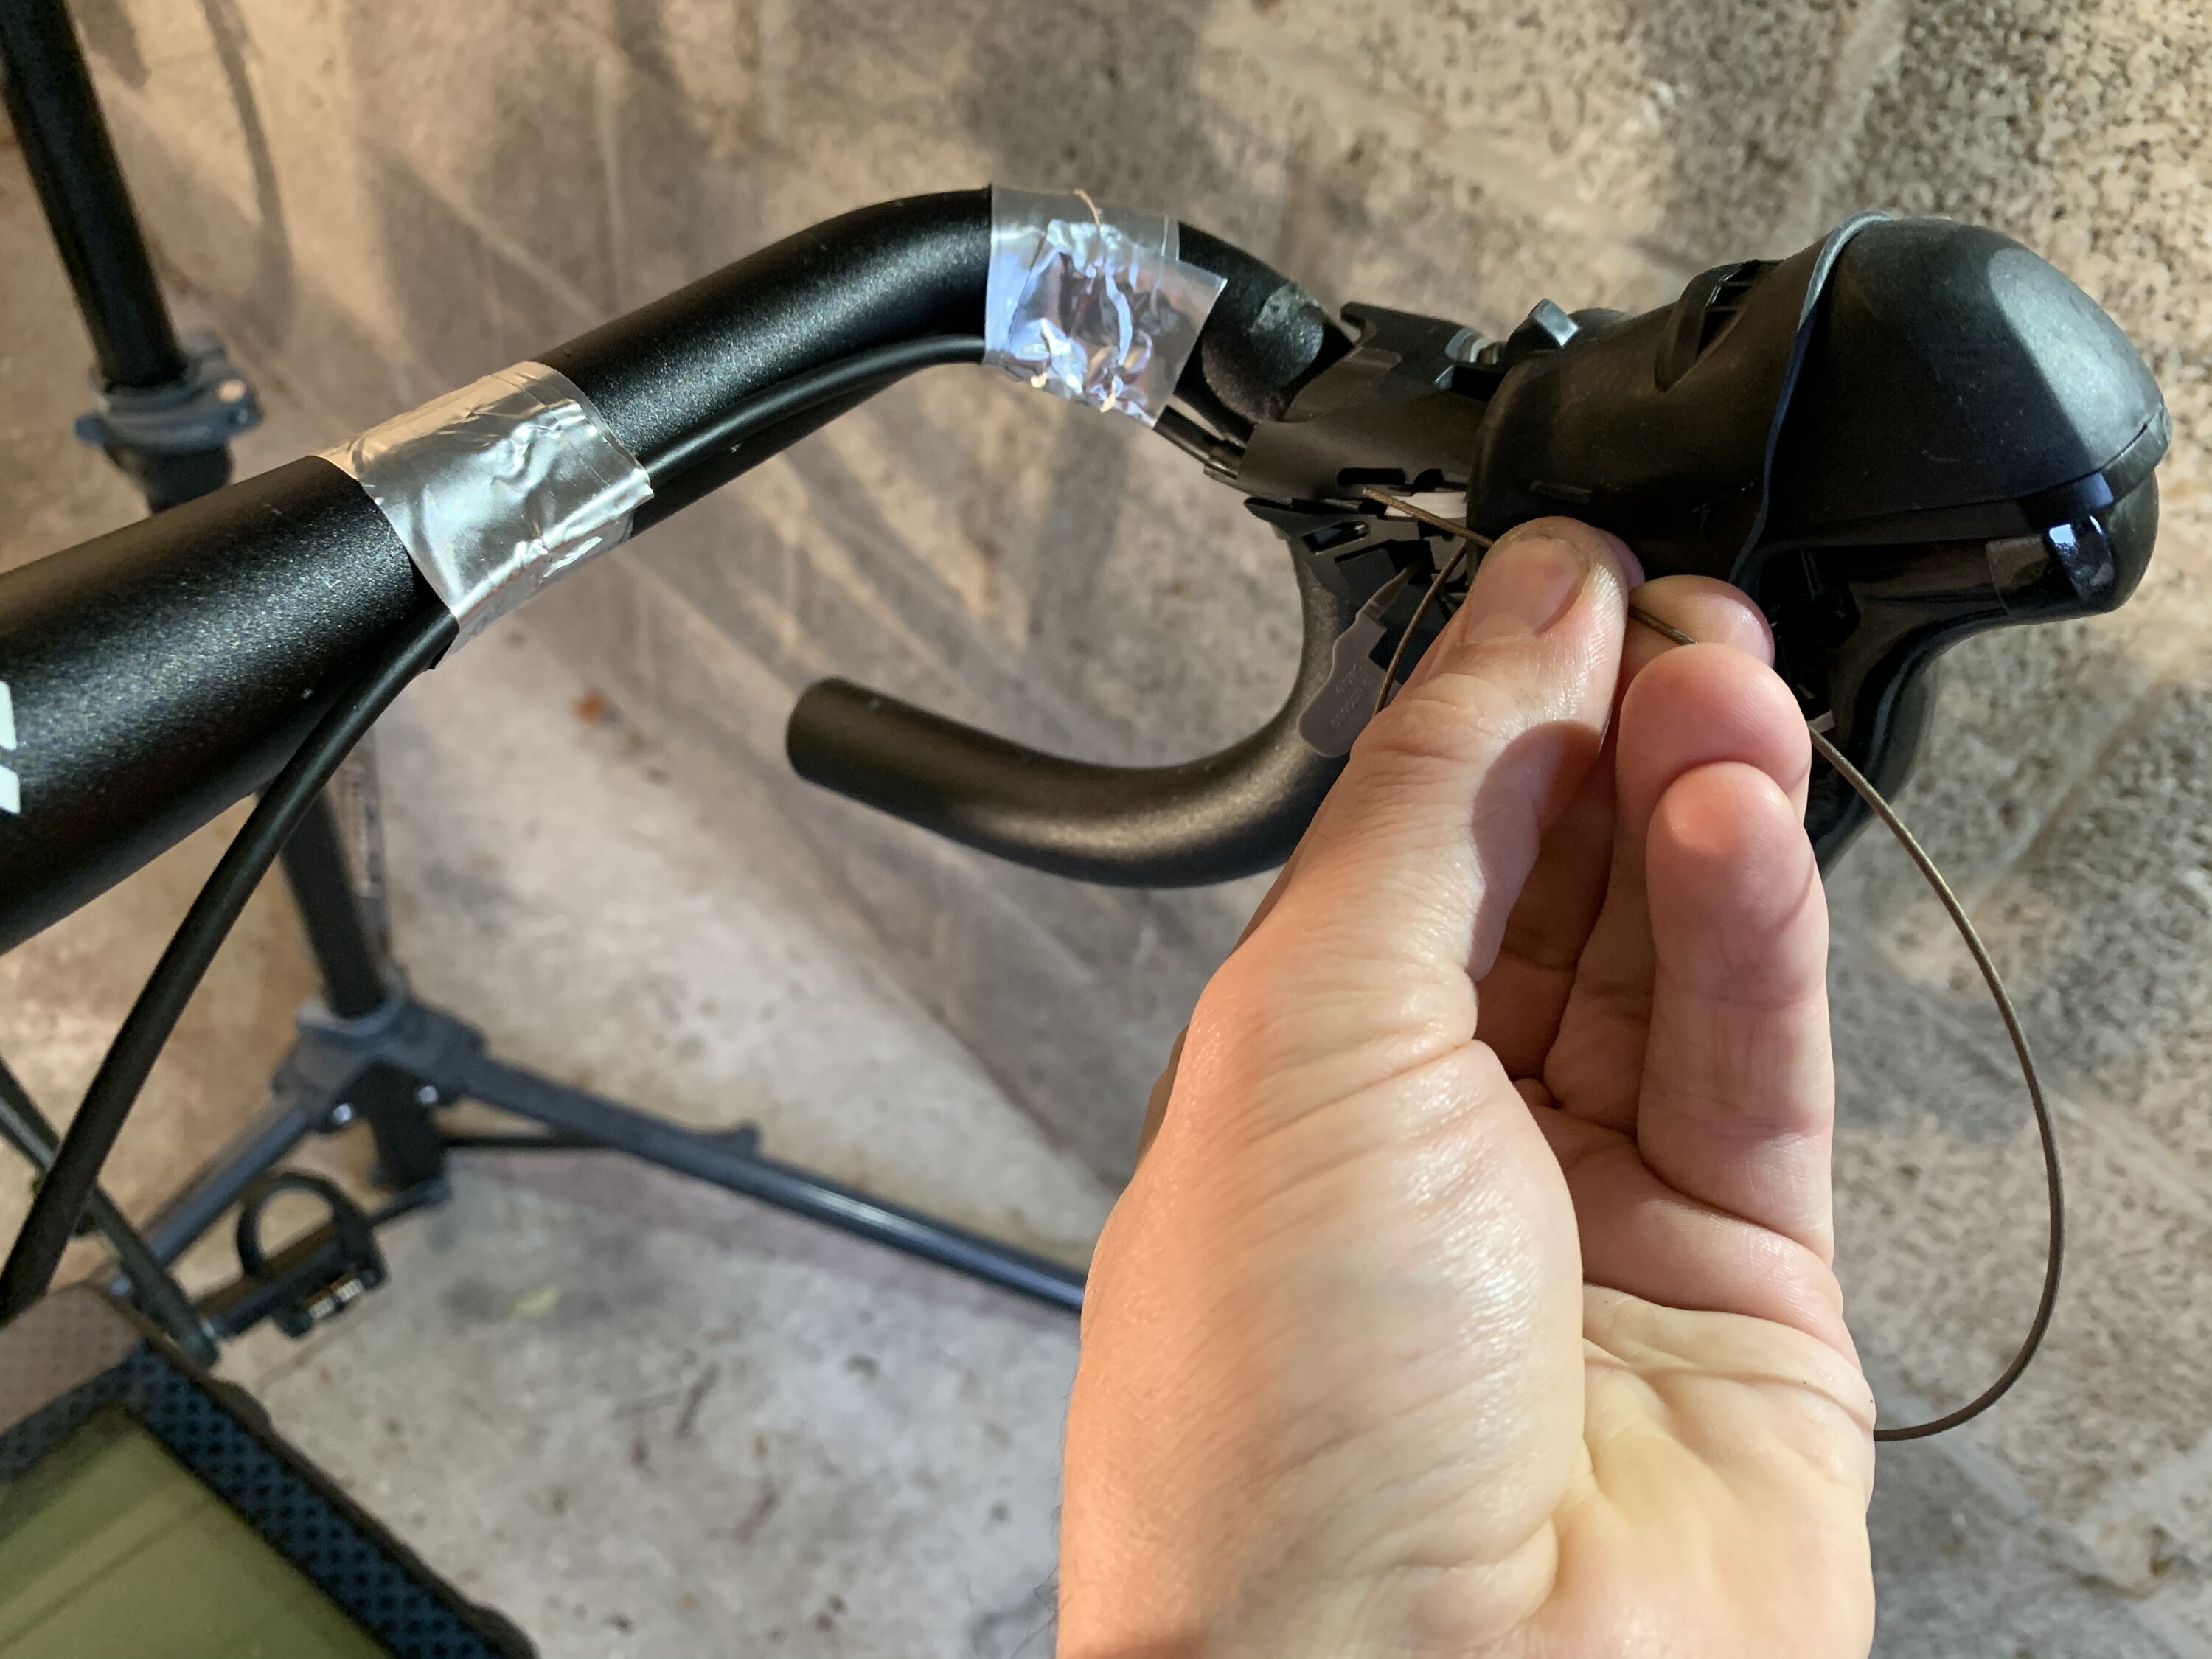
Aligning the derailleurs is not very hard to do, but it is a good idea to watch some YouTube instruction videos on how to index your gears. Once again it's easier to do this if you have fixed your bike in a work stand, allowing you to pedal and shift freely while finetuning the gears.
Conclusion
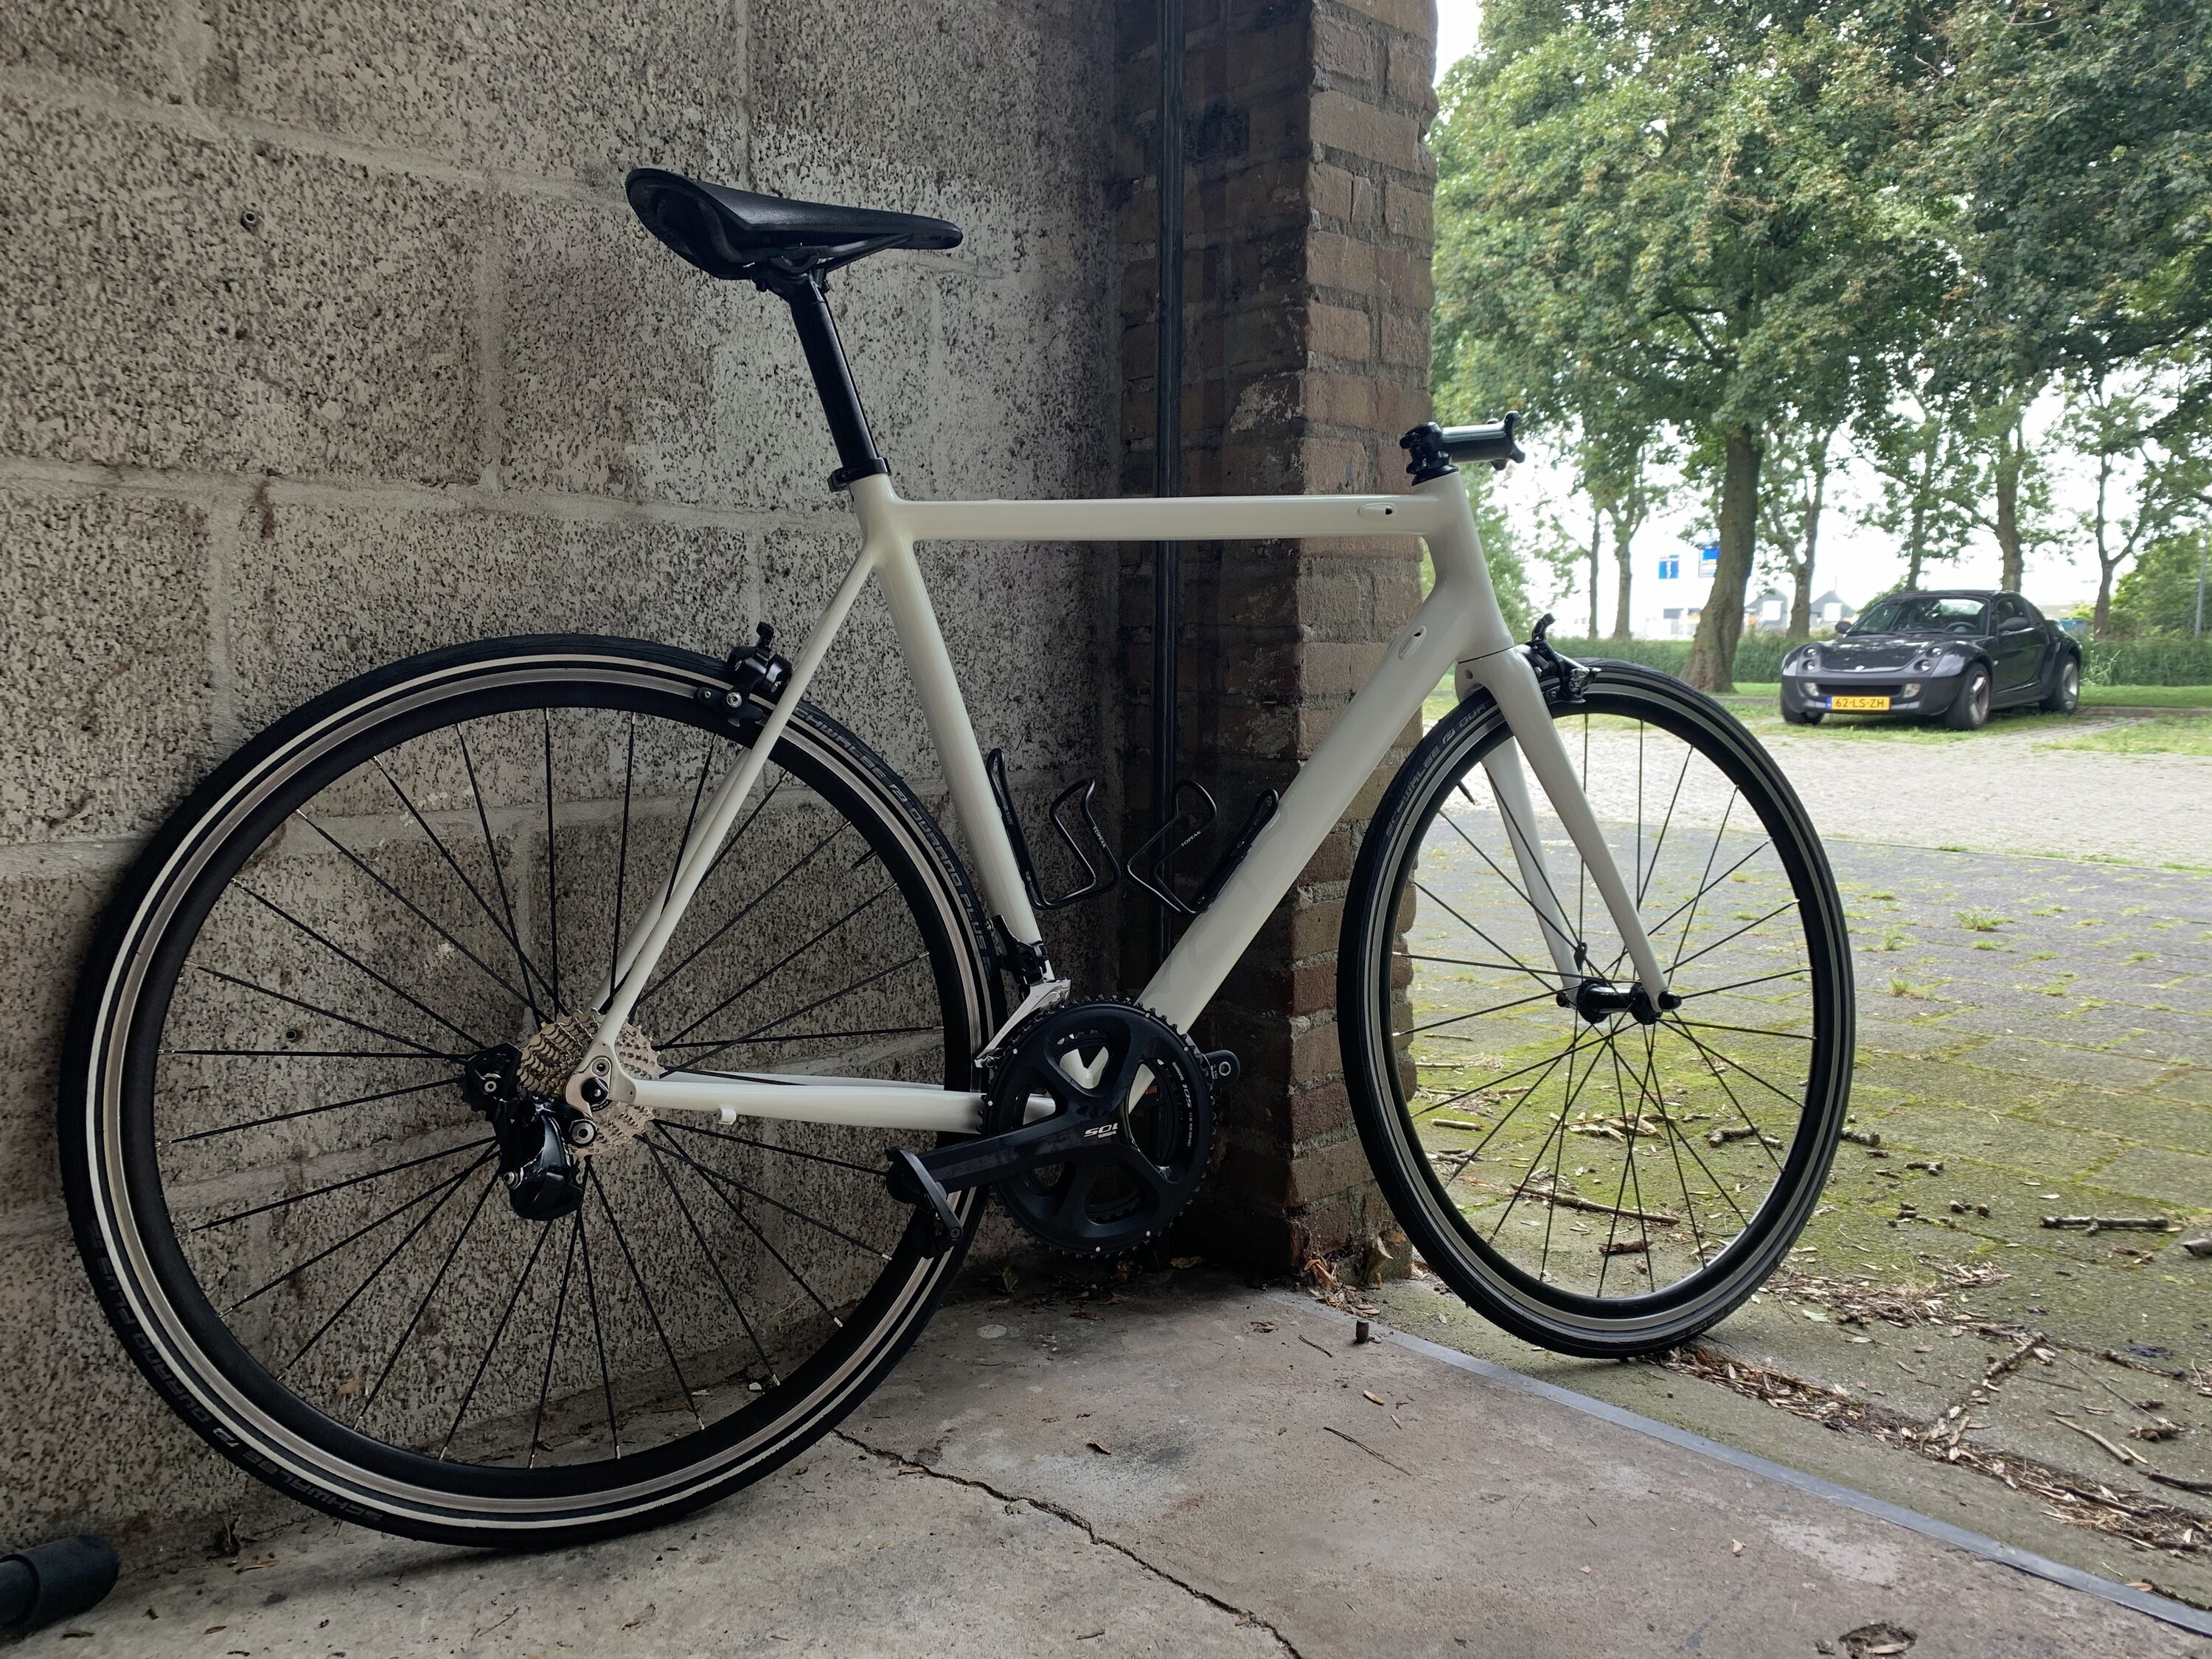
Many hours later the spare parts have become a modern and minimalistic road bike! You will feel proud of your creation as it is more than the sum of its parts.
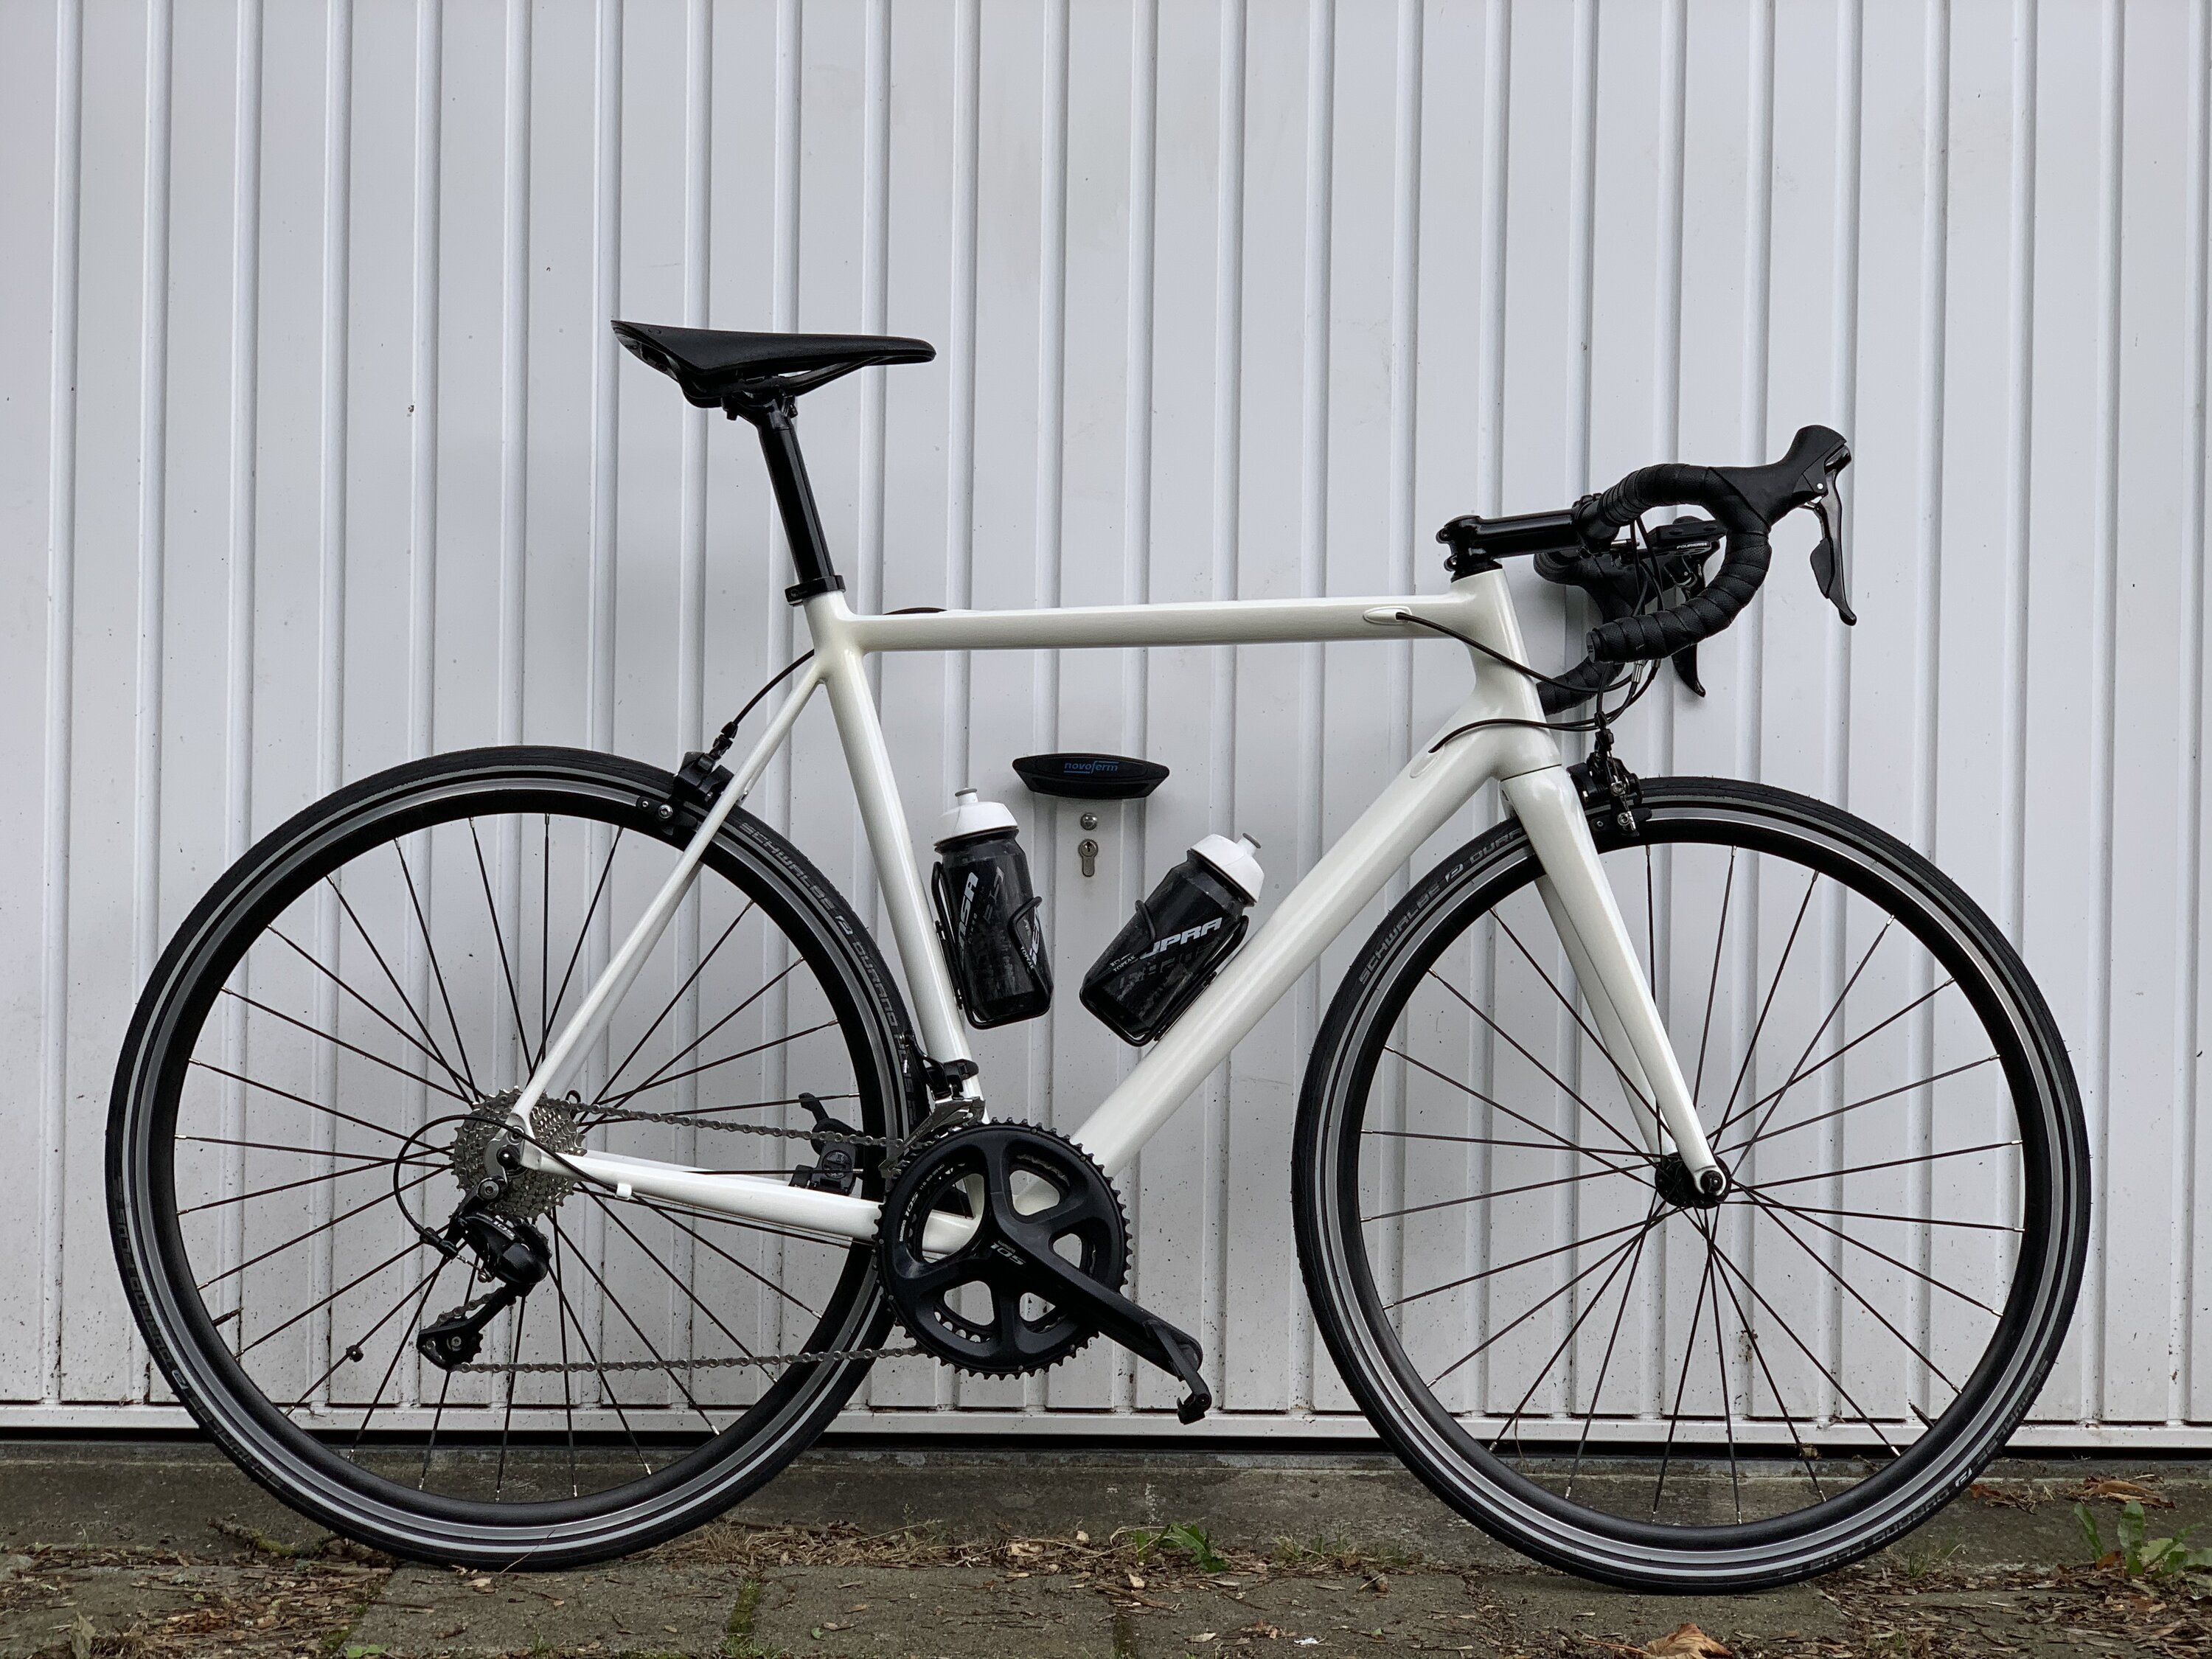
Building your own bike will give you an incredible understanding of its parts. It is very satisfactory to ride it!

Download
If you enjoy reading offline, this article is available for download:
Translations
This article is available in the following languages:
RSS / Atom
Grab one of the feeds to stay up to date, the feeds contain the full posts: