Nov. 1, 2023
And... there is light!
Installing dynamo powered lights on my road bike
The darker days are here in the northern hemisphere, and so is the need for good lights on your bike. Although battery powered lights can do the job, you need to keep them charged. I wanted a light system on my road bike that just works. Read along for some light in the darkness!!
Since my move to the country side of Limburg, I find myself more often in utter darkness as many of the country side roads don't feature any street lights. With two young kids I need to be a bit creative on when I go out for a workout; like when they're tucked into bed. This means that good bike lights aren't just a luxury, they are essential for how I use my bike.
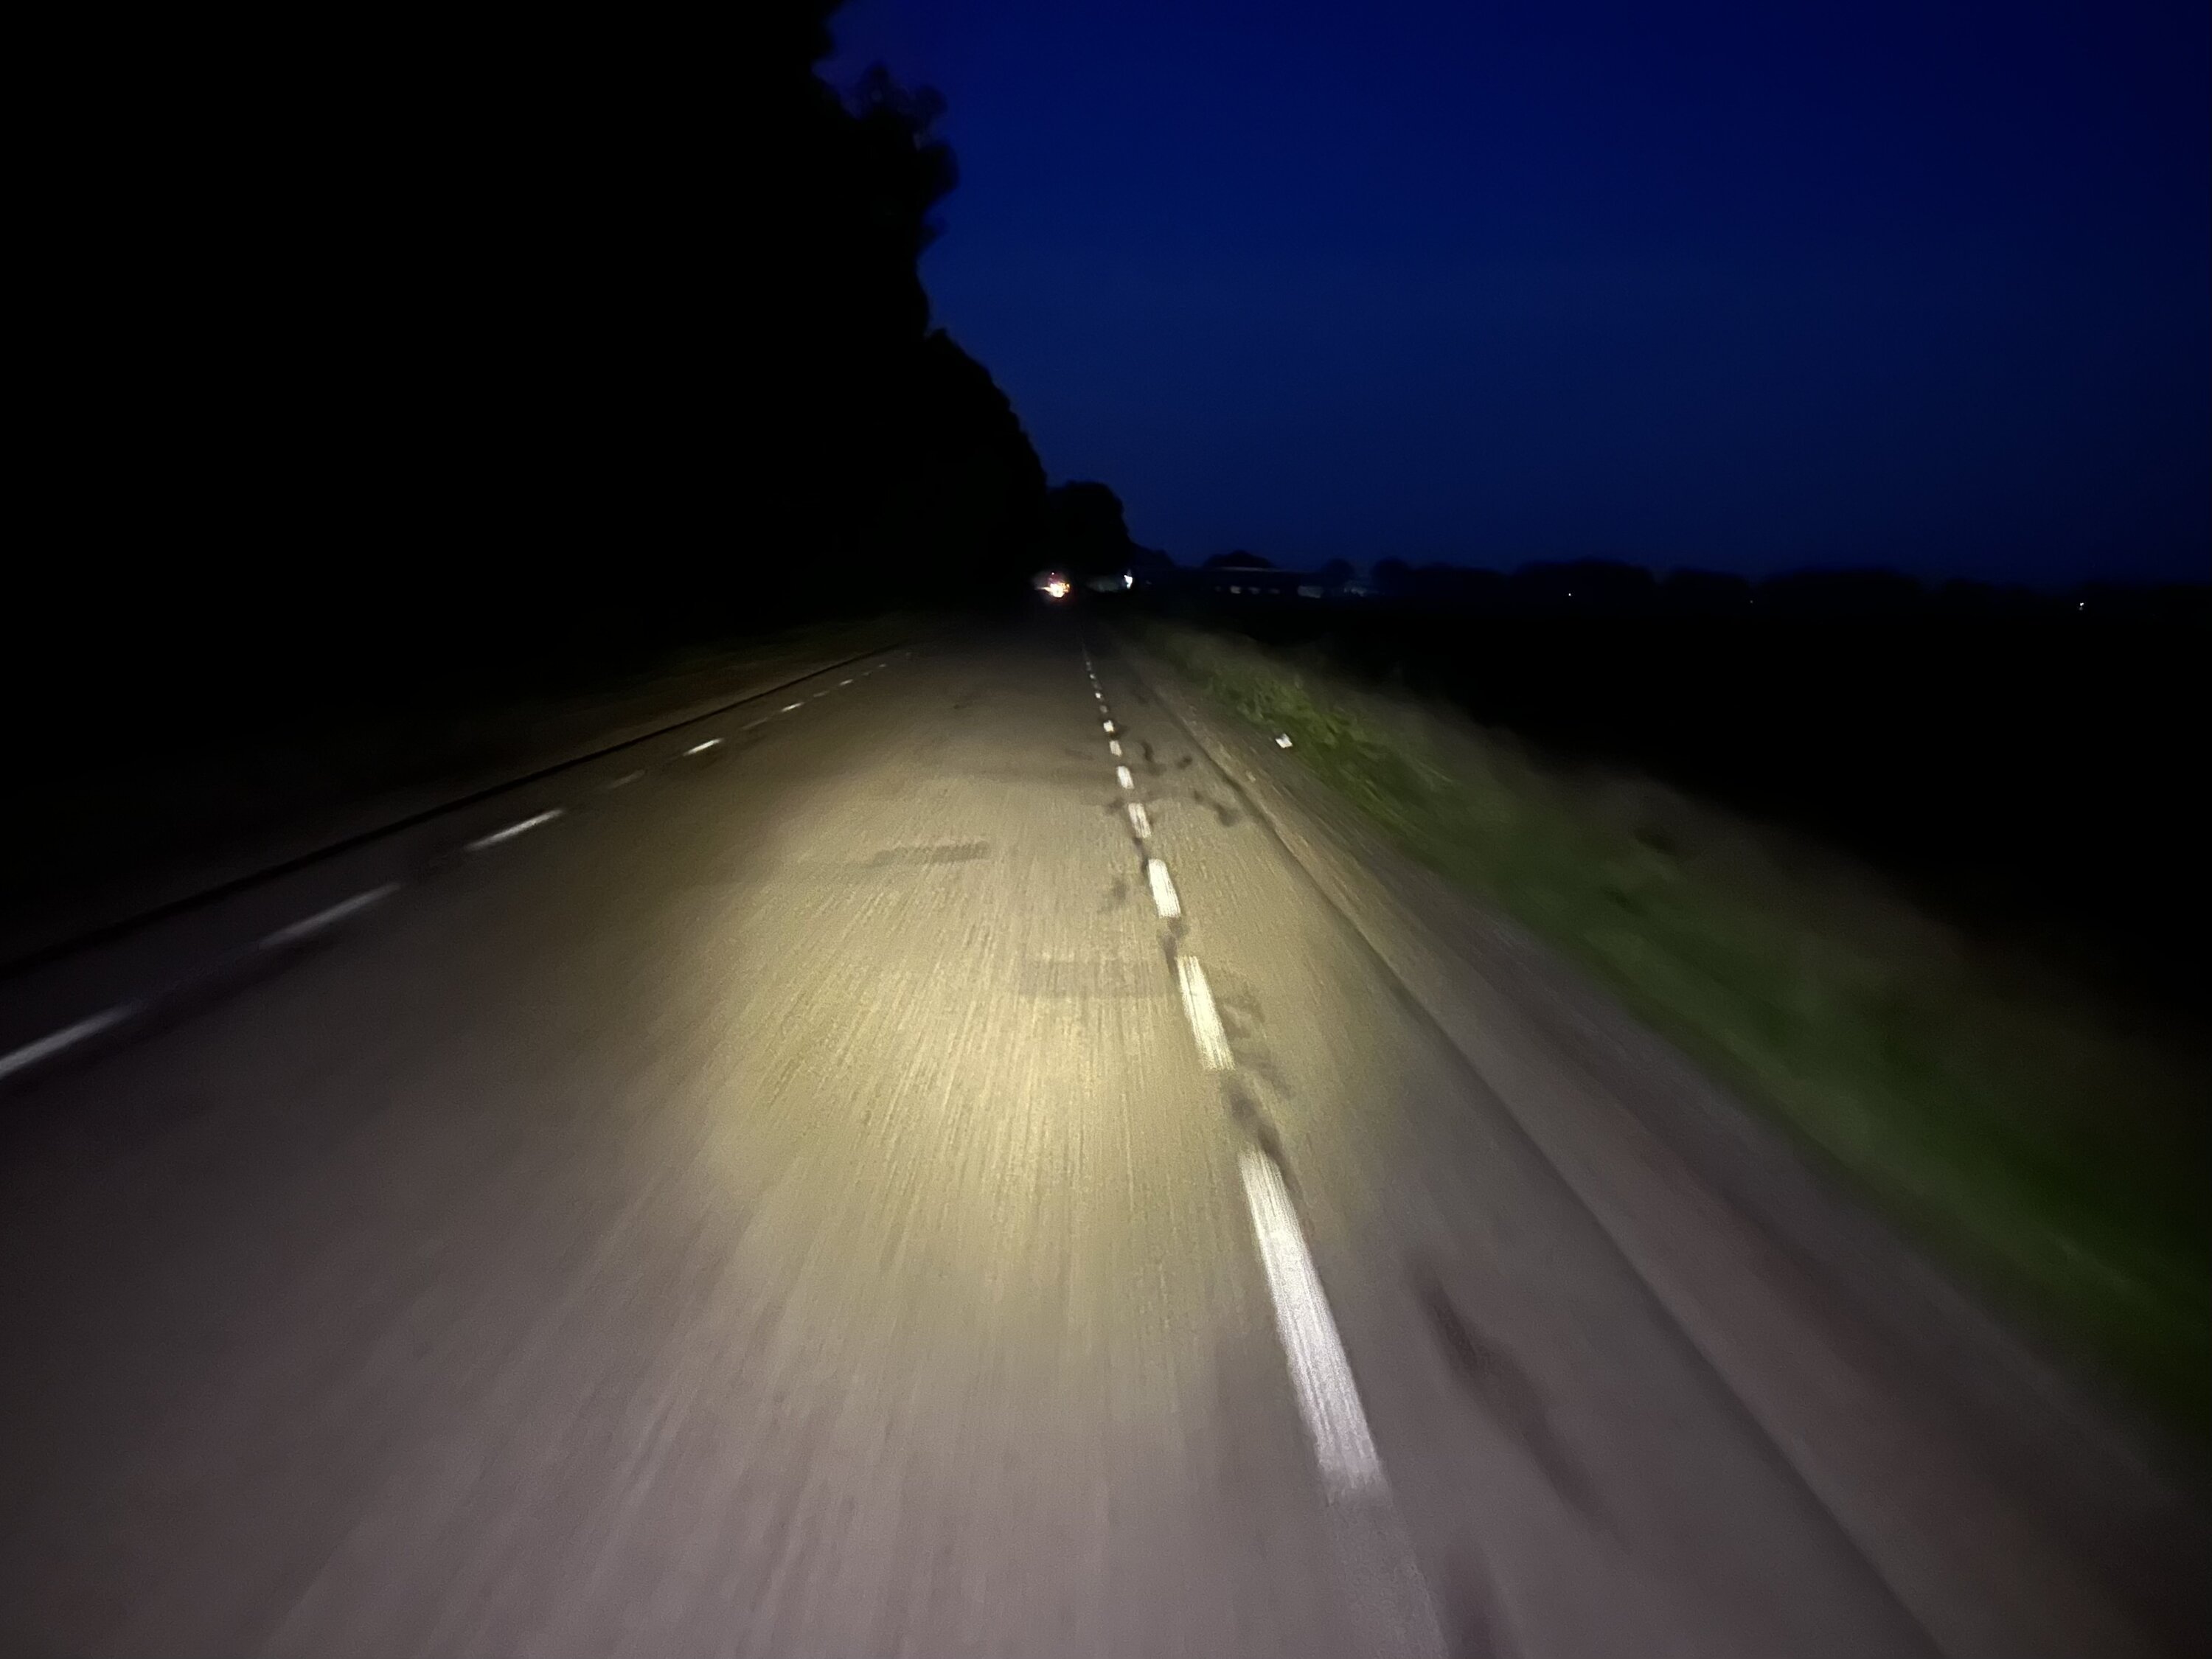
Along with my Garmin Edge bike computer I have the Garmin Varia lights, both a headlight (UT800) and rear light with radar (RTL515). They are so-called smart lights, adjusting their beams and intensity on ambient light and your speed. Your Garmin bike computer manages this through a wireless connection. Most of the time this works well, but not *always*... and then it can be a hassle to get the entire system to be reset (e.g. having to reboot both lights, the bike computer) and/or checking the individual wireless connections. Sometimes the *smart* simply fails and then you're stuck with some stubborn blinking lights when you really want a steady bright beam. Another (serious) limitation is that the brightest beam - which you need in utter darkness - uses so much battery power, that it only lasts for 1.5 hours (under good conditions!). I just want my lights to work - no hassles or battery management, please!
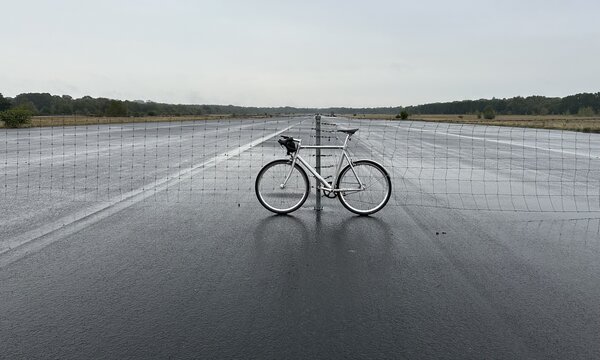
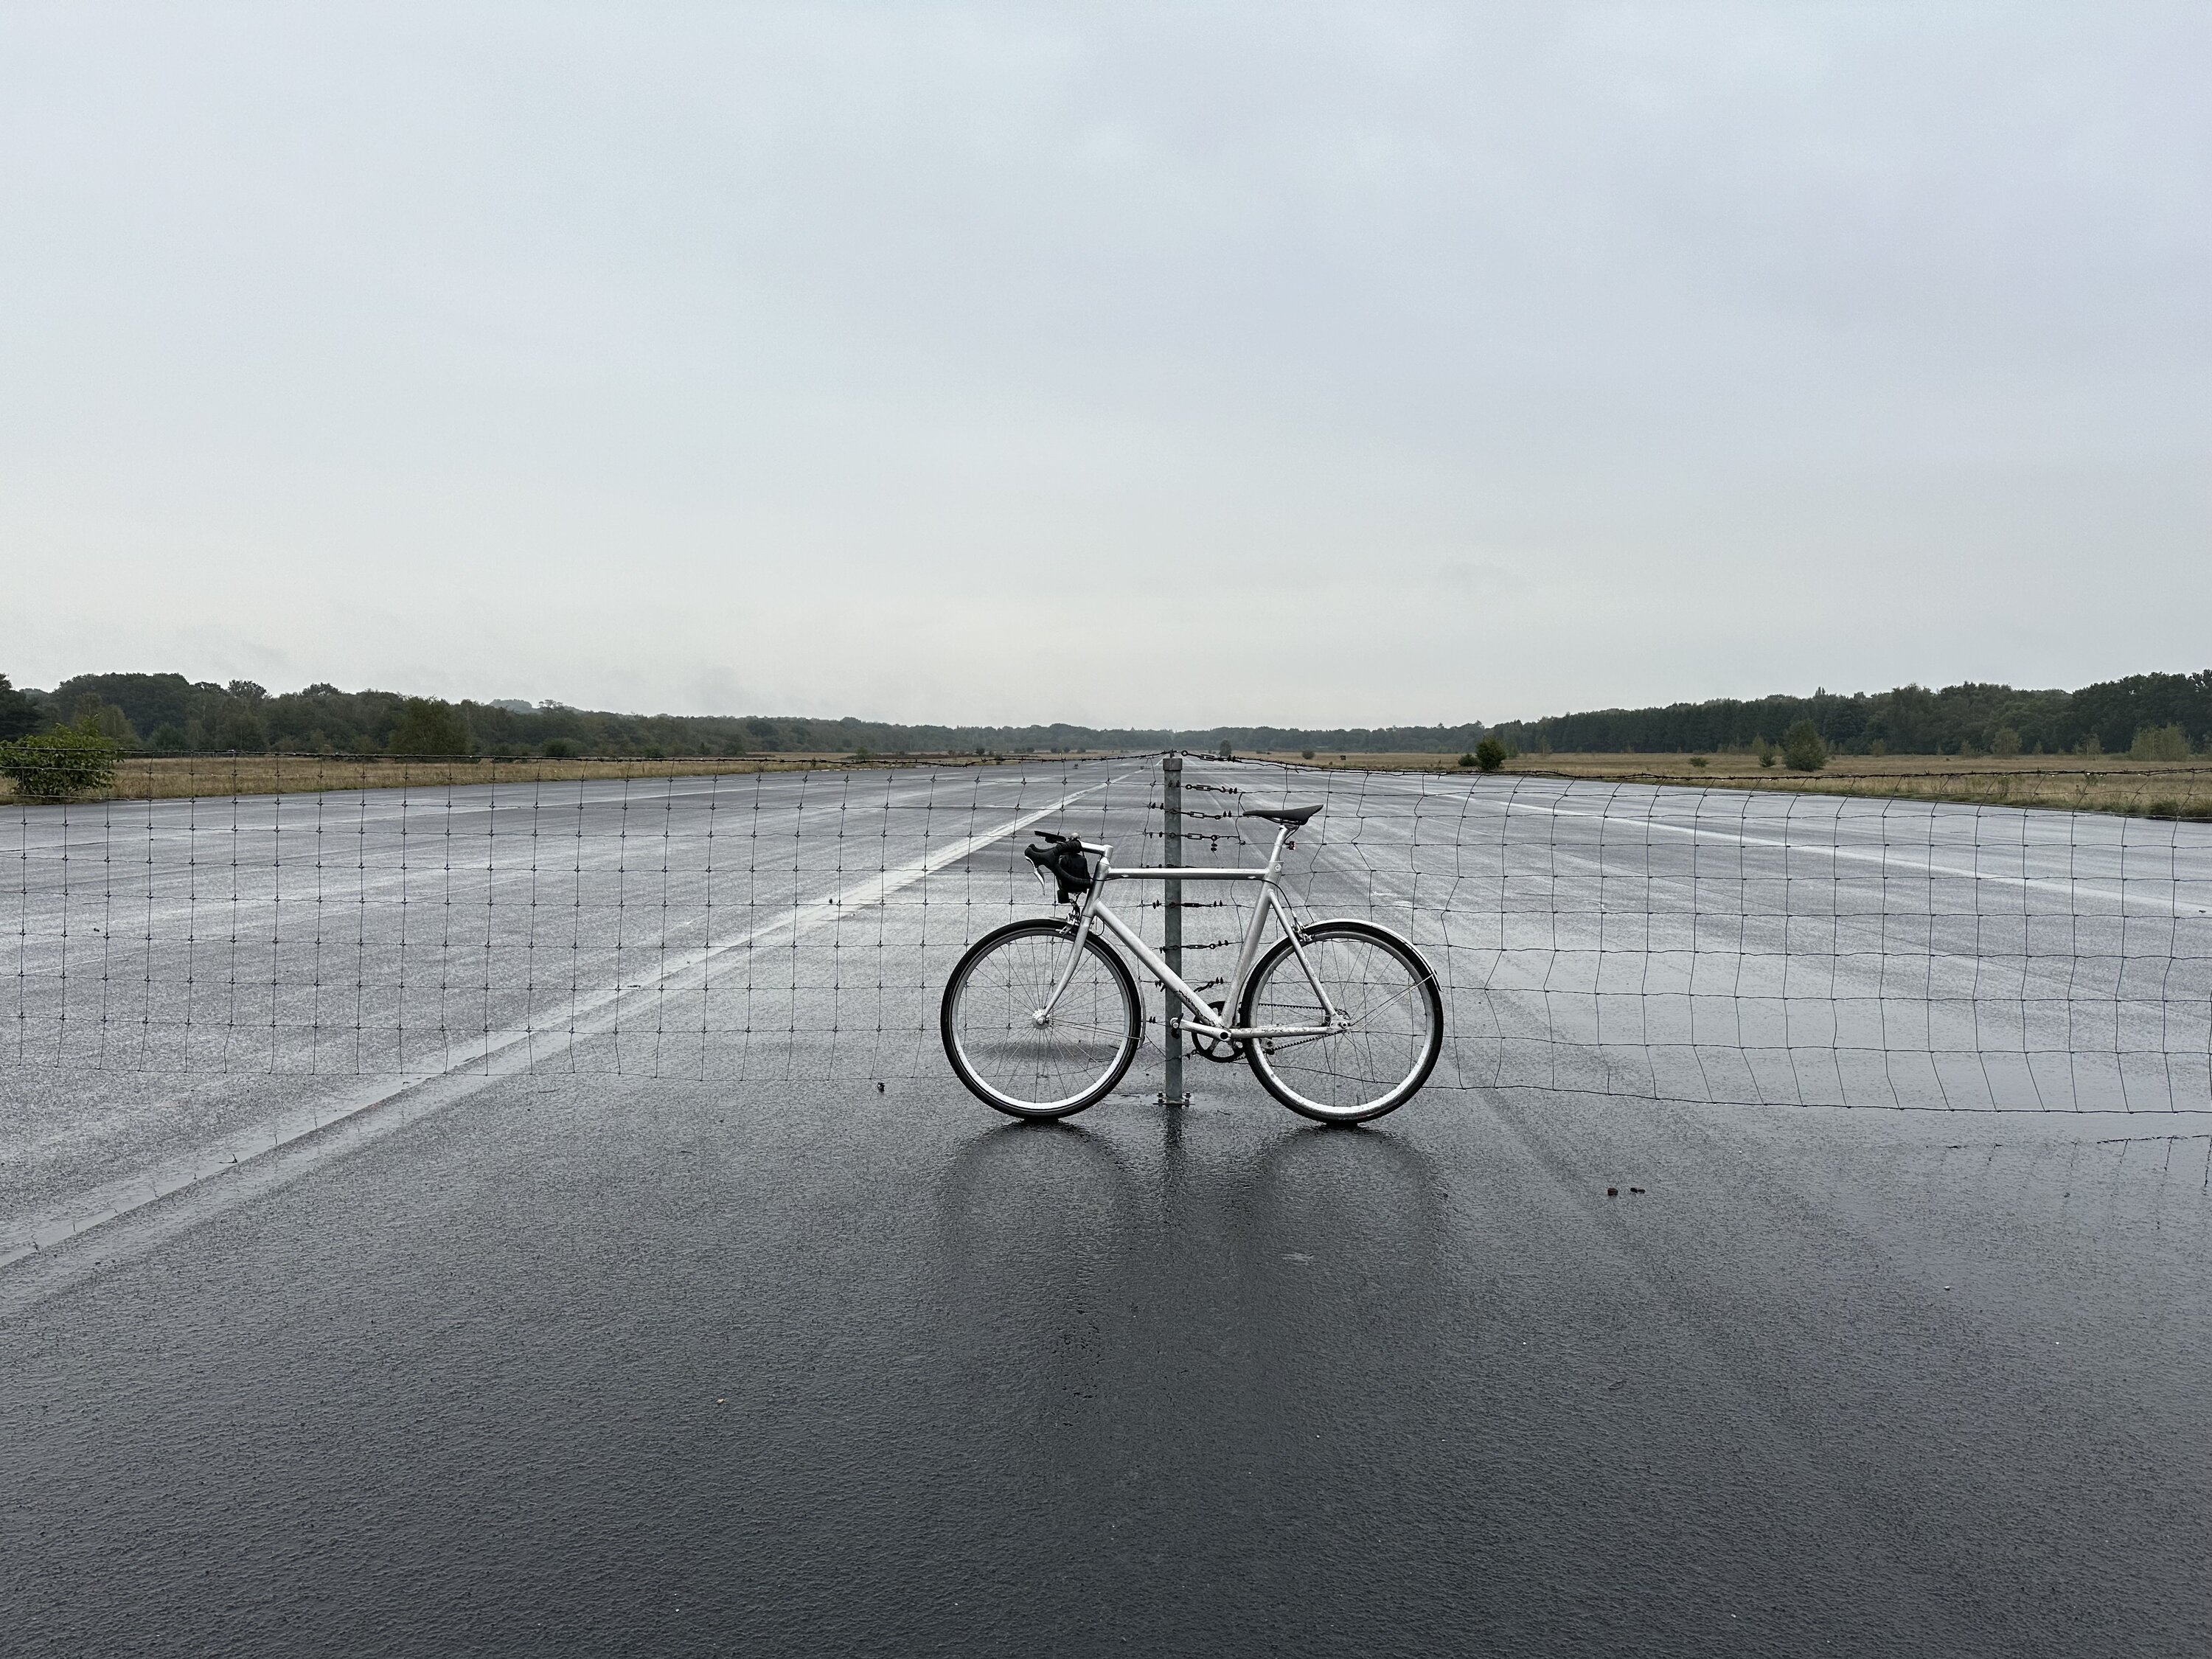
Friends of the blog will know that I have a minimalistic road bike from Schindelhauer, a devoted bike builder from Berlin. The modified Siegfried Road I use does not have a dynamo, hence my original choice for battery powered lights. To change this, I somehow need a wheel with dynamo, electrical wires and some good dynamo powered lights.
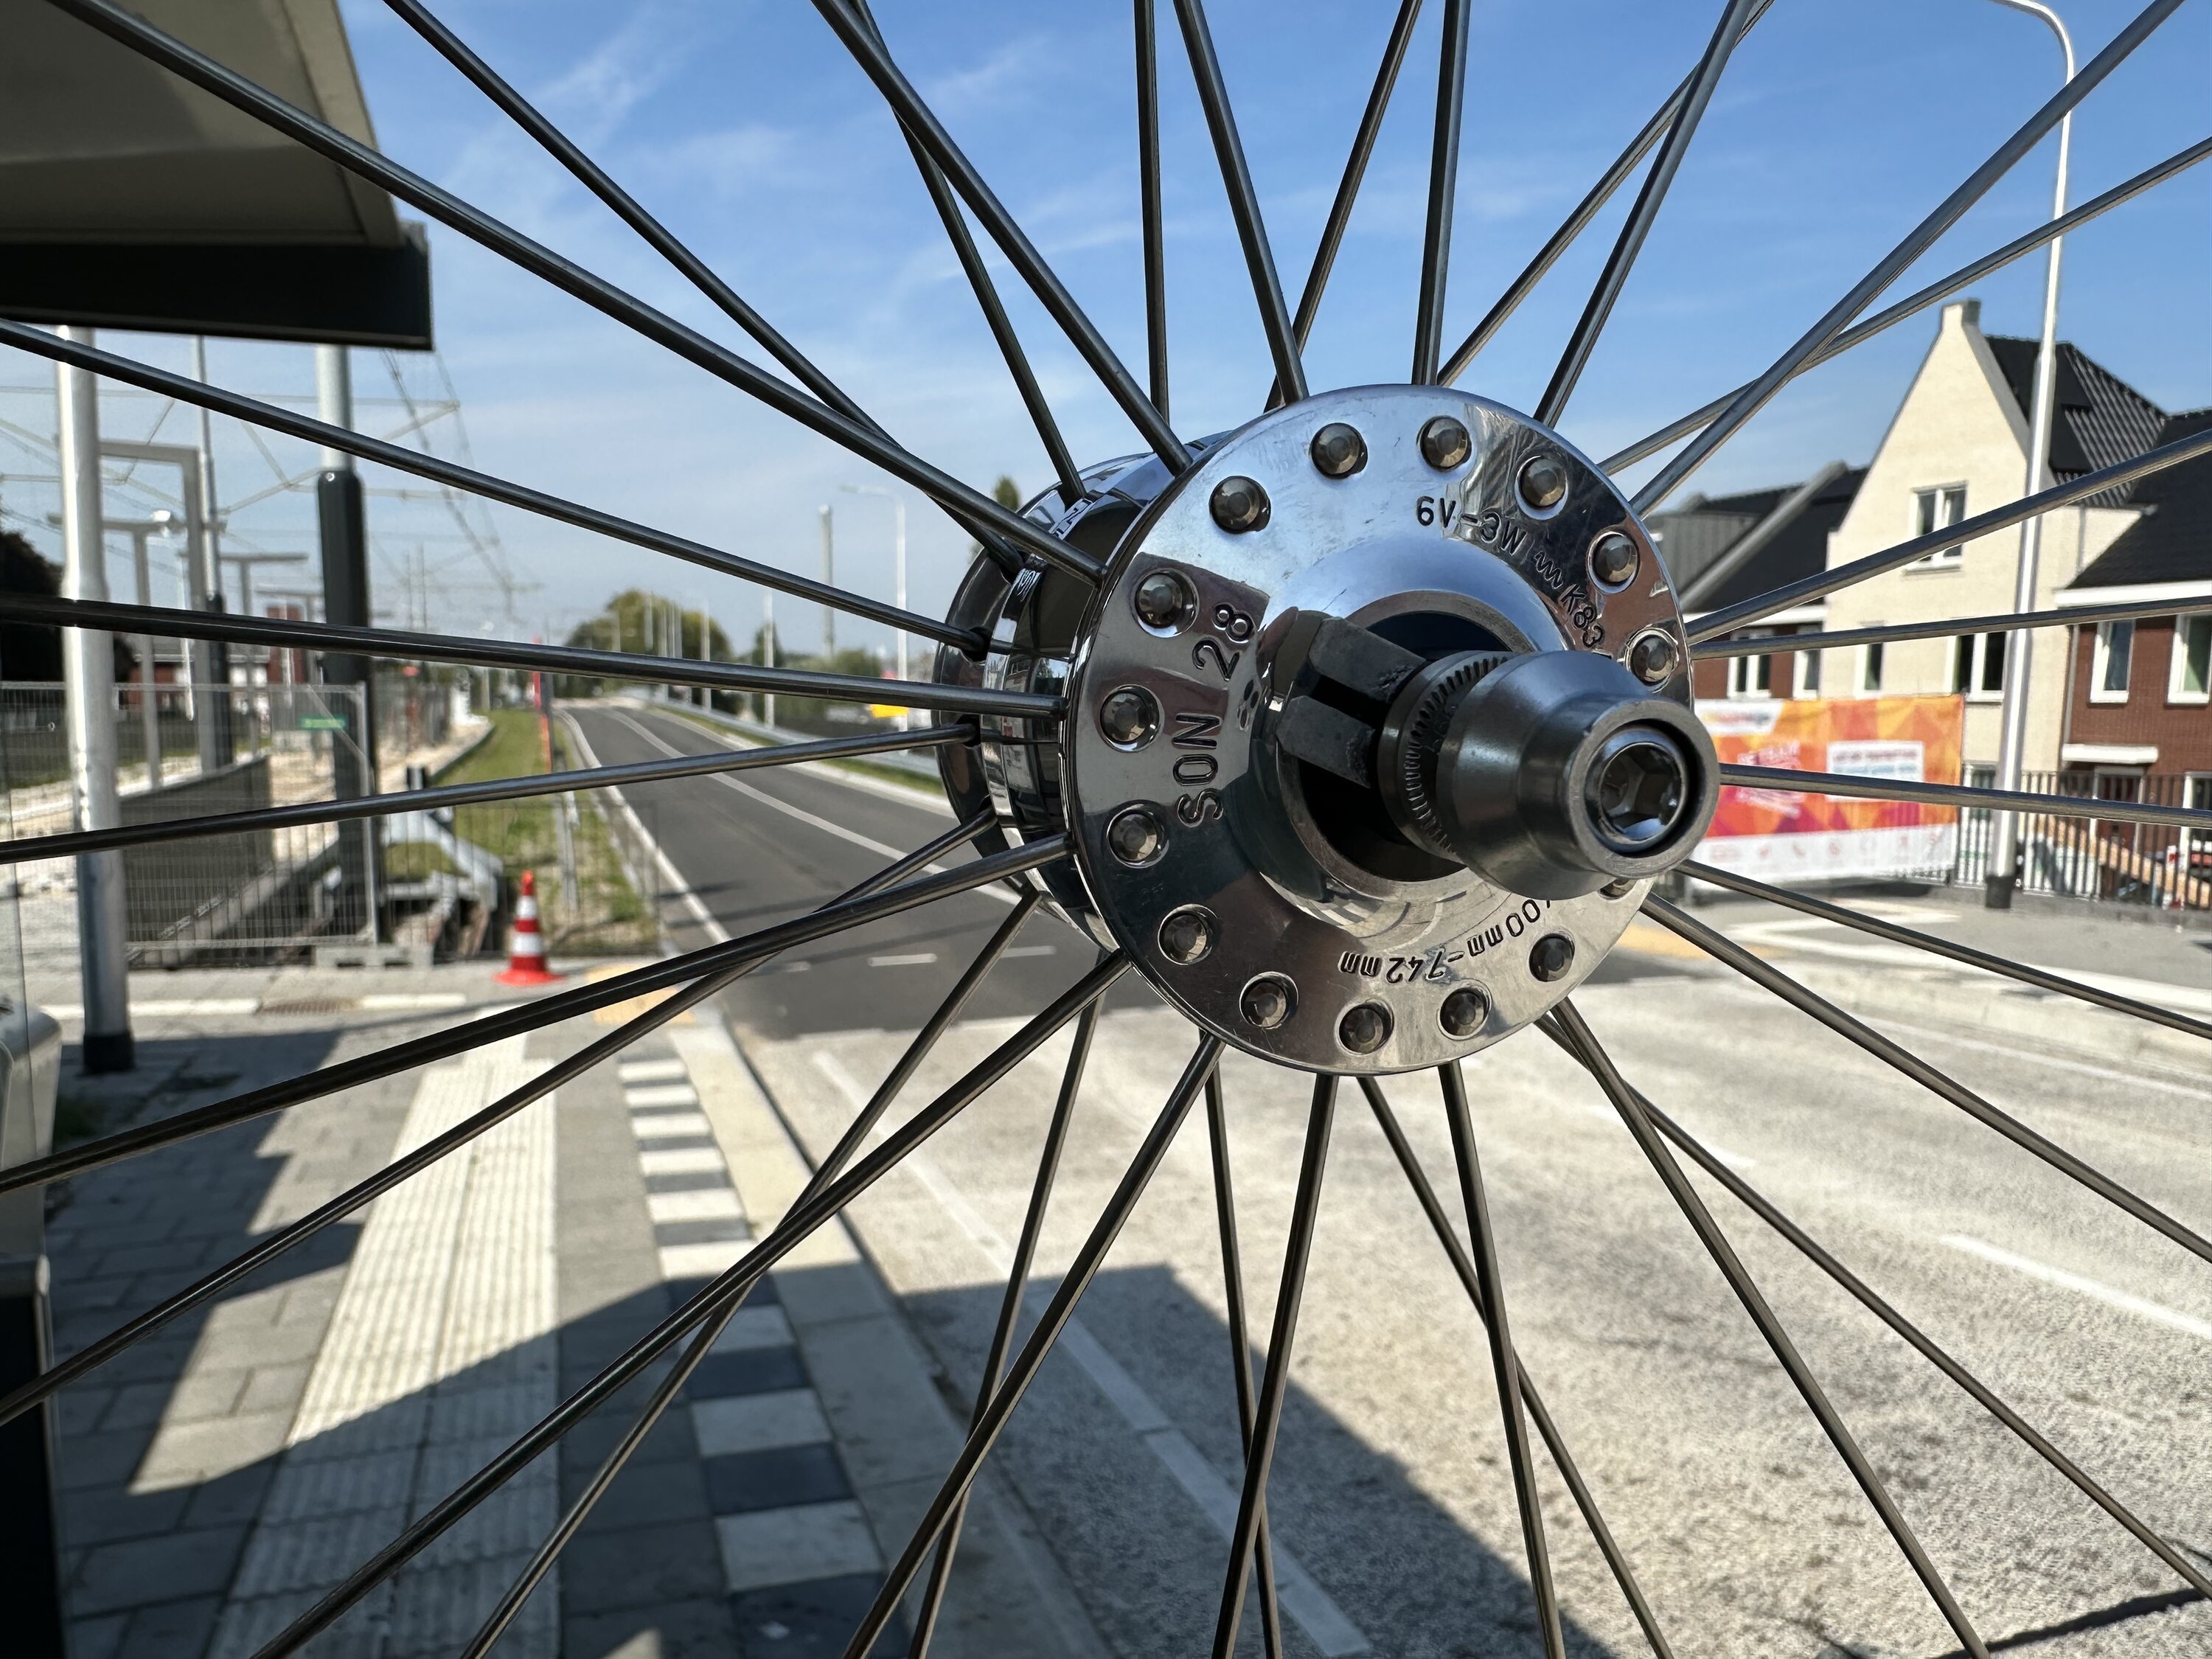
The most efficient and maintenance free dynamos are hub dynamos that sit on/inside the axle of your wheel. Your wheel will have a bit more rolling resistance, but you will get a steady and infinite supply of electric energy in return. The German SON makes fantastic bike dynamos, they are really among the best when it comes to energy output, durability and overall design. All made in Germany.

I asked the bike factory of Schildelhauer if they could supply me with a dynamo equipped wheel for my Schindelhauer Siegfried Road. Some of their other bikes feature dynamo powered lights, so I fancied my chances. Unfortunately they could not supply me with a fitting wheel, but they were absolutely willing to help me out. They offered me an original rim that they kept in stock because it failed their quality standards as it had some minor scratches on it. In addition to the rim, they gave me the specifications of the exact dynamo model that would work best on my road bike: I needed a SON28 dynamo with 32 spoke holes.
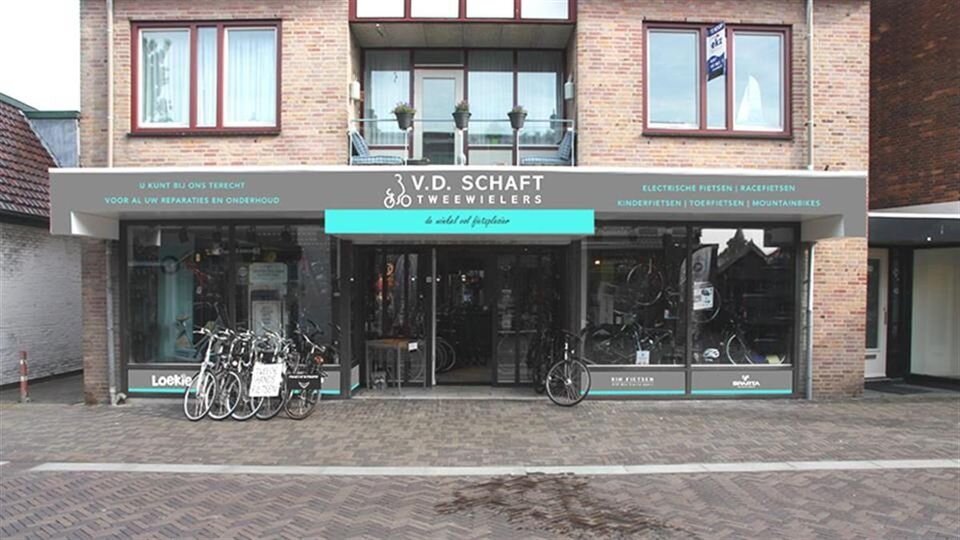
Now I only needed to find a skill-full wheel builder who would be able to create the custom road bike wheel with the SON hub dynamo. Although I can do pretty much do anything myself, creating a perfectly balanced and tensioned wheel calls for craftsmanship beyond my abilities. So I went back to my old hometown of Uithoorn where I knew the local bike shop, Ruud van der Schaft. I explained my crazy plan and he luckily agreed to help me if I would supply him with all the necessary parts.
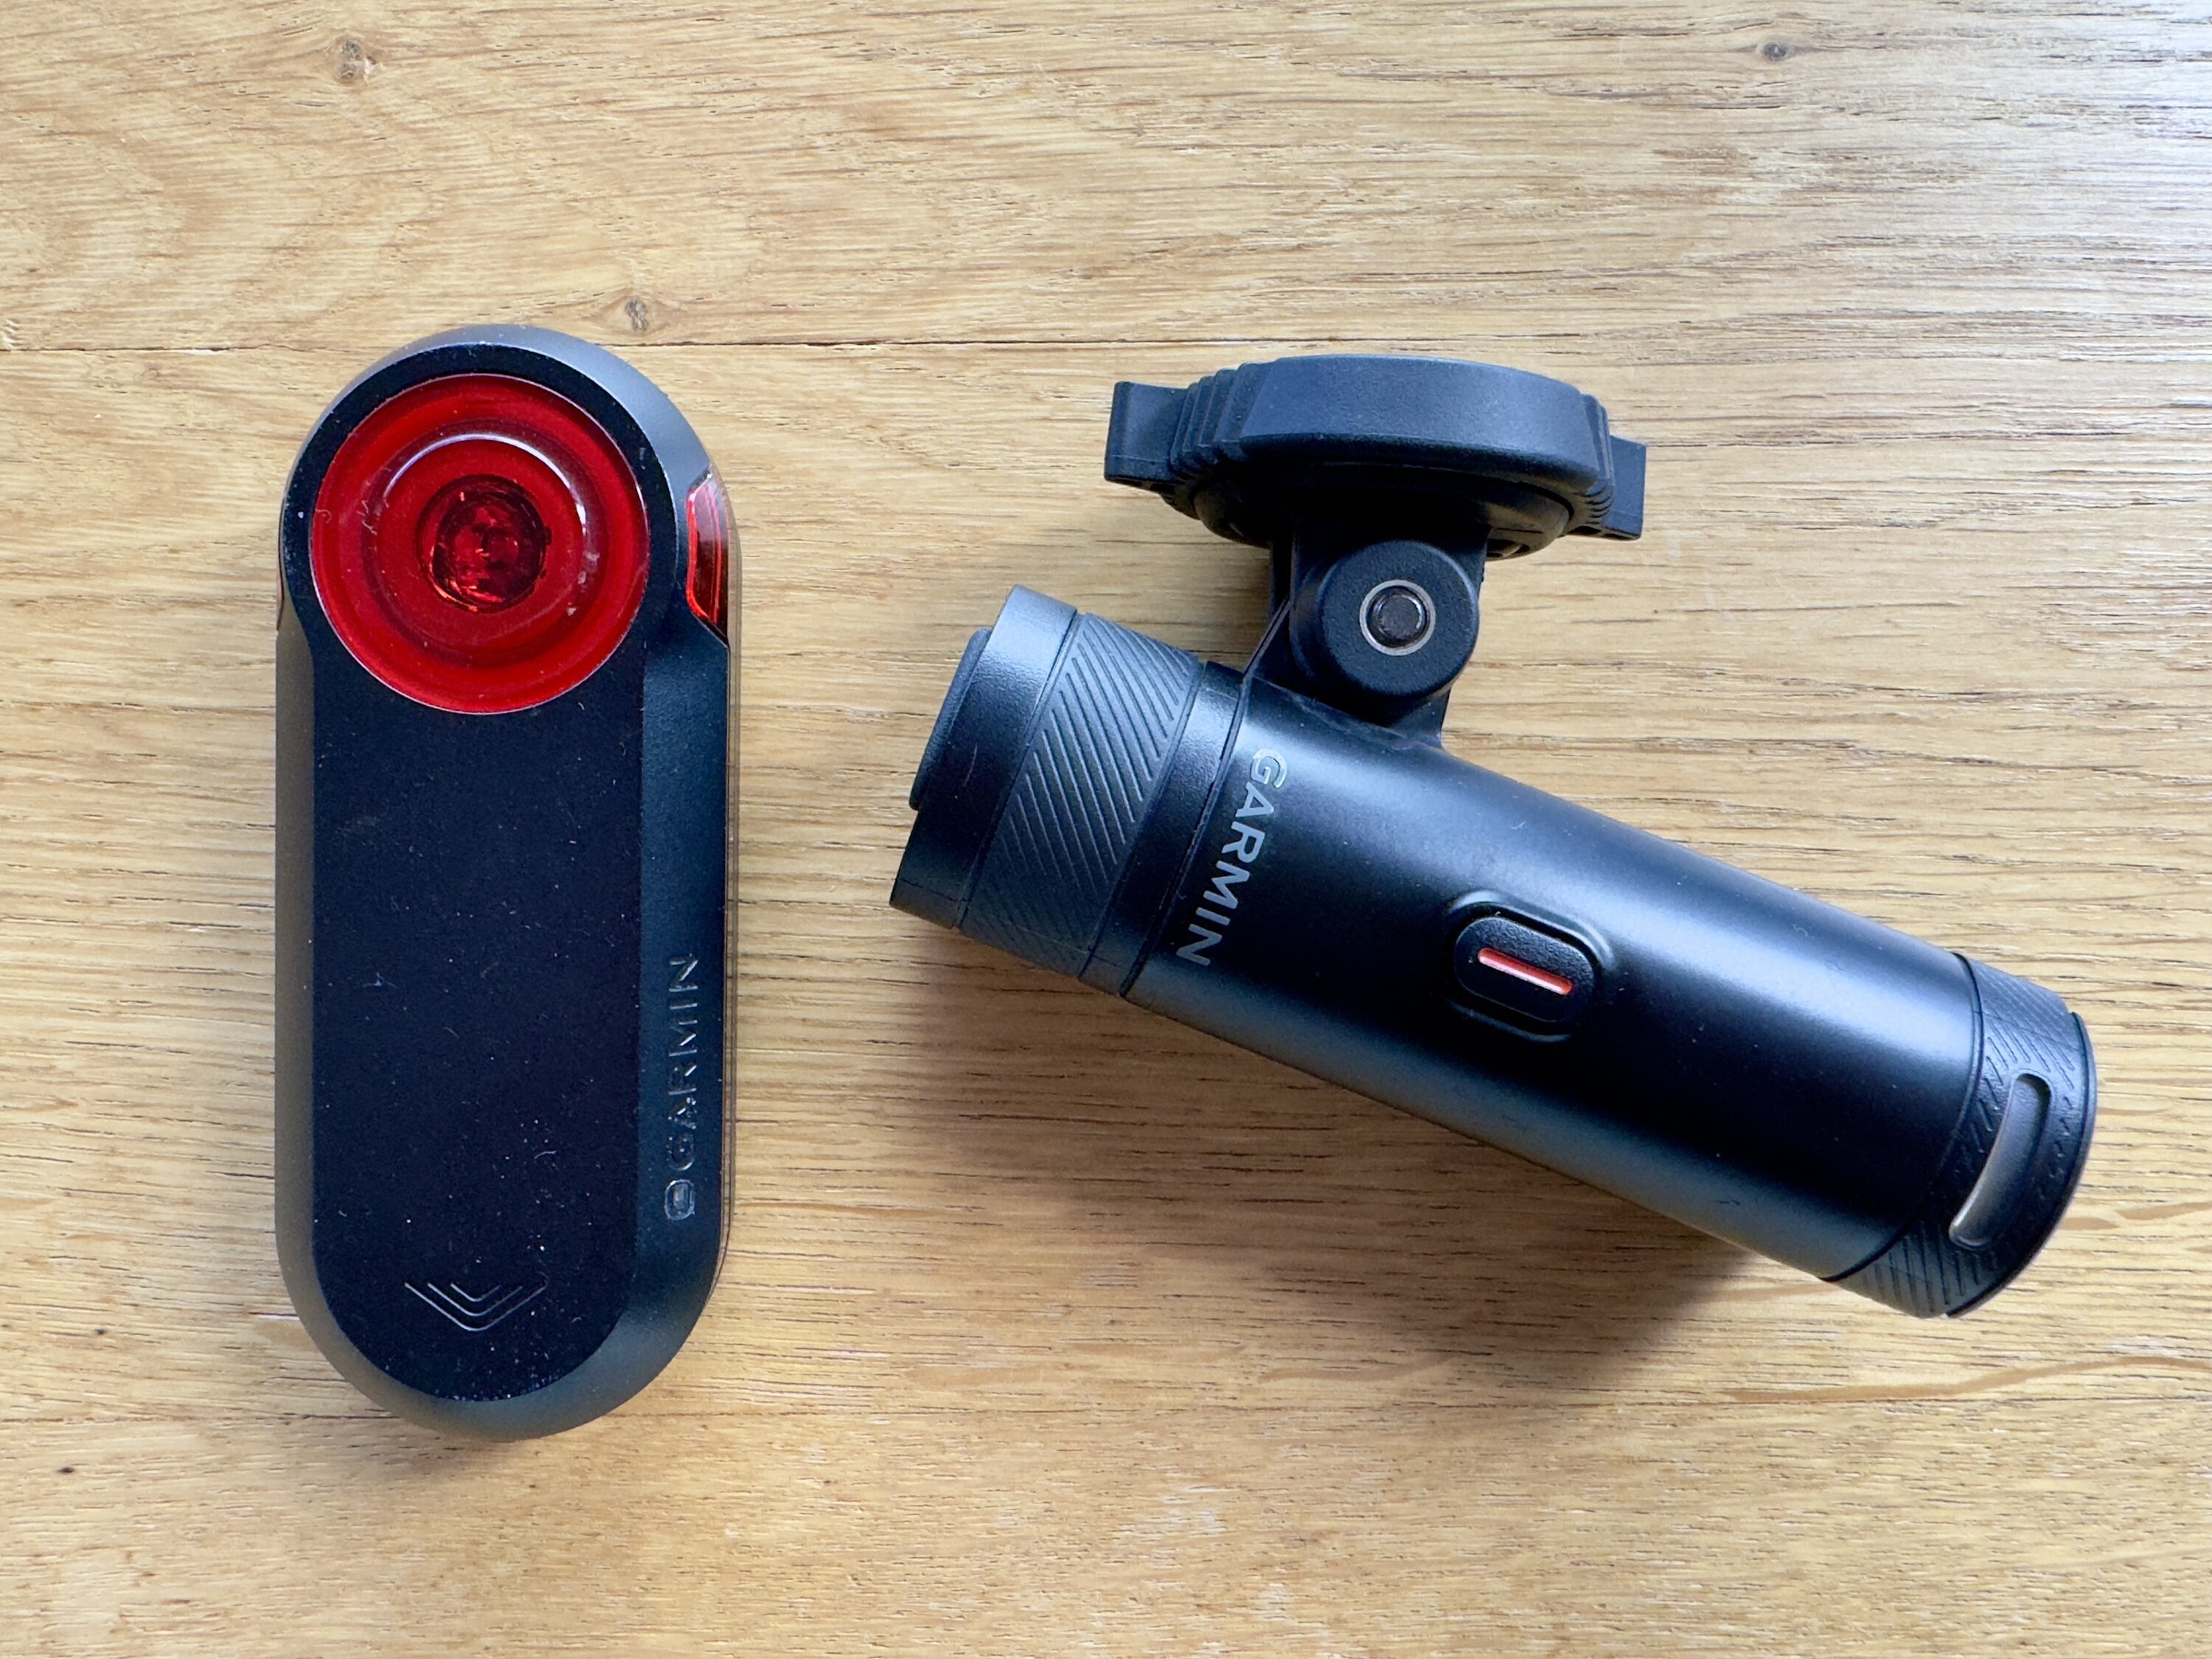
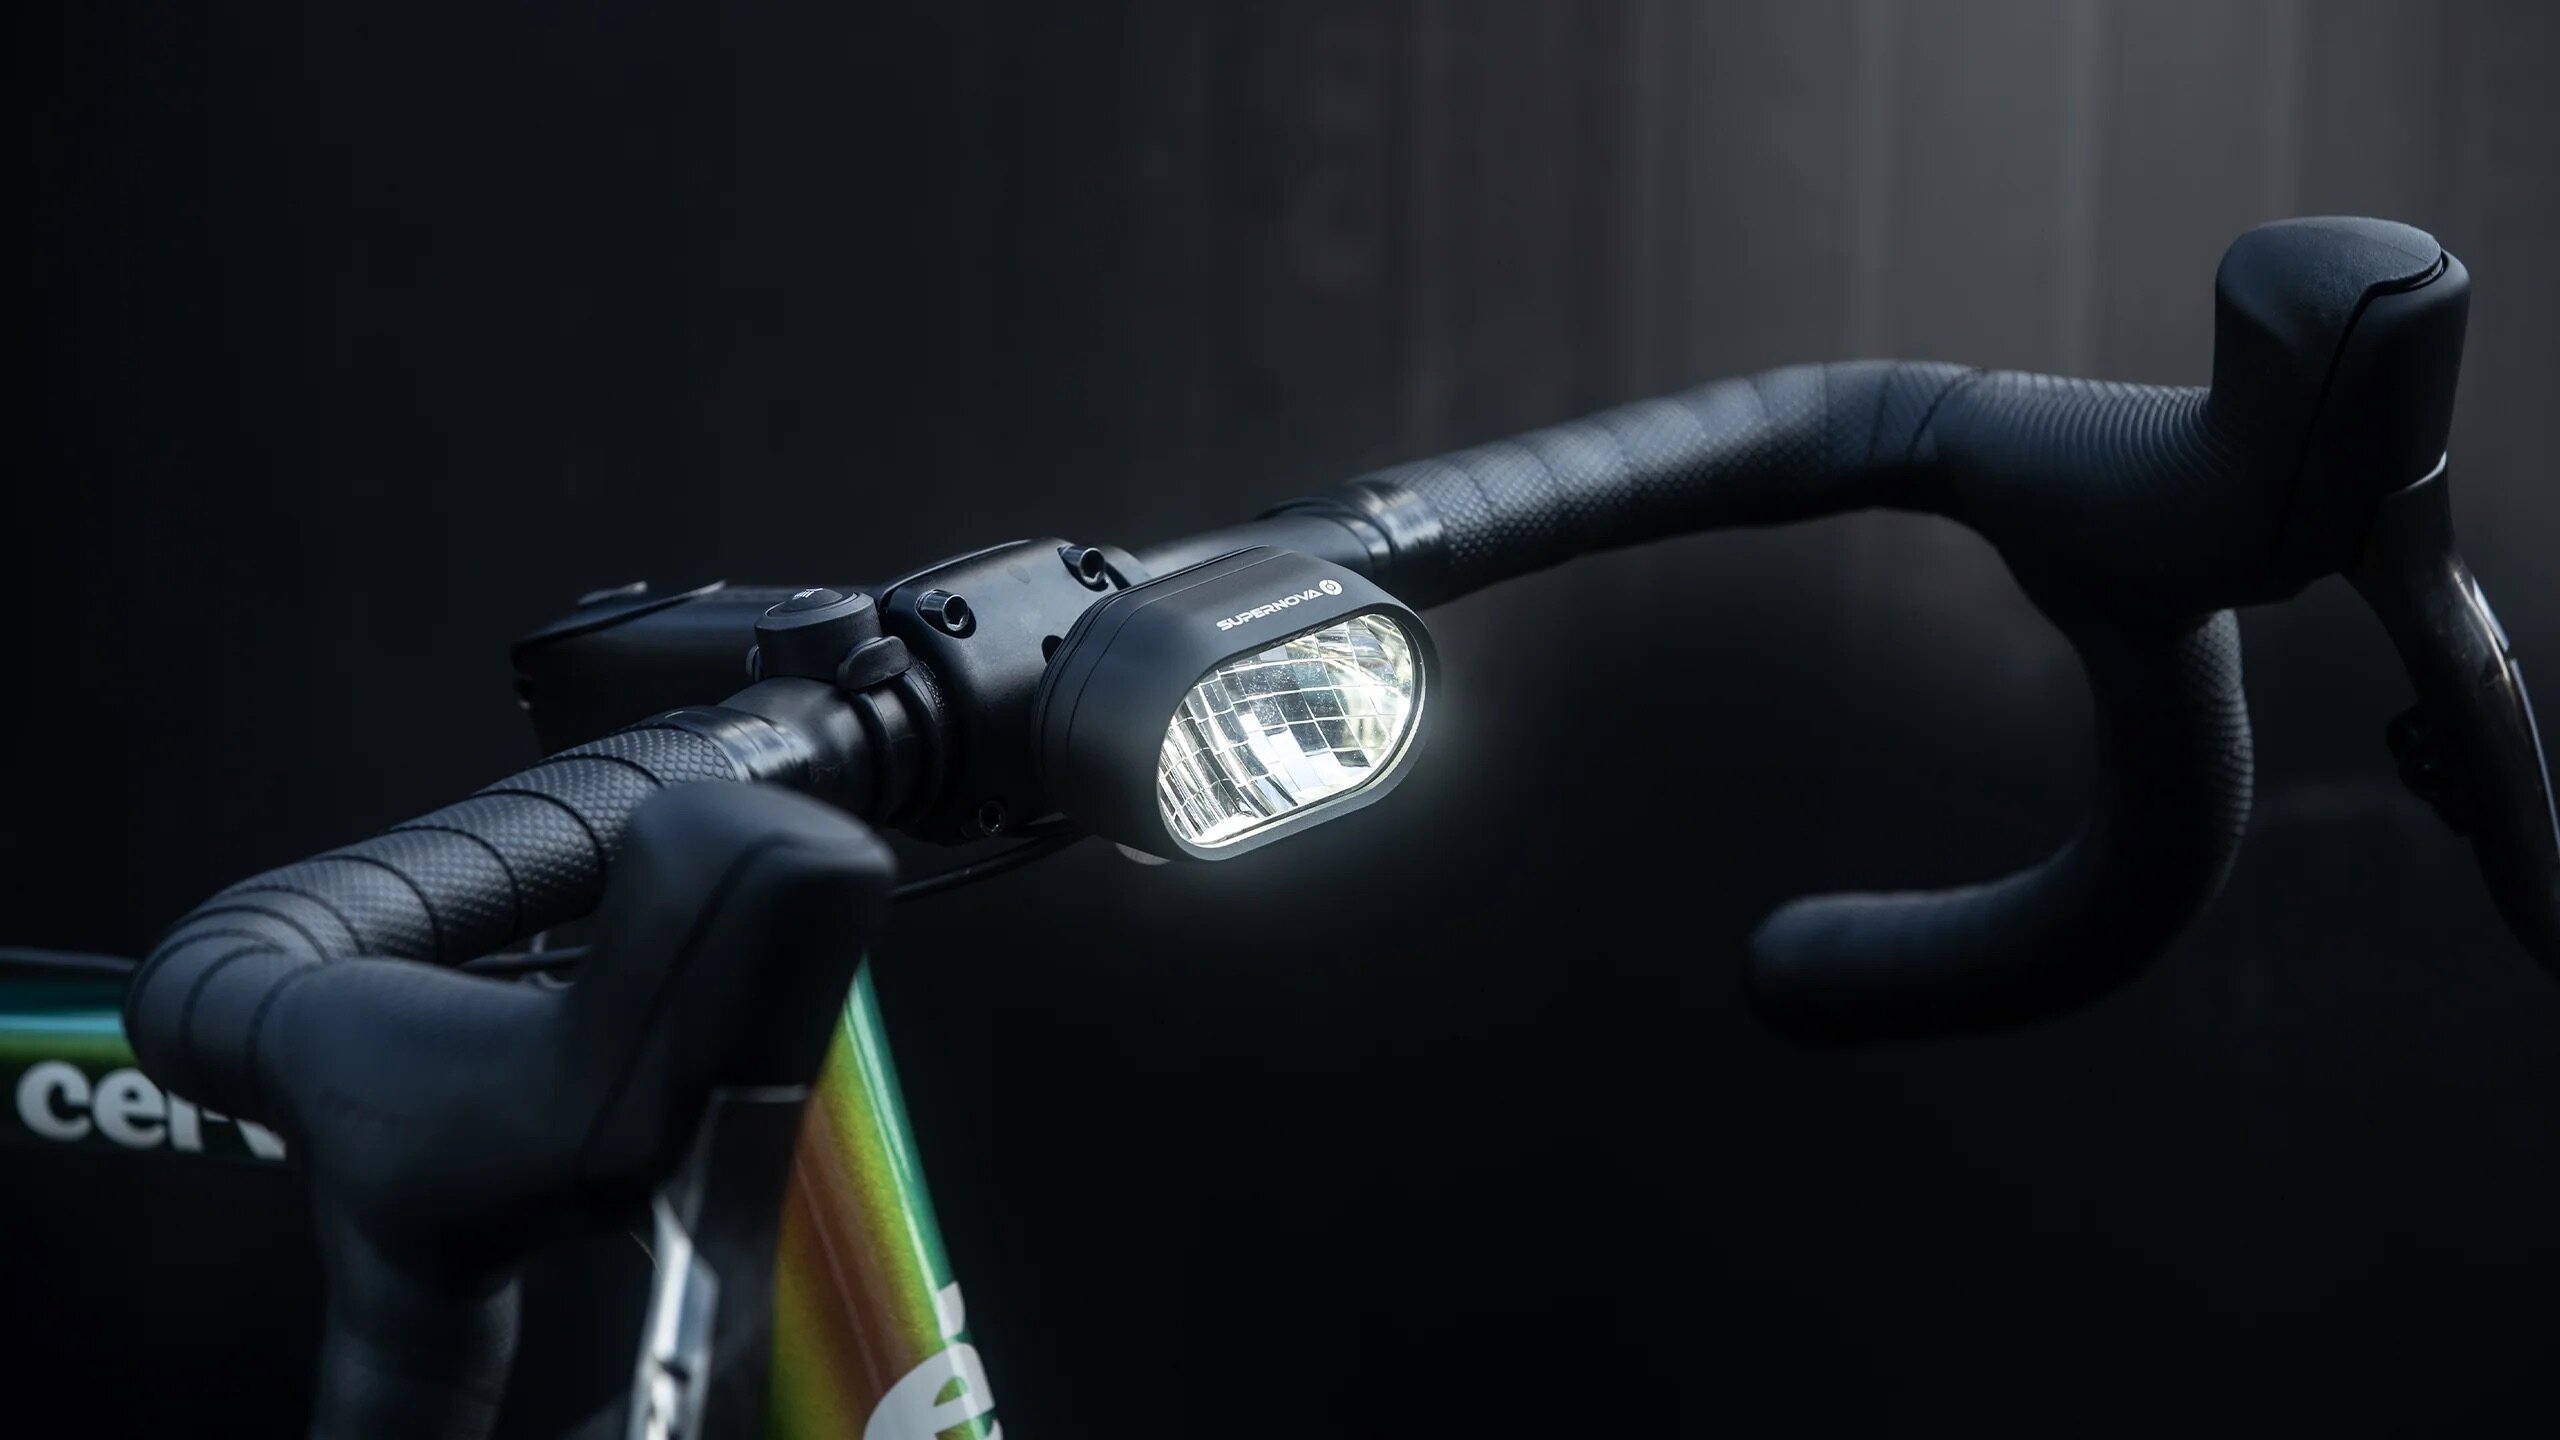
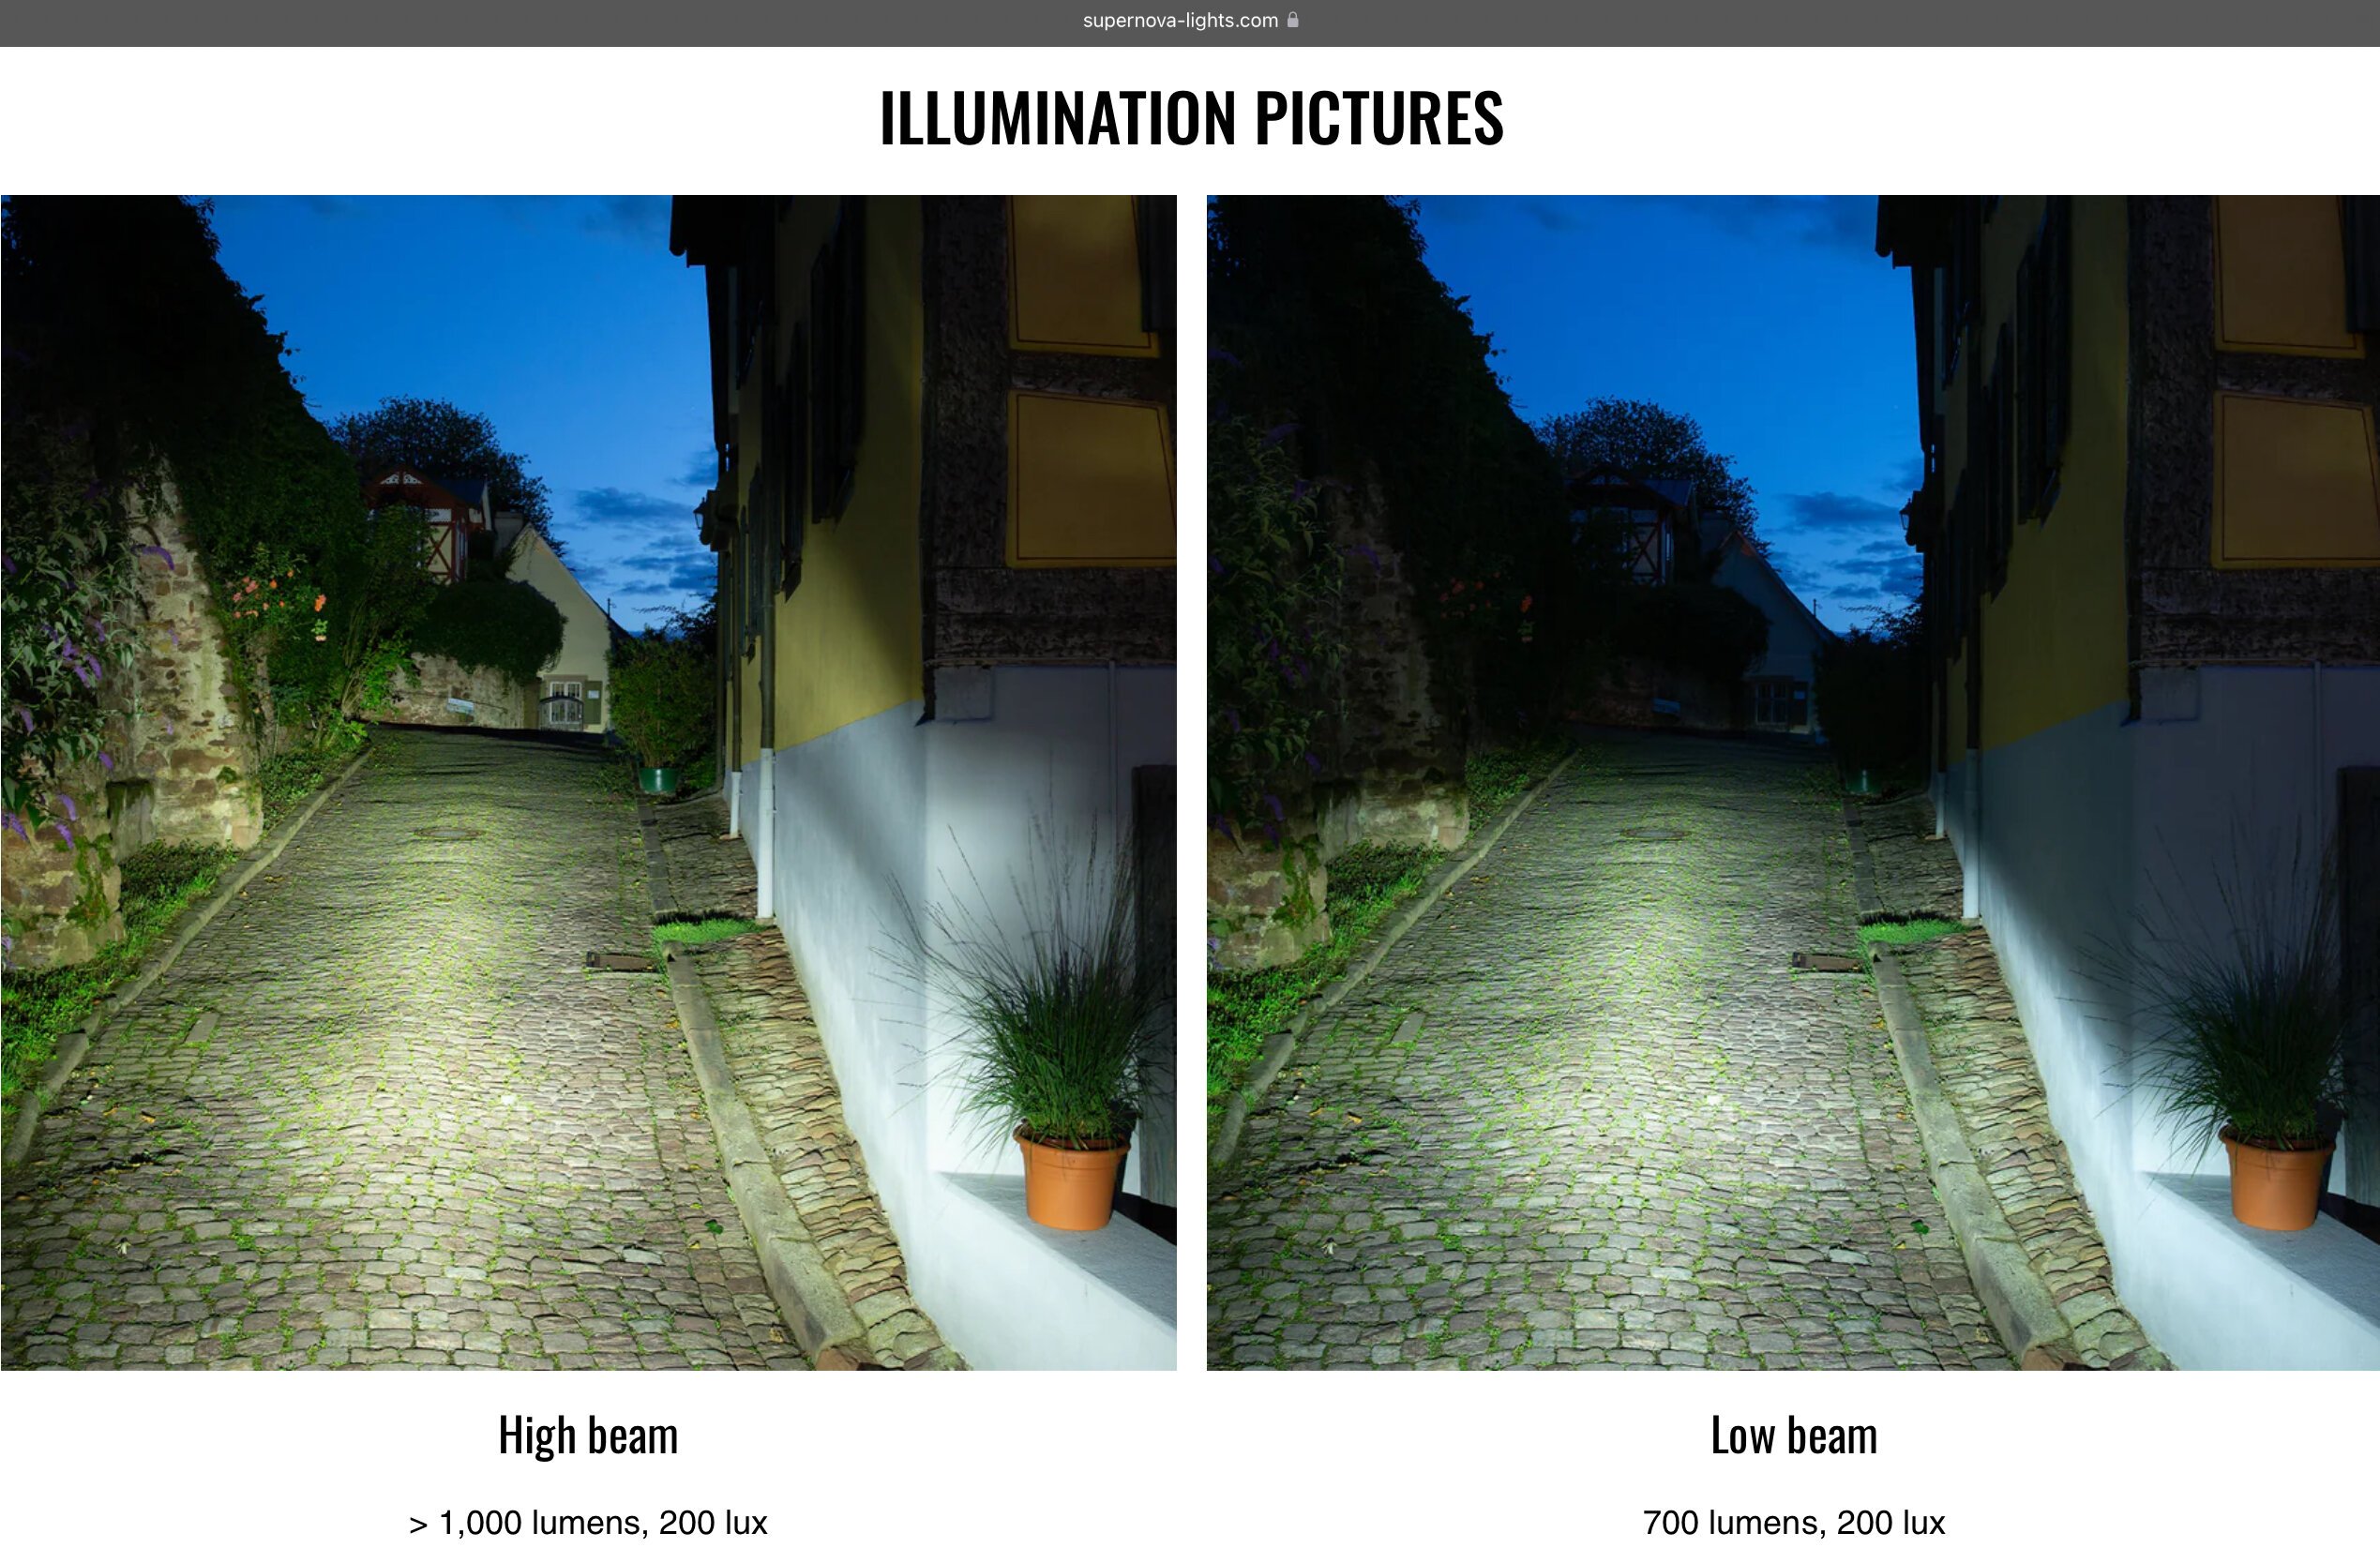
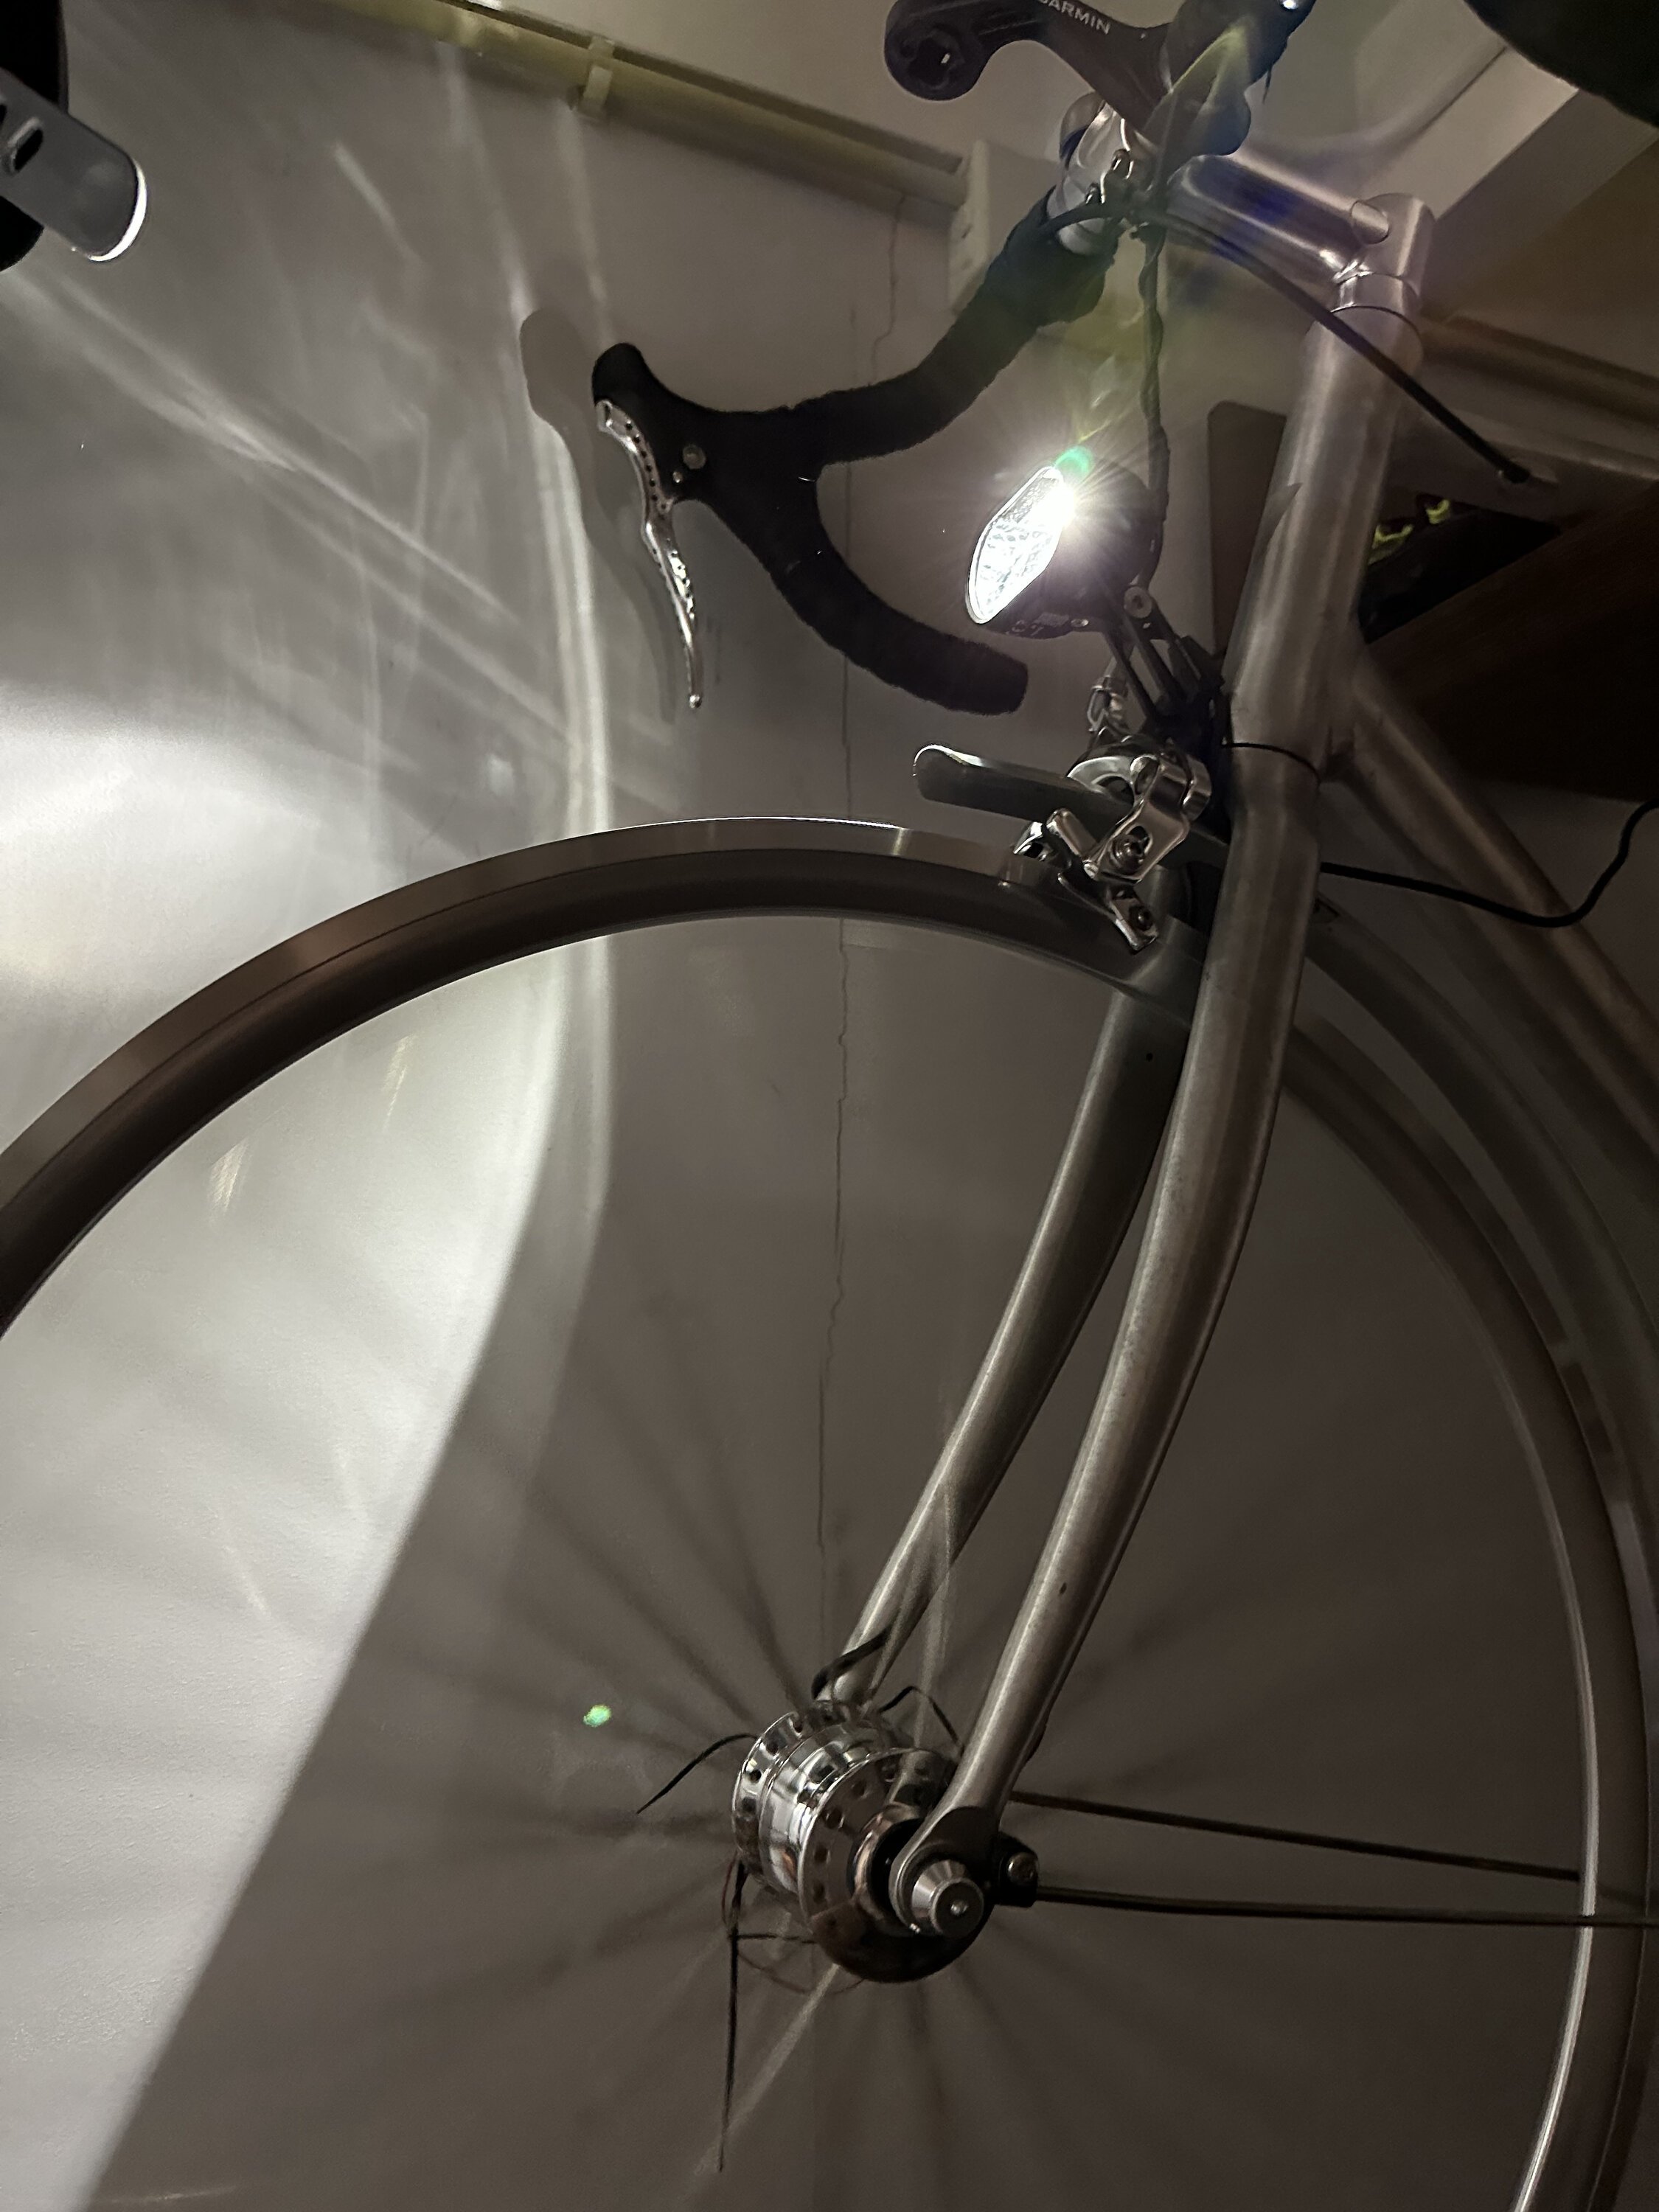
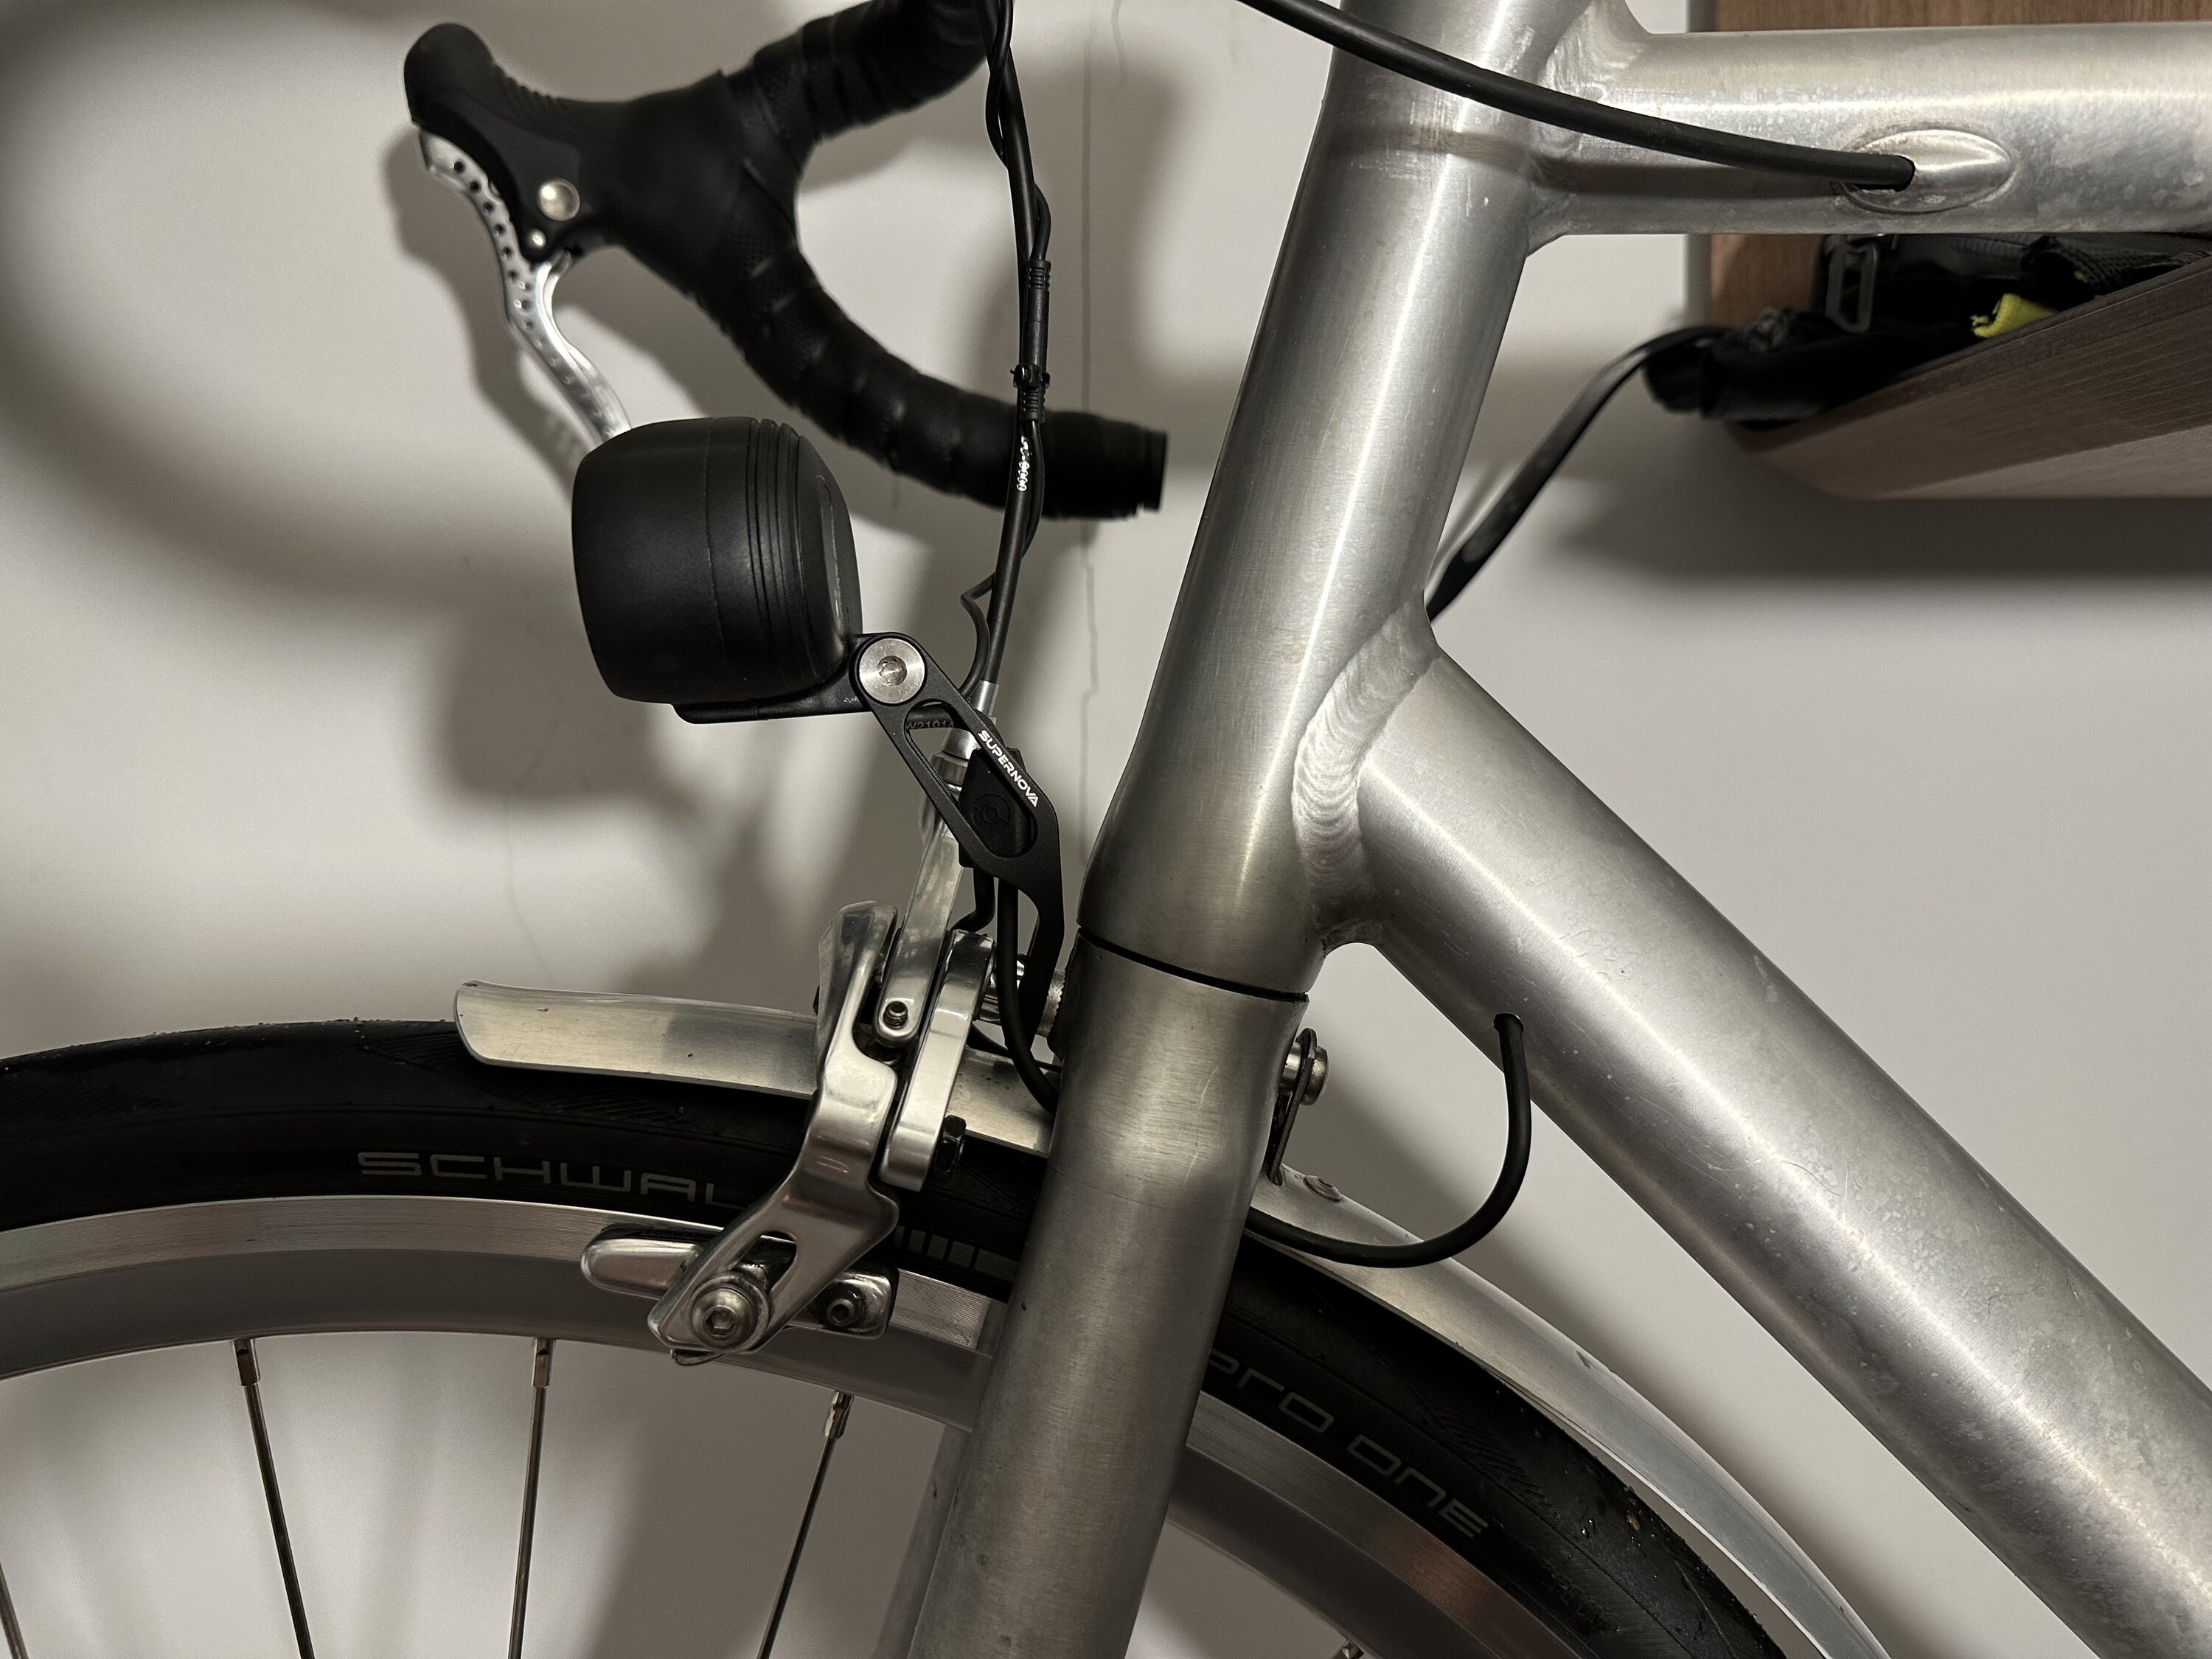
With the newly made dynamo powered wheel I needed to figure out what lights I would use and how I would connect these to the hub dynamo. I have some really good experience with the Supernova bike lights on my commuter bike. They're a typical example of what happens if you let Germans design and engineer some technology: they go all the way! Their newest model, the M99 DY PRO, has a matrix of 11 LEDs and new control electronics enabling a high beam function. It produces light values up to 1,000 lumens and 200 lux. Now, that's what I call light! HA! I really love this.
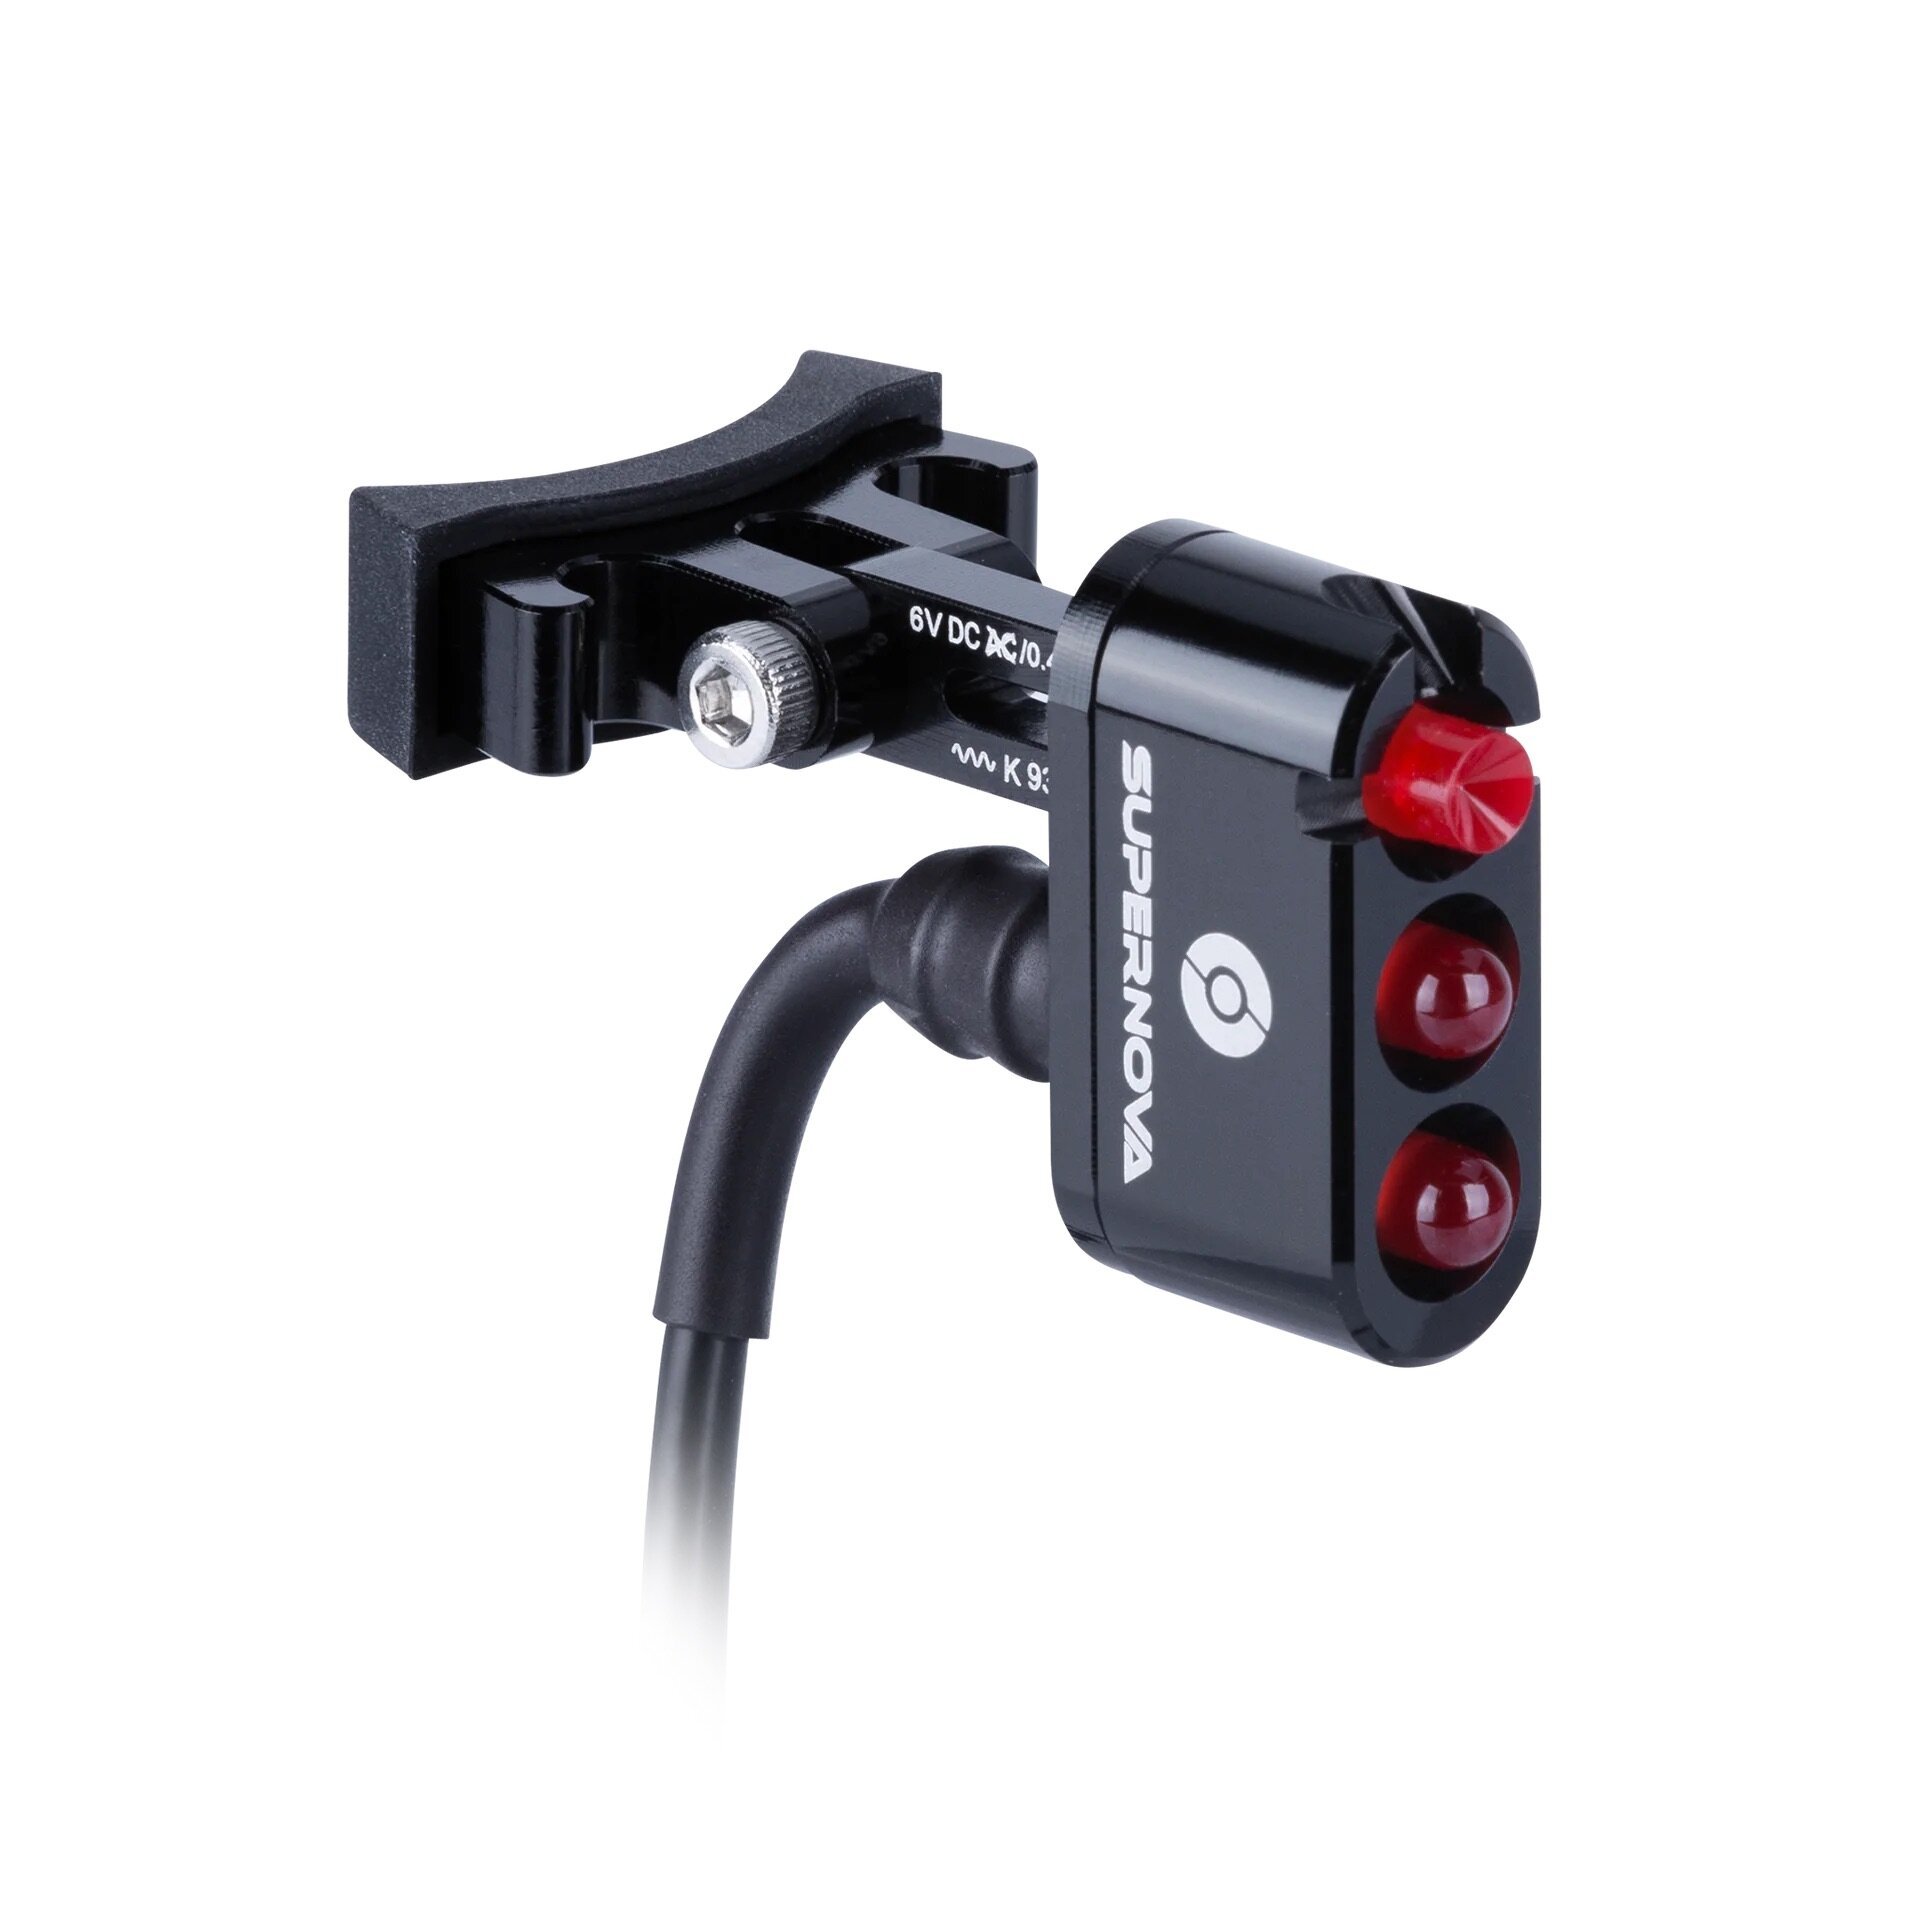
For the rear I selected the Supernova E3 Tail Light 2, which works well in tandem with the Supernova head light. Both Supernova lights have capacitors that keep the lights on even if you stop your dynamo powered bike, enhancing visibility when you need to stop down the road (e.g. at traffic lights).
Installation
Installing the dynamo powered lights on a road bike may require some thinking, tinkering and creativity. My bike is made from aluminium and some parts already had holes in them that I could use to route the electrical wires. But, before making any permanent modifications I hooked up my lights in a 'quick and dirty' way to see if all parts were working well together.
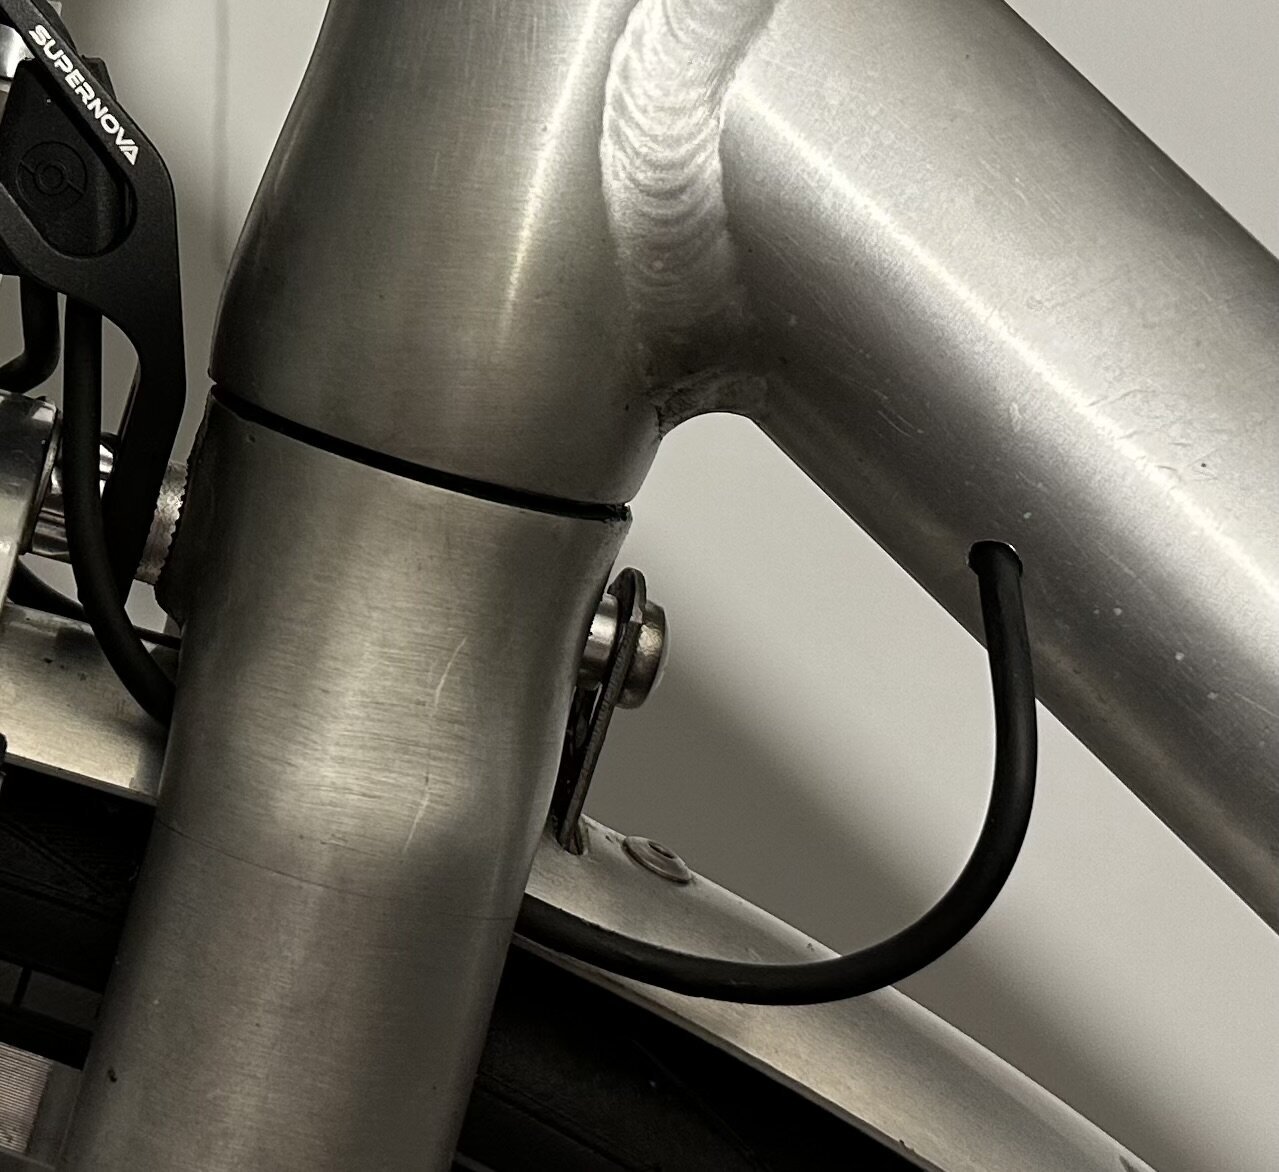
For various reasons, including durability and looks, I wanted to hide the electrical cables as much as possible. Luckily my front fork had holes in it allowing me to wire the main cables to the hub dynamo.
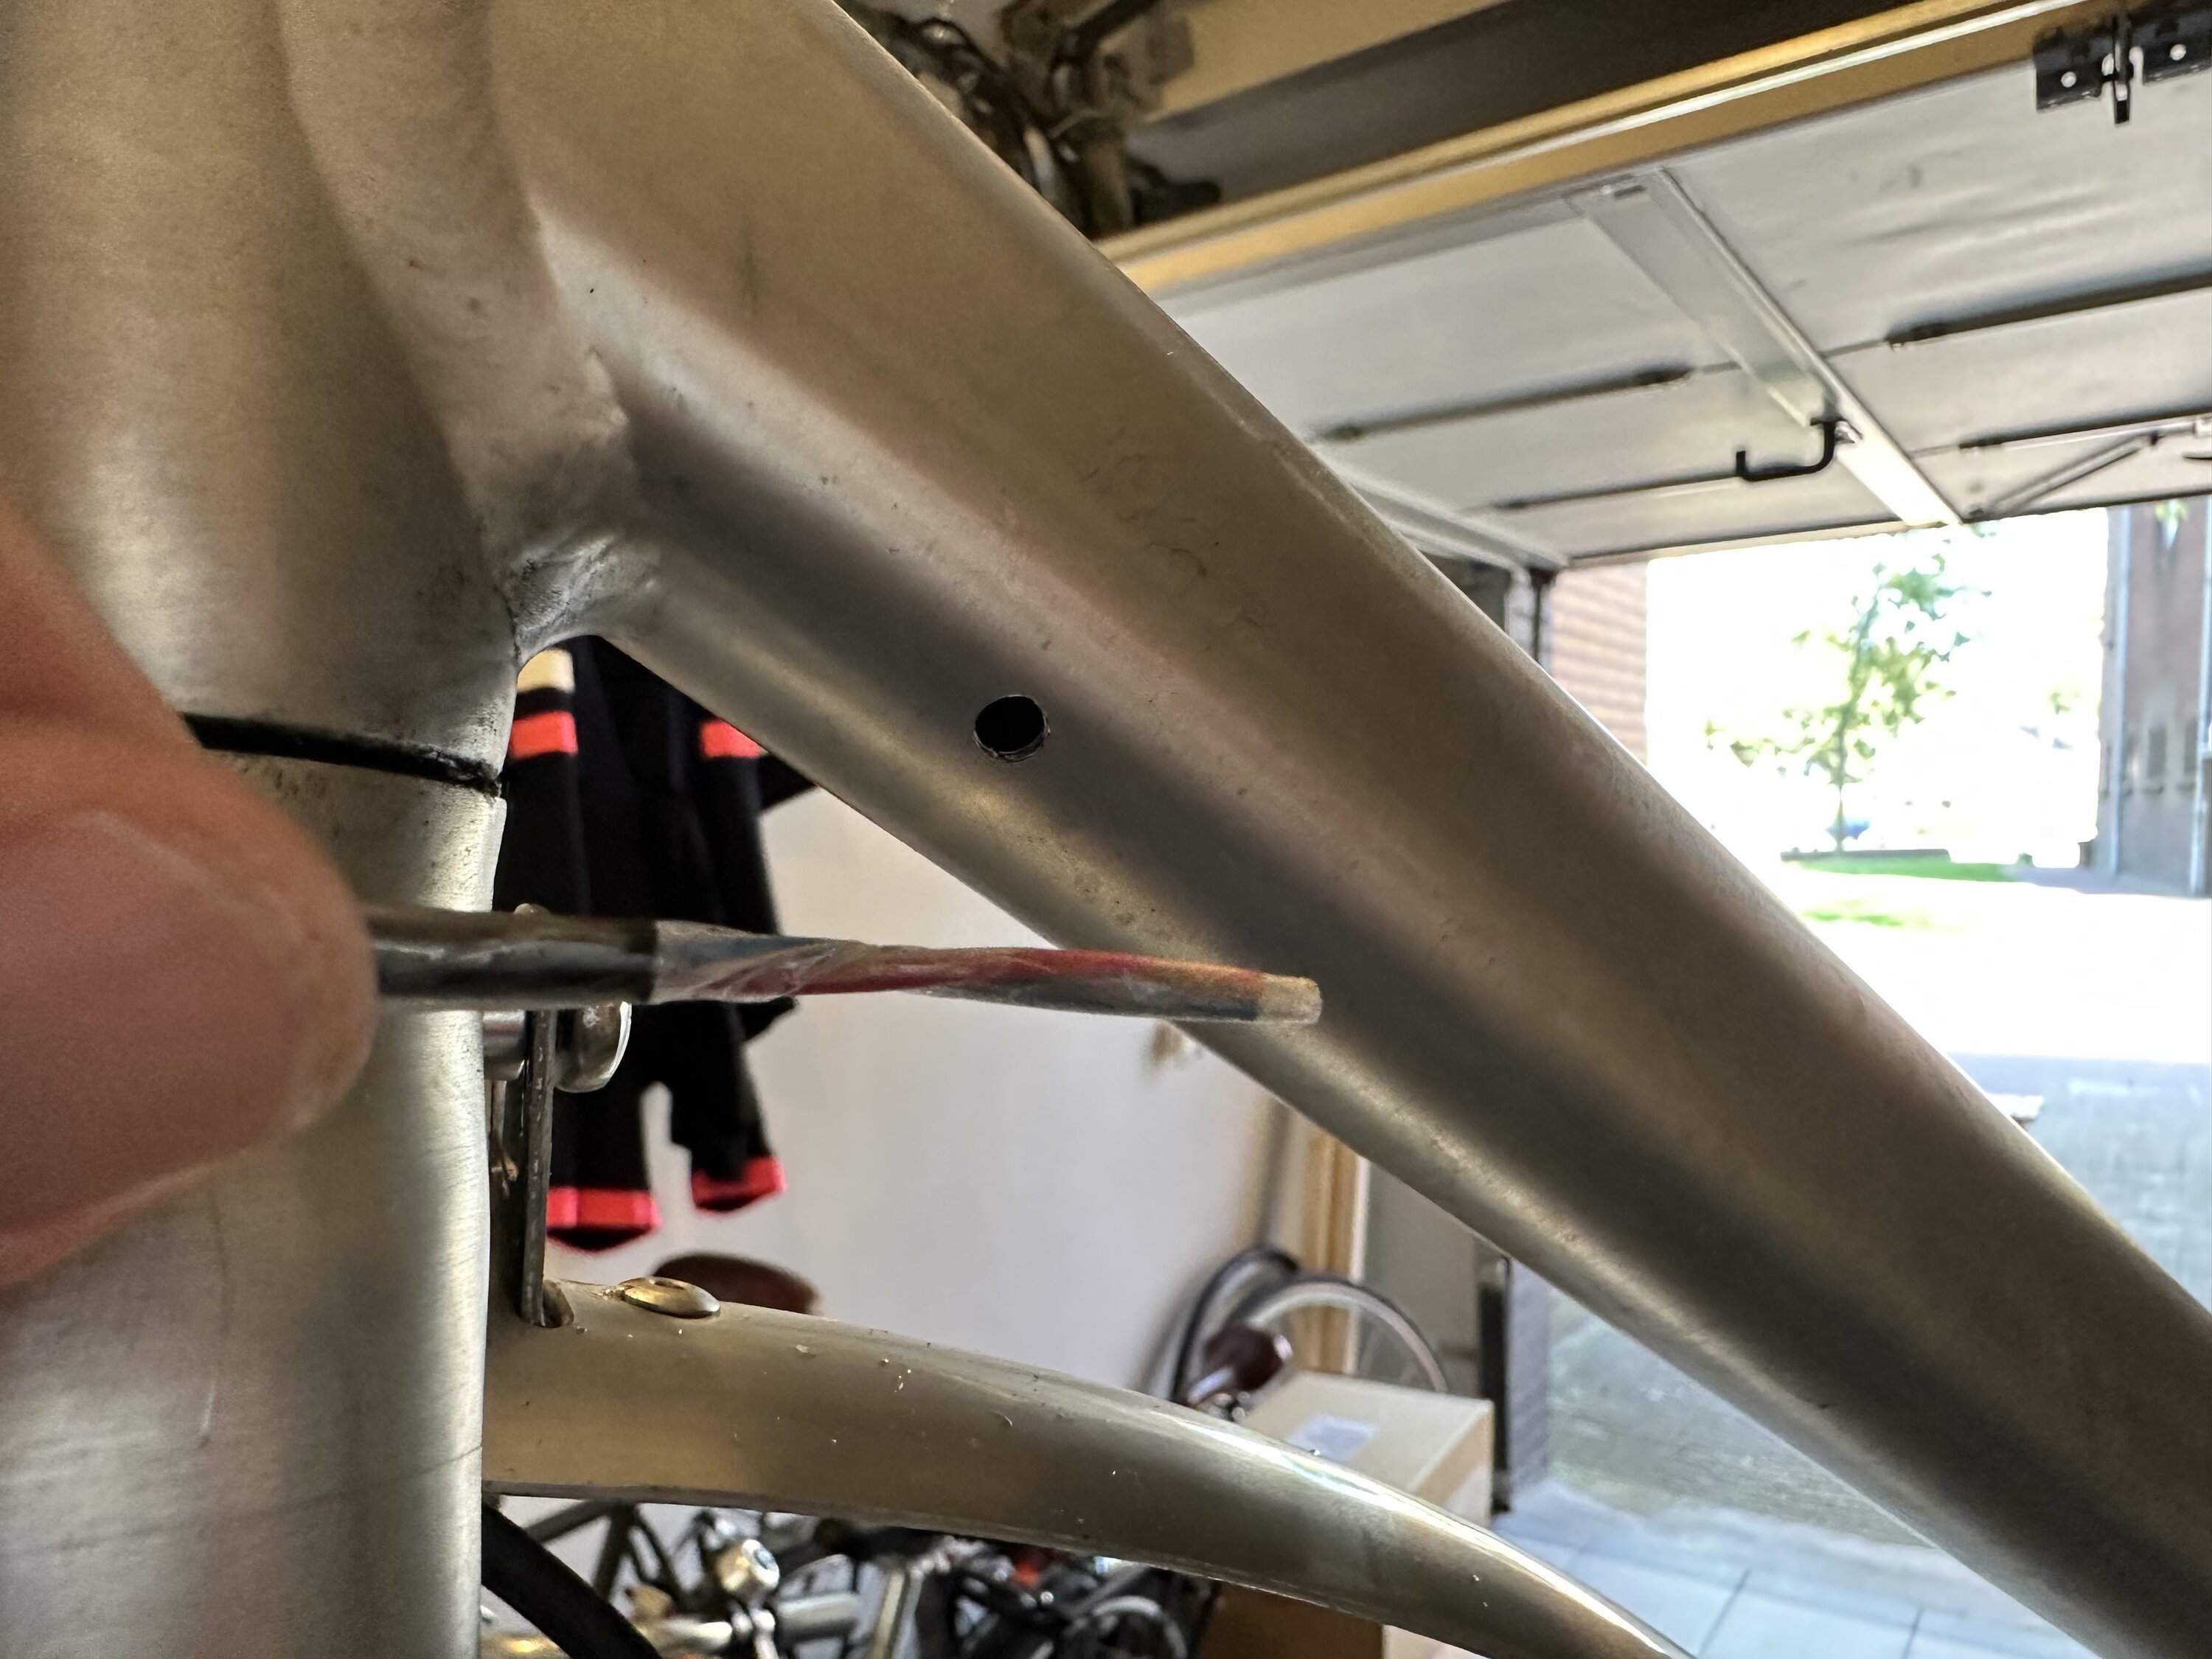
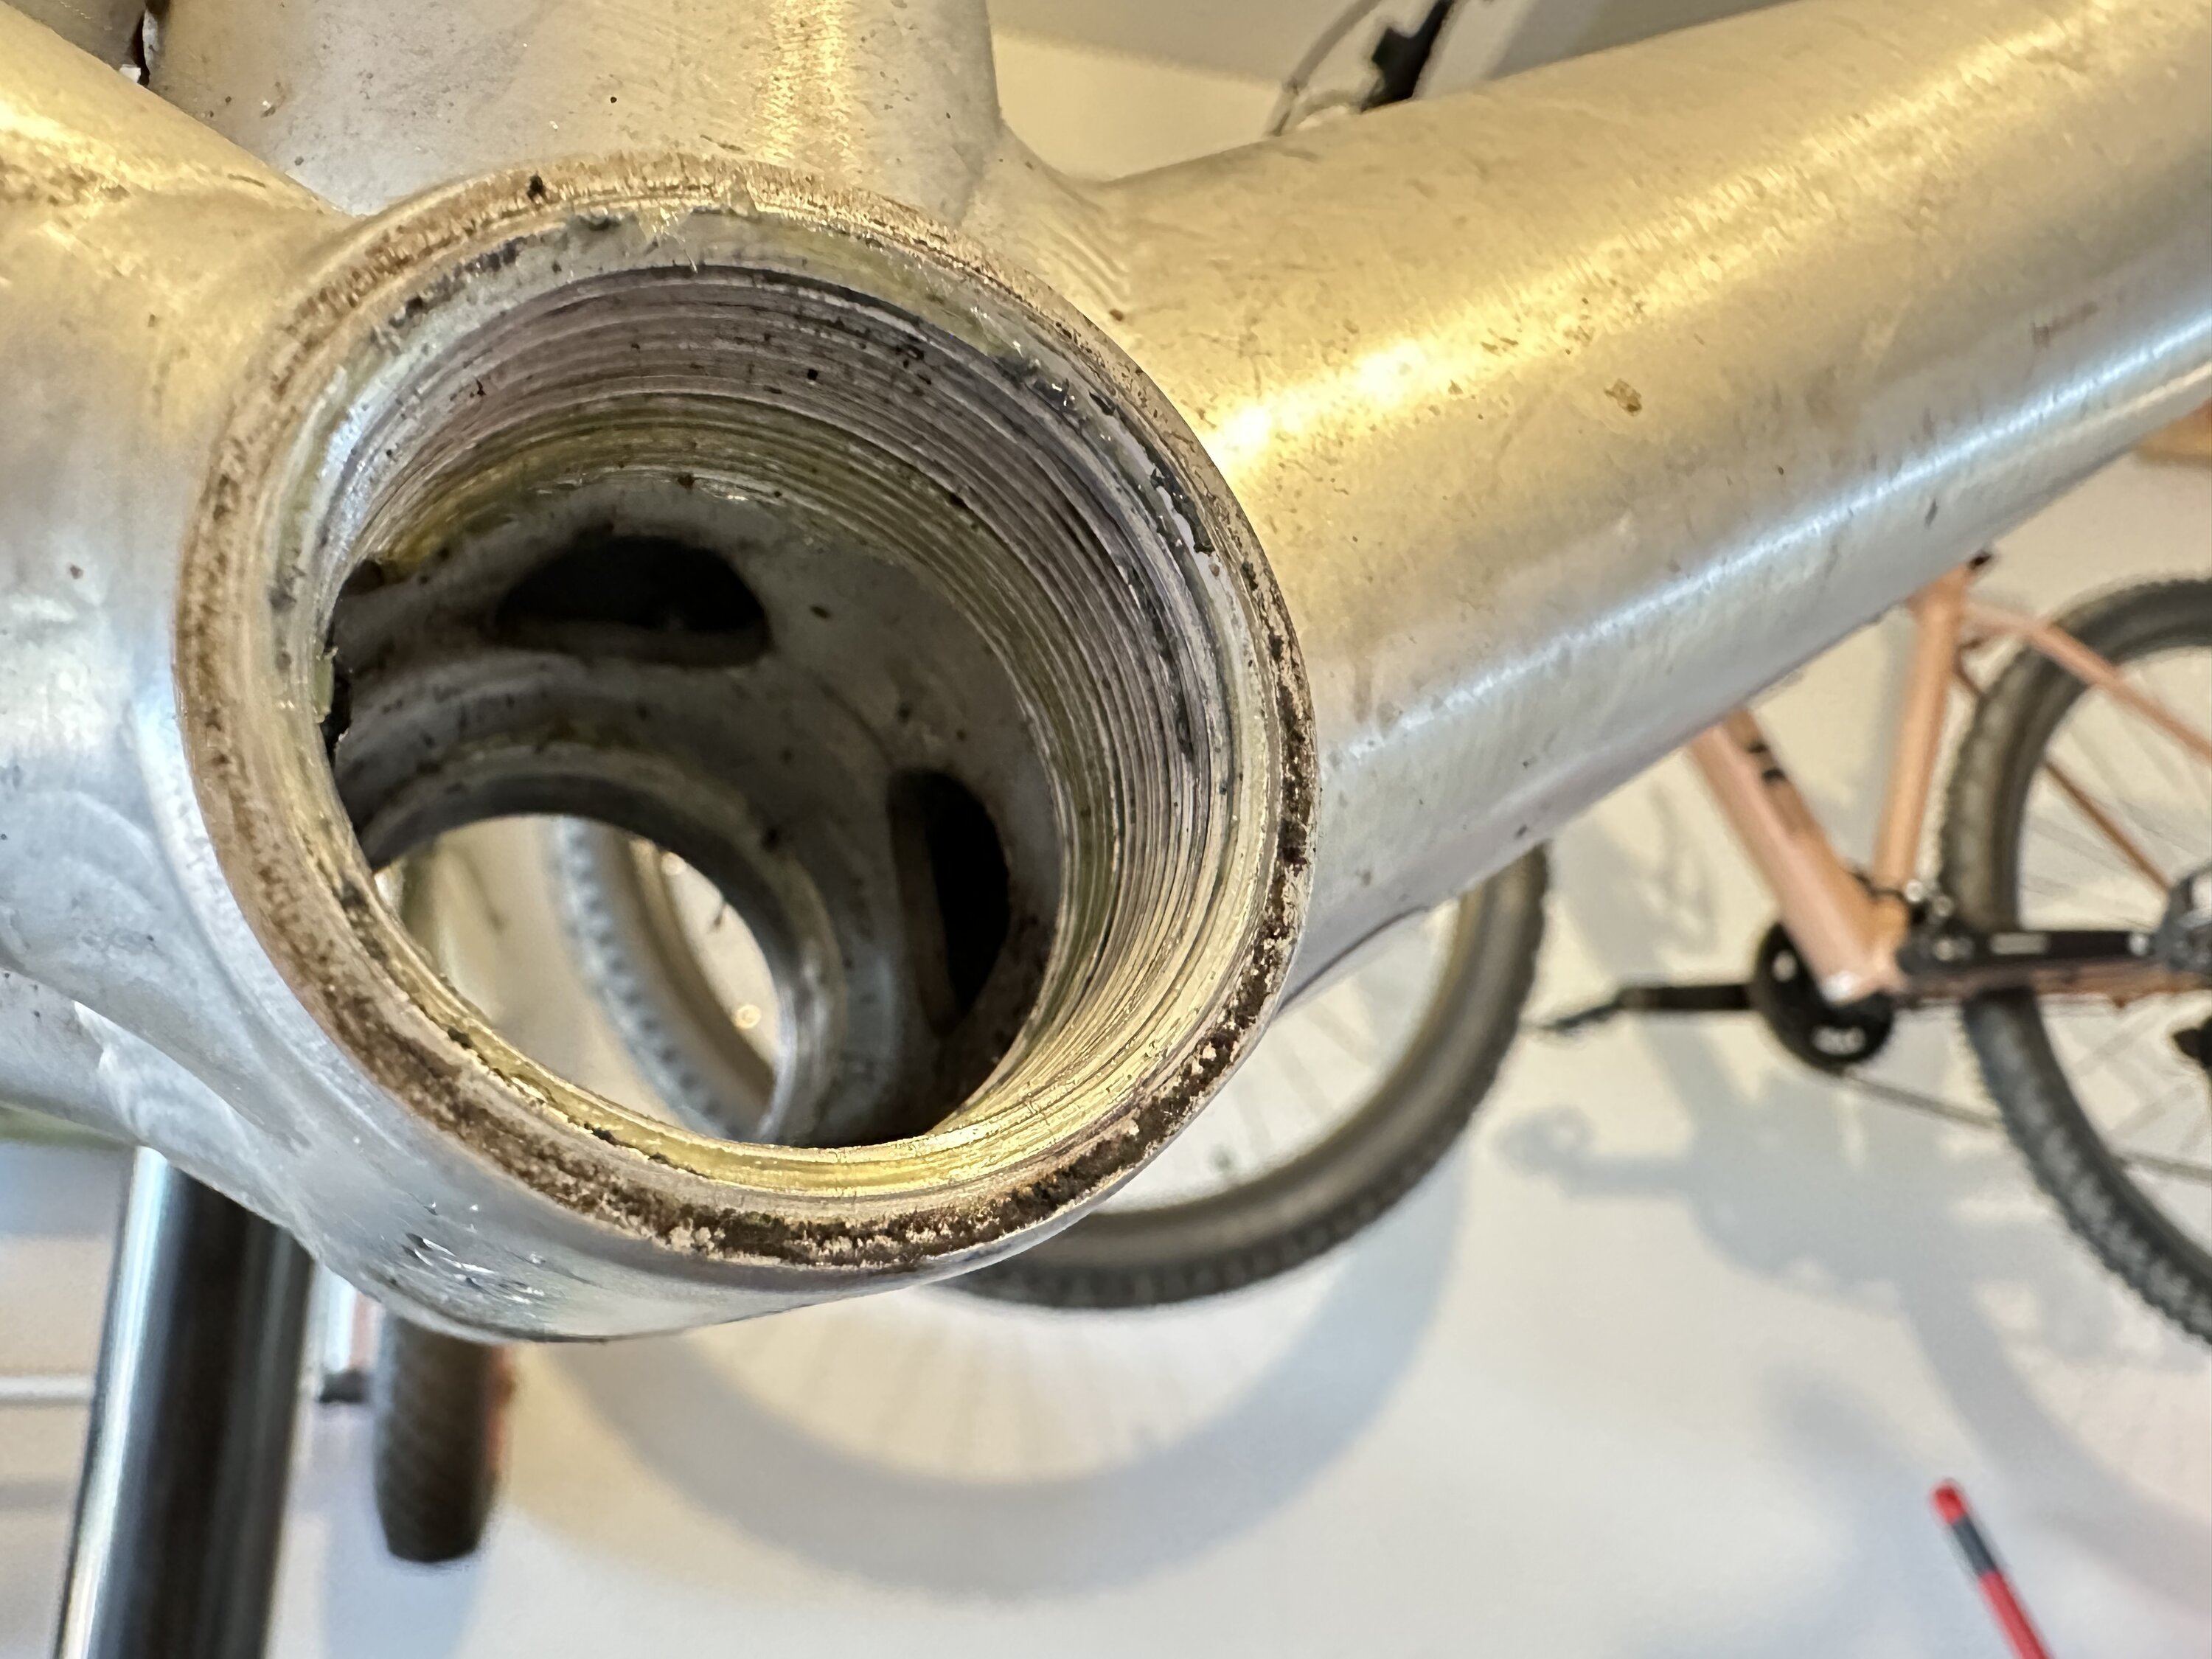
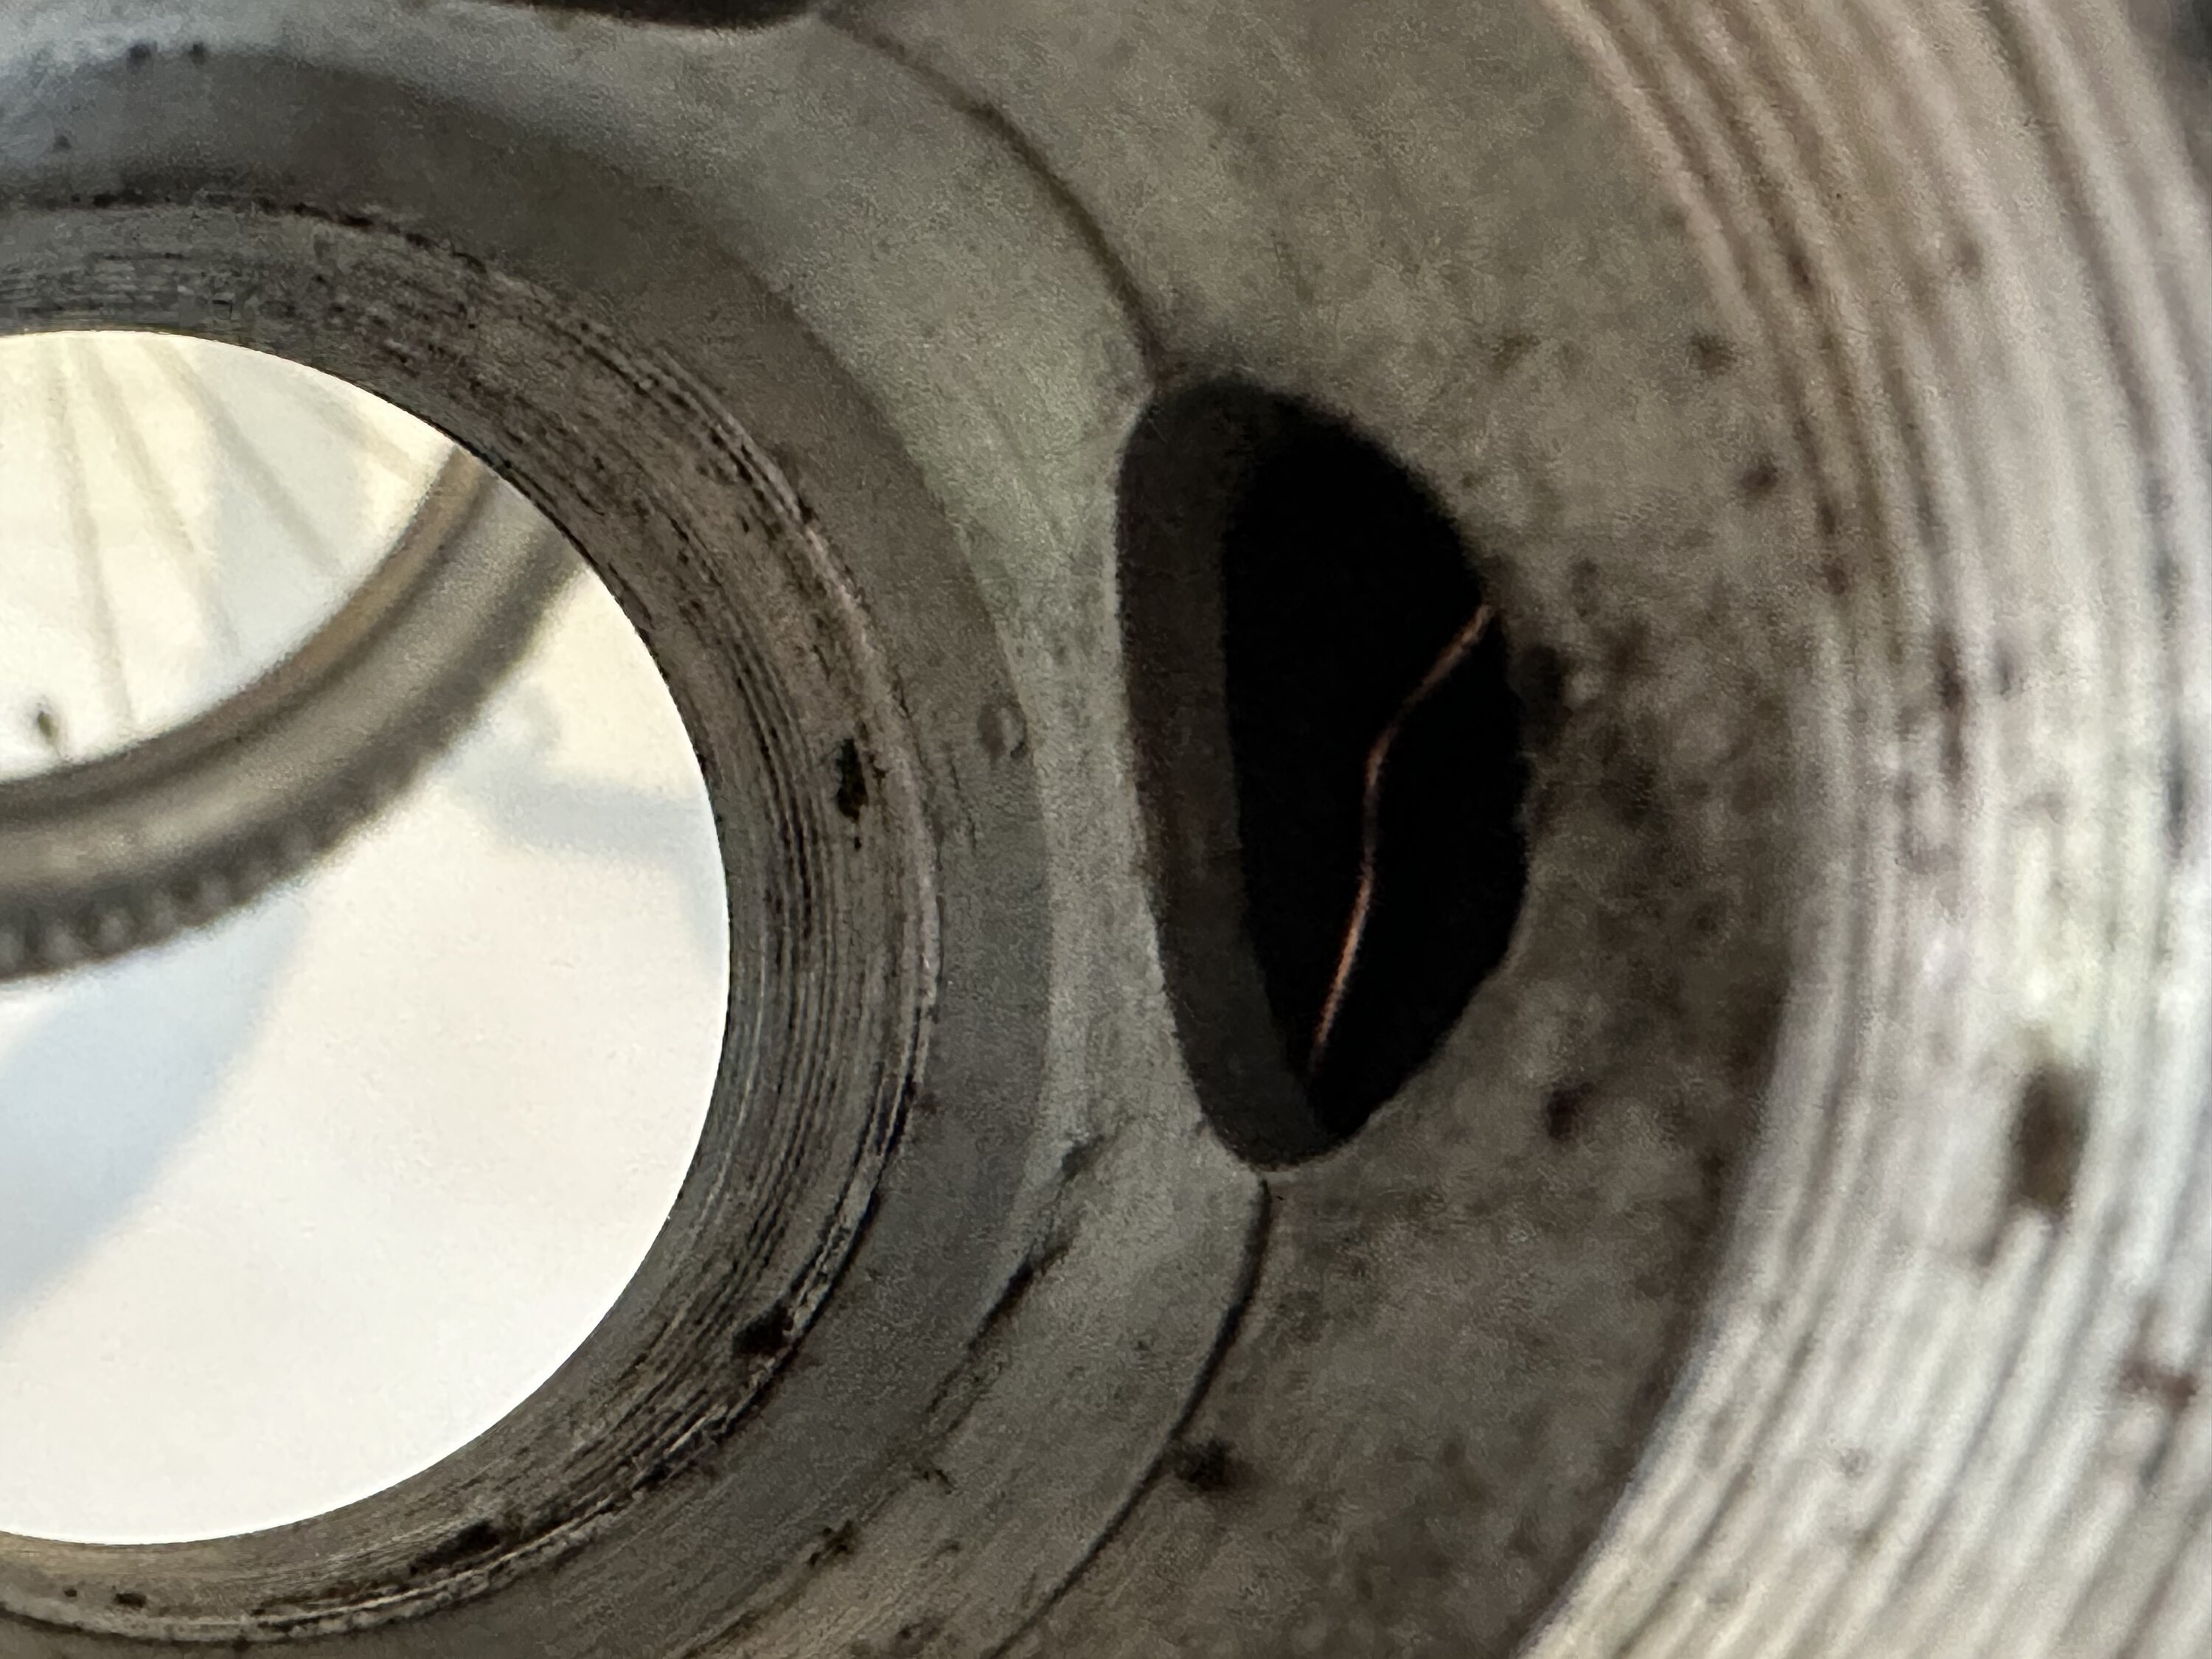
The main challenge on my bike was to wire the cable through the bike frame. It required drilling a small hole in one of the tubes. I am really reluctant to drill holes in my bike, but I figured (judging on other bikes having holes here) that it would not harm the structural integrity of my frame.
My bike has aerodynamically shaped tubes, they are not perfectly round, leaving some vertical space near the bottom bracket that I assumed to be good enough for an electric wire to pass. Ultimately I had to remove my bottom bracket, crankshaft and pedals to be able to reach the holes inside my bike frame.
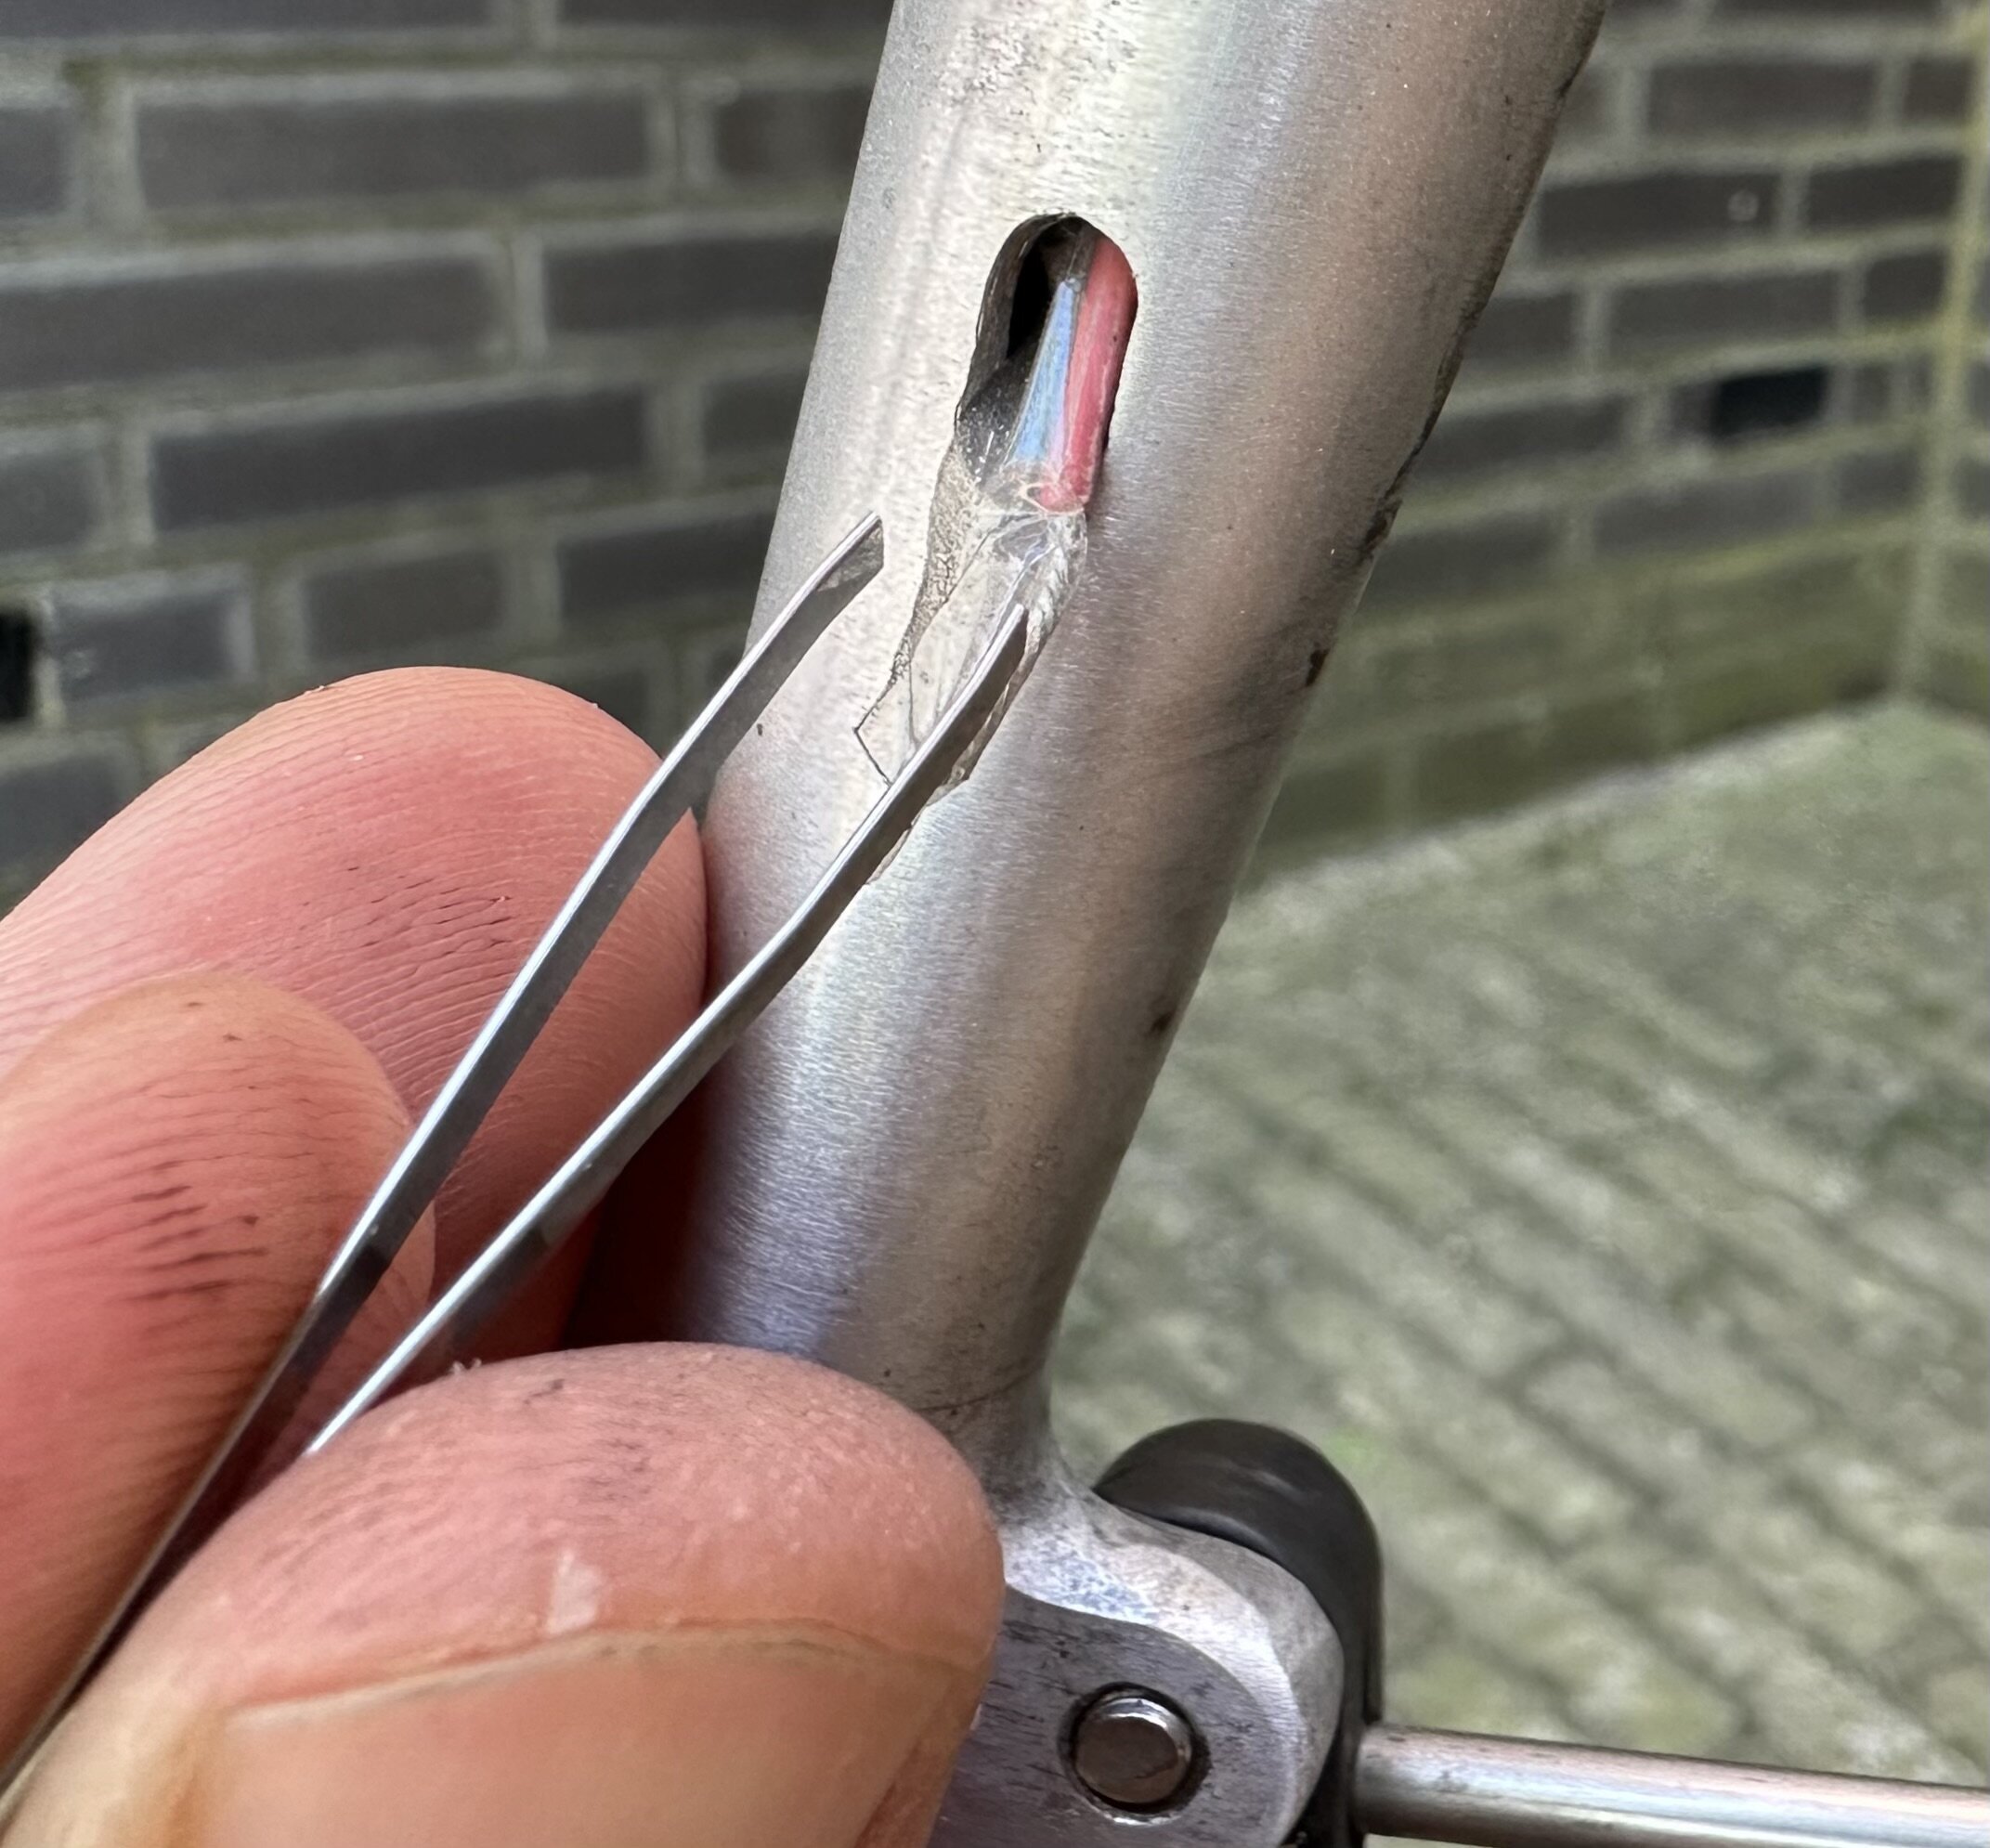
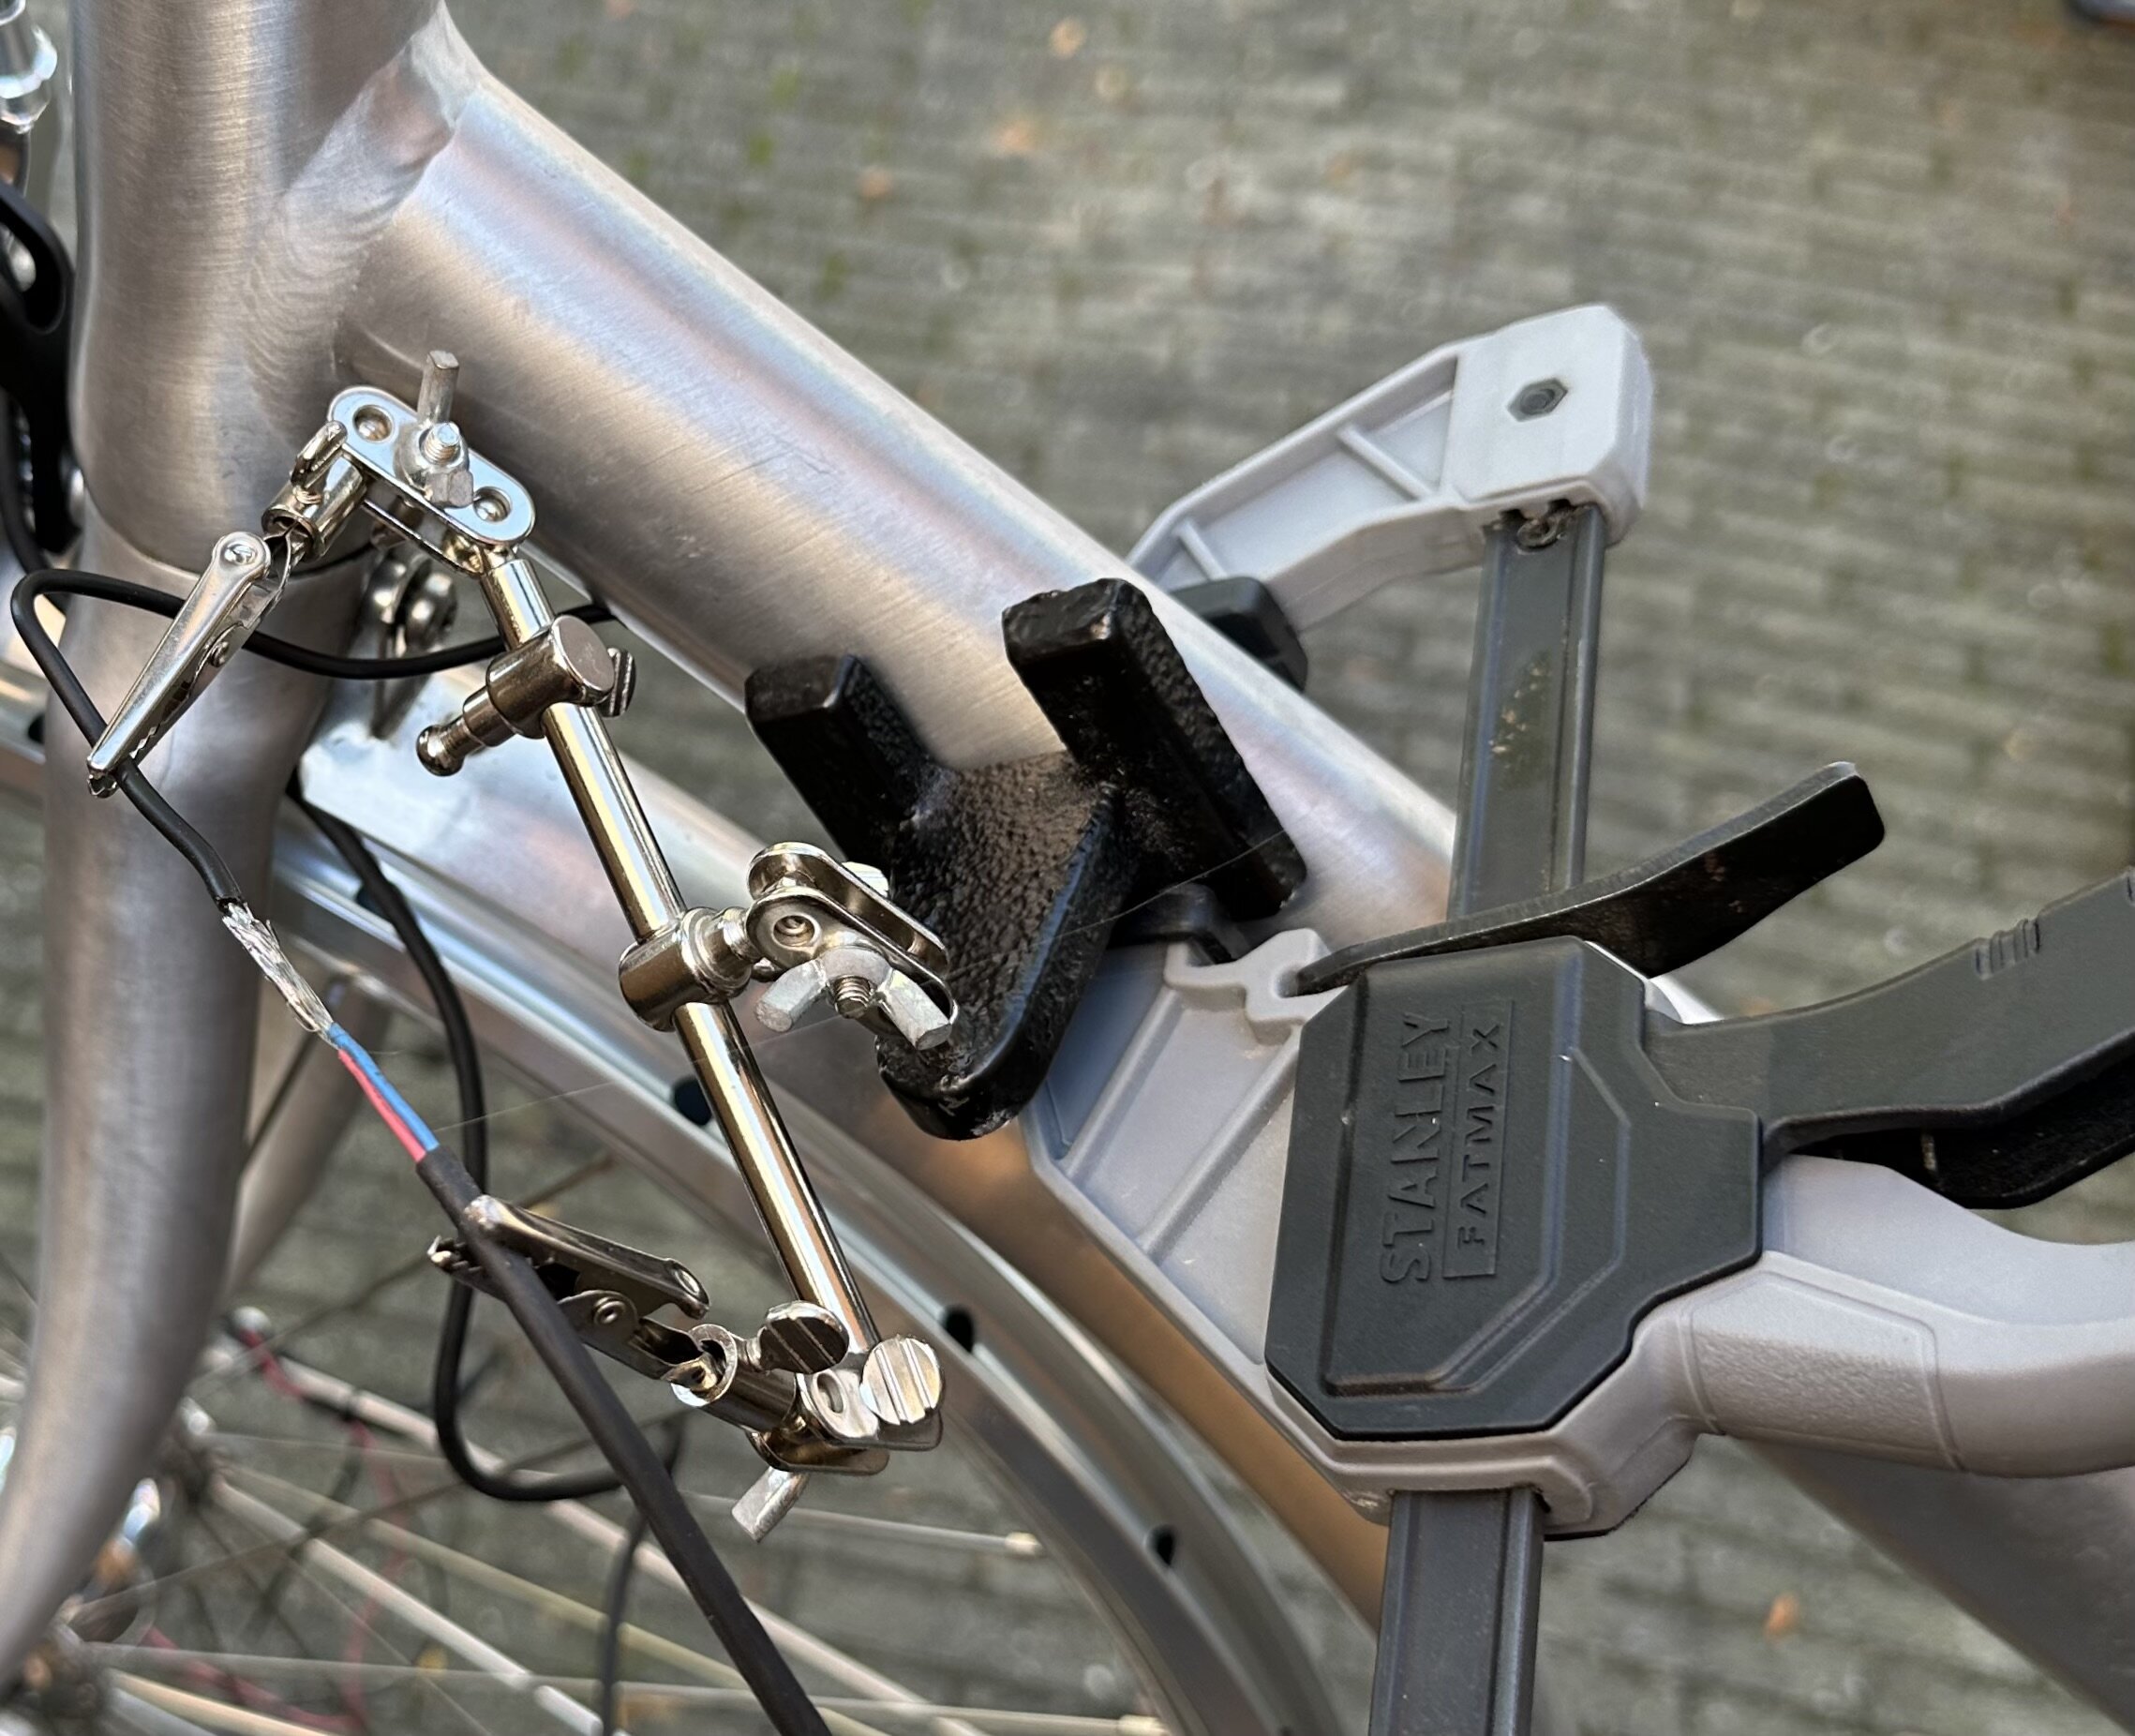
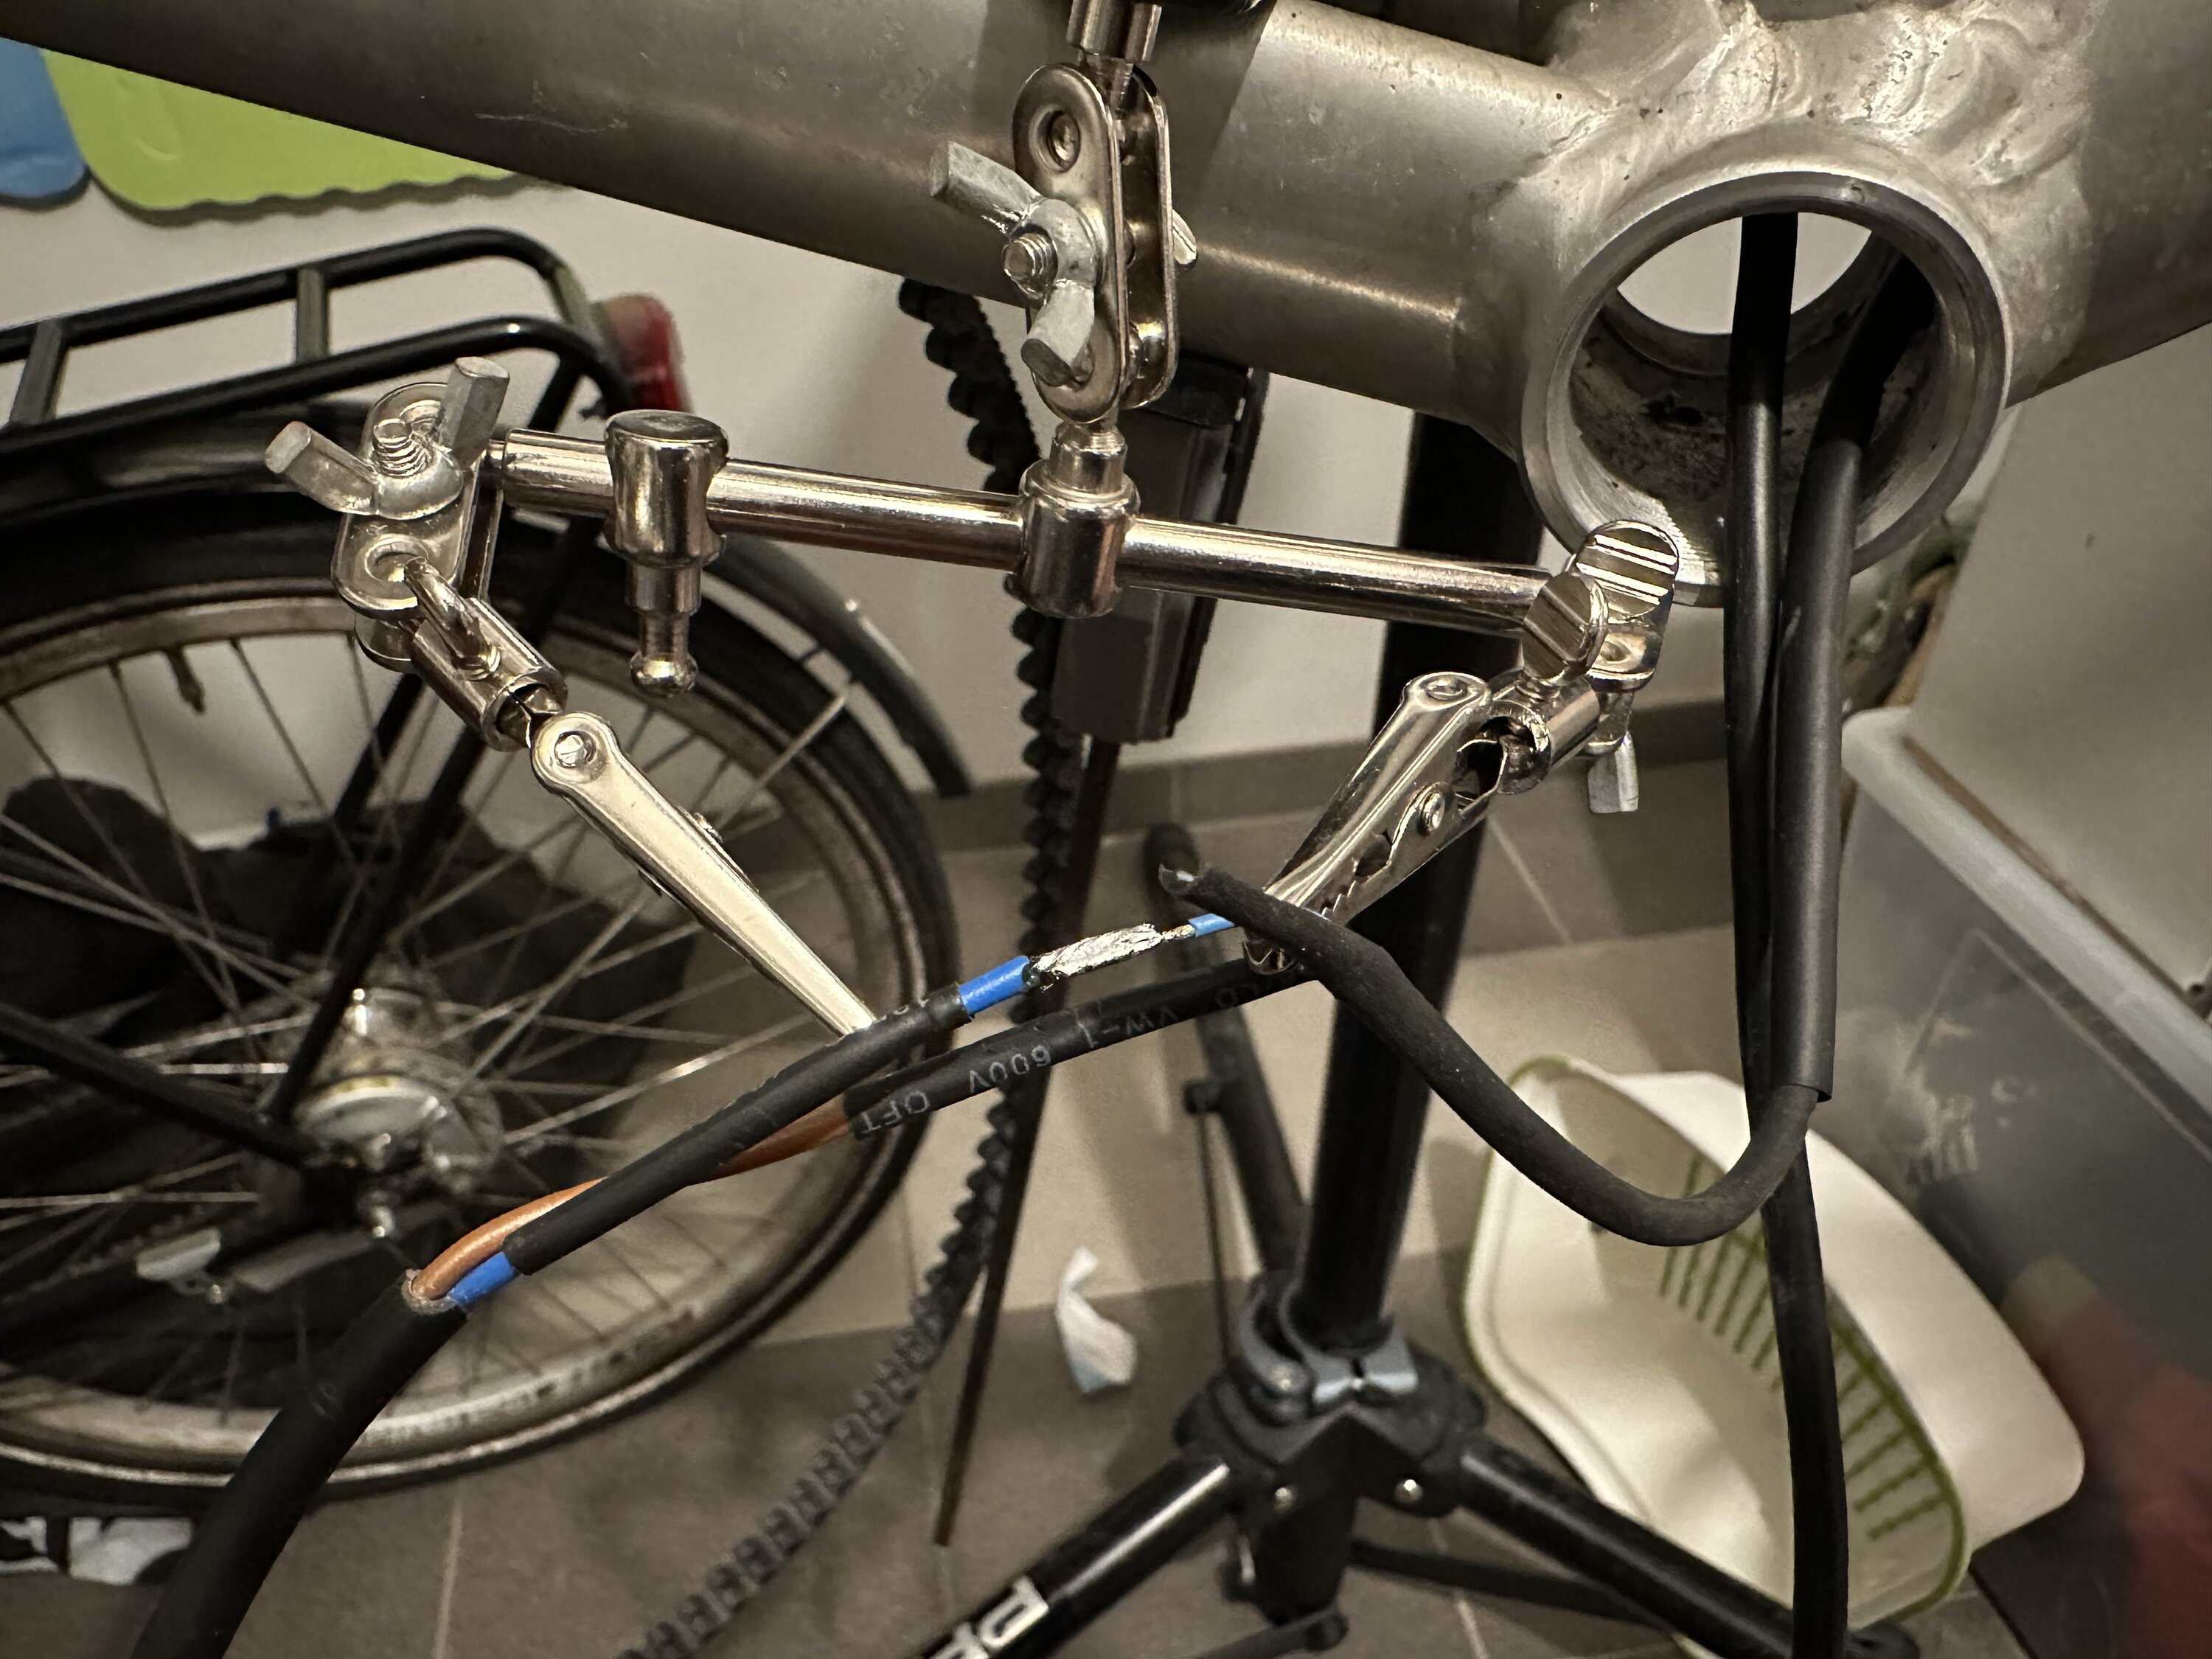
Before wiring the actual (thinner) wires, I used a thicker and sturdier copper cable to act as a guide. It is much simpler to 'steer' a sturdy cable.

Later I used this sturdy cable to pull the actual cable through. It requires patience and some effort, but eventually you can make it work. I temporarily soldered the actual wire to the guiding wire to make pulling it a little easier. I used a clamp to make a strong connection between both cables.
The rear light has a cable that I wired through my seat post, it goes in a tiny hole that is just underneath my saddle. That cable goes all the way down to the bottom bracket where it meets the other cable from the front of my bike.
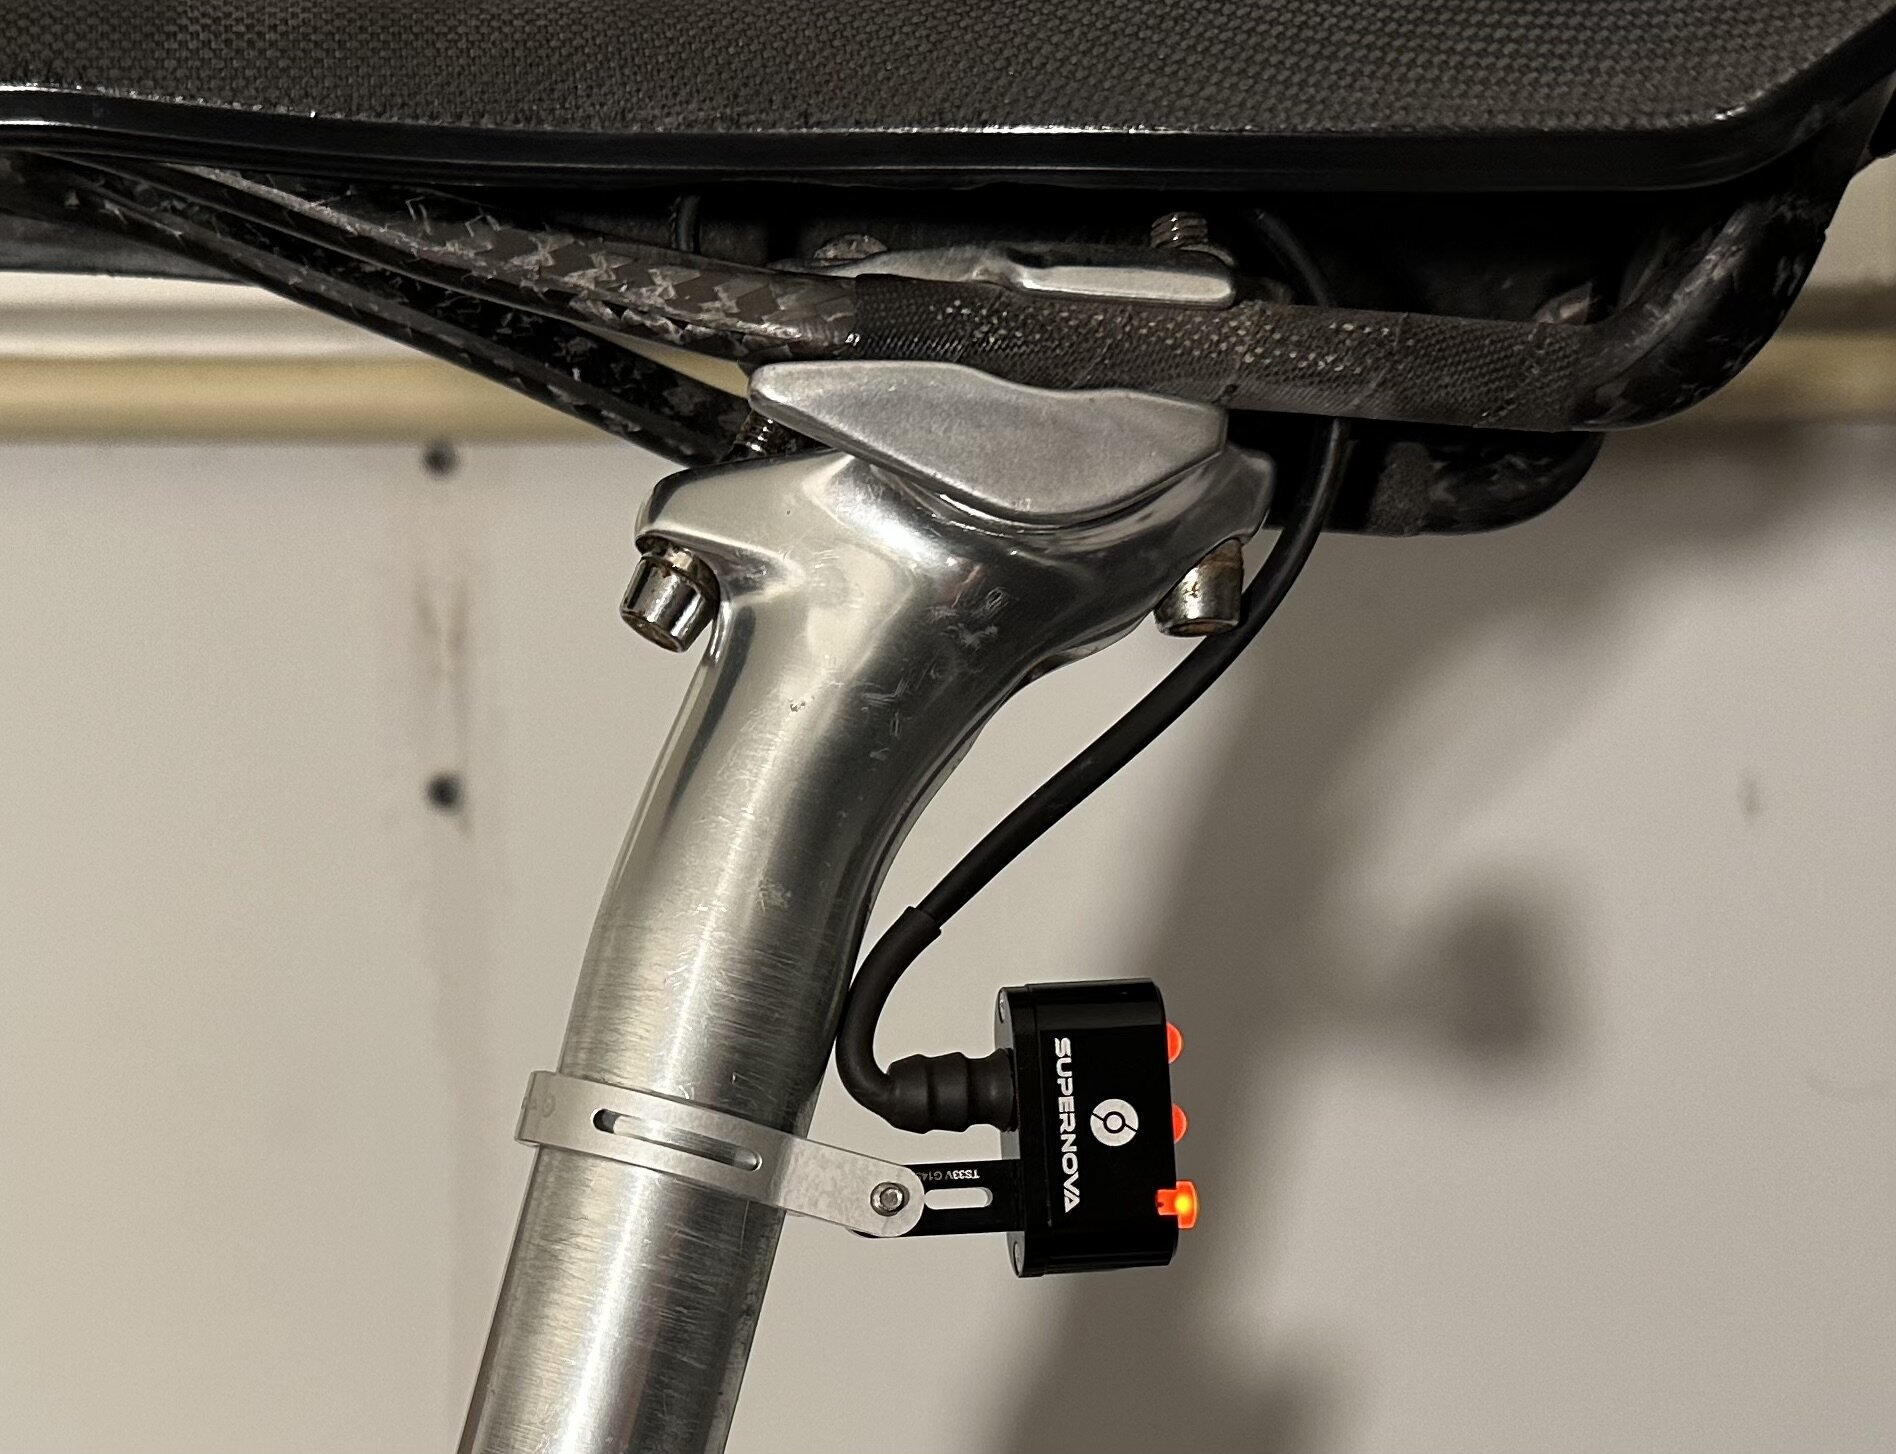
Eventually I was able to connect all the wires, soldering the individual leads together and shrink wrapping them. I left some extra cable length in the seat post tube with two clamp connectors allowing me to remove it if needed.

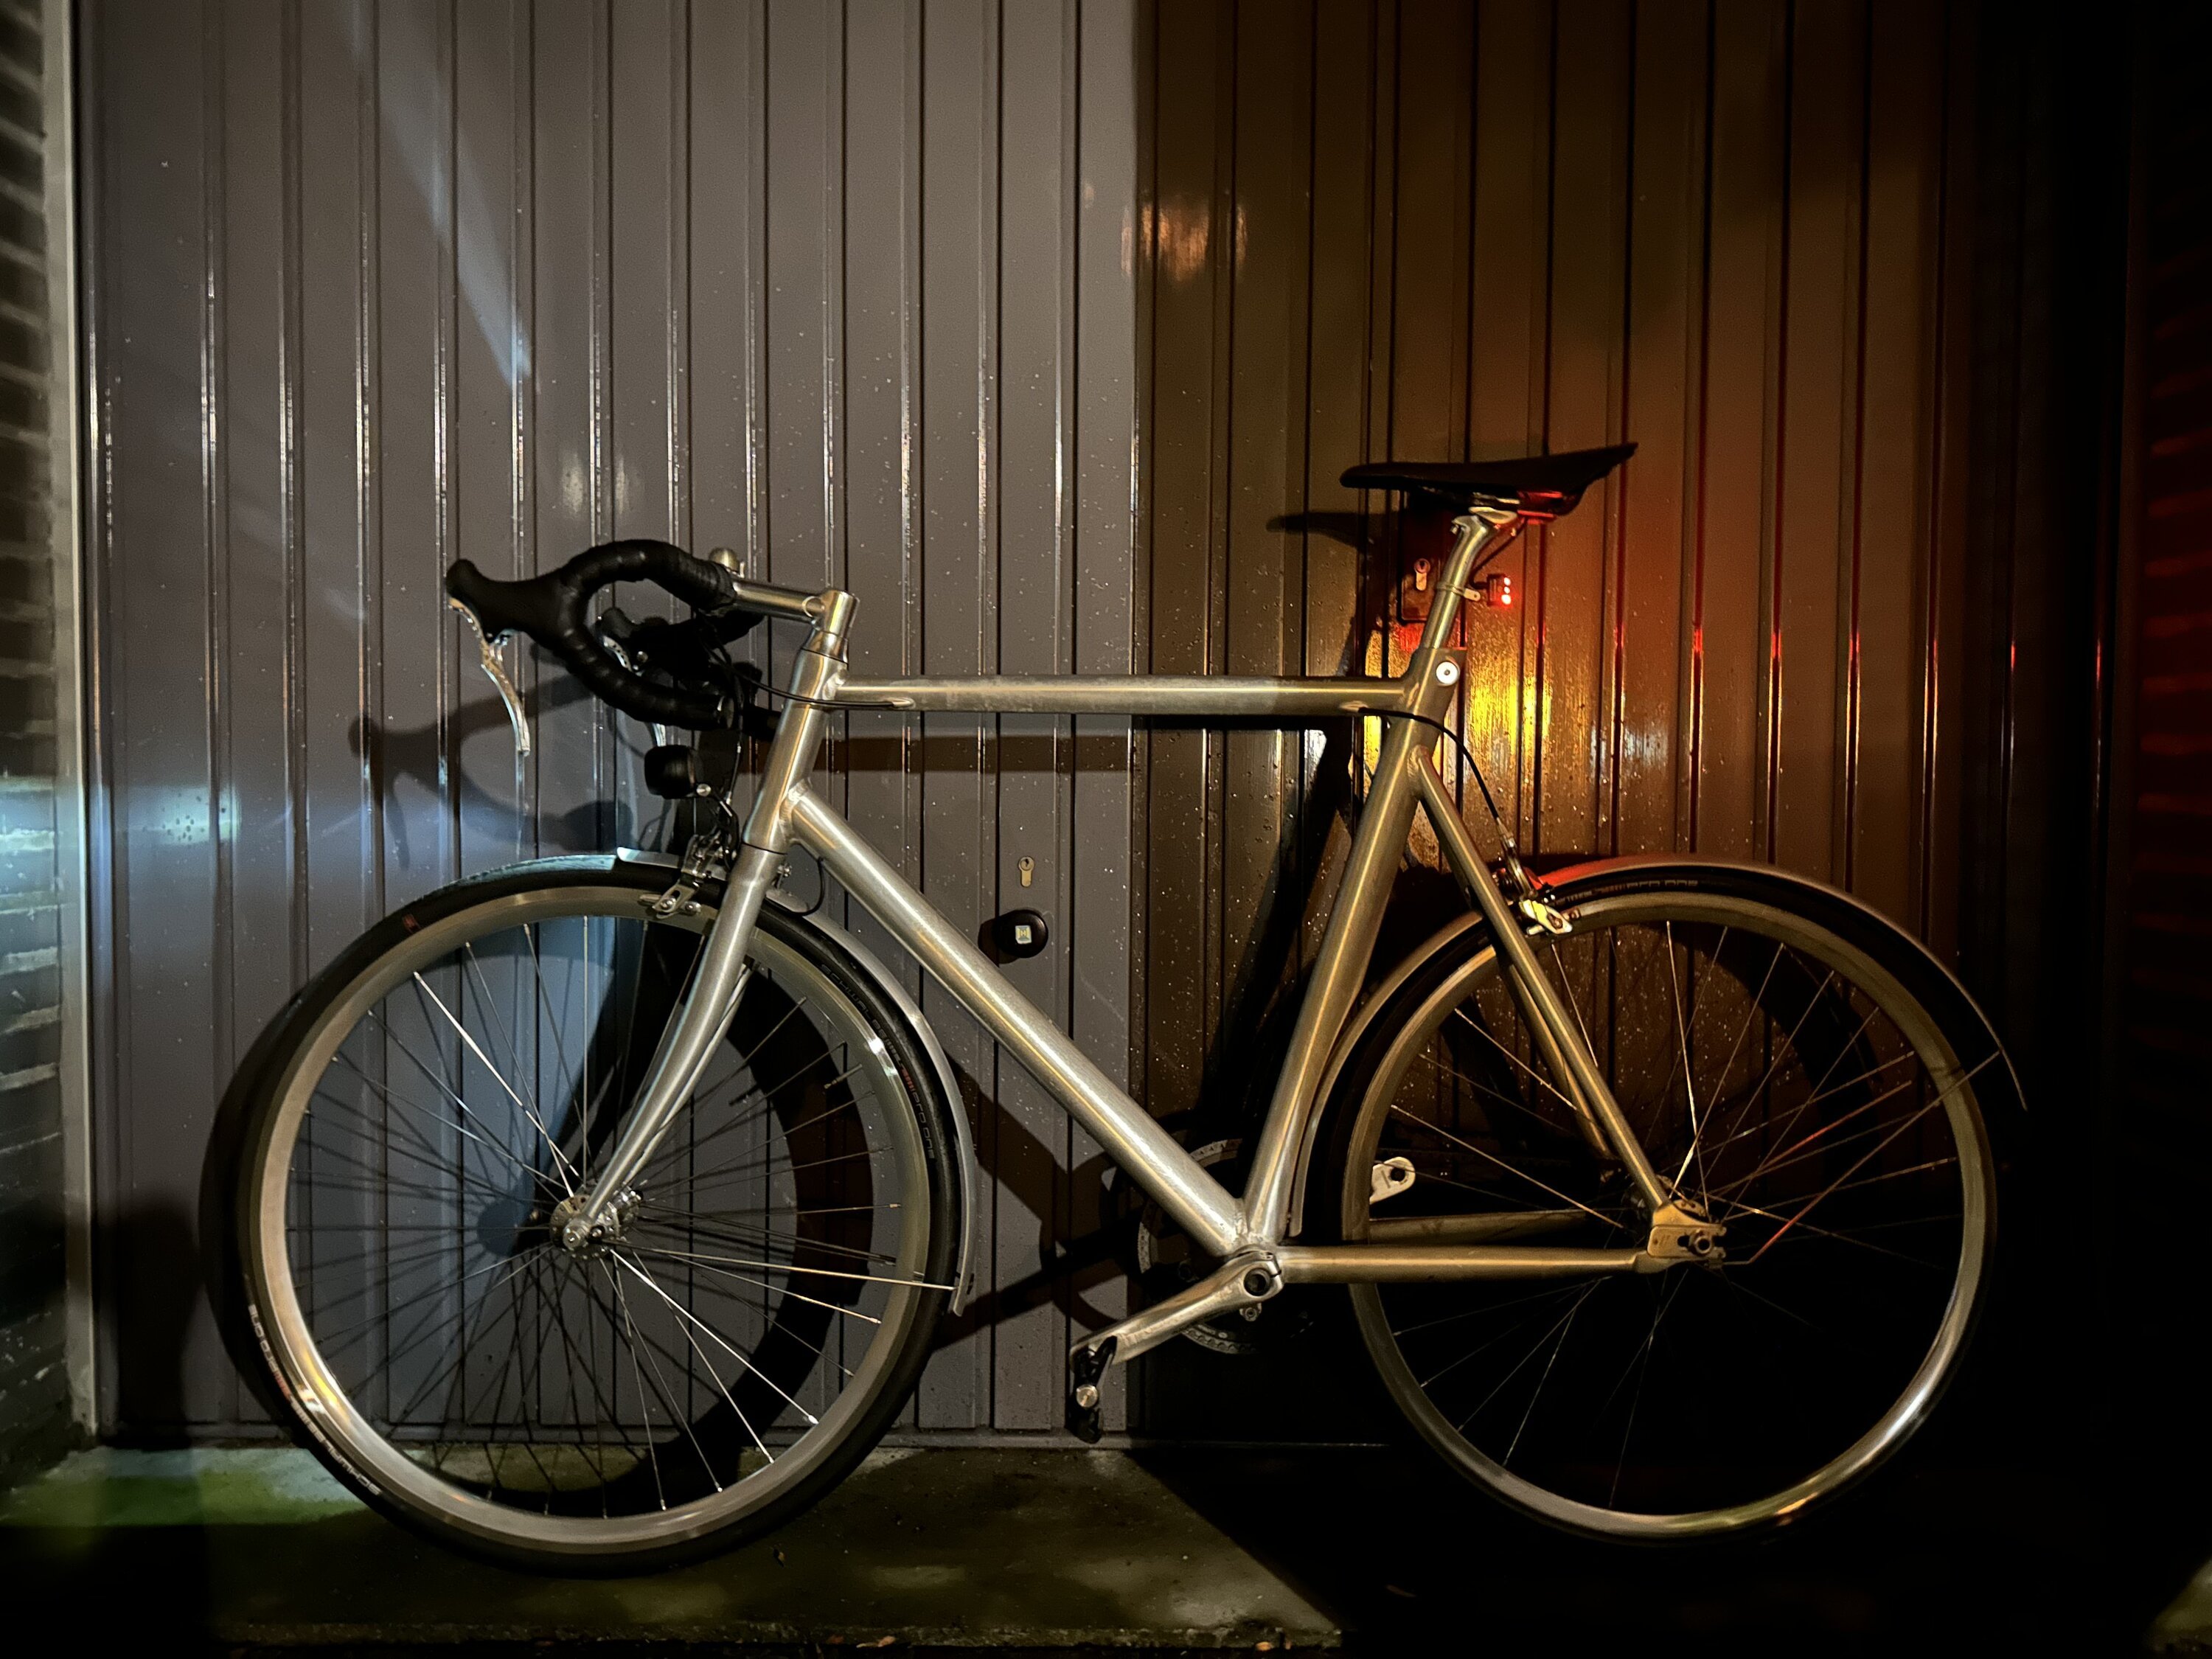
After putting everything back together, the result is amazing. Both lights work well and I am very satisfied with how it ended up. I received some comment that it is almost like this was factory installed - I'll take that as a compliment!
Conclusion
And there was light! WOW! It took some time and effort (..) but it was well worth it. The dynamo powered lights take away the fiddling with wireless battery powered lights, replacing them with a durable solution that requires much less attention in the long run. It just works!
Download
If you enjoy reading offline, this article is available for download:
Translations
This article is available in the following languages:
RSS / Atom
Grab one of the feeds to stay up to date, the feeds contain the full posts: