Mar. 20, 2019
Servicing a robot vacuum cleaner
My iRobot Roomba is now running for 8 years and counting!
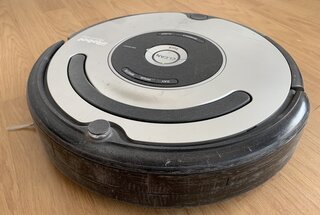
Back in 2011 I got myself an iRobot Roomba 555 robot vacuum cleaner to automatically clean my apartment. It's a little circle shaped robot that drives around sucking up dust bunnies. Over the years it has bravely fought the dangers of my apartment... shoes, cables, carpet and belts. It survived and it is still working perfectly! This week it was time for some maintenance.
iRobot
In 2002, iRobot launched the Roomba vacuum cleaner robot. The Roomba is able to change direction when it encounters an obstacle, detect dirty spots on the floor and prevents crashing down from stairs. The iRobot company was founded in 1990 by three roboticists named Colin Angle, Helen Greiner and Rodney Brooks. The company was originally dedicated to making robots for military use.
These days iRobot is fully dedicated to consumer robots. But I still love the idea that there is some military precision and resilience in my vacuum cleaner.
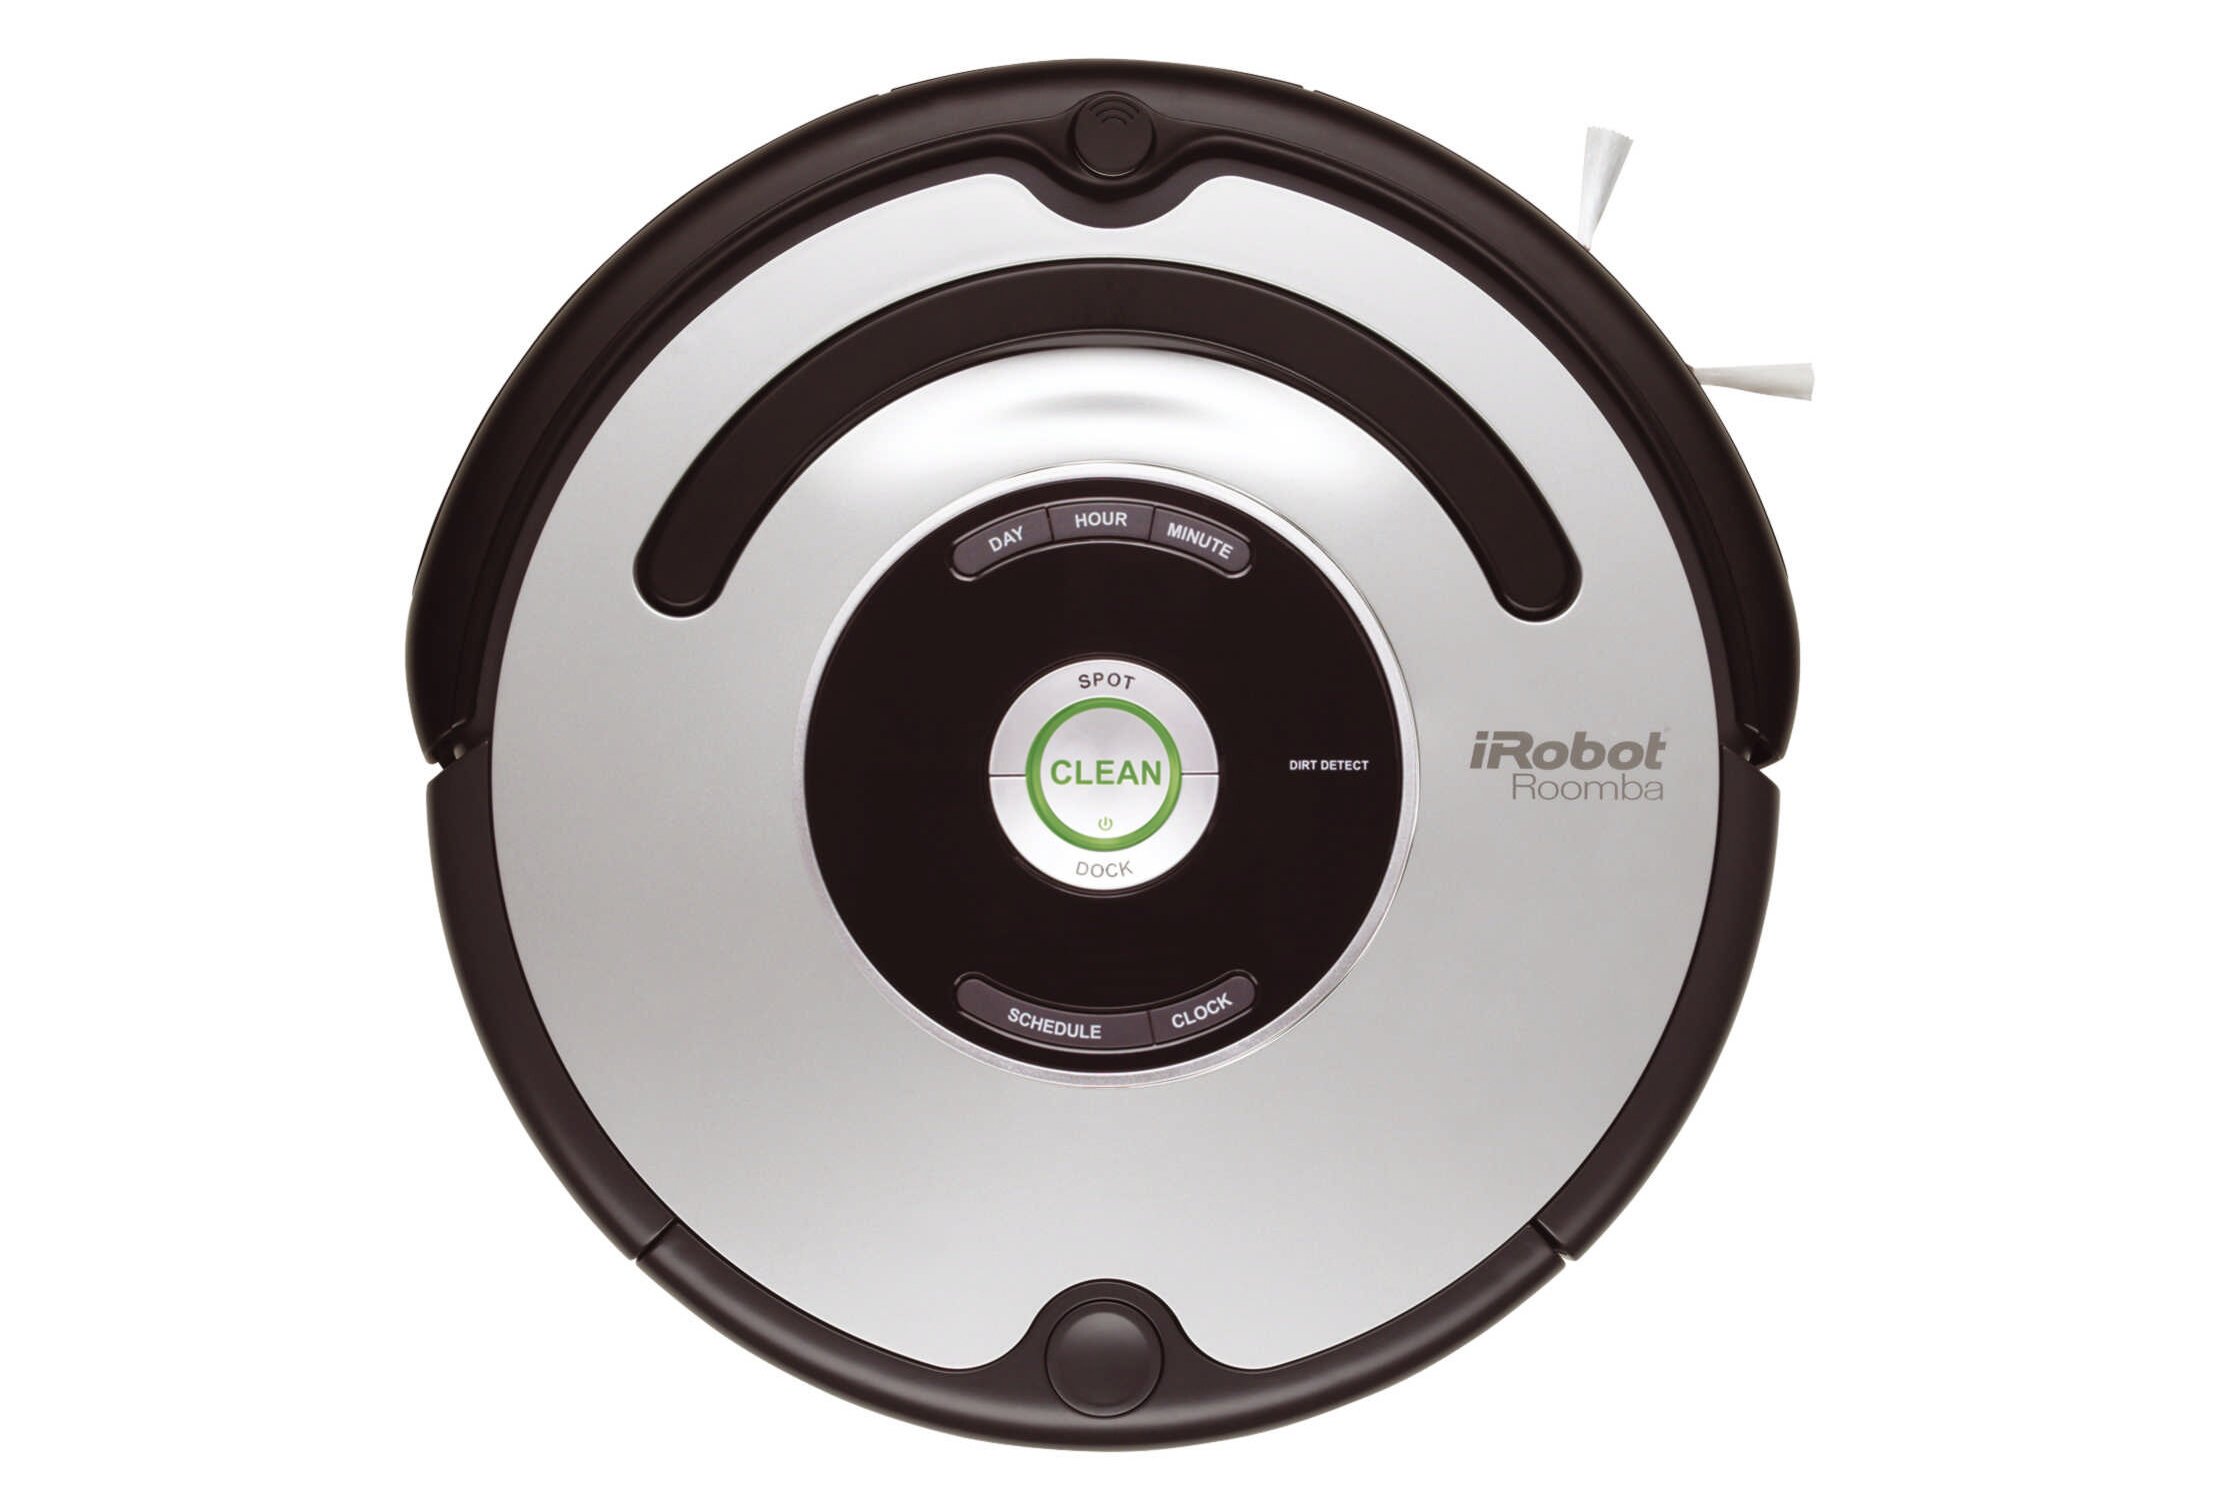
Tired of vacuum cleaning myself, I was looking for some robotised with dust bunnies help in 2011. I was lucky to find a store in Amsterdam that sold one of the first robot vacuum cleaners available in The Netherlands: the iRobot Roomba 555.
Sucking (dust) since 2011
Unlike some other consumer products, the iRobot Roomba is a resilient piece of technology, provided you take care of it. I regularly service it since it started its job in 2011.
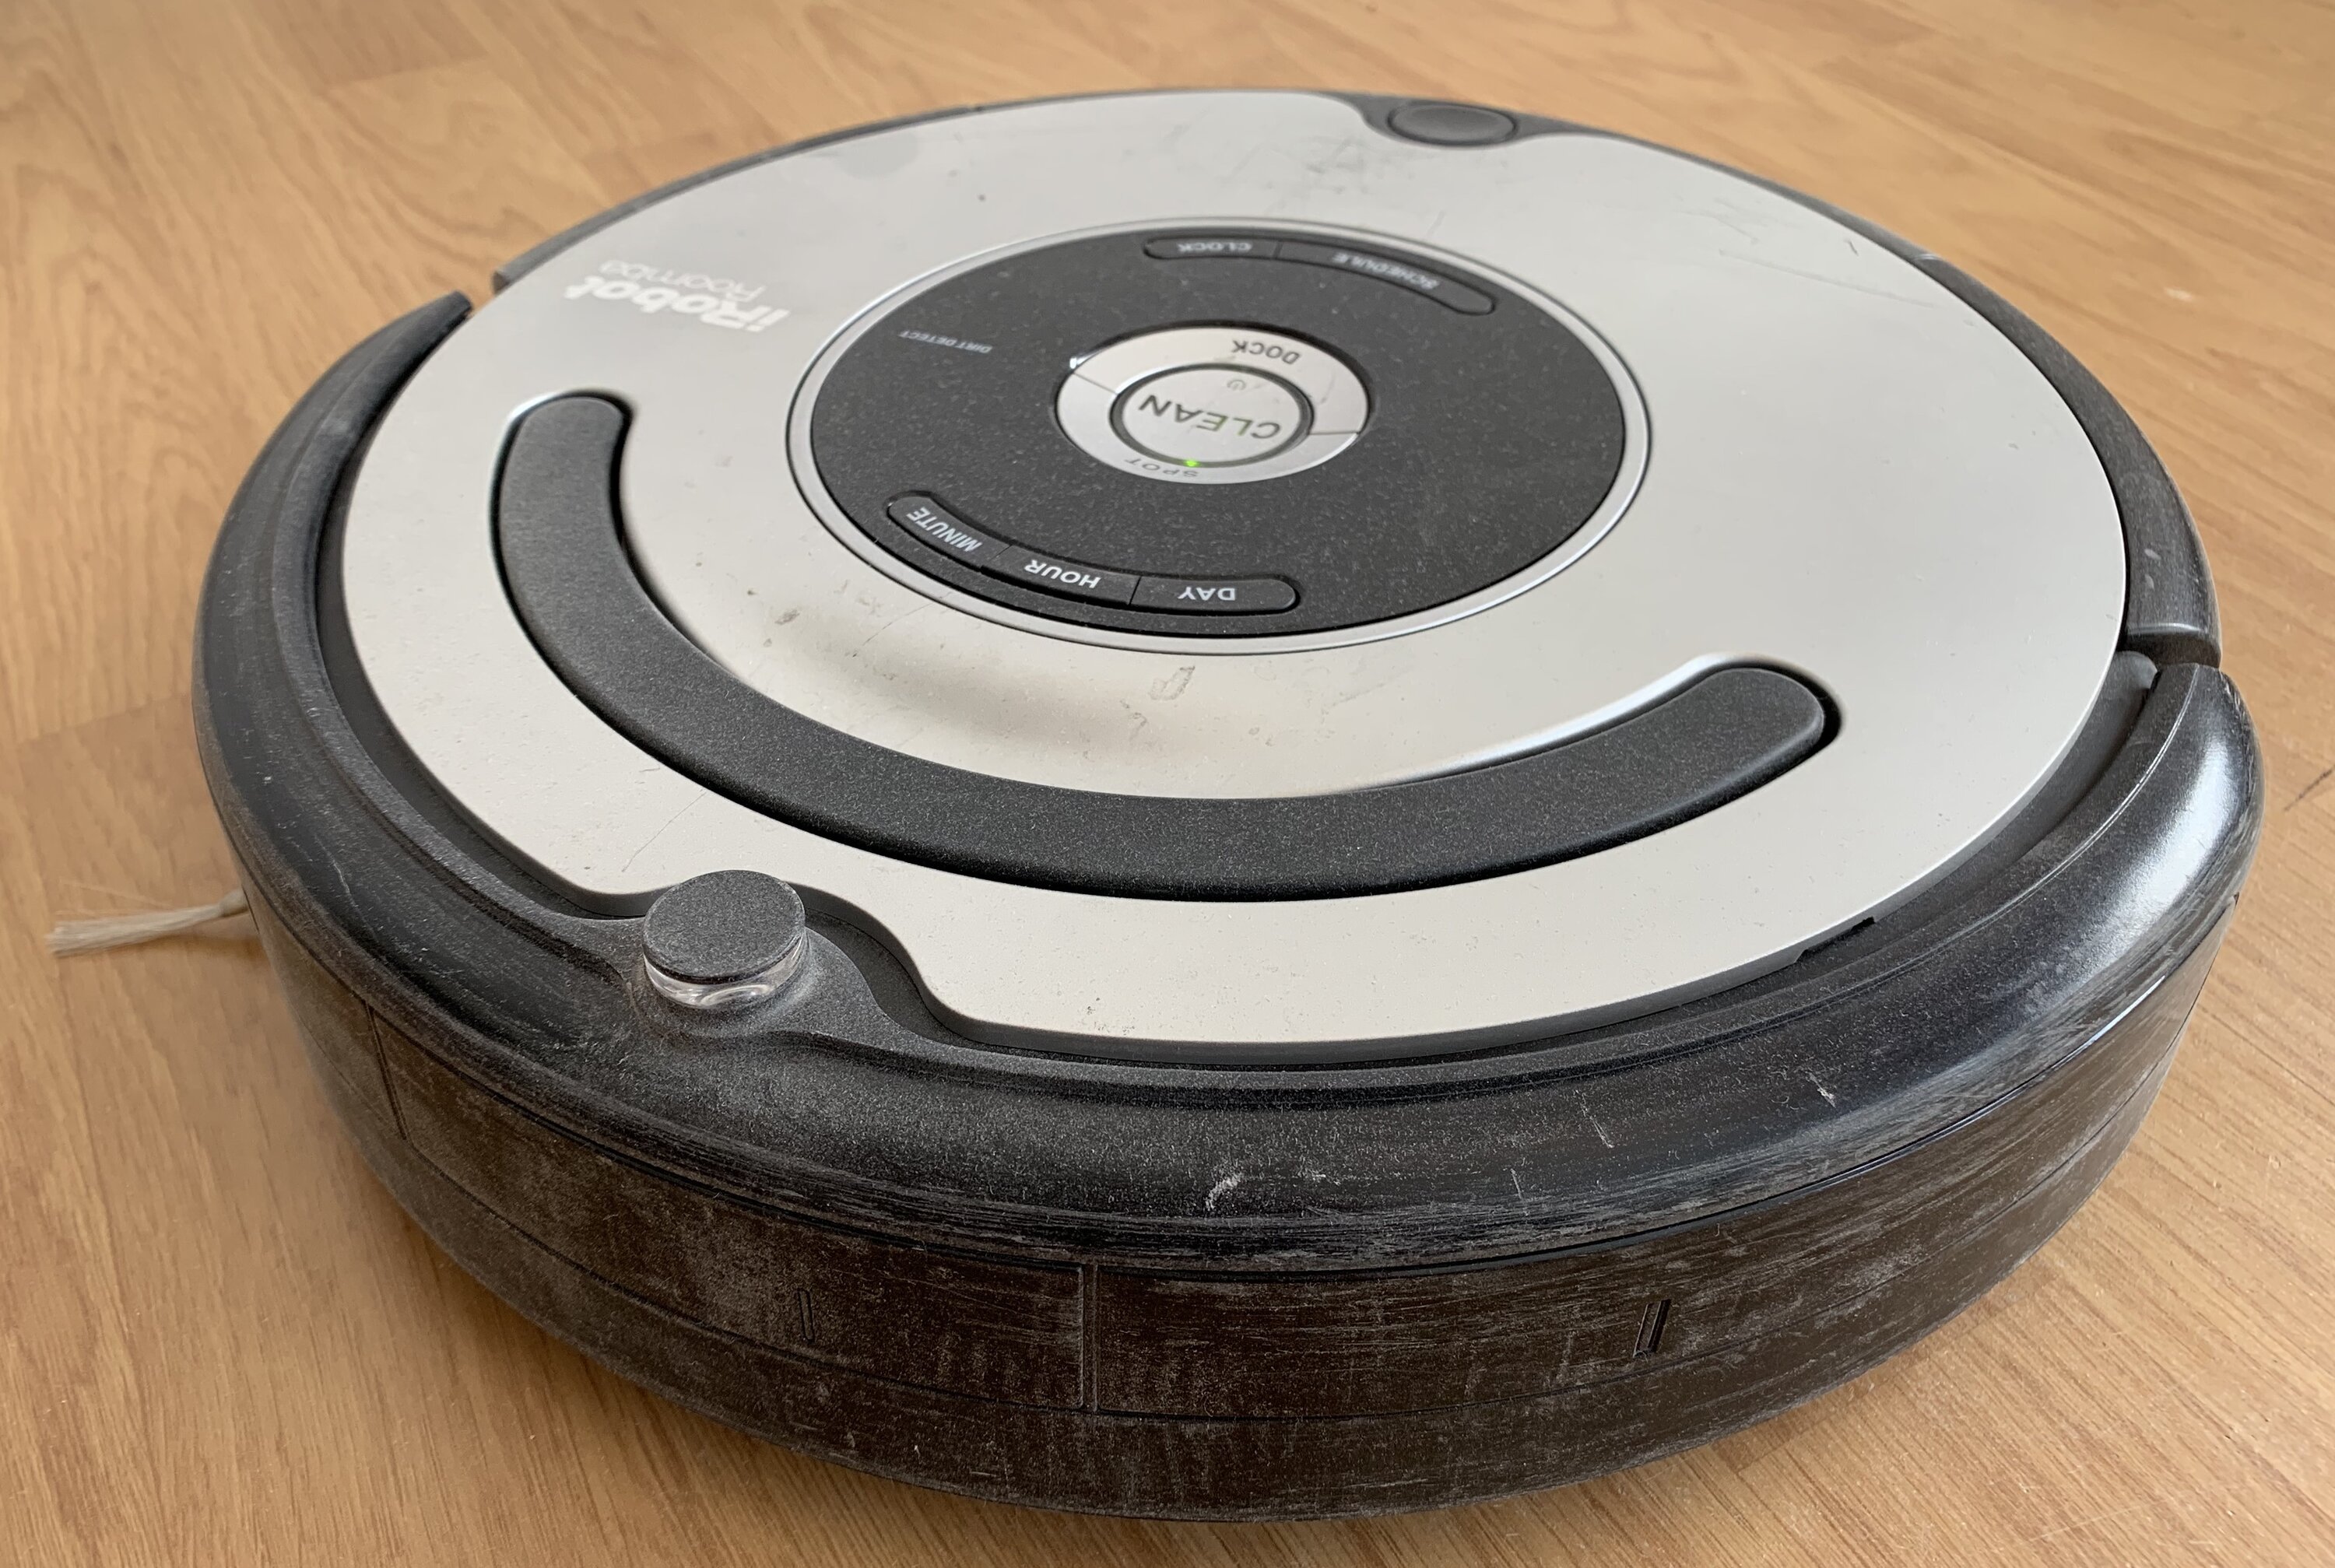
Servicing the iRobot Roomba
To keep the robot operational you'll need to make sure it doesn't get stuck. A periodic maintenance and cleanup is recommended. I'll show you to do this using step by step instructions. You'll need:
- a plus (+) screw driver
- a minus (-) screw driver (or a tiny knife)
- another vacuum cleaner
- some time and patience
Disclaimer: I am not responsible for damage inflicted on your robot friend, if your maintenance attempt fails. You may void warranties while doing it...
This should be your standard maintenance, remove dust from the bottom of your robot using the other vacuum cleaner. We'll get to the dust container/filter and brushes later.

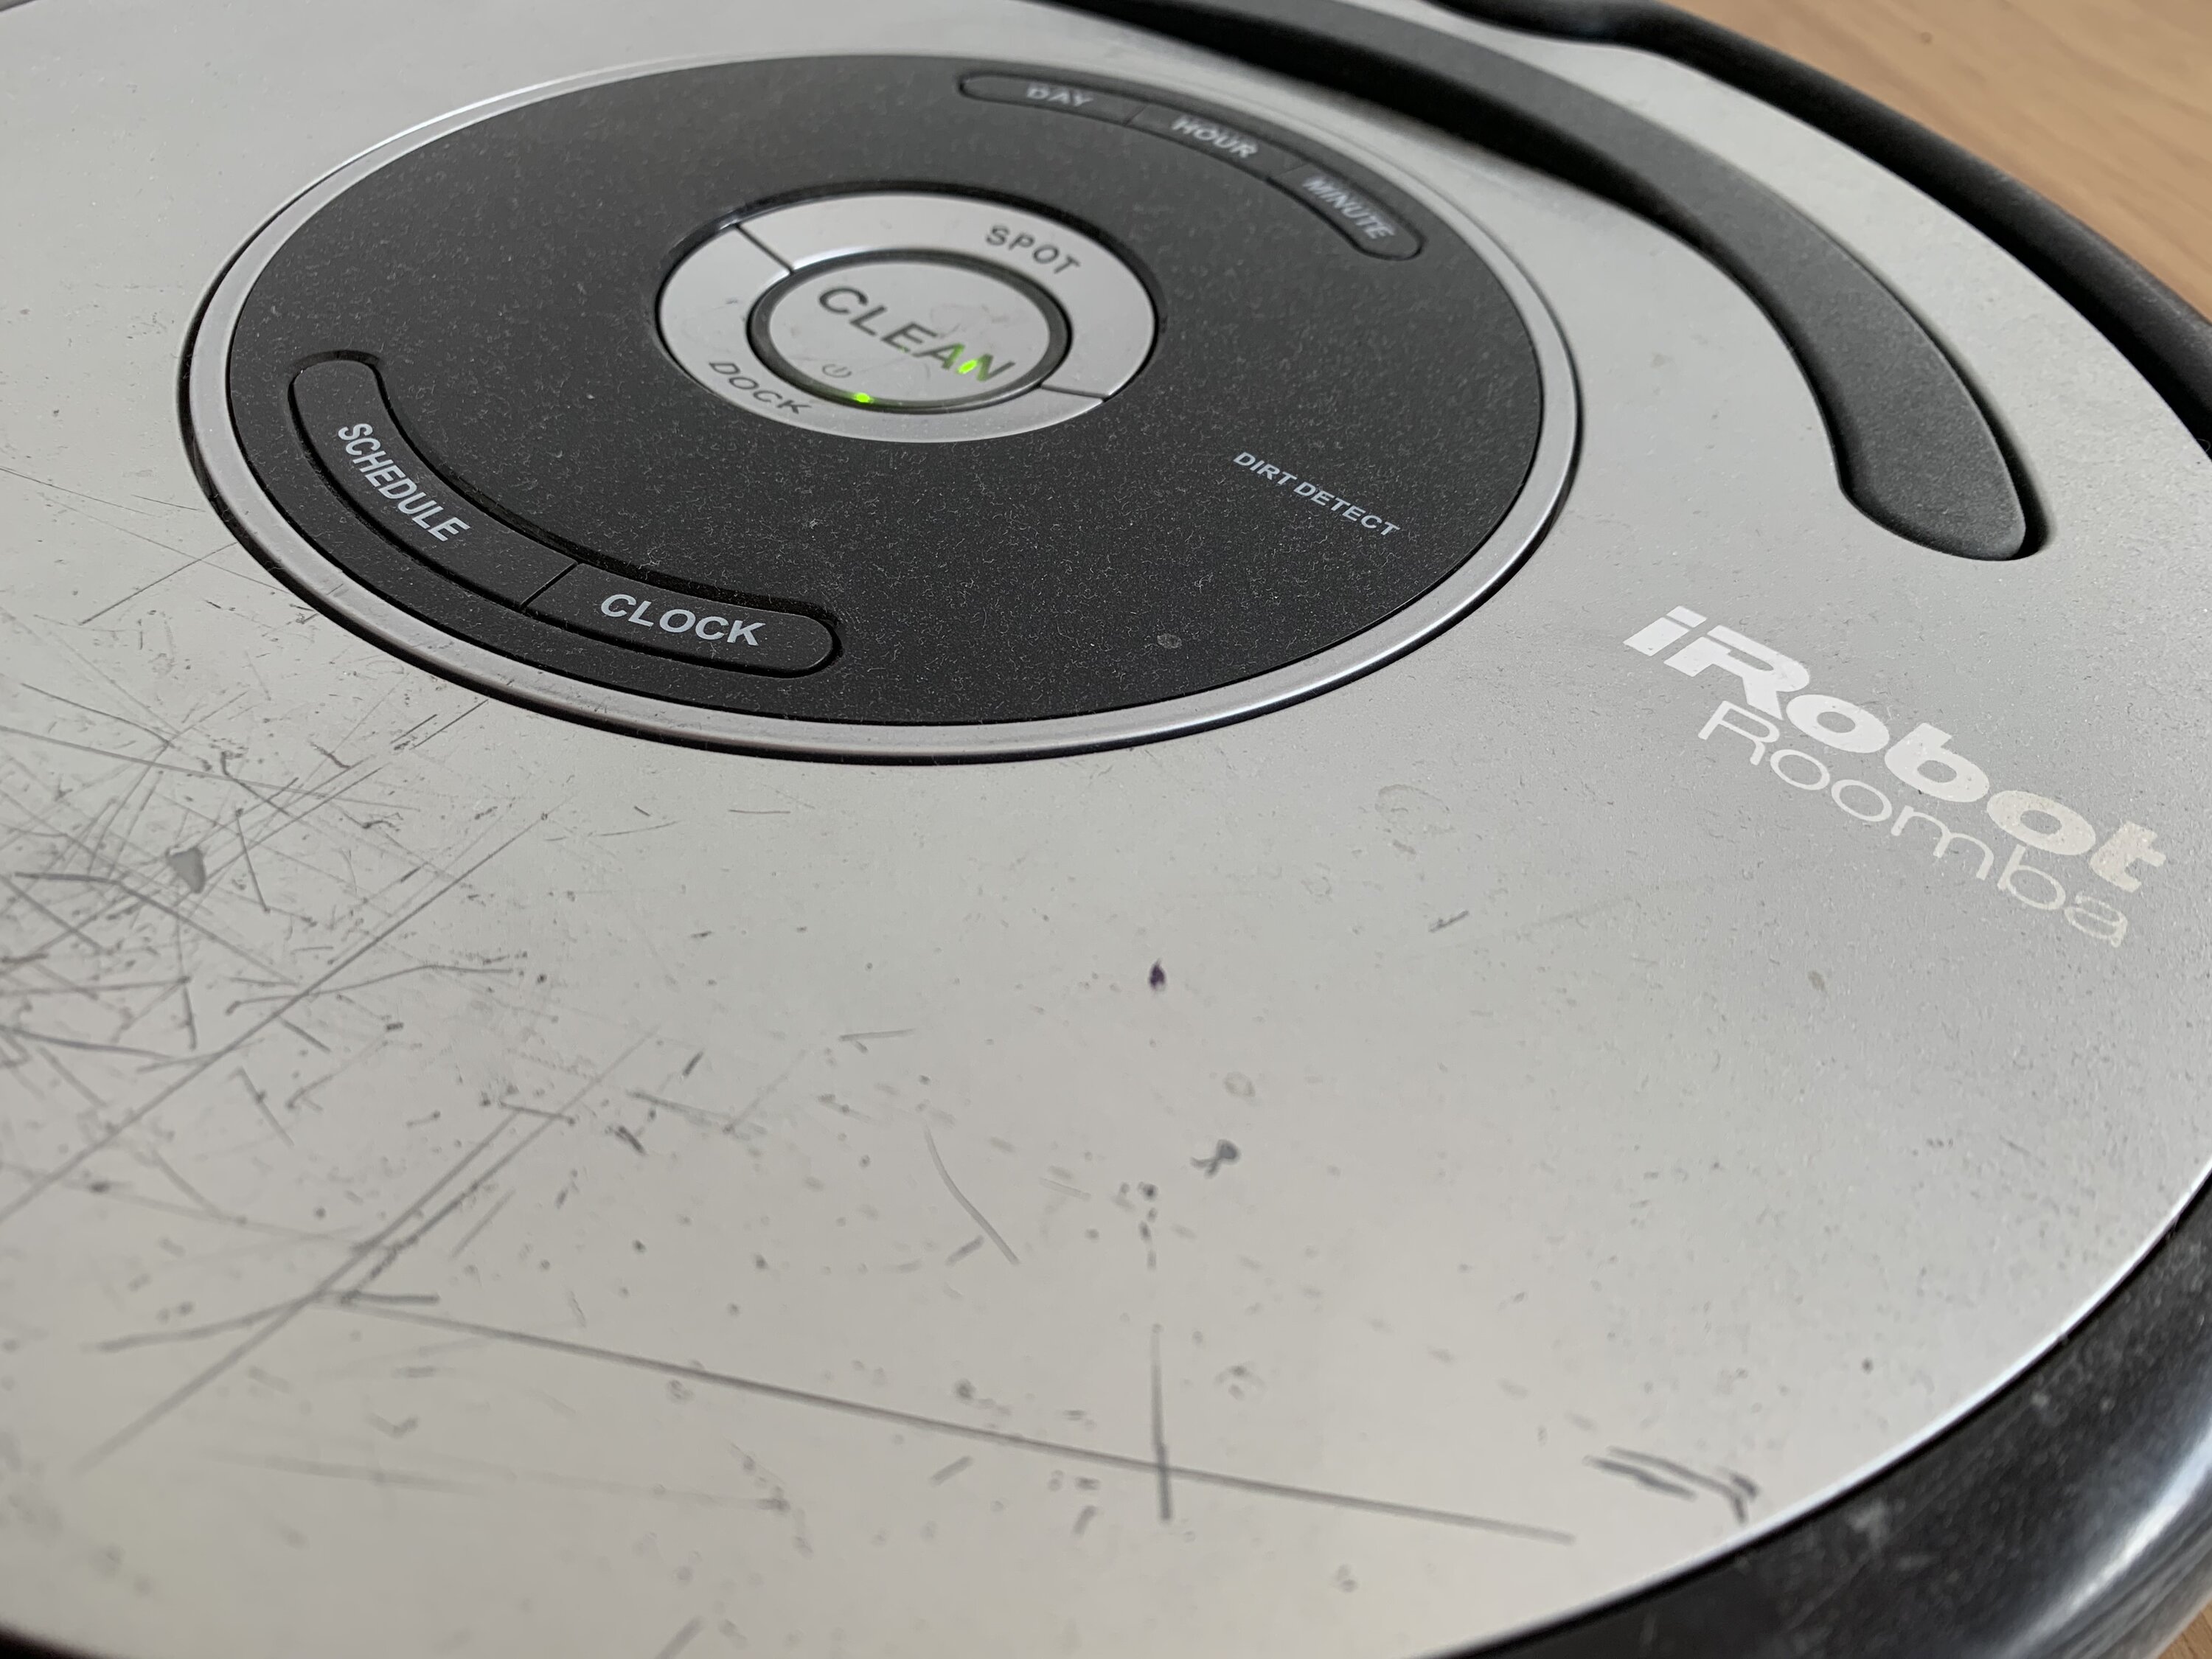
The robot navigates using infrared sensors. They are located behind transparent 'windows' near the edge of the robot. You should thouroughly clean them in order for them to function at peak efficiency.
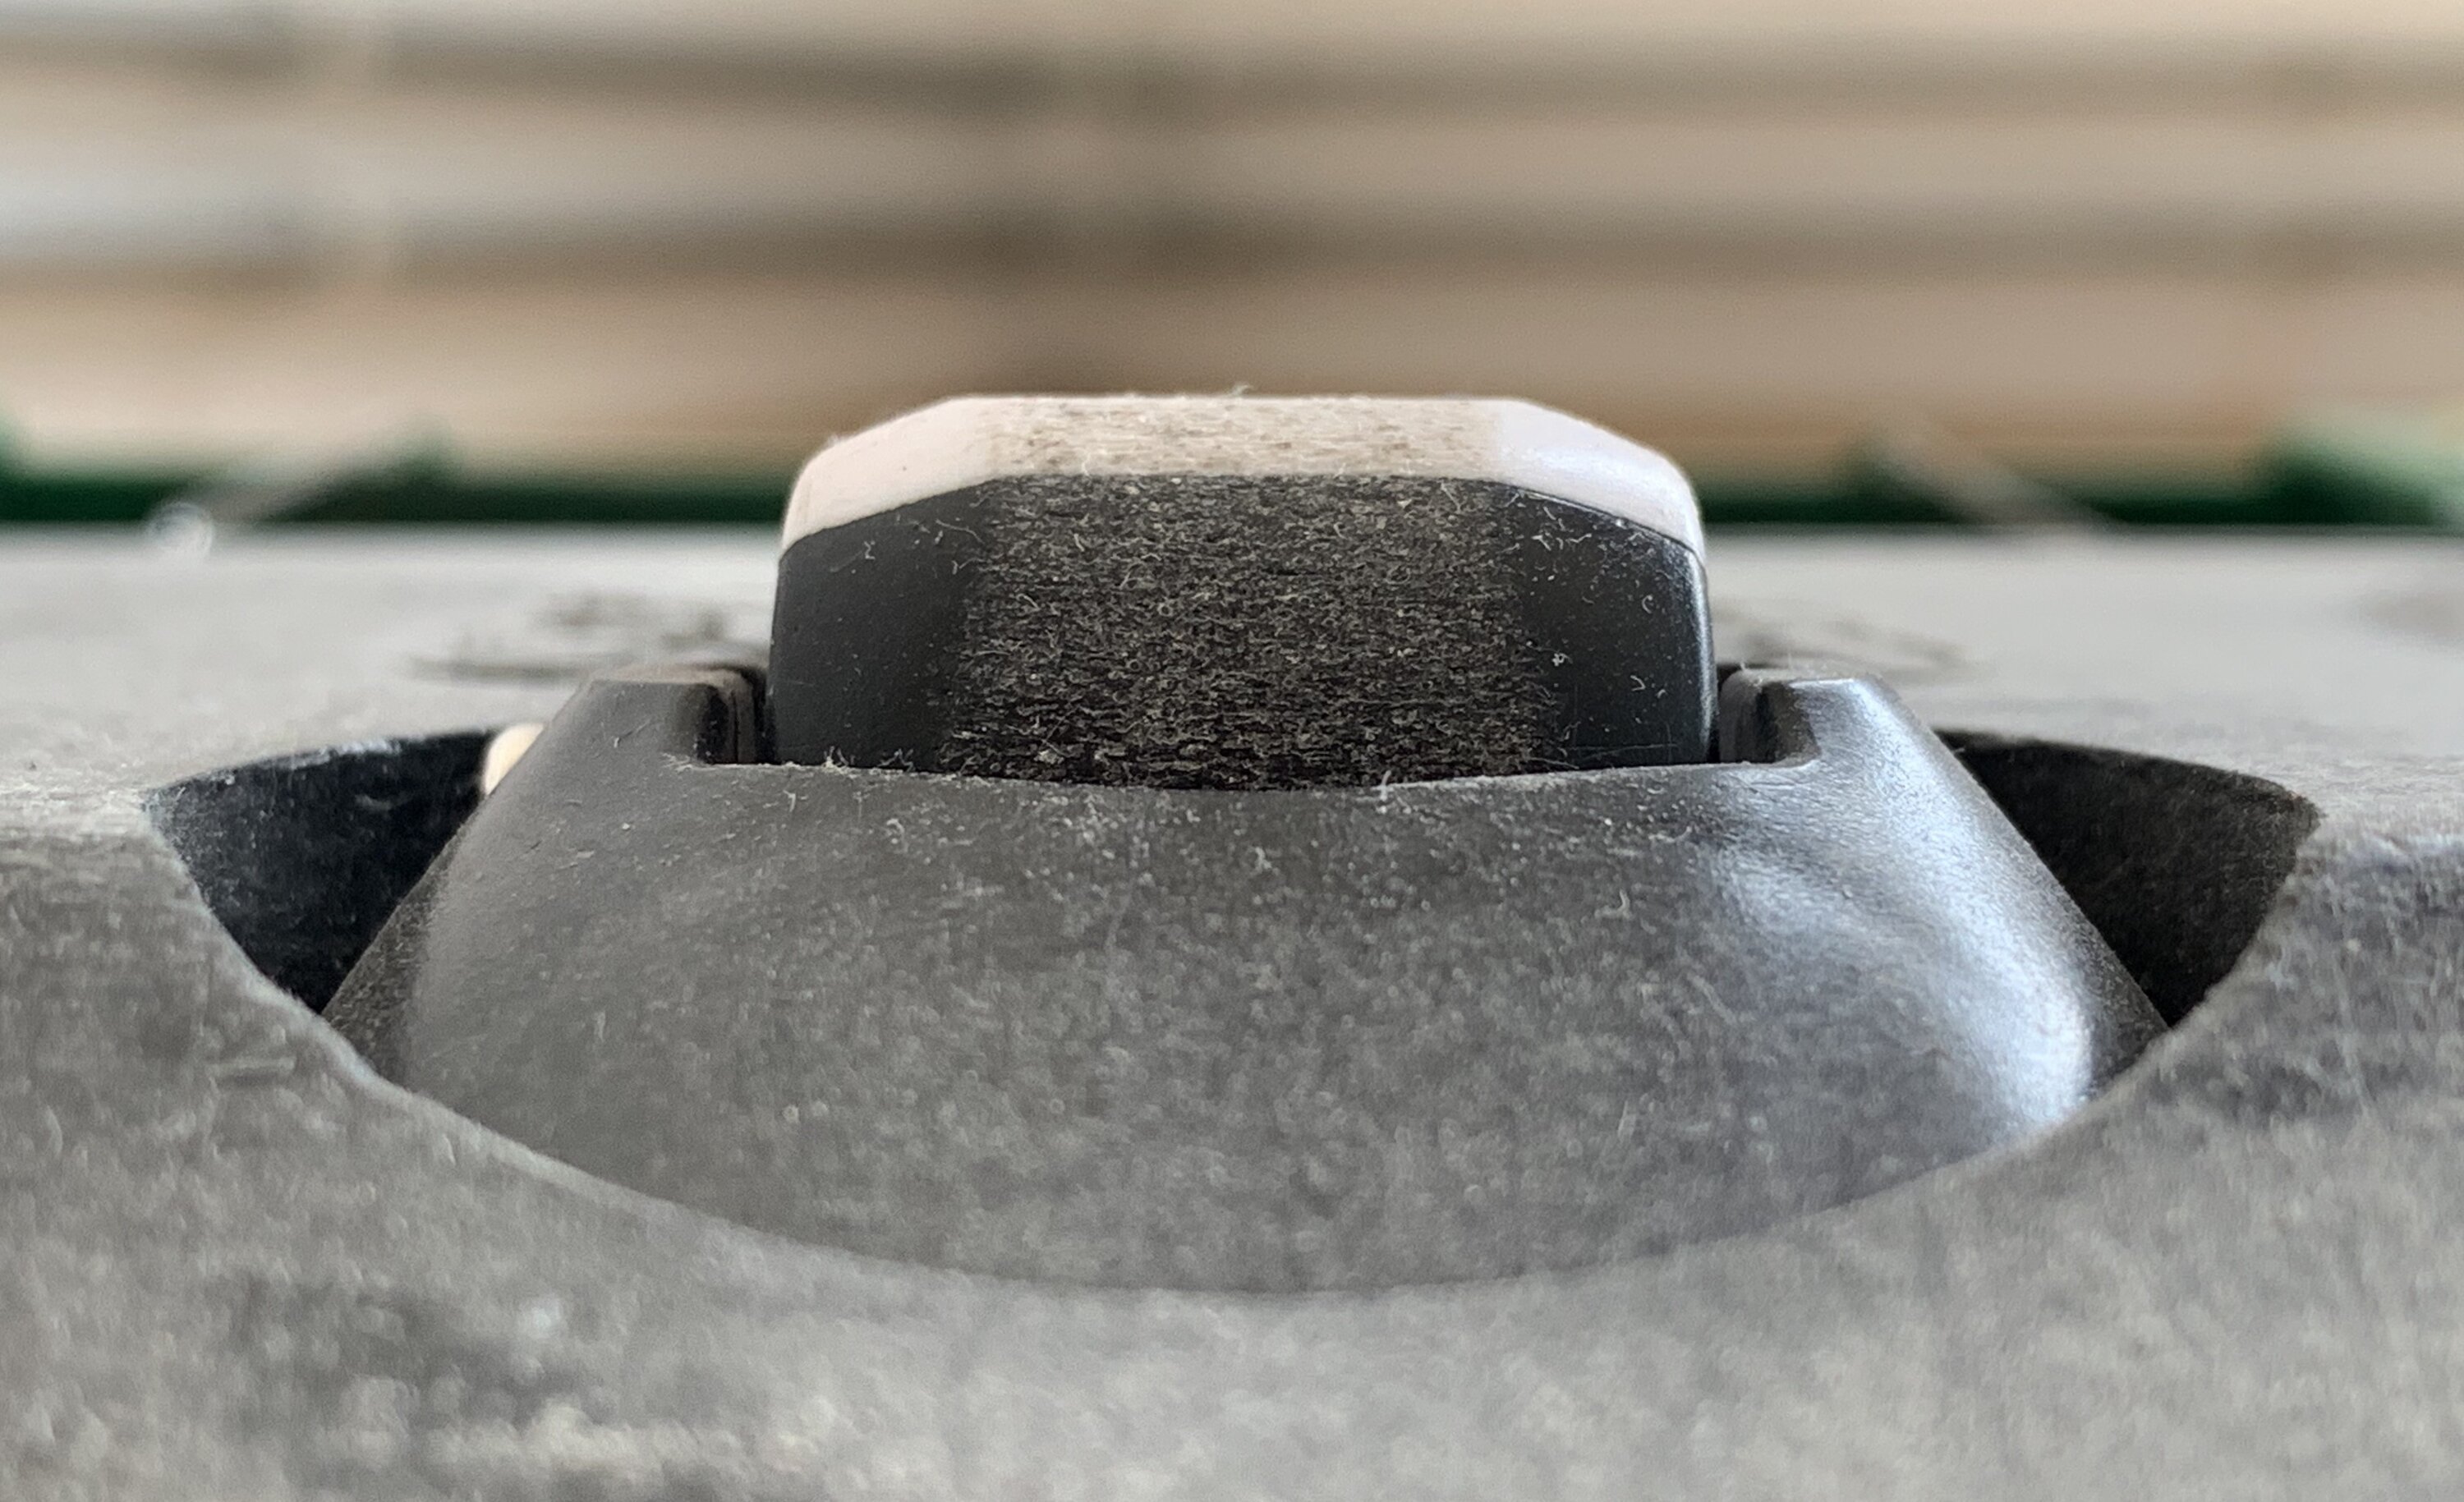
The front wheel of the robot features a black and white pattern. What you might not know is that there is a sensor located underneath the wheel to scan for this 'brightness/darkness'-pattern to detect movement.
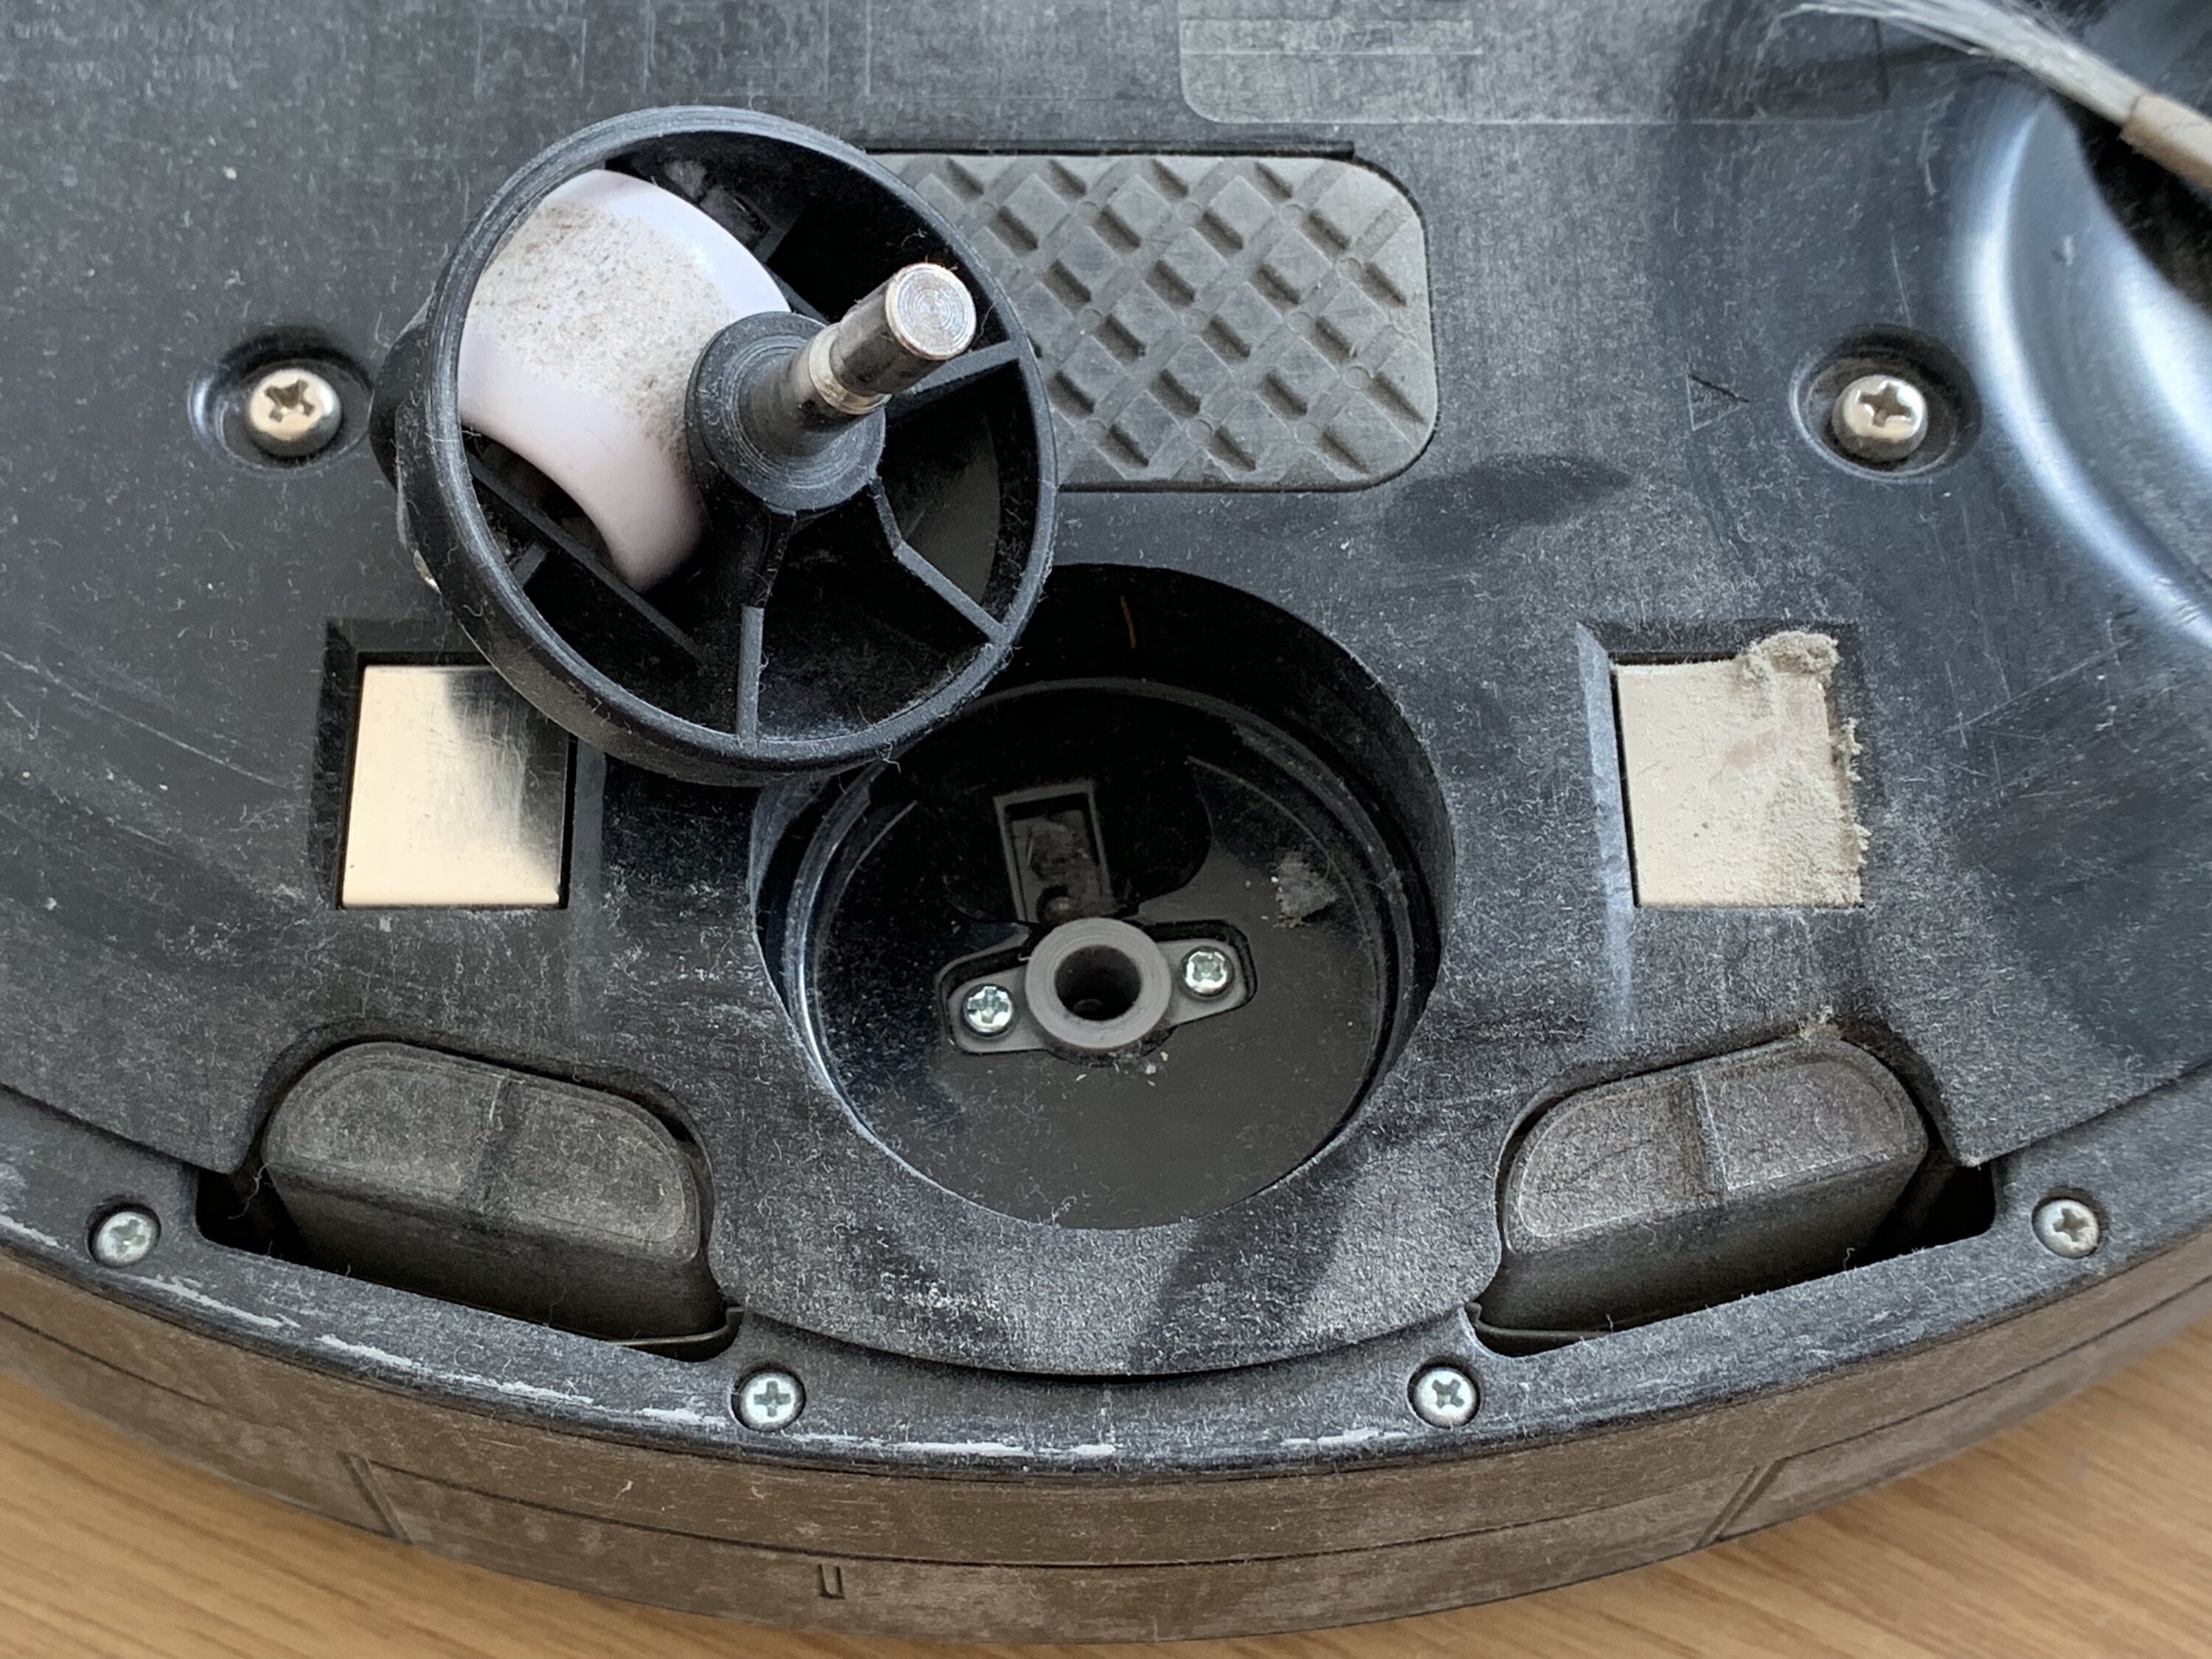
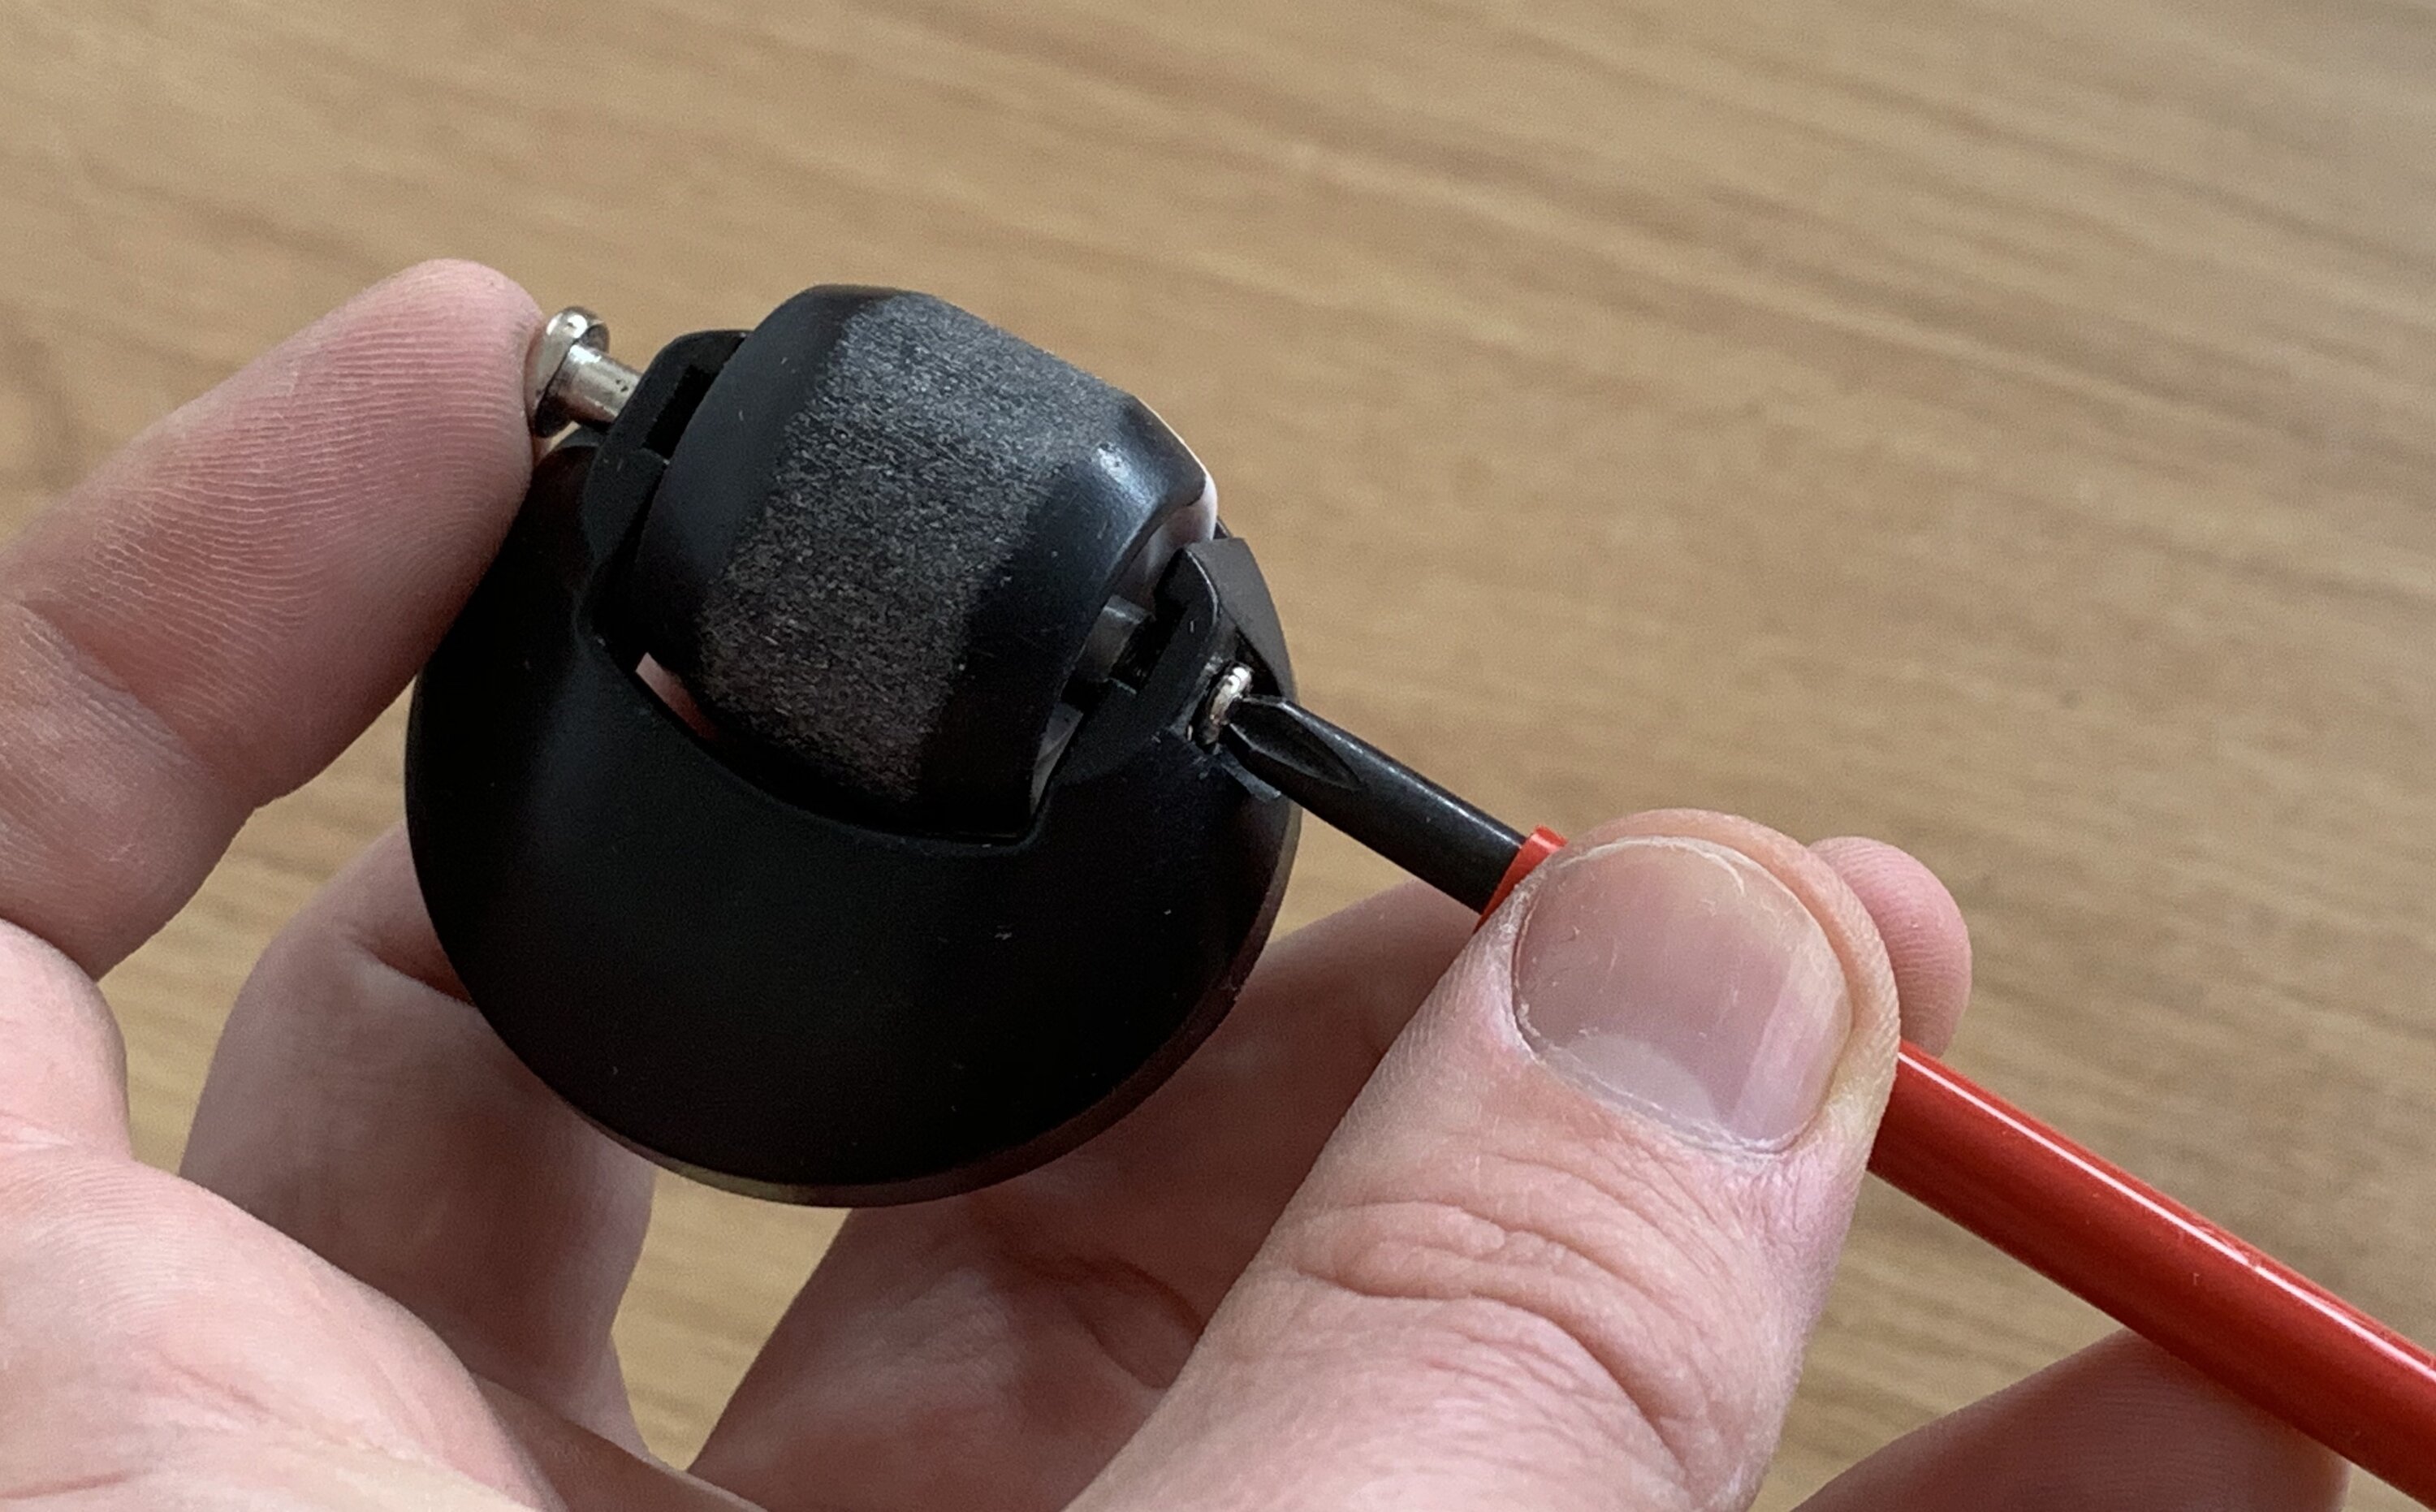
After many hours of vacuum cleaning there is usually some dust on it. Clean it by pulling out the wheel base. If you want to you can remove the wheel and clean its bearings.
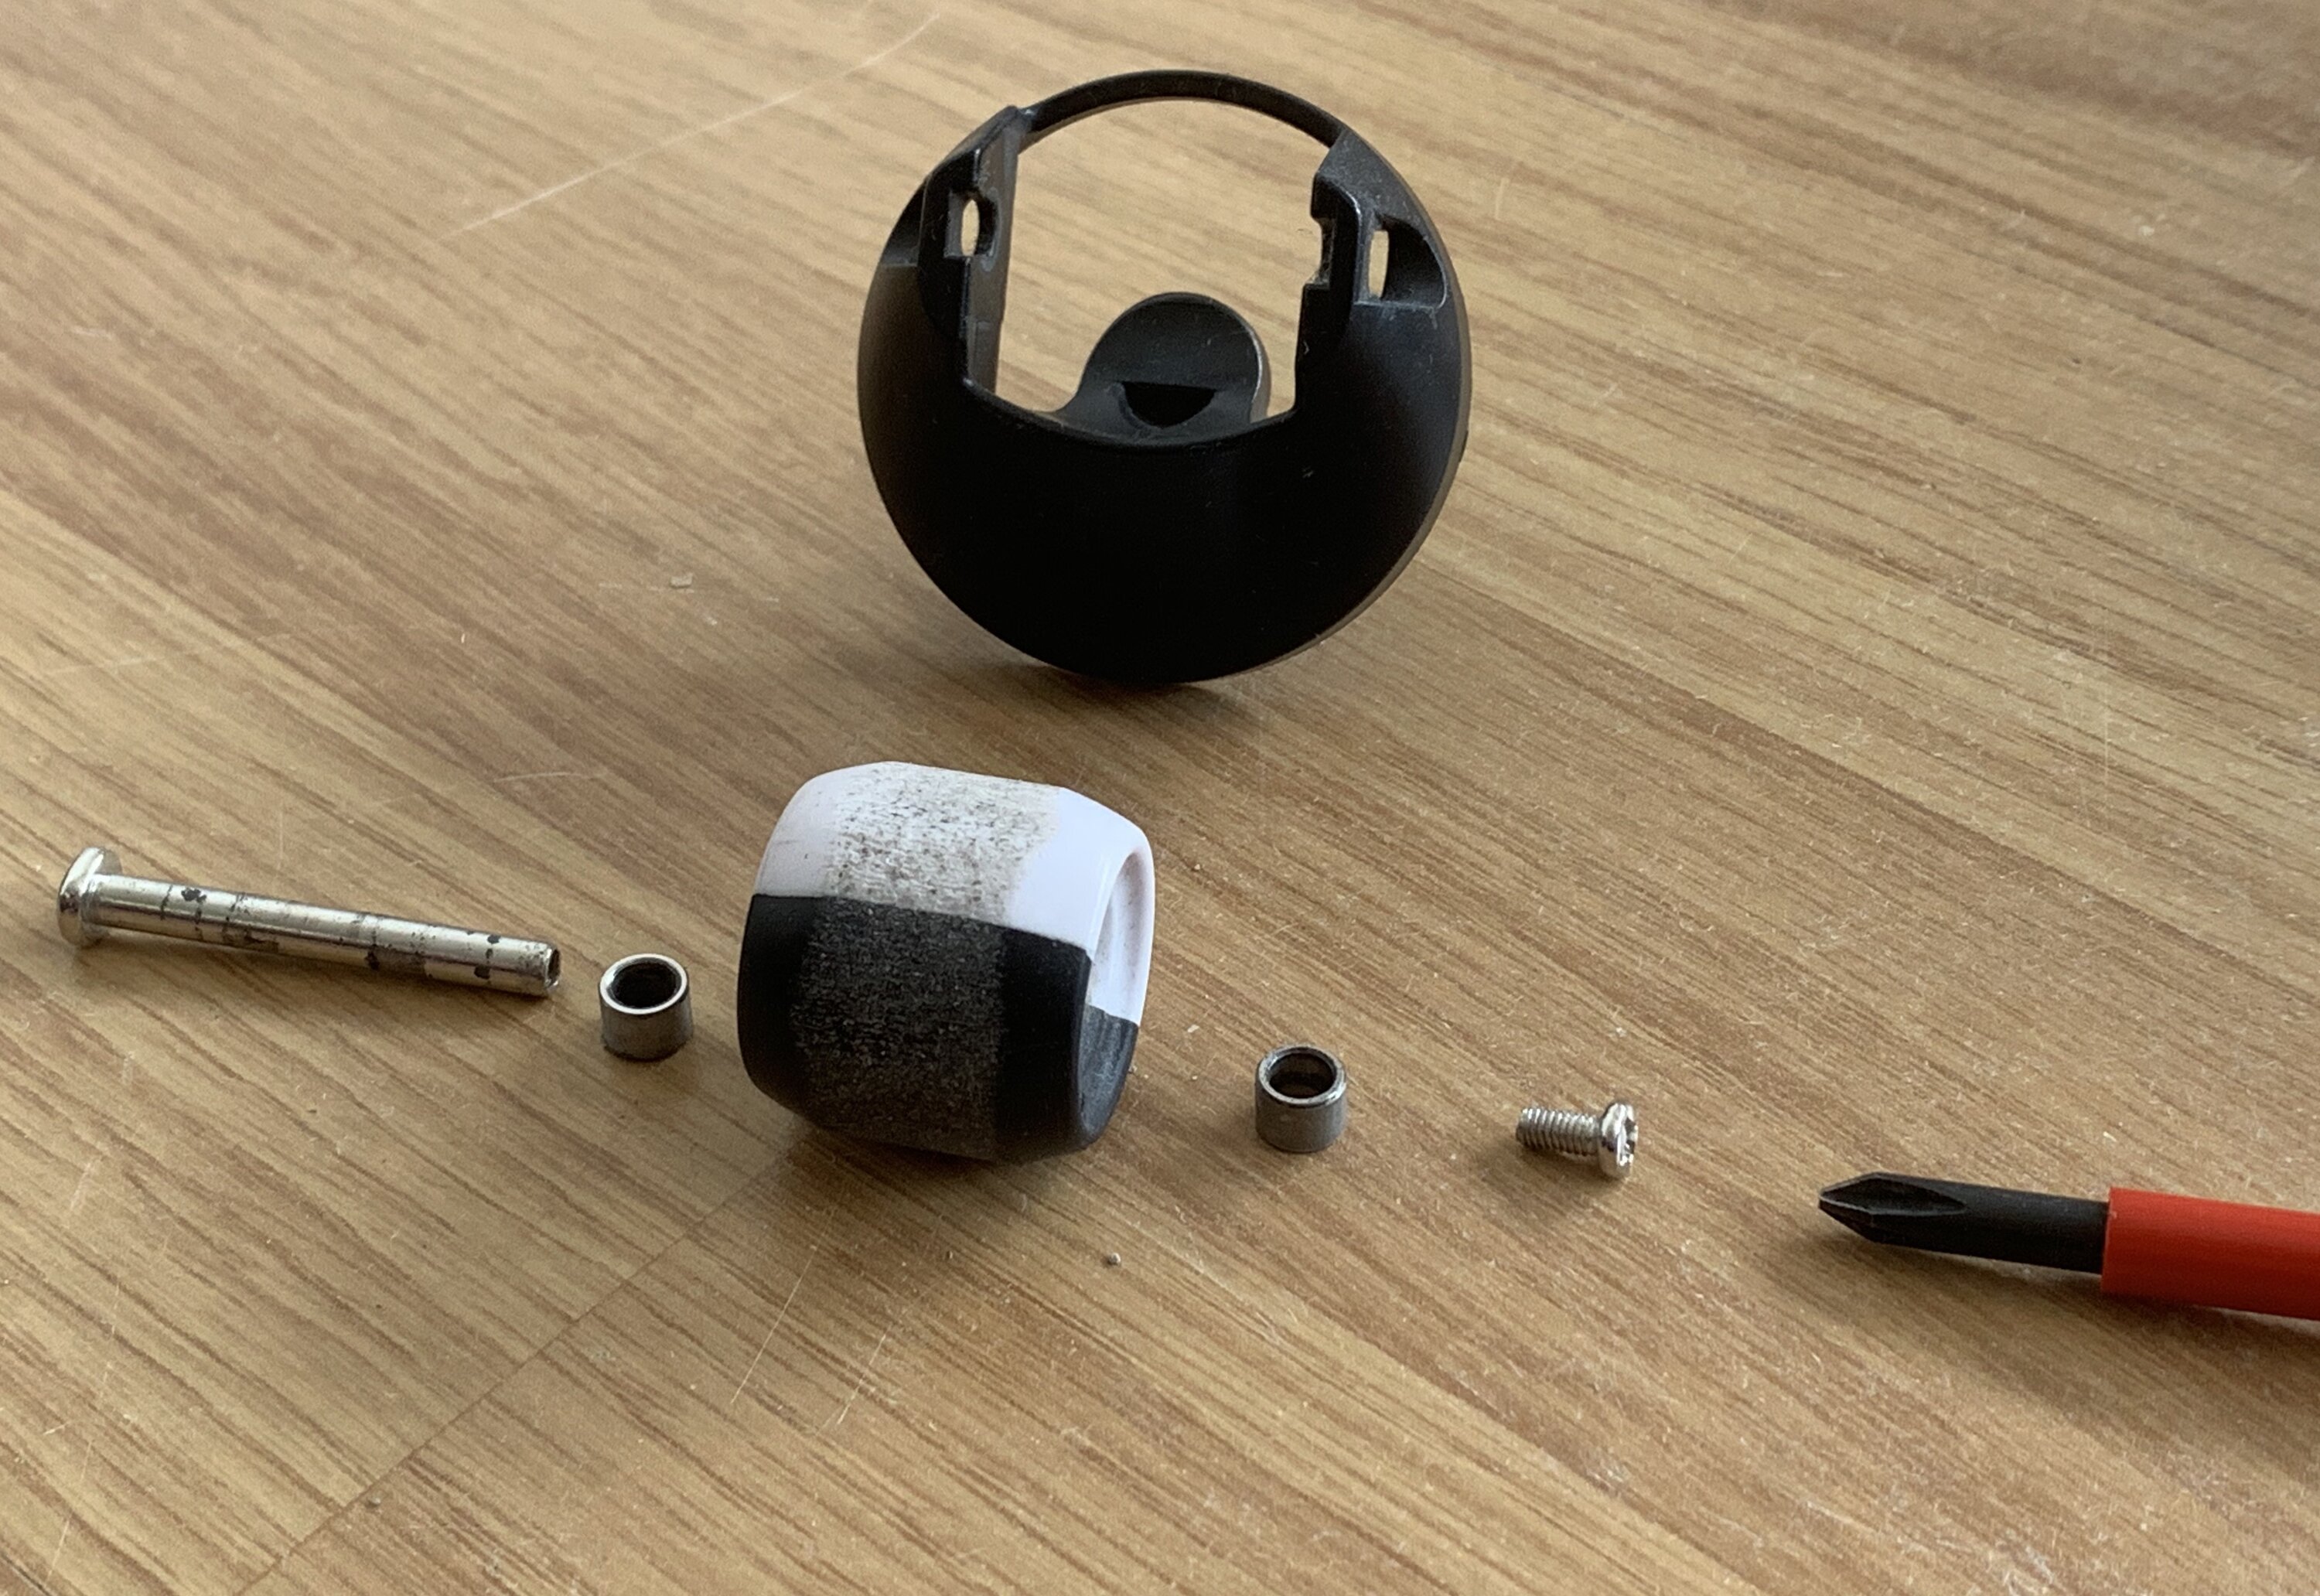
After the first few years of service my Roomba started losing its original front wheel on bumps... Its axle was worn loose. I replaced it with one I found on Ebay that uses a screw for fixture.
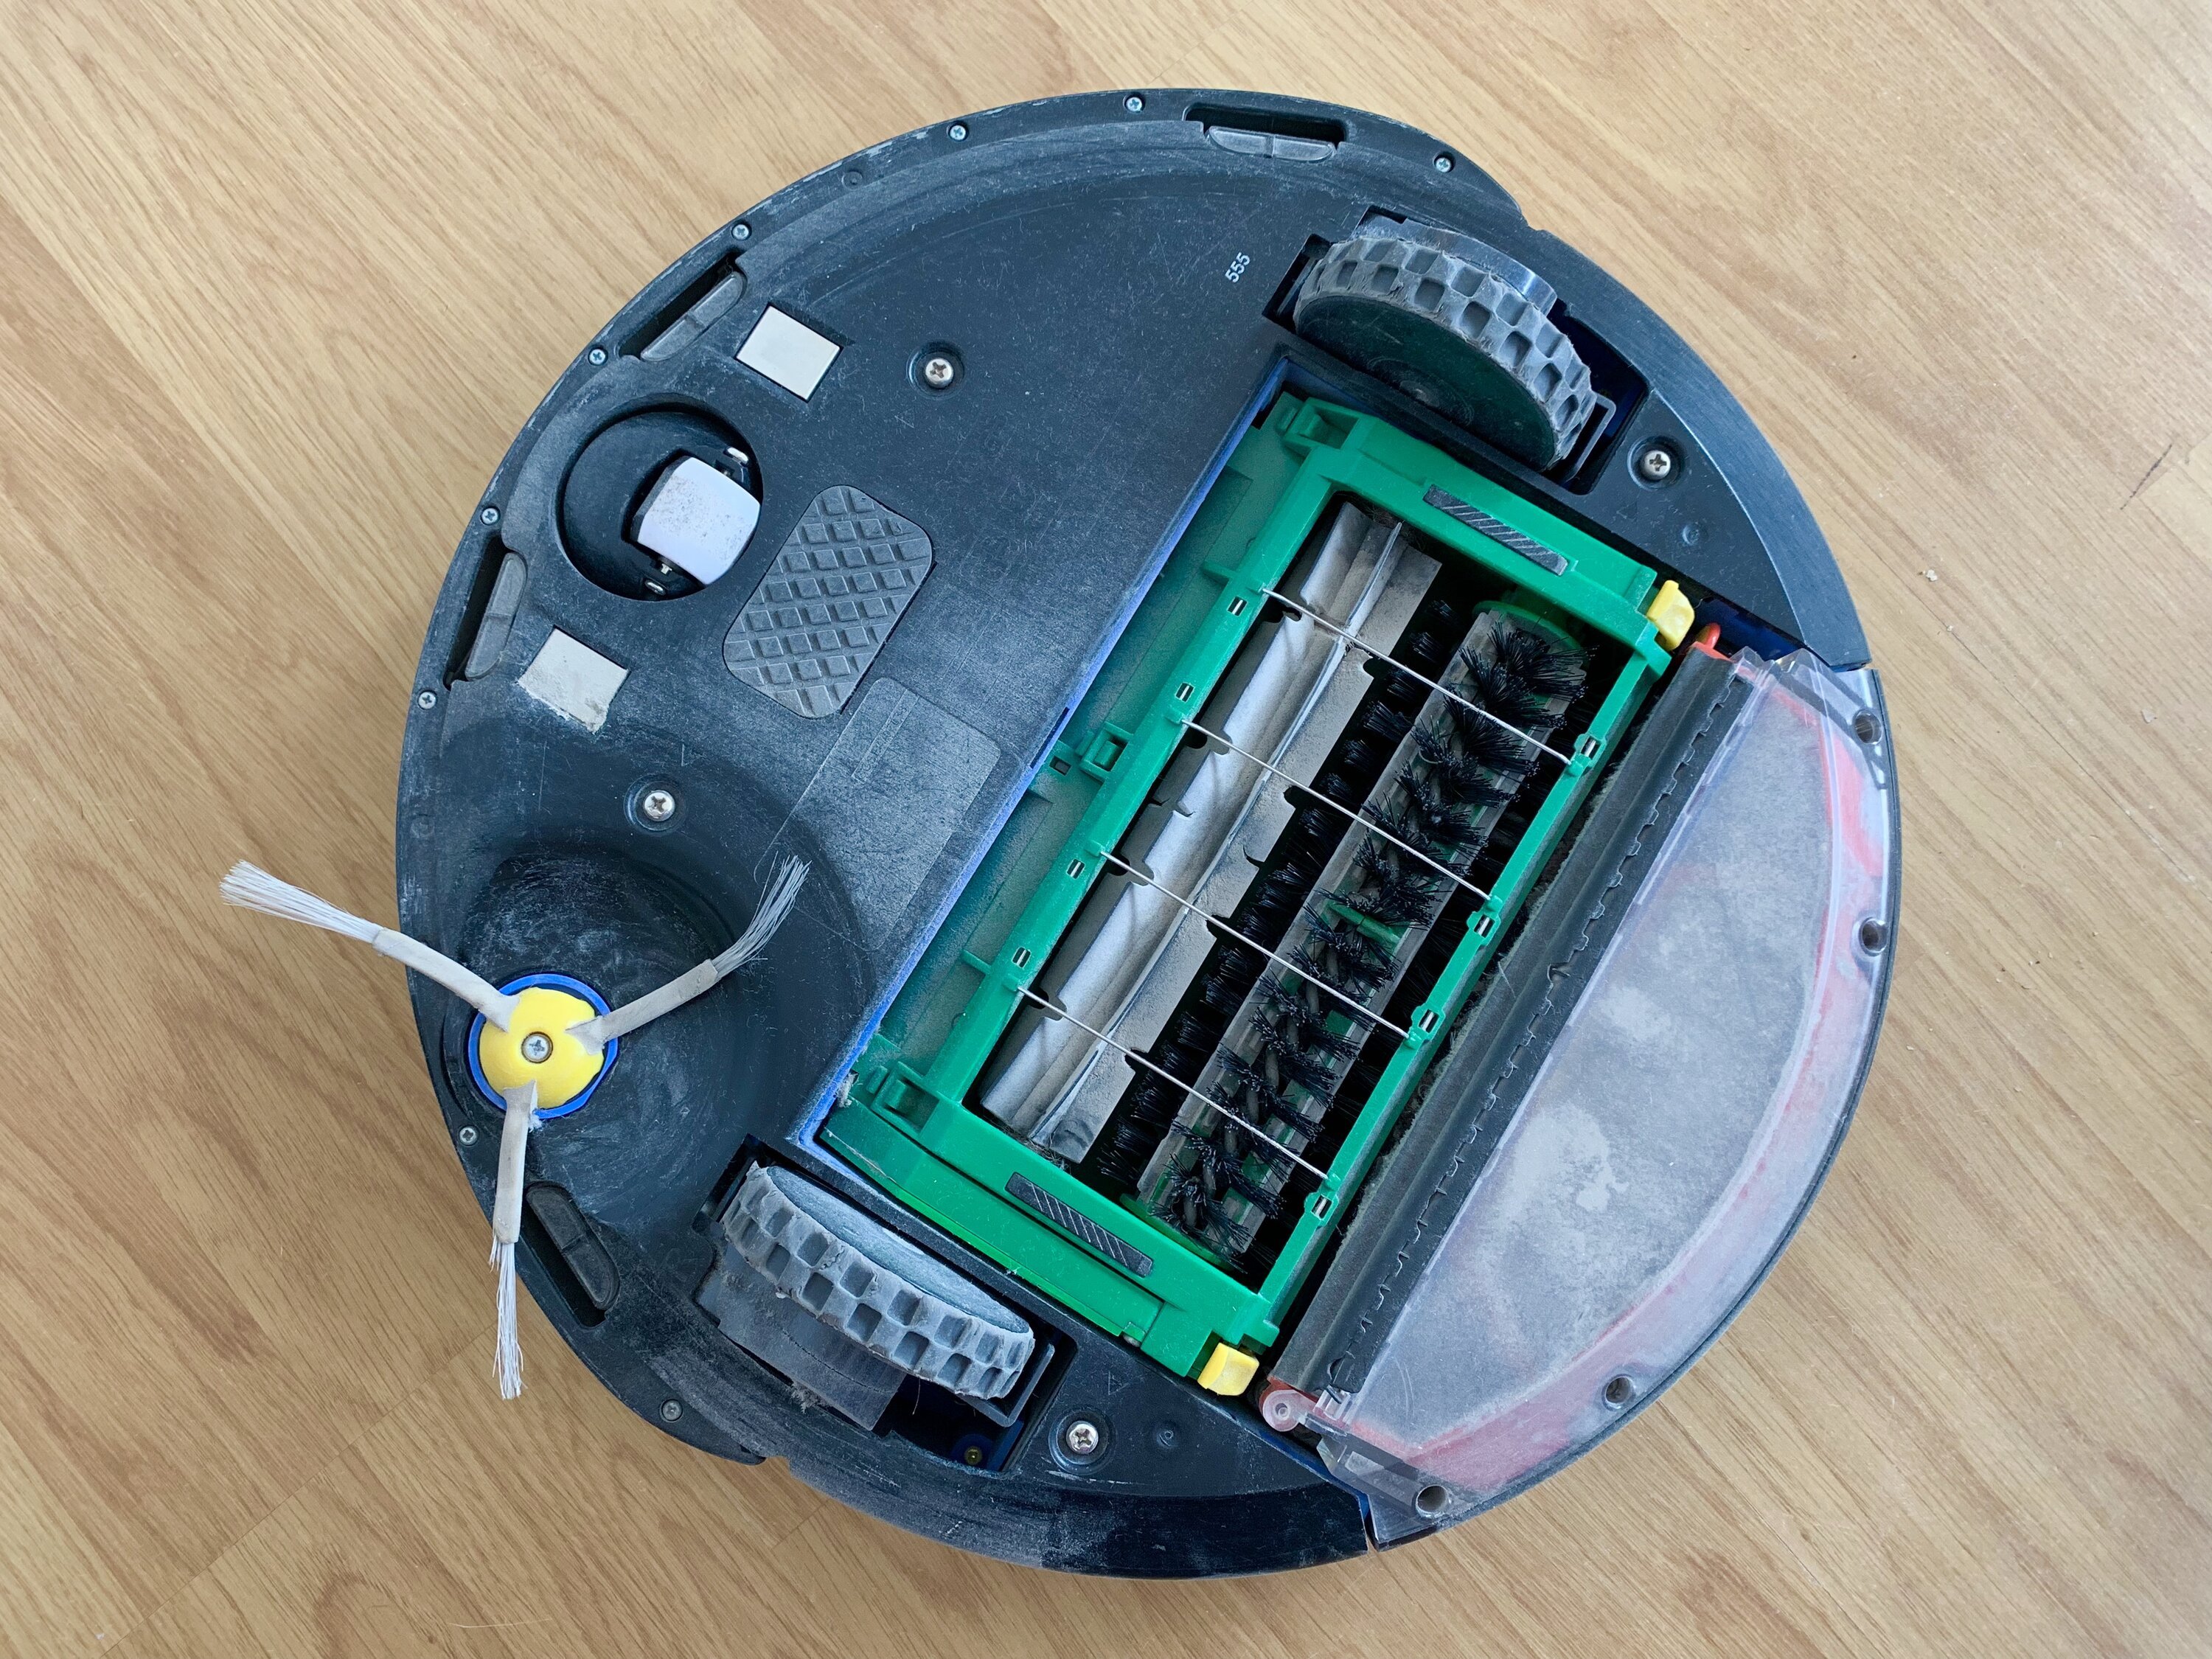
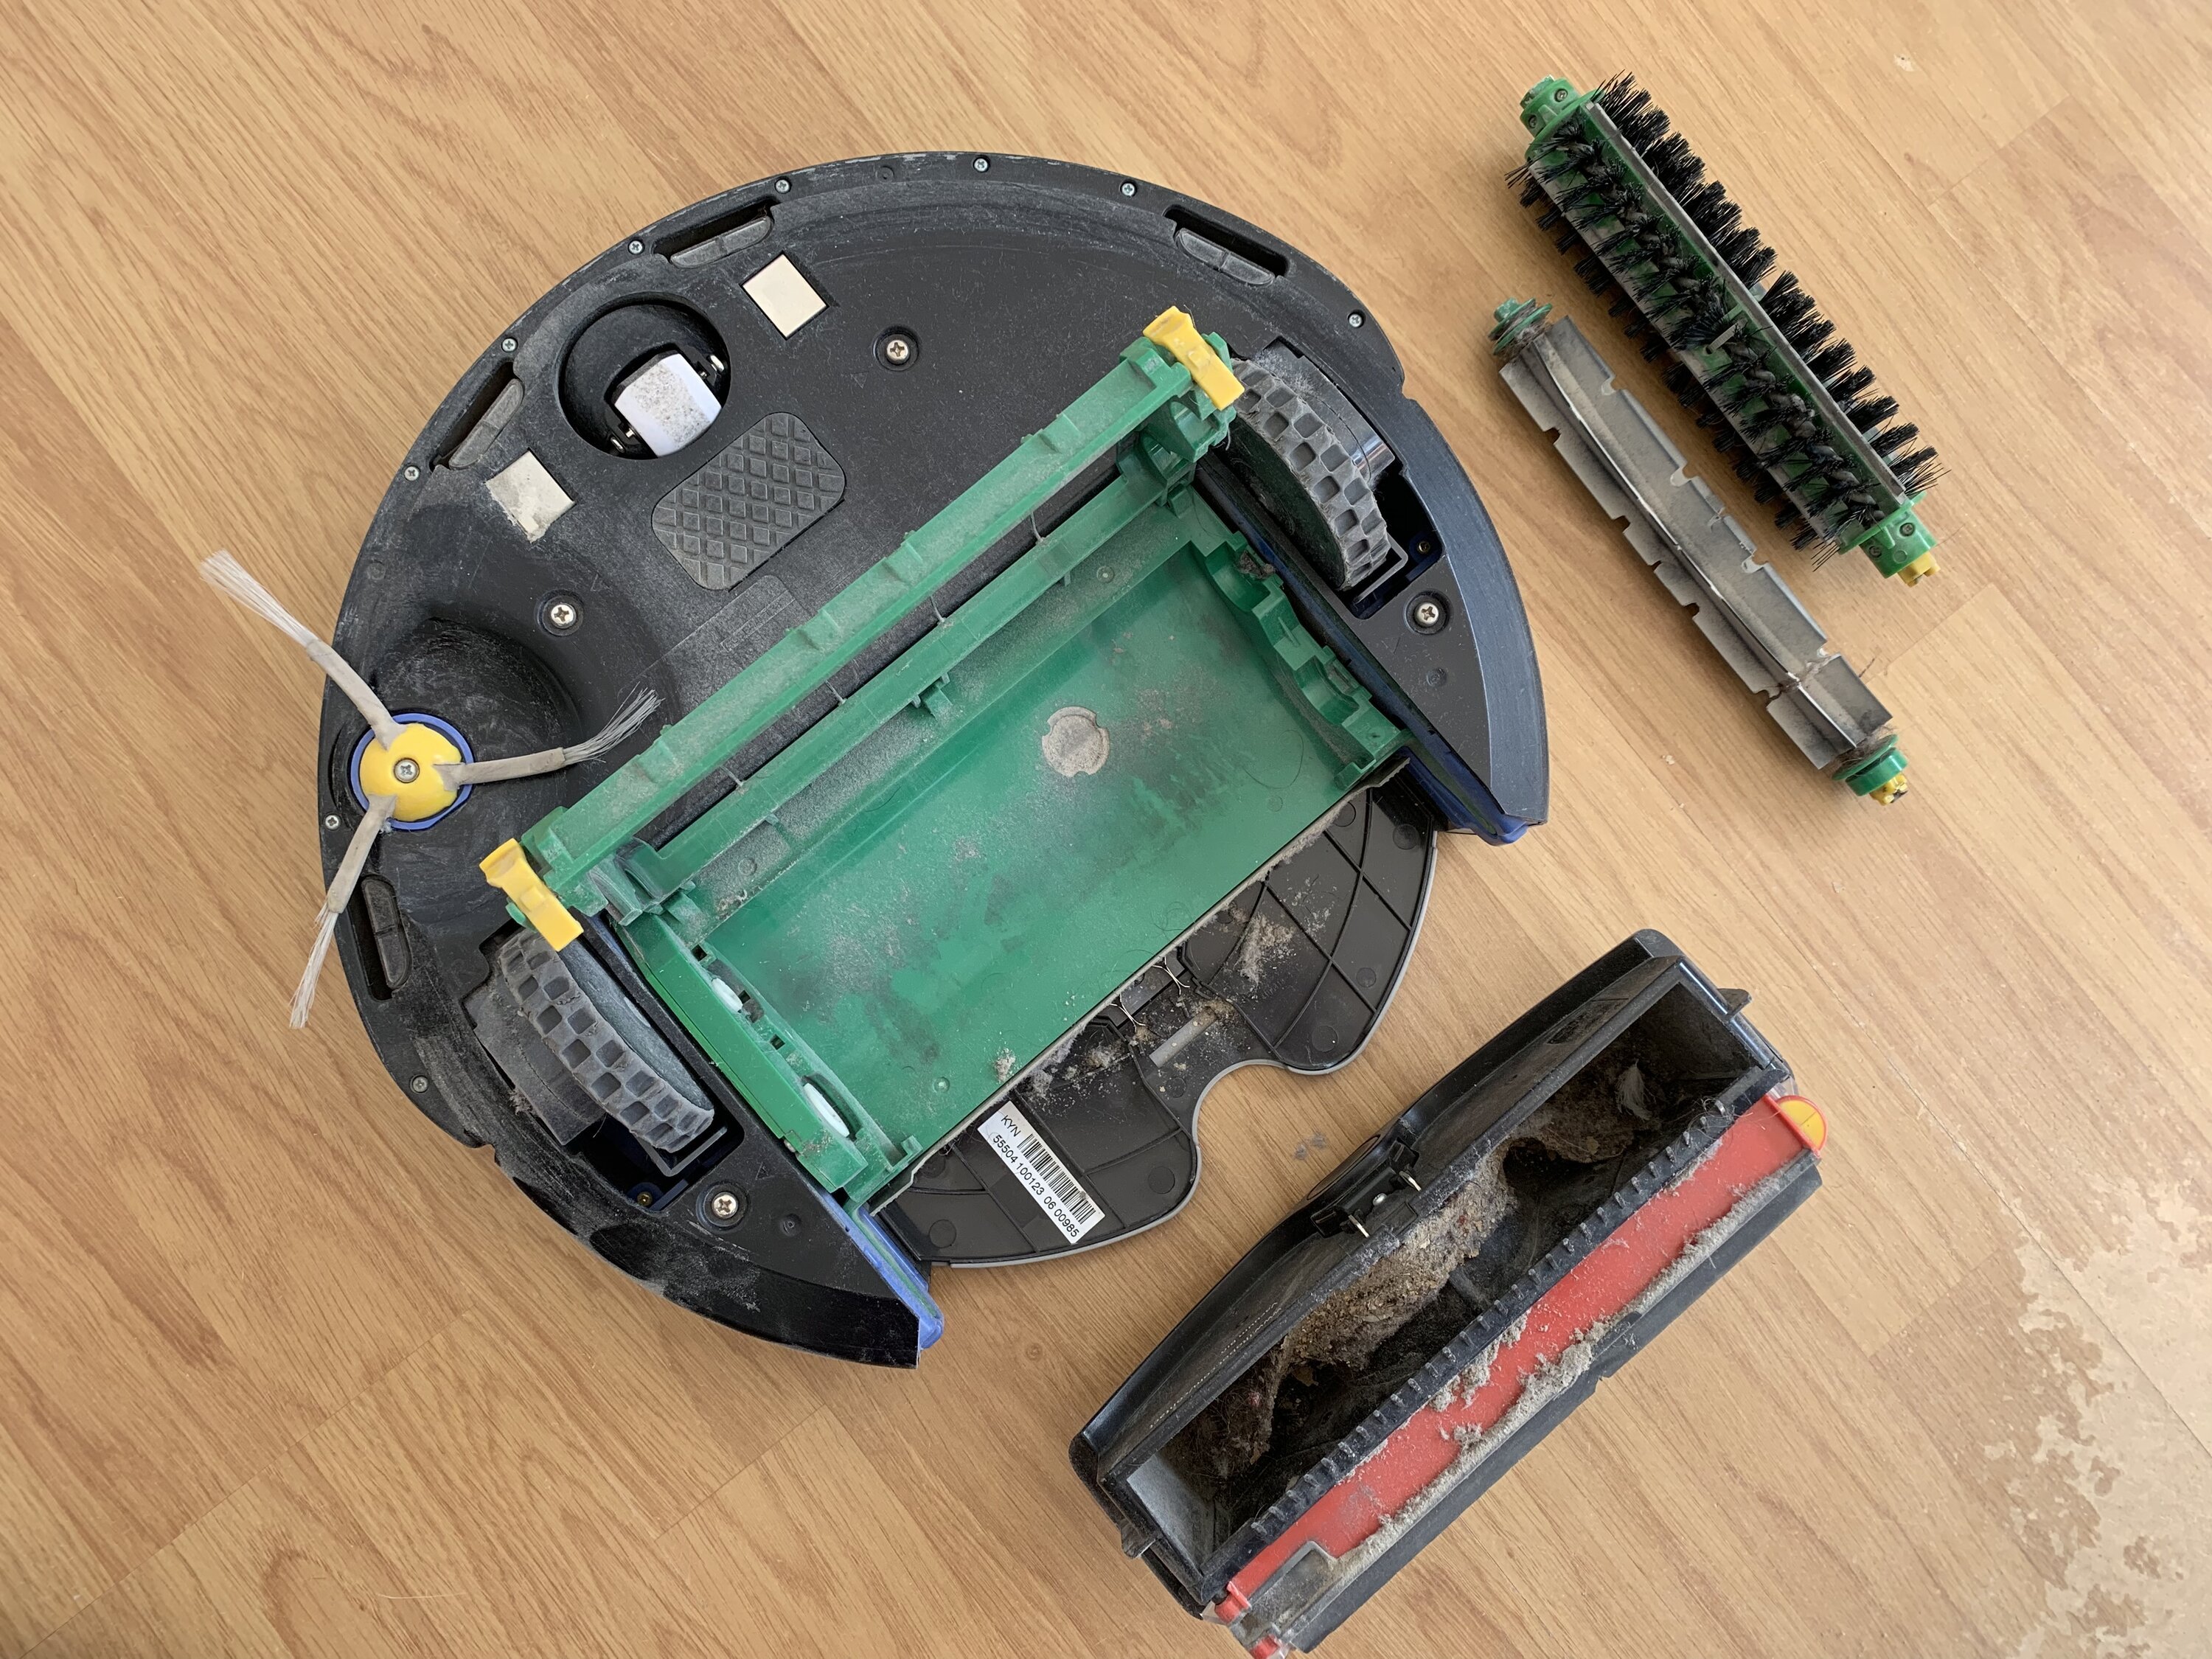
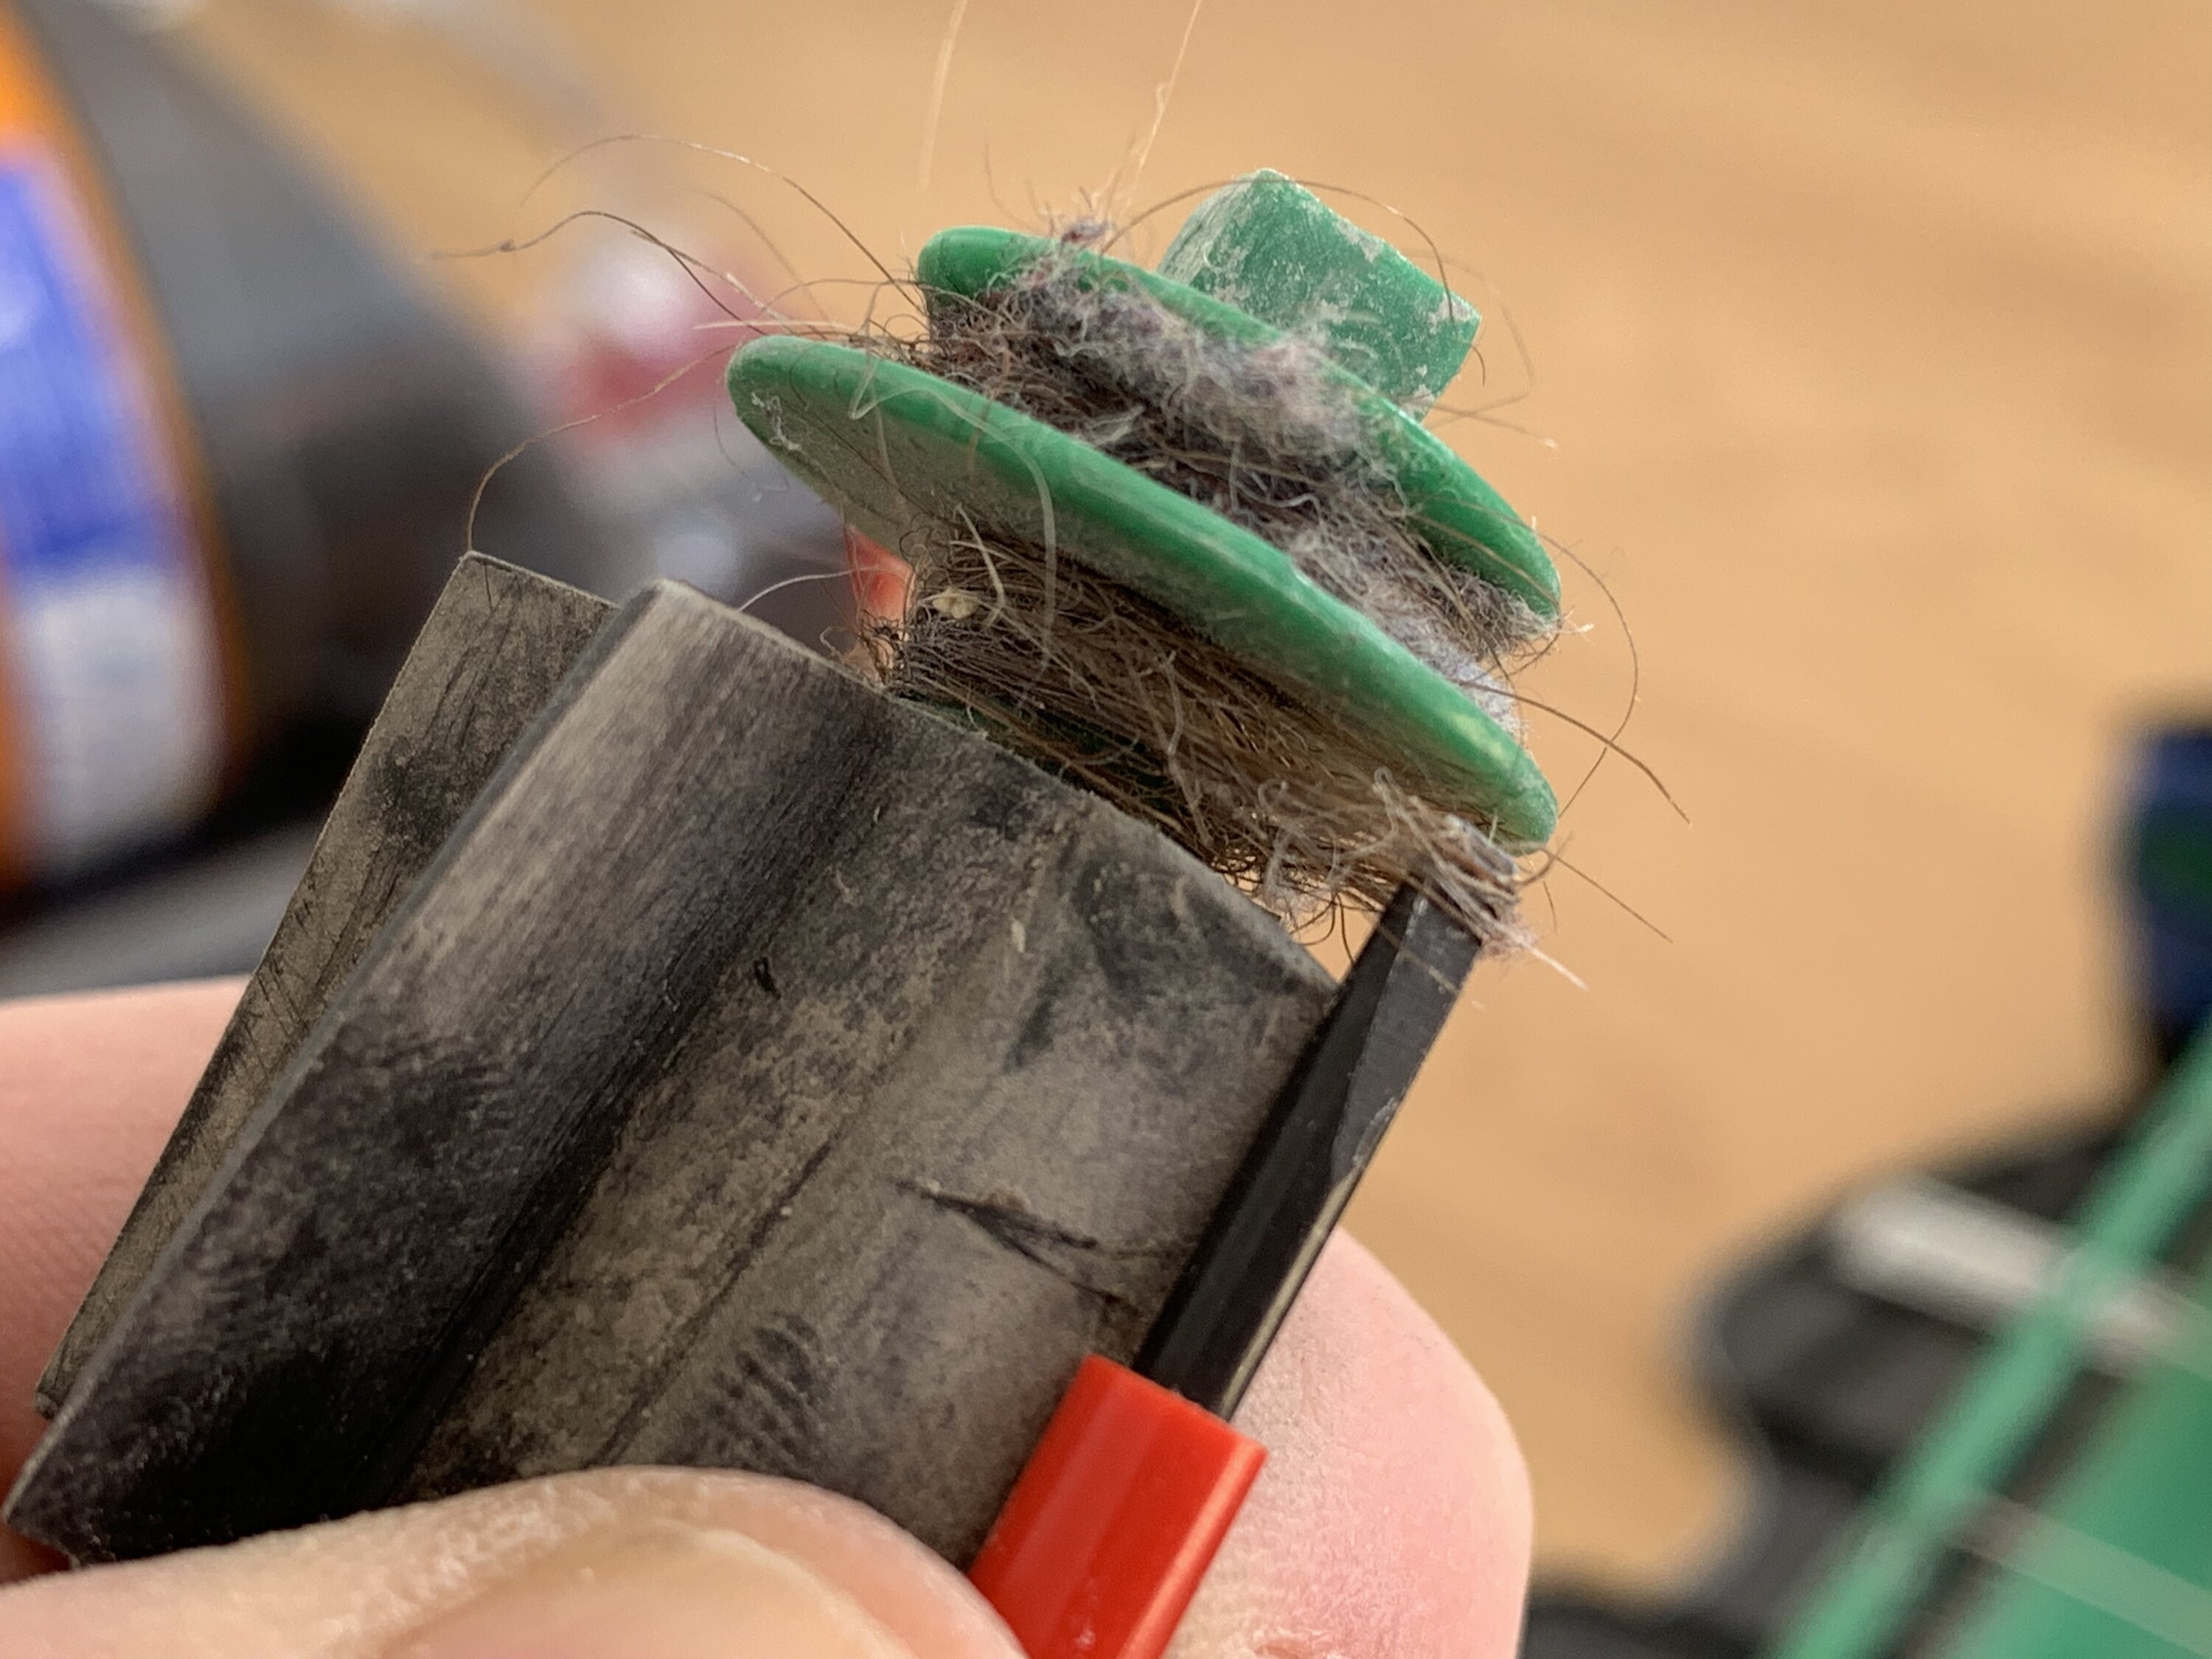
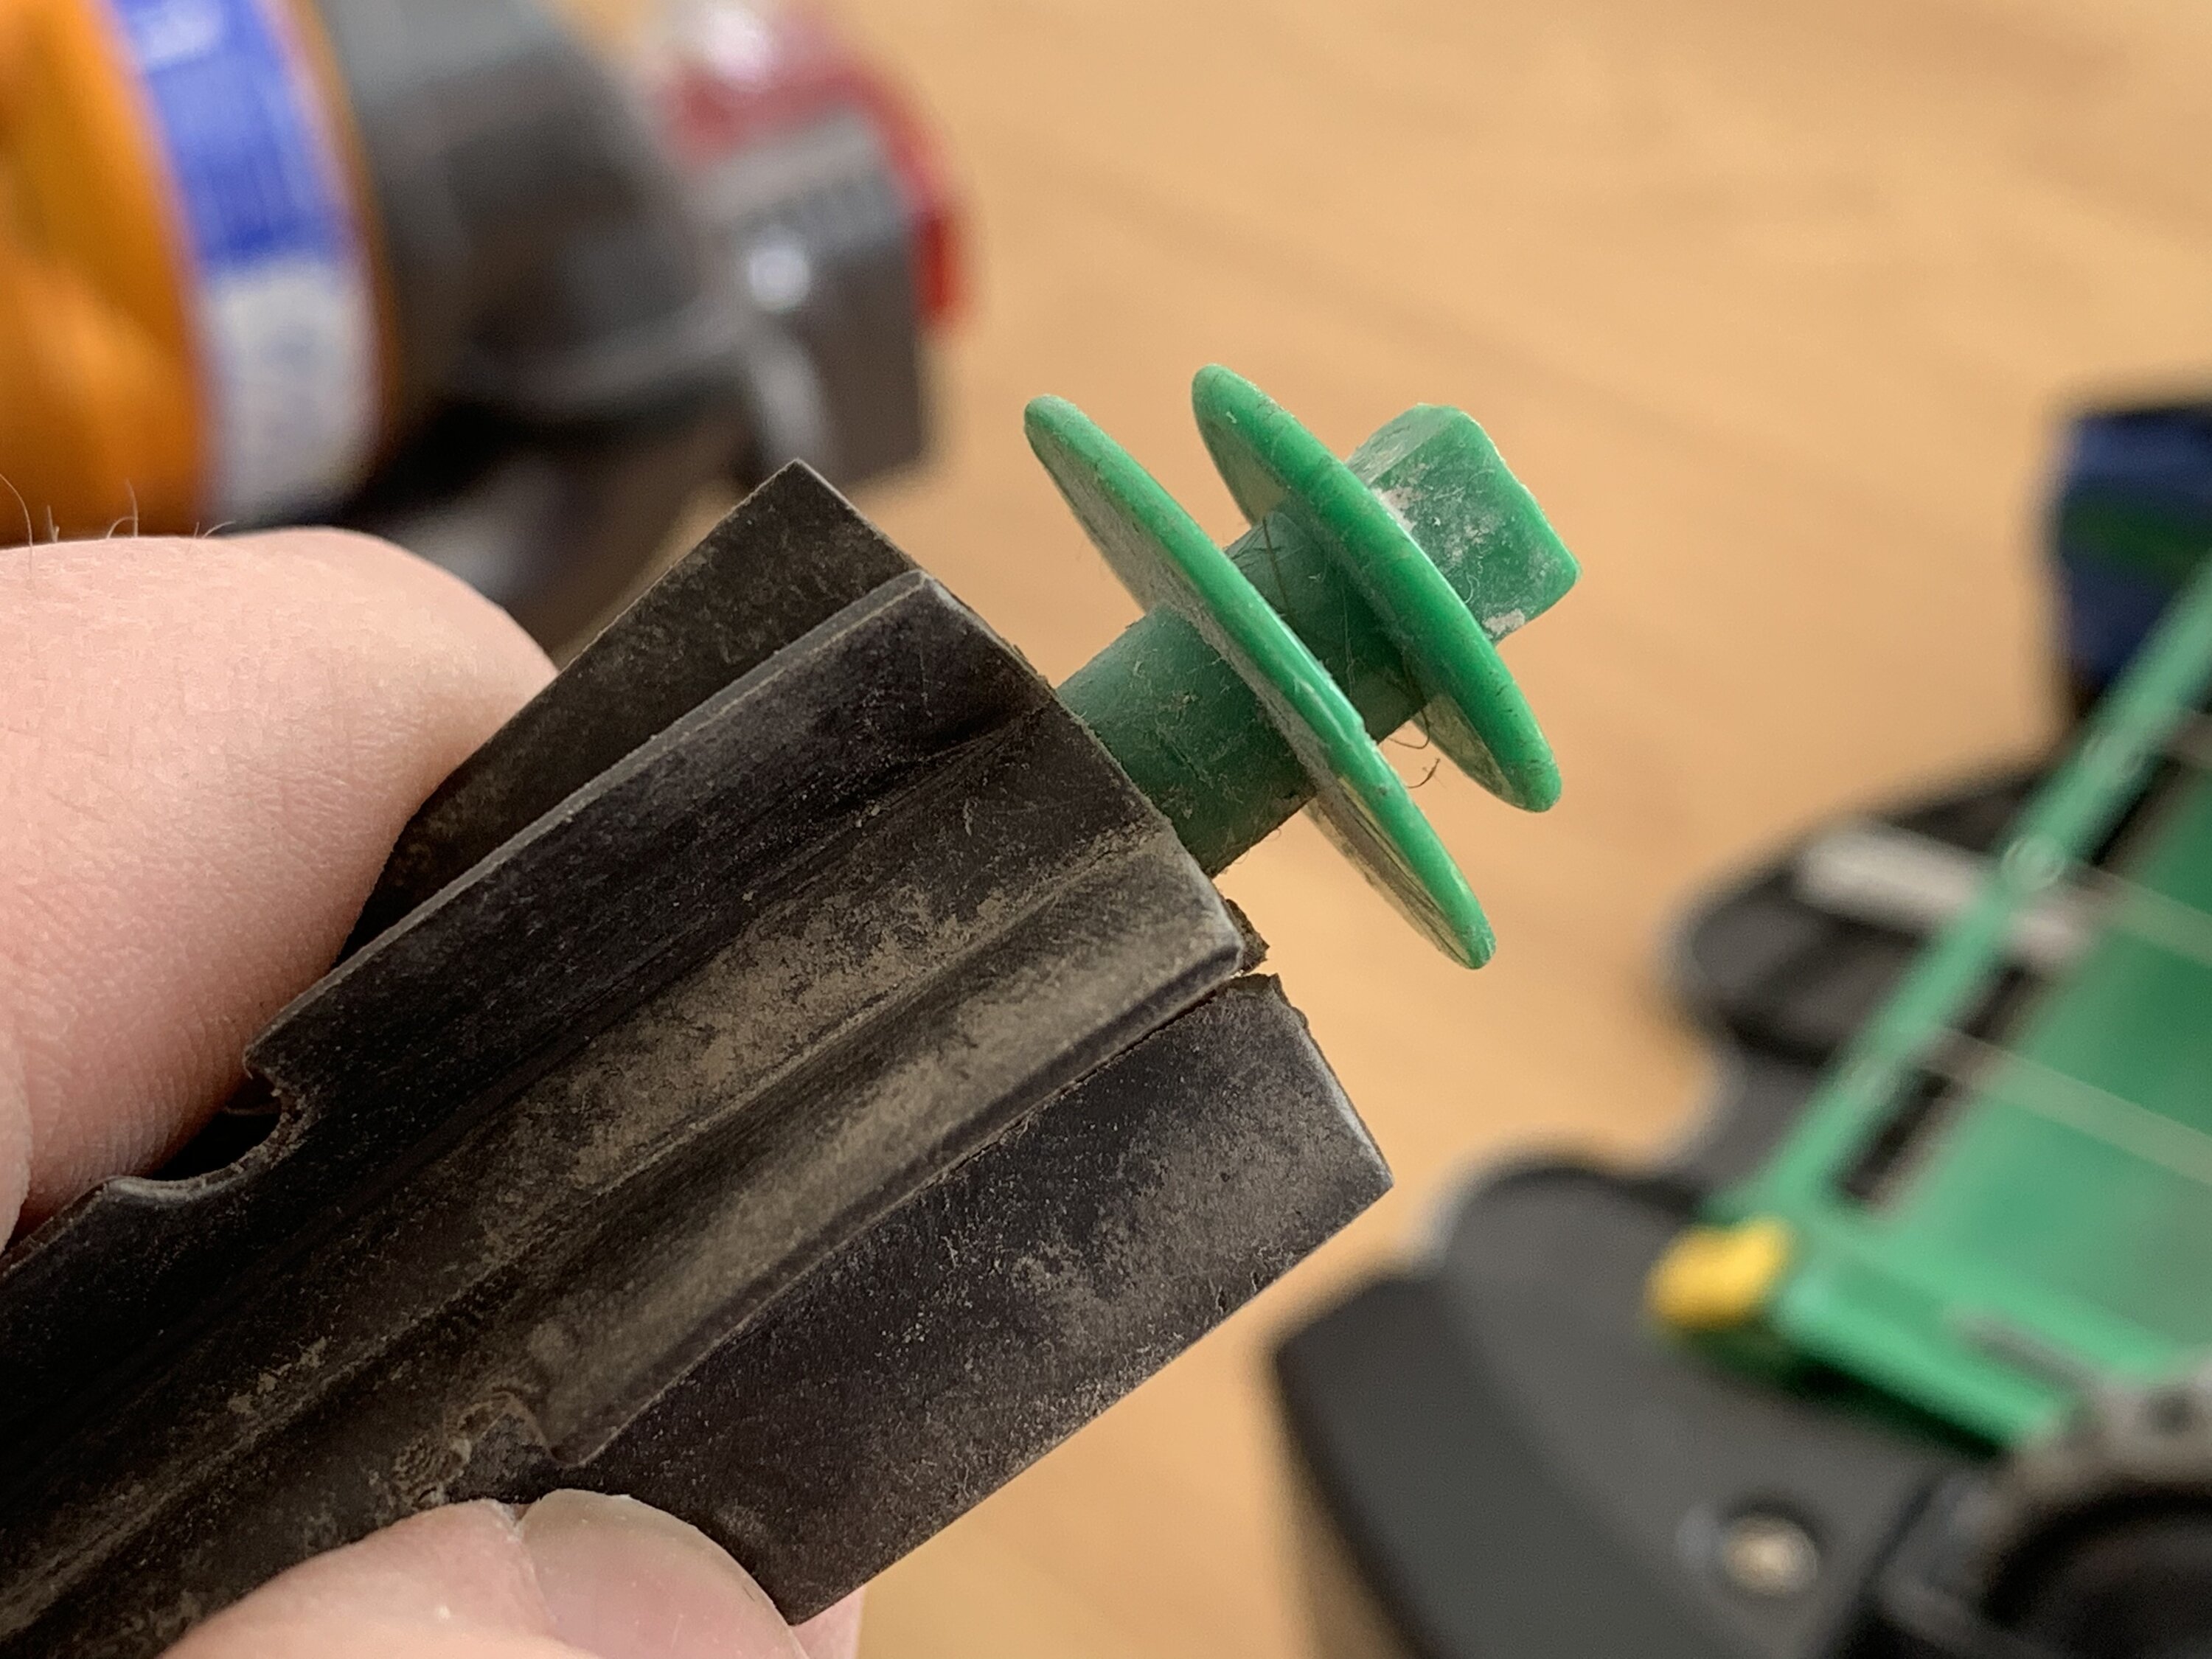
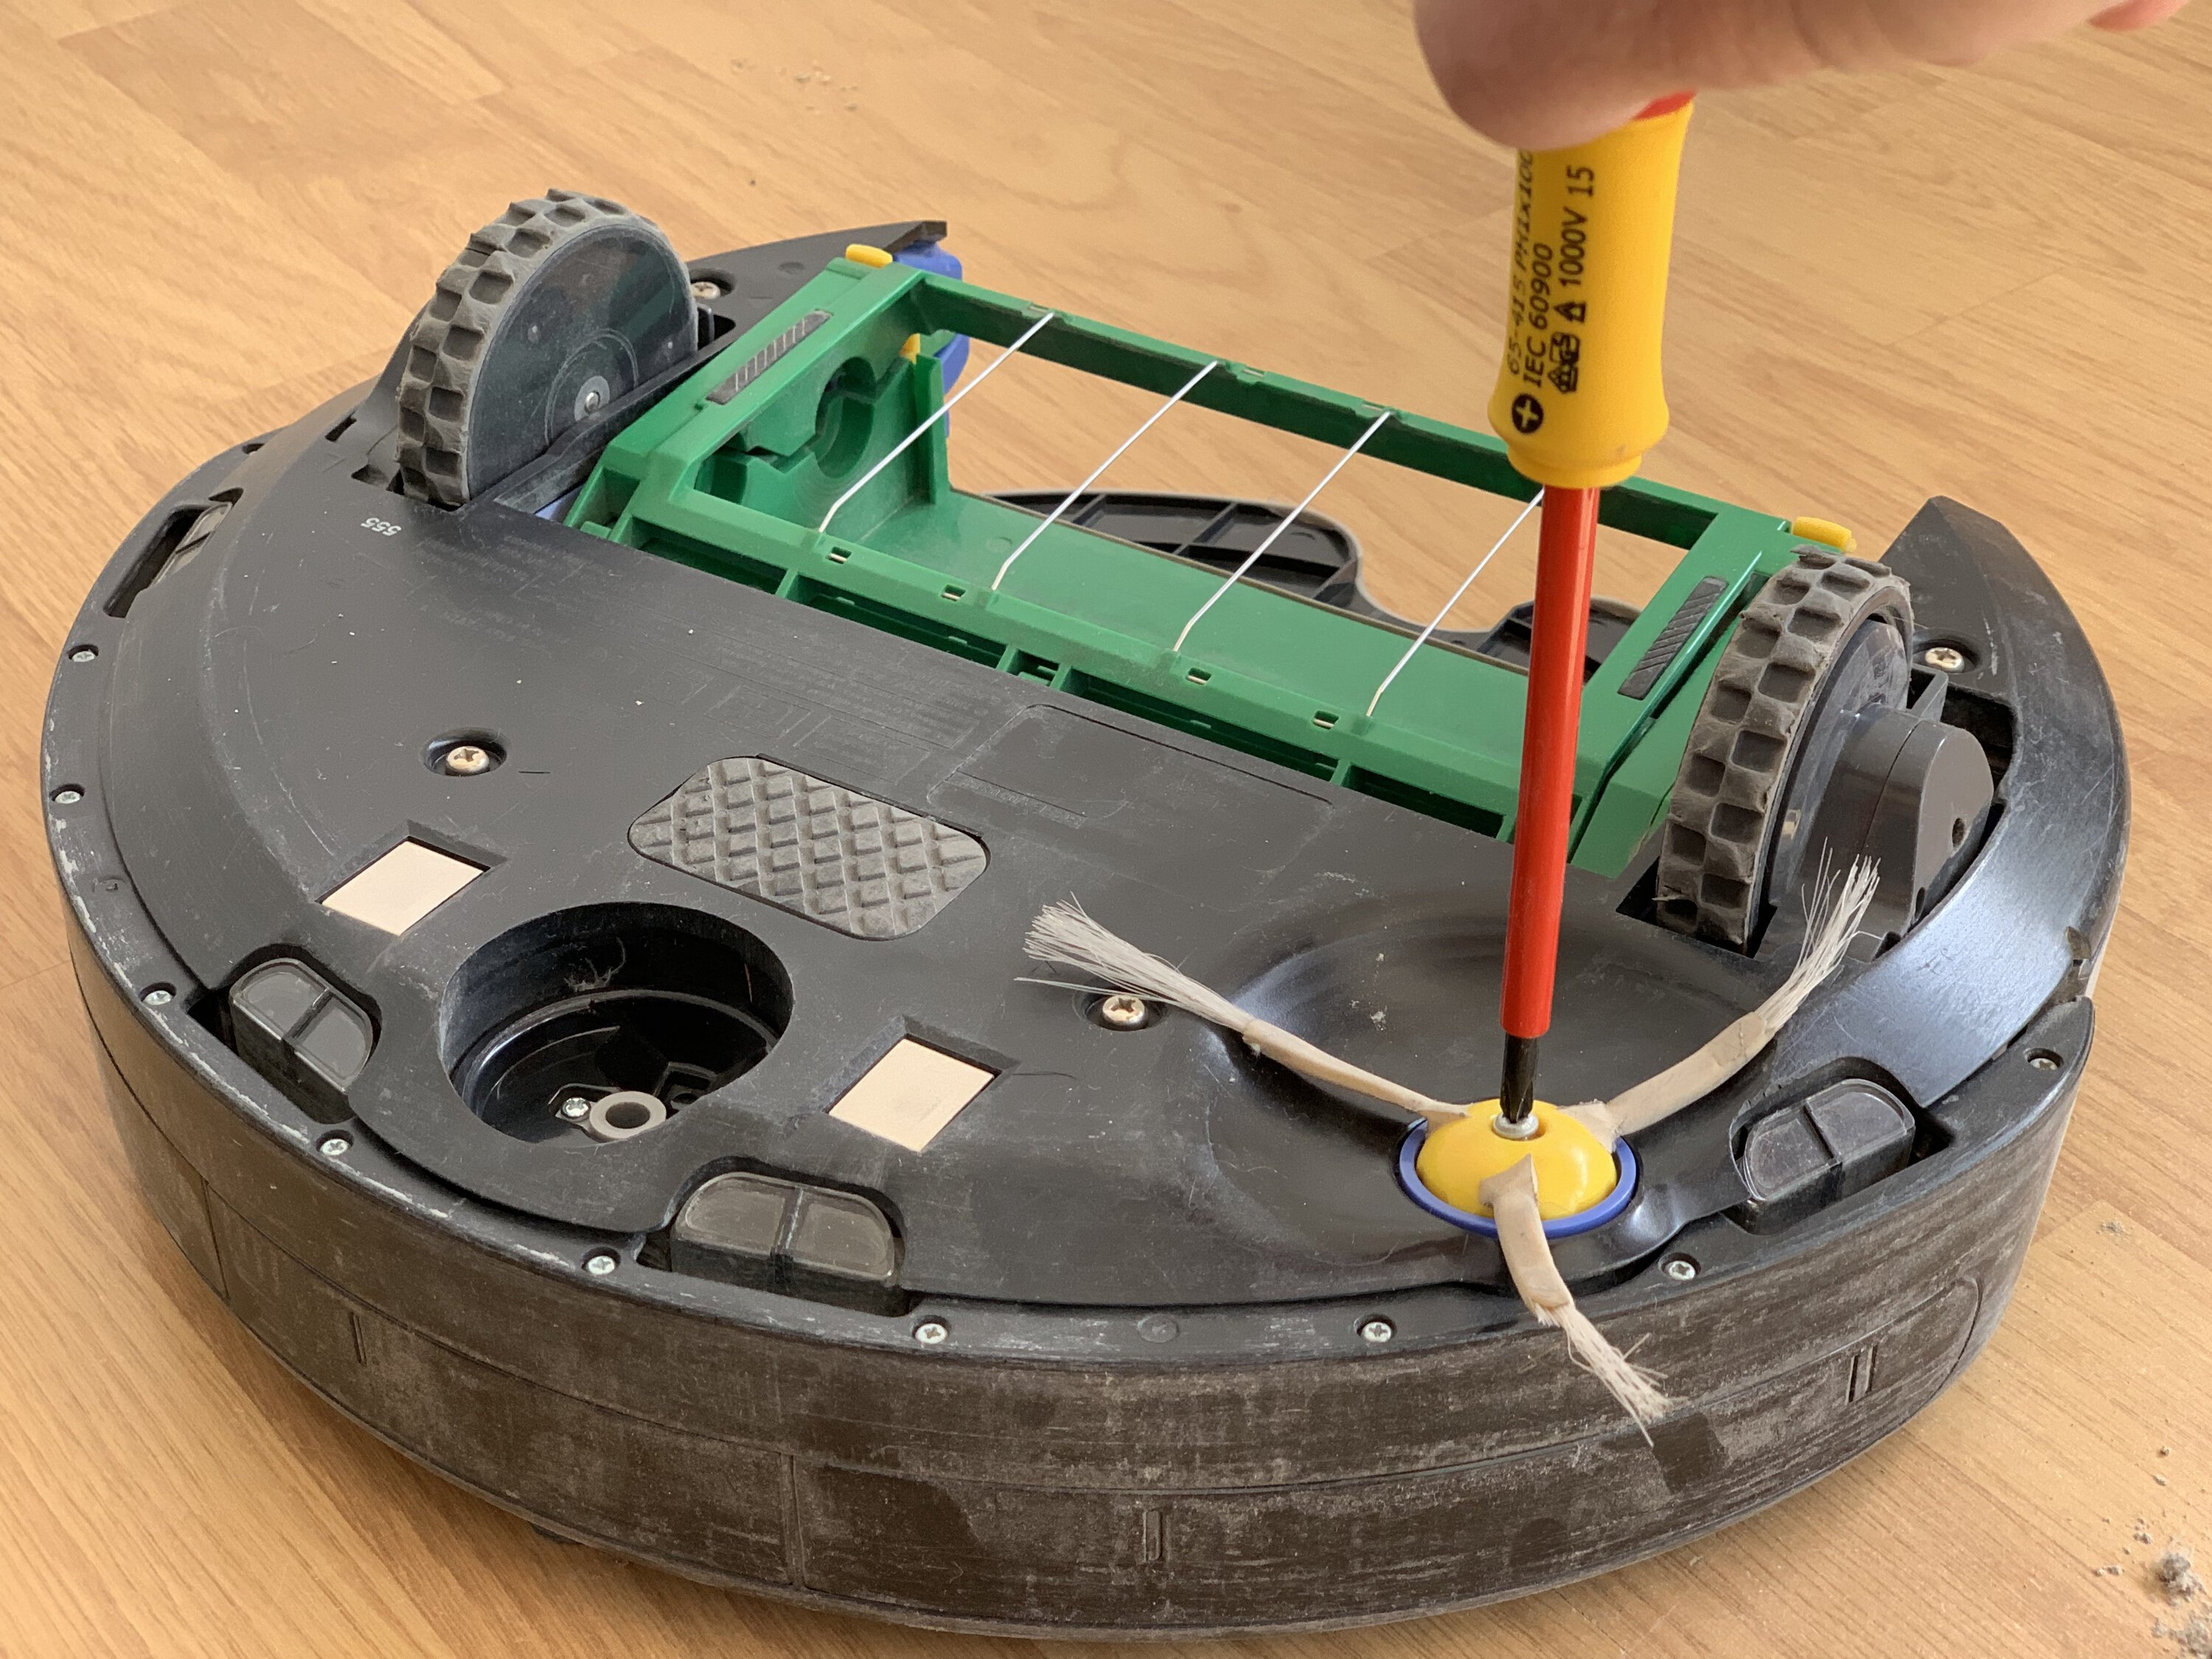
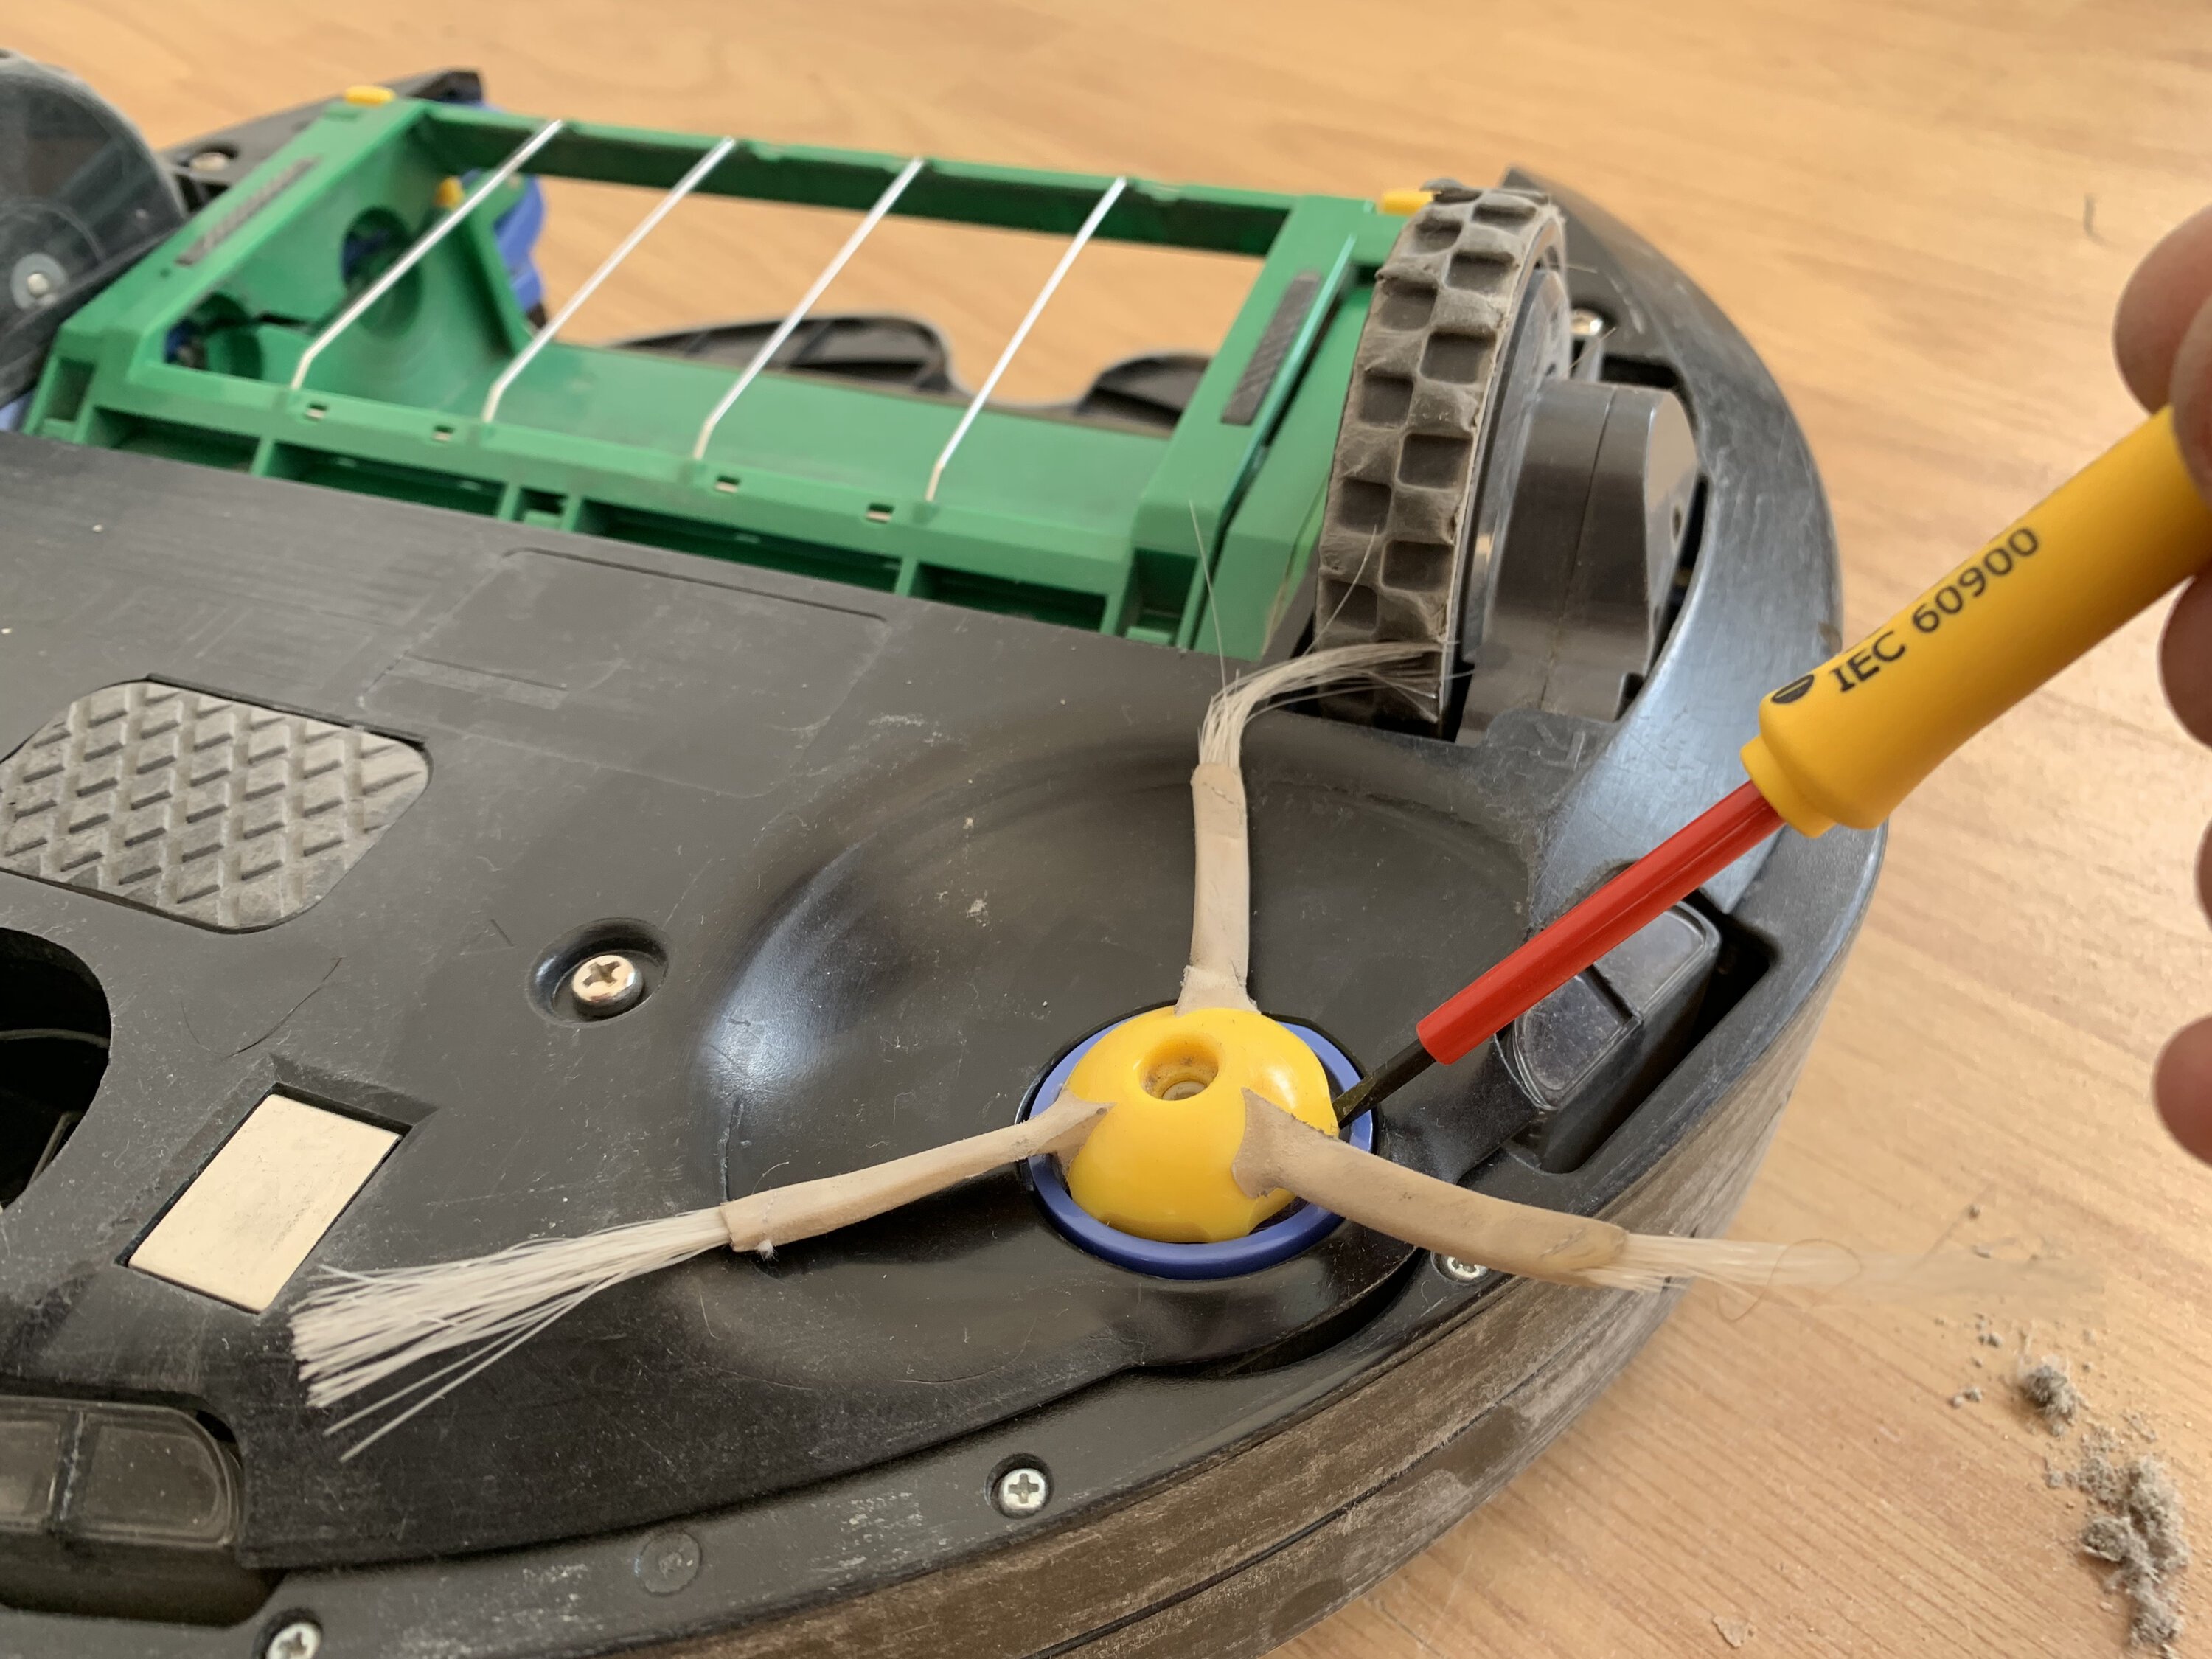
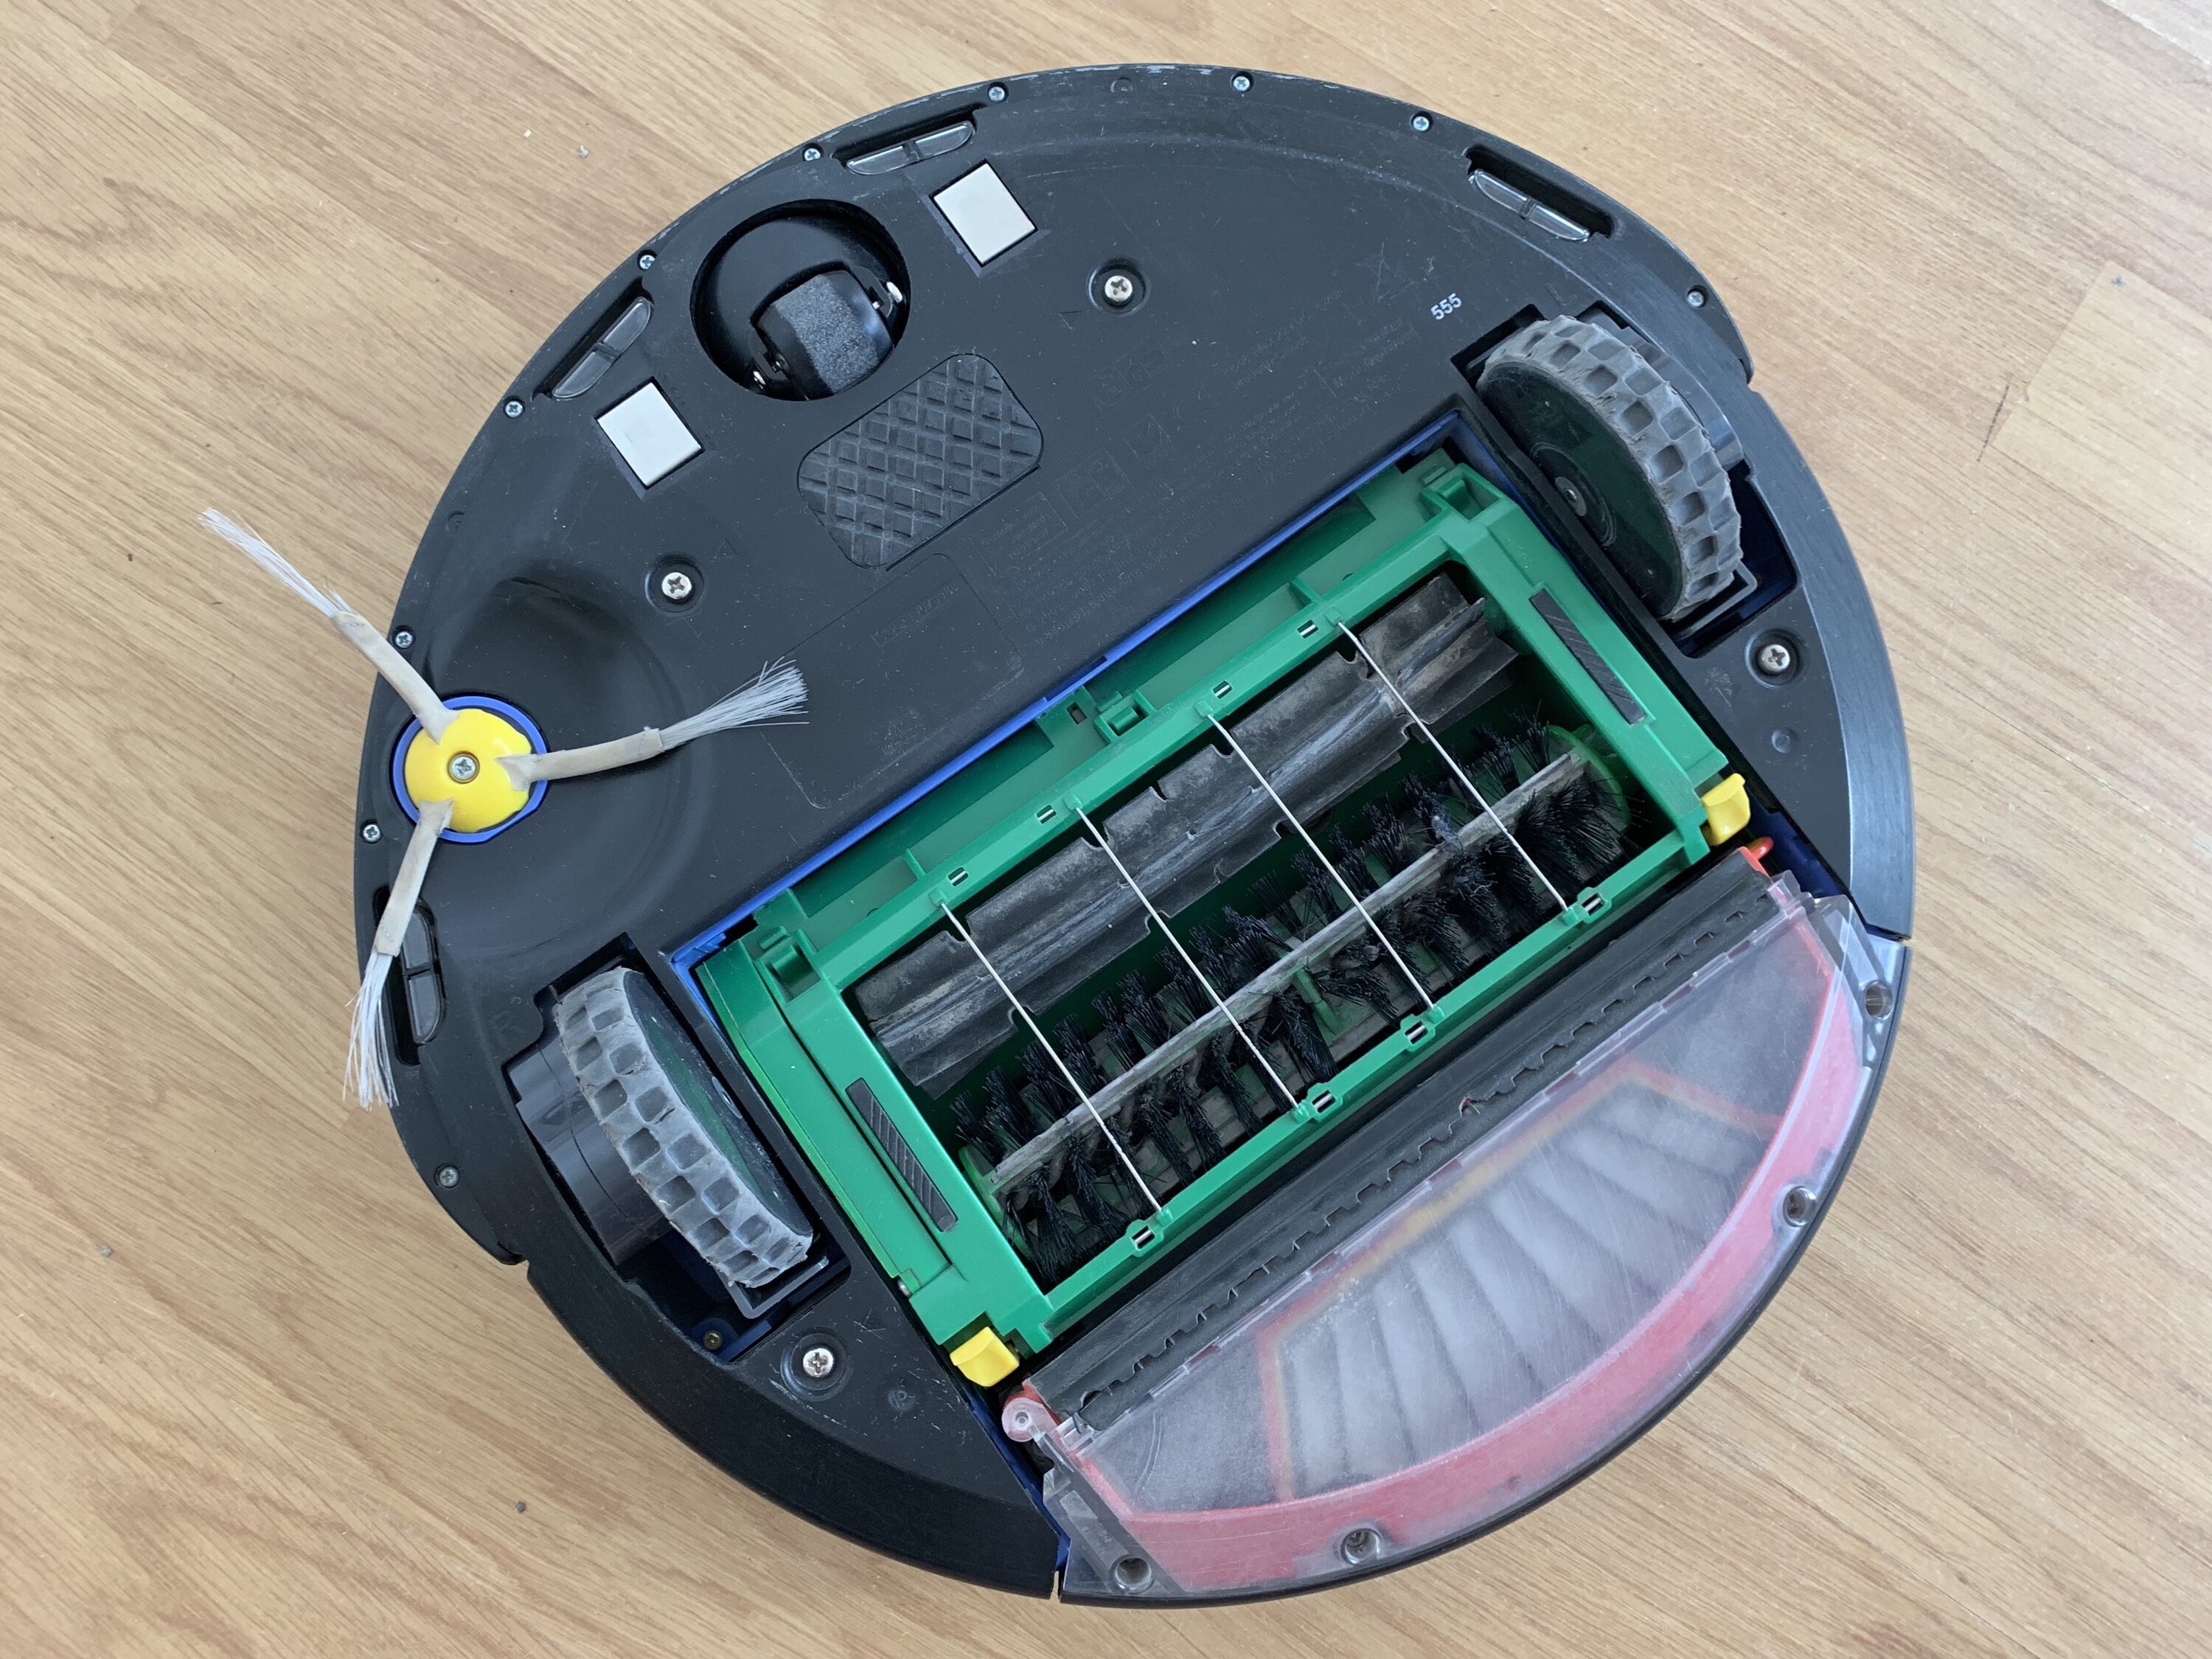
The next step is to remove hairs and dirt from the brushes. Have a close look at both ends of each brush. Remove caps and check underneath them. Use a screw driver (or a small knife) to cut hairs loose.
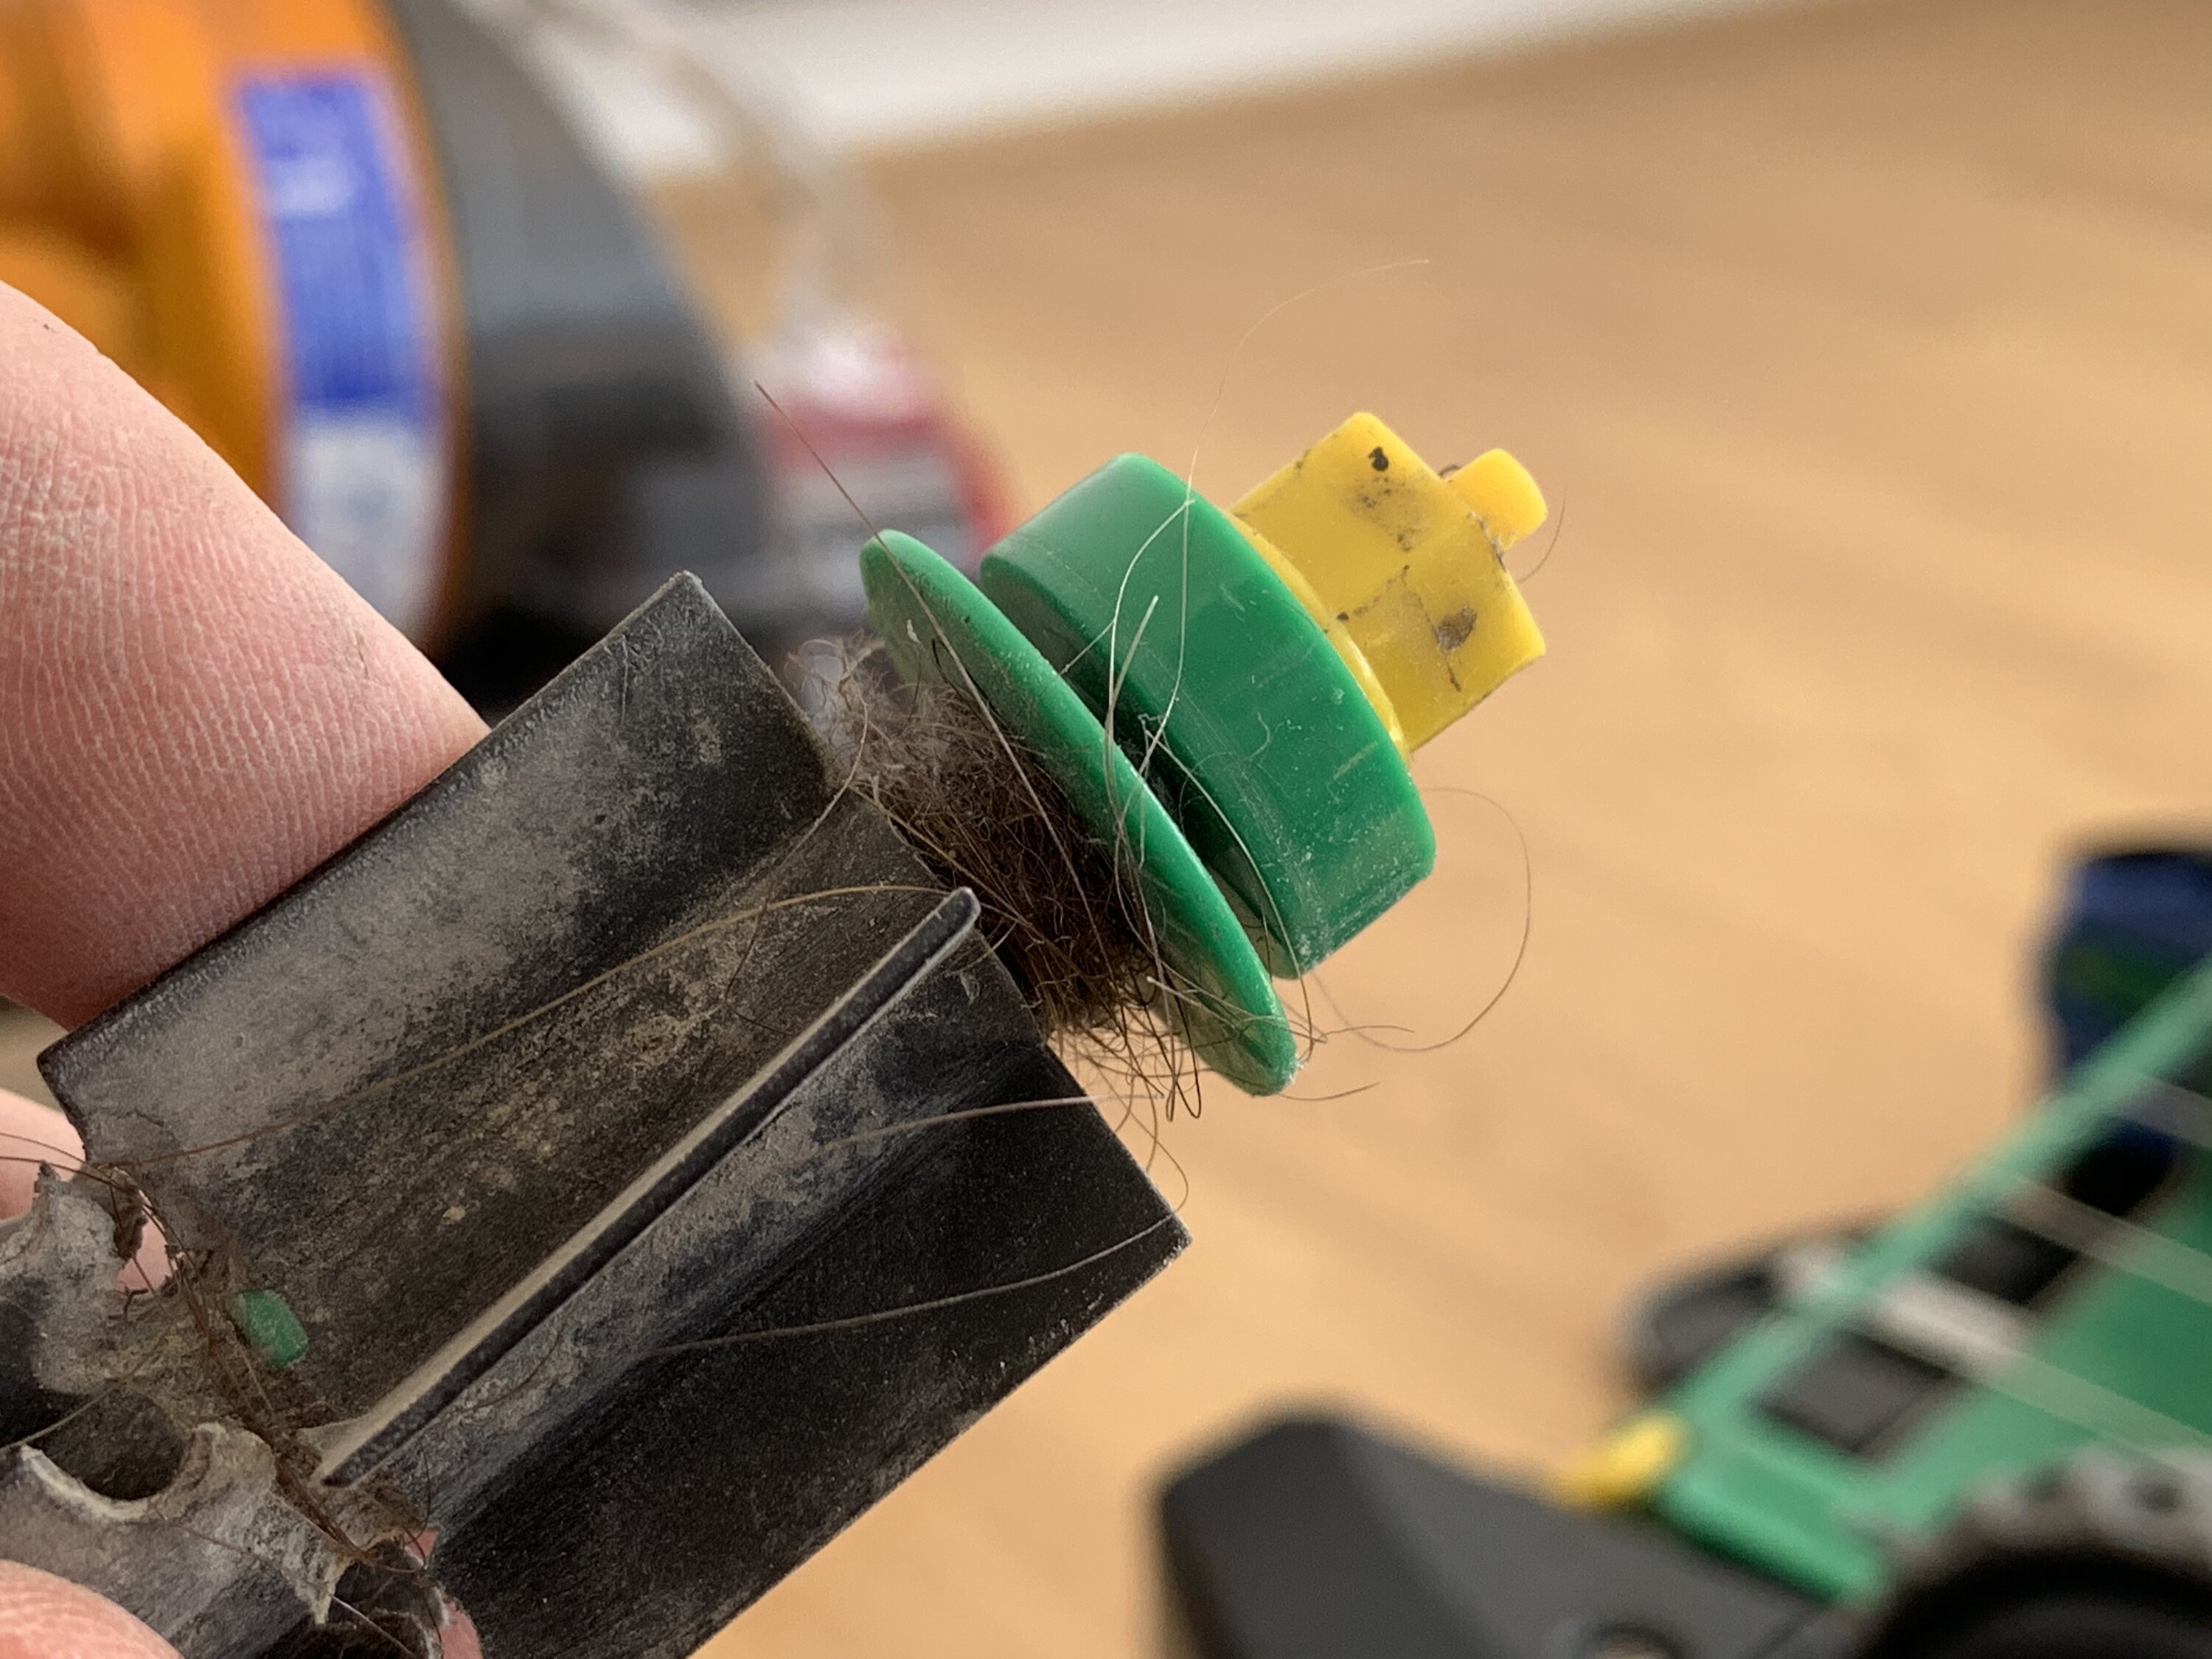
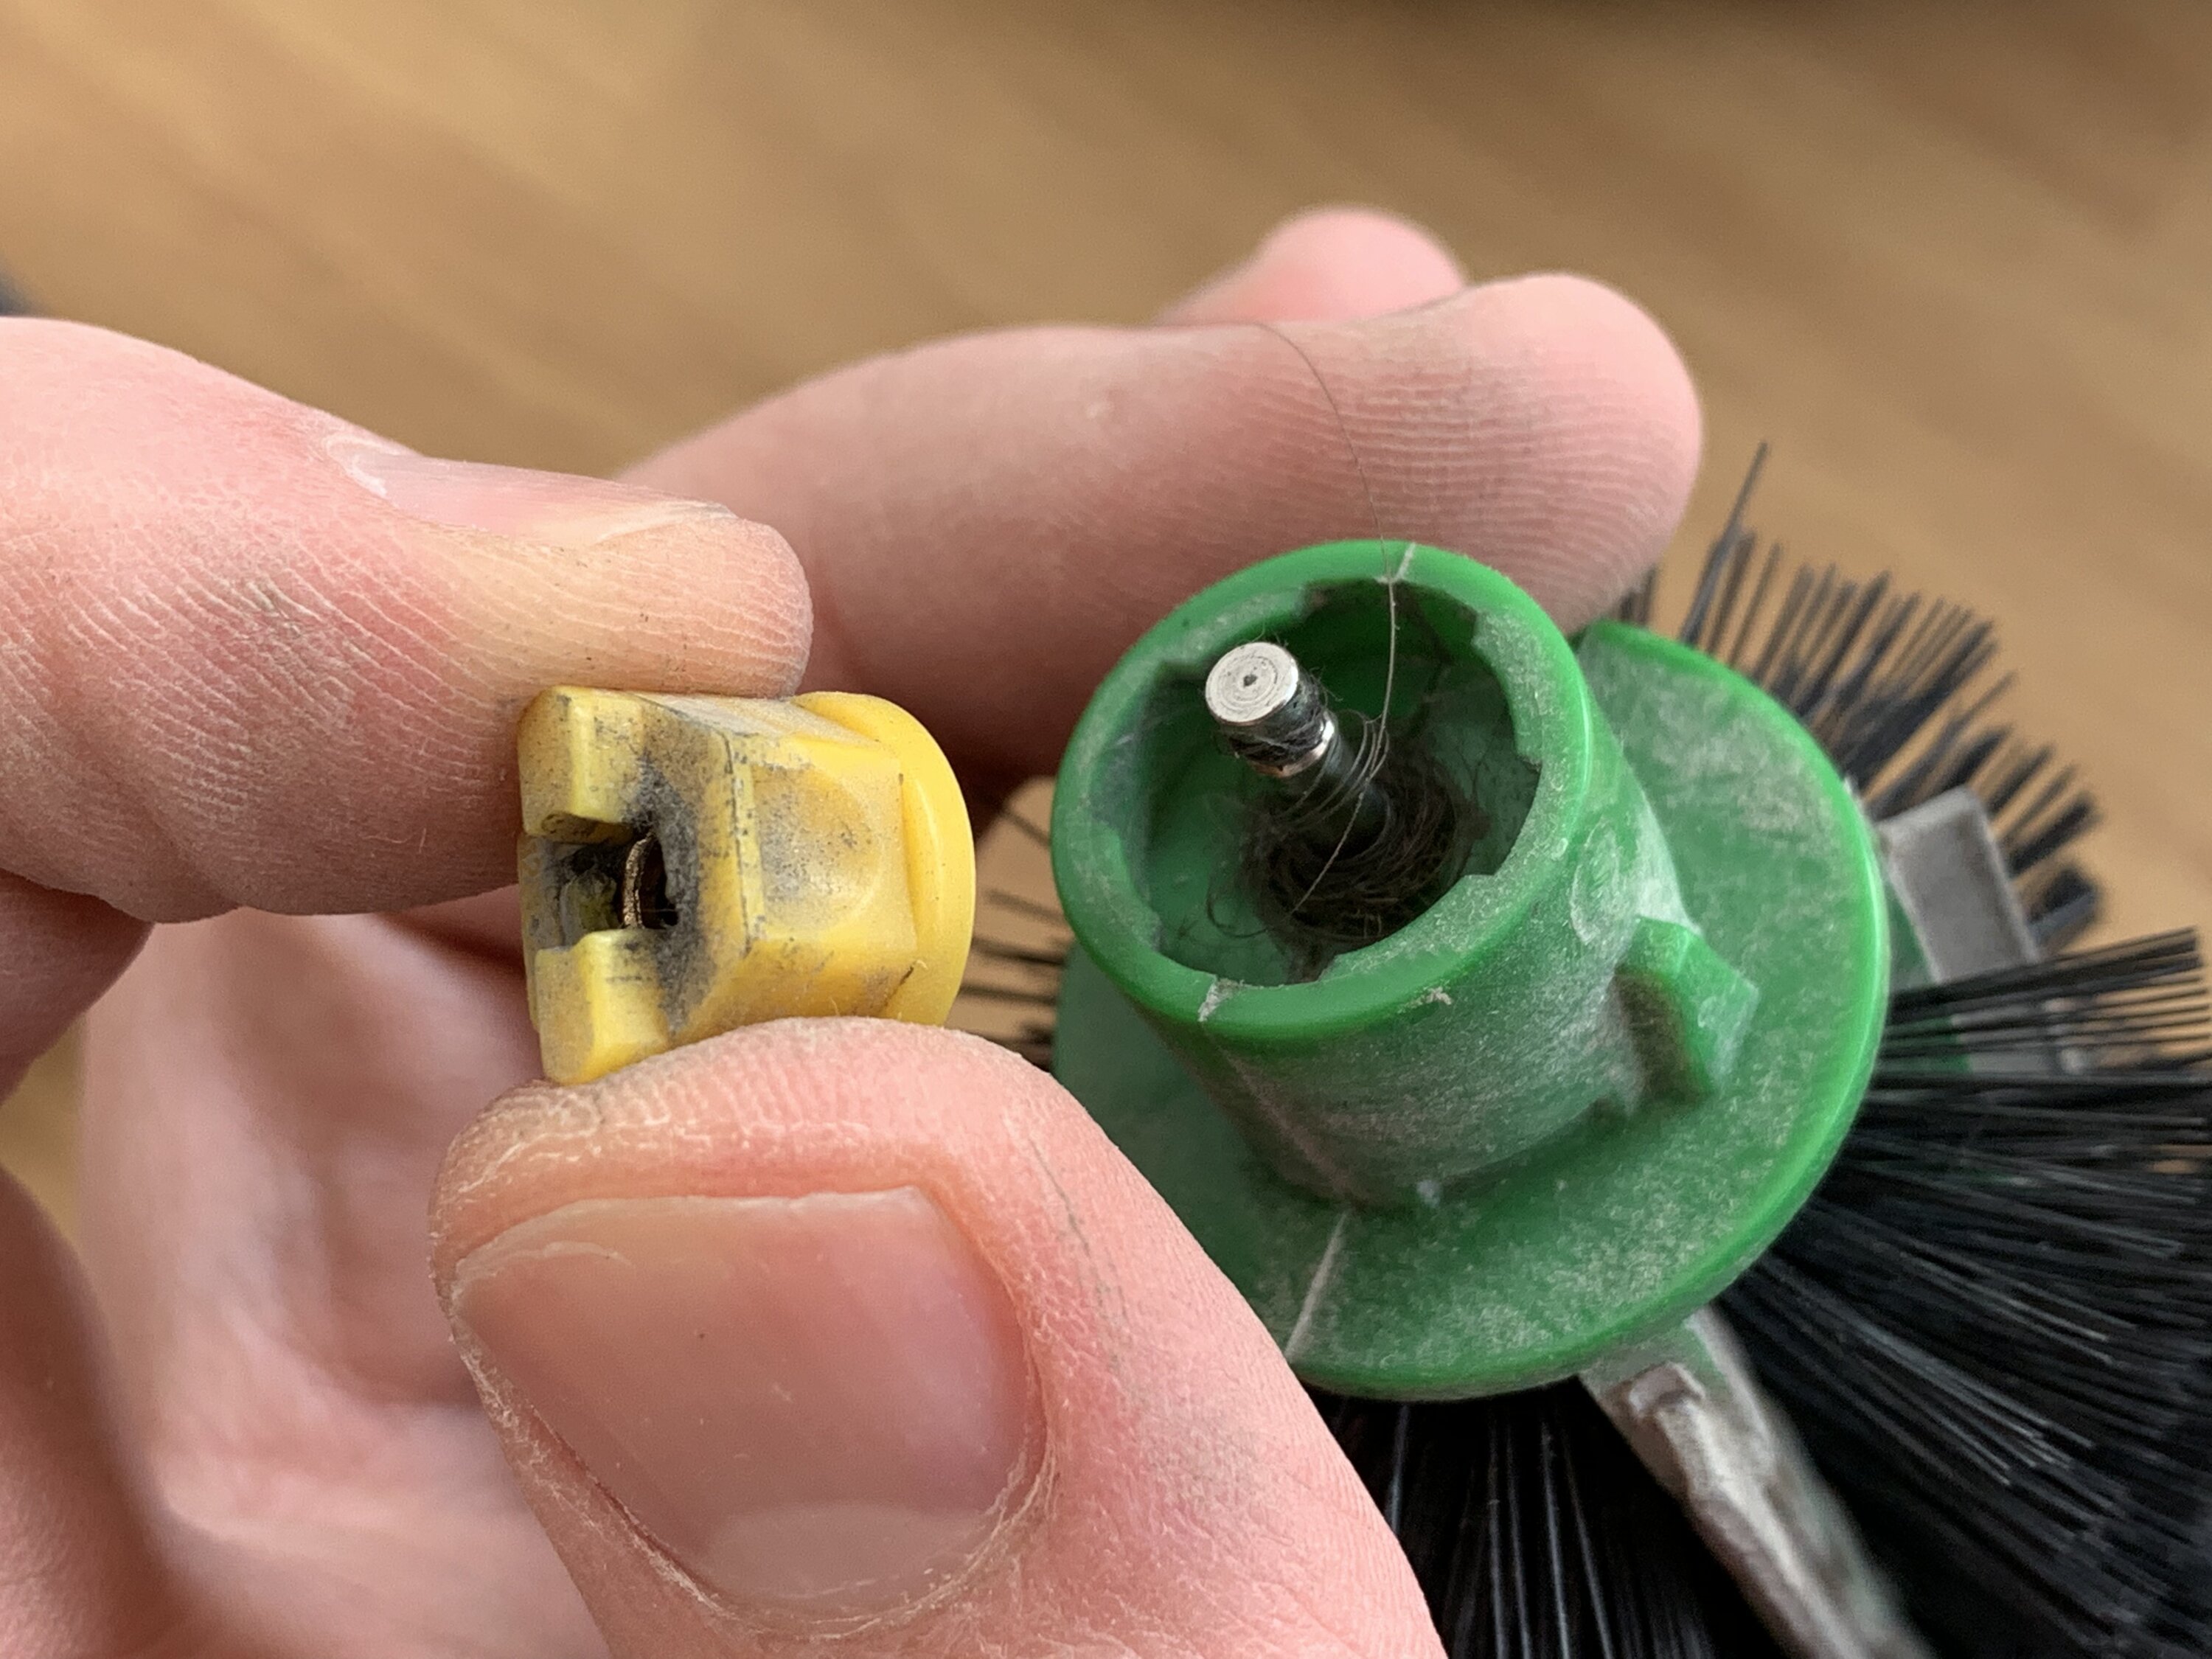
The other spinning brush requires loosening a screw to be removed. Use the small screw driver to wiggle it loose from its center axle. You'll be surprised how much dirt can hide underneath it...

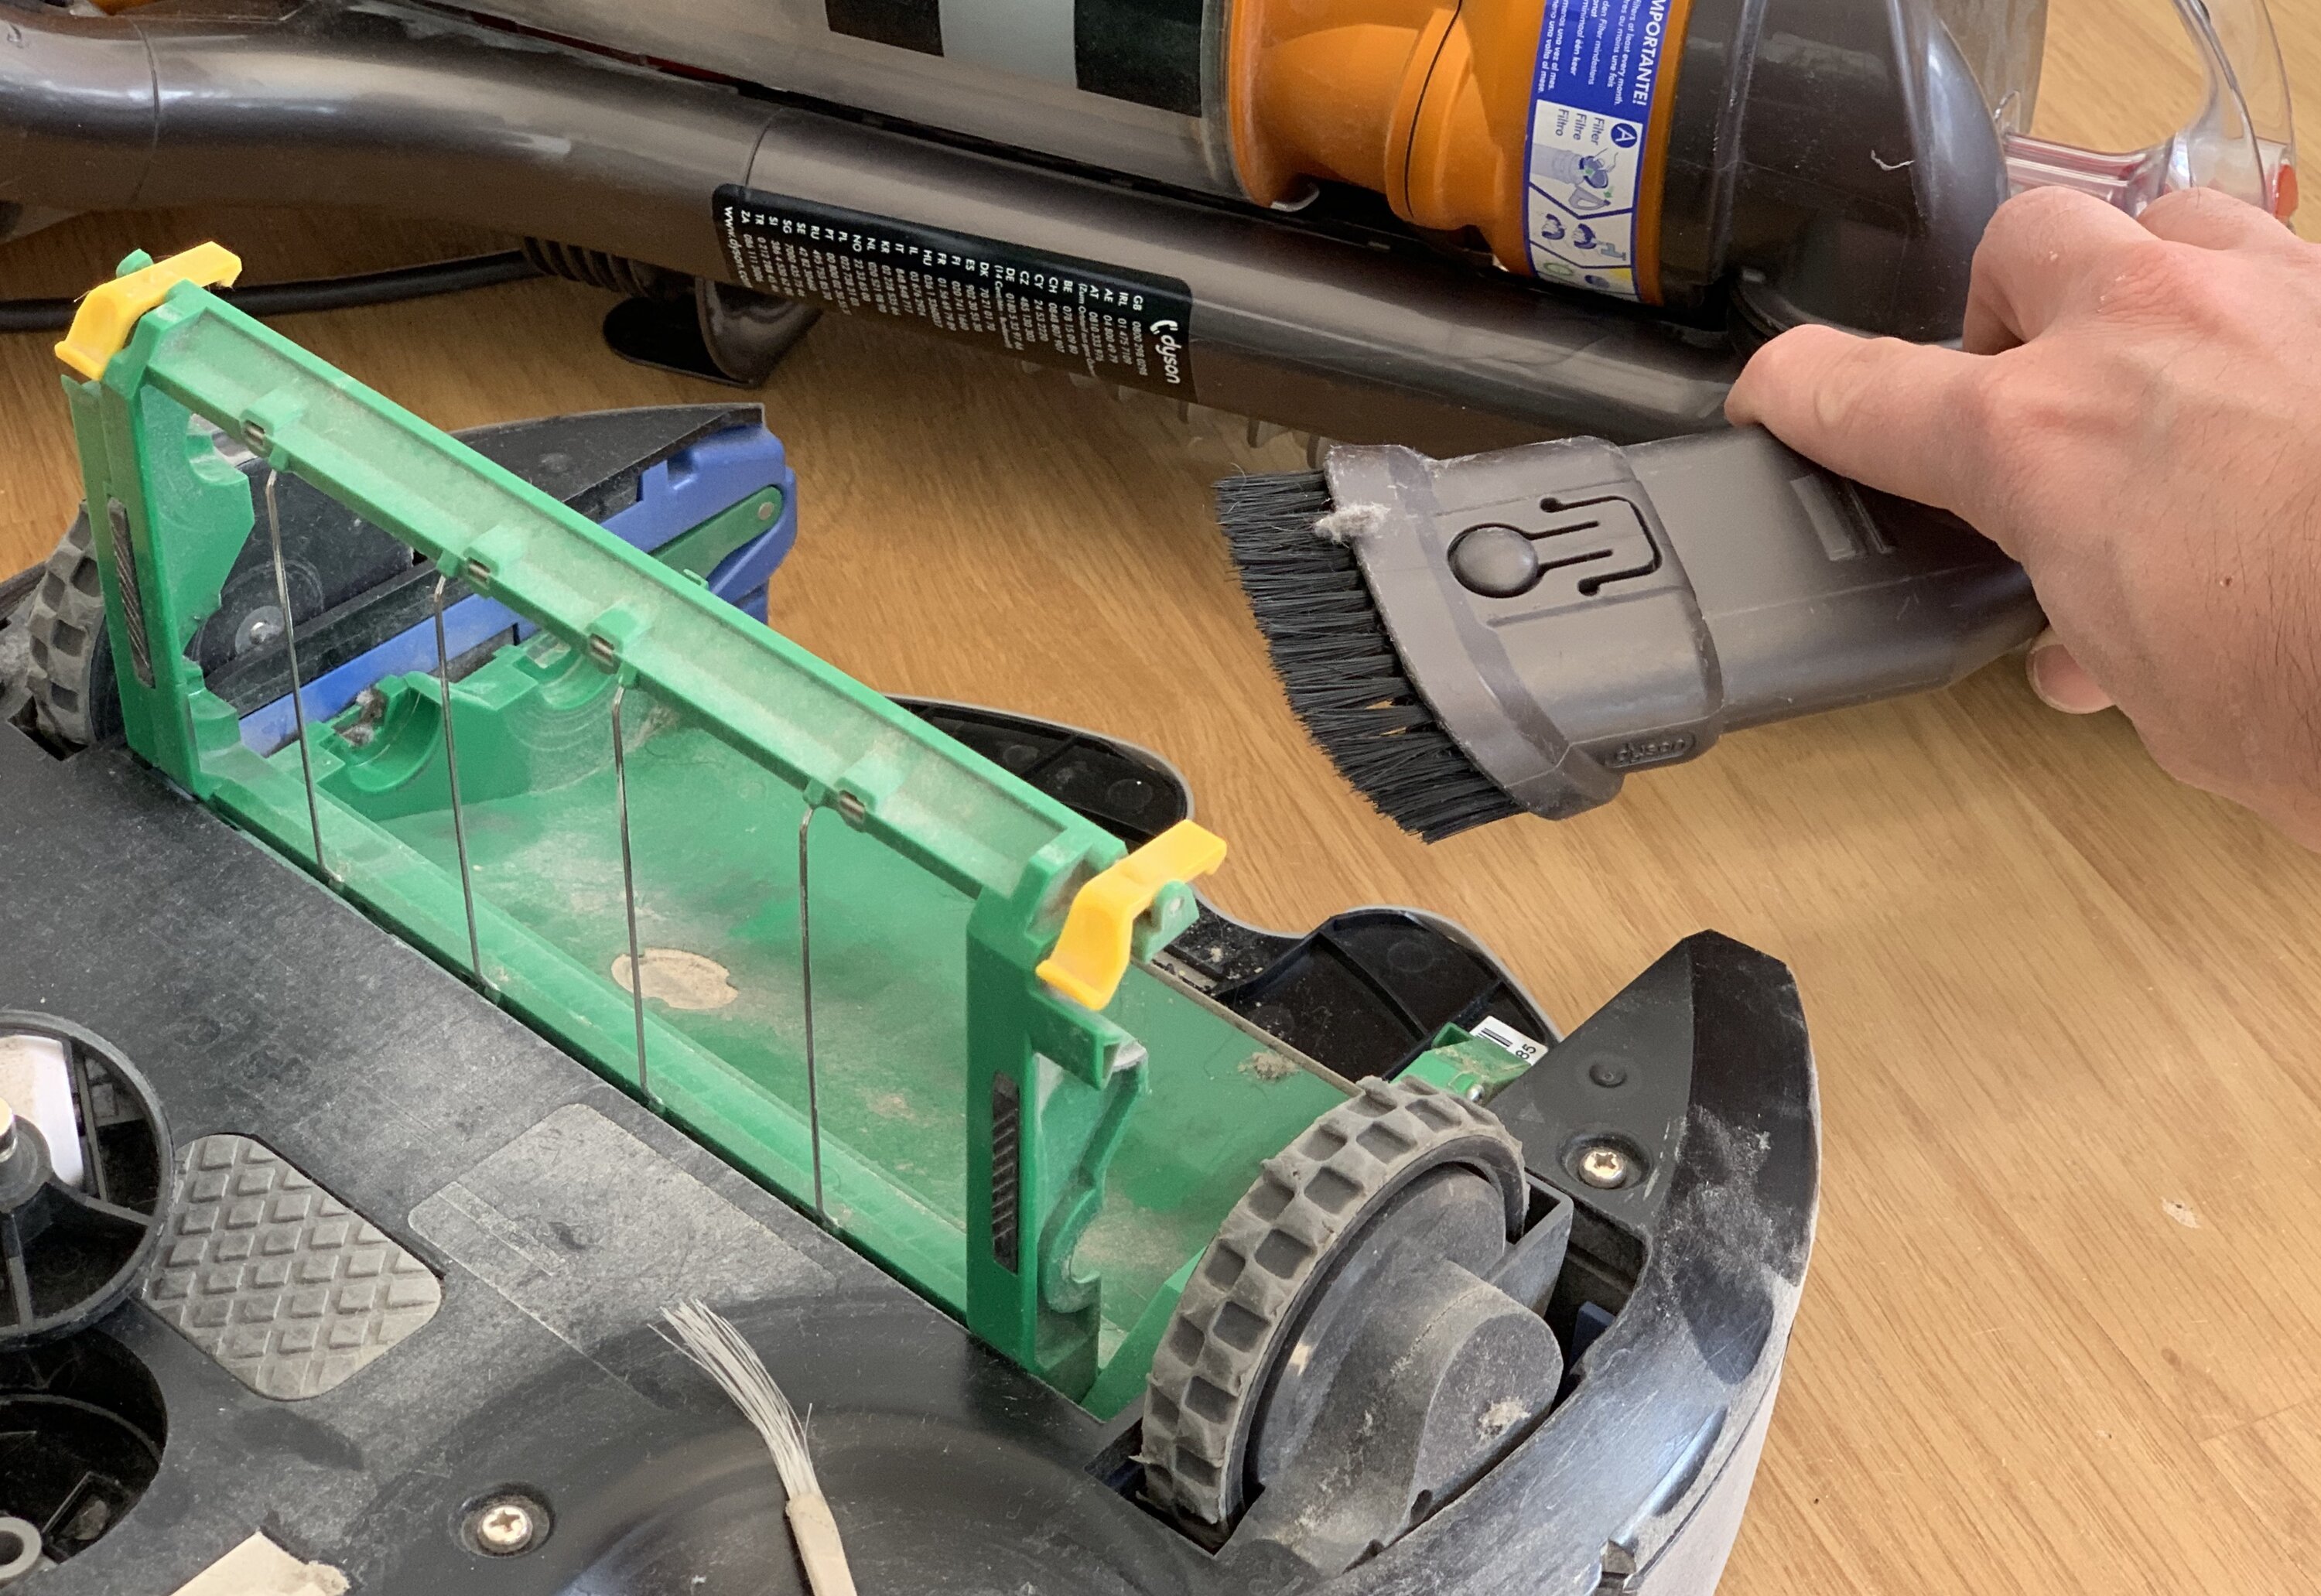
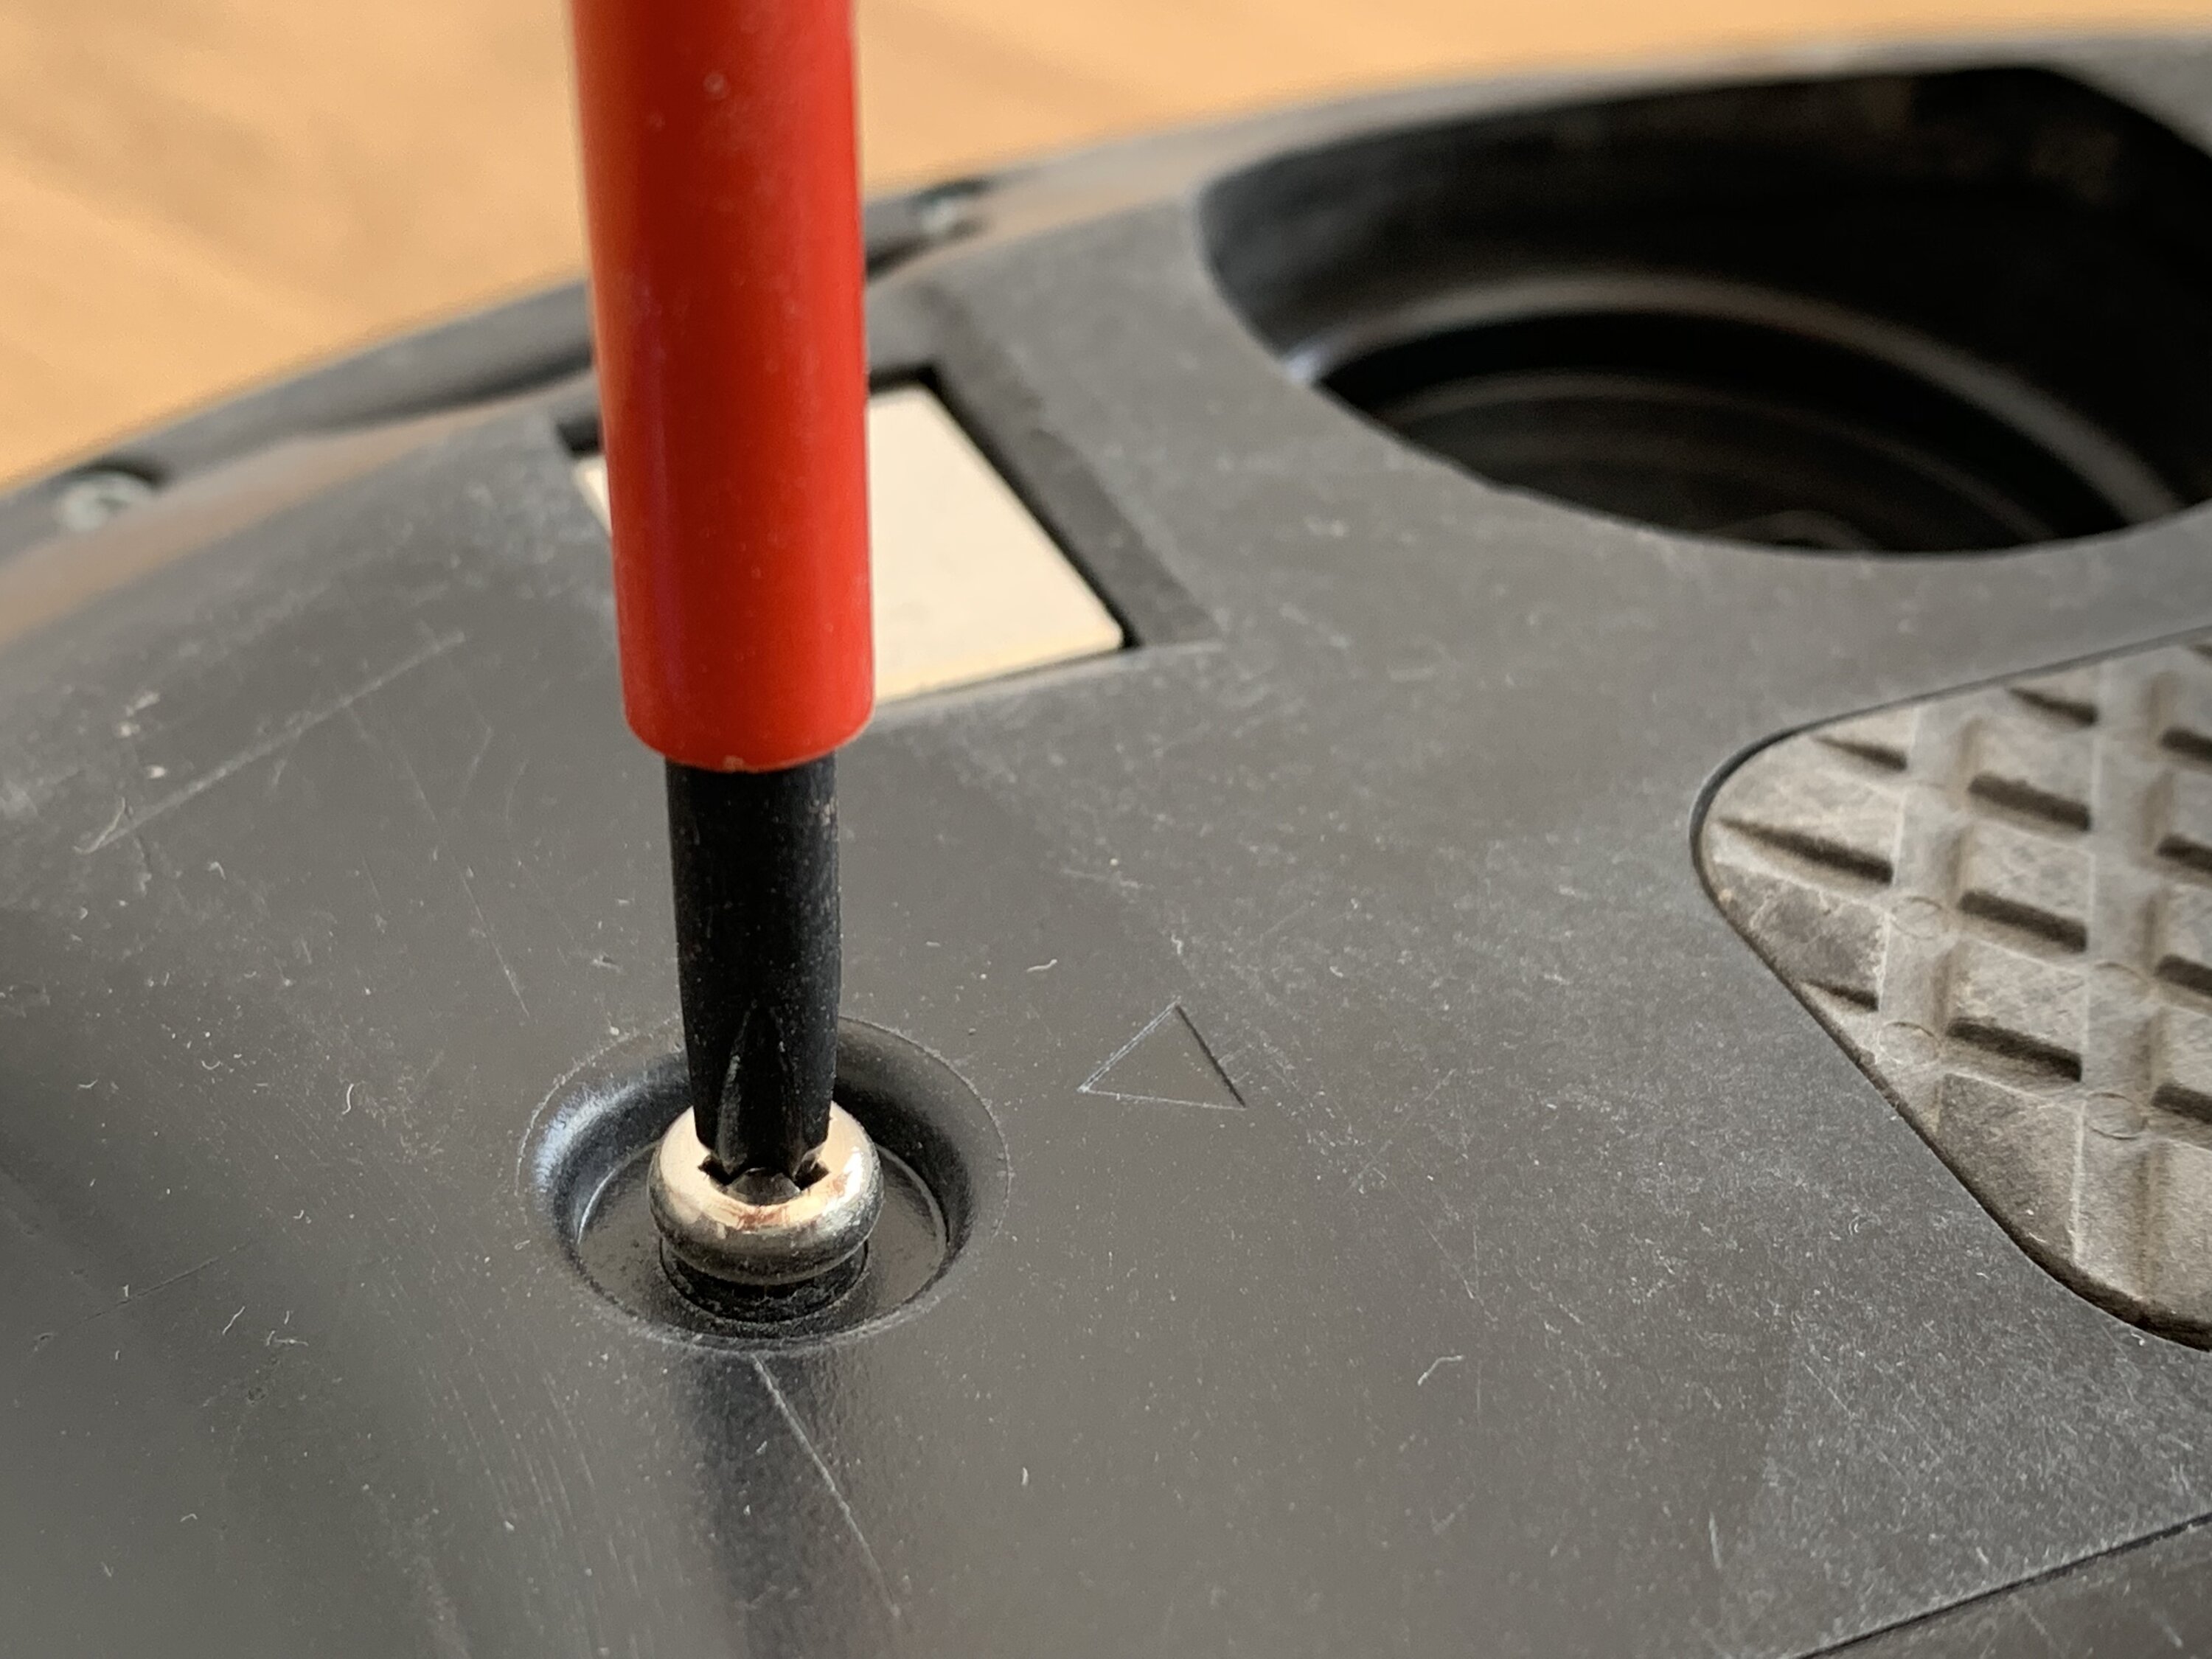
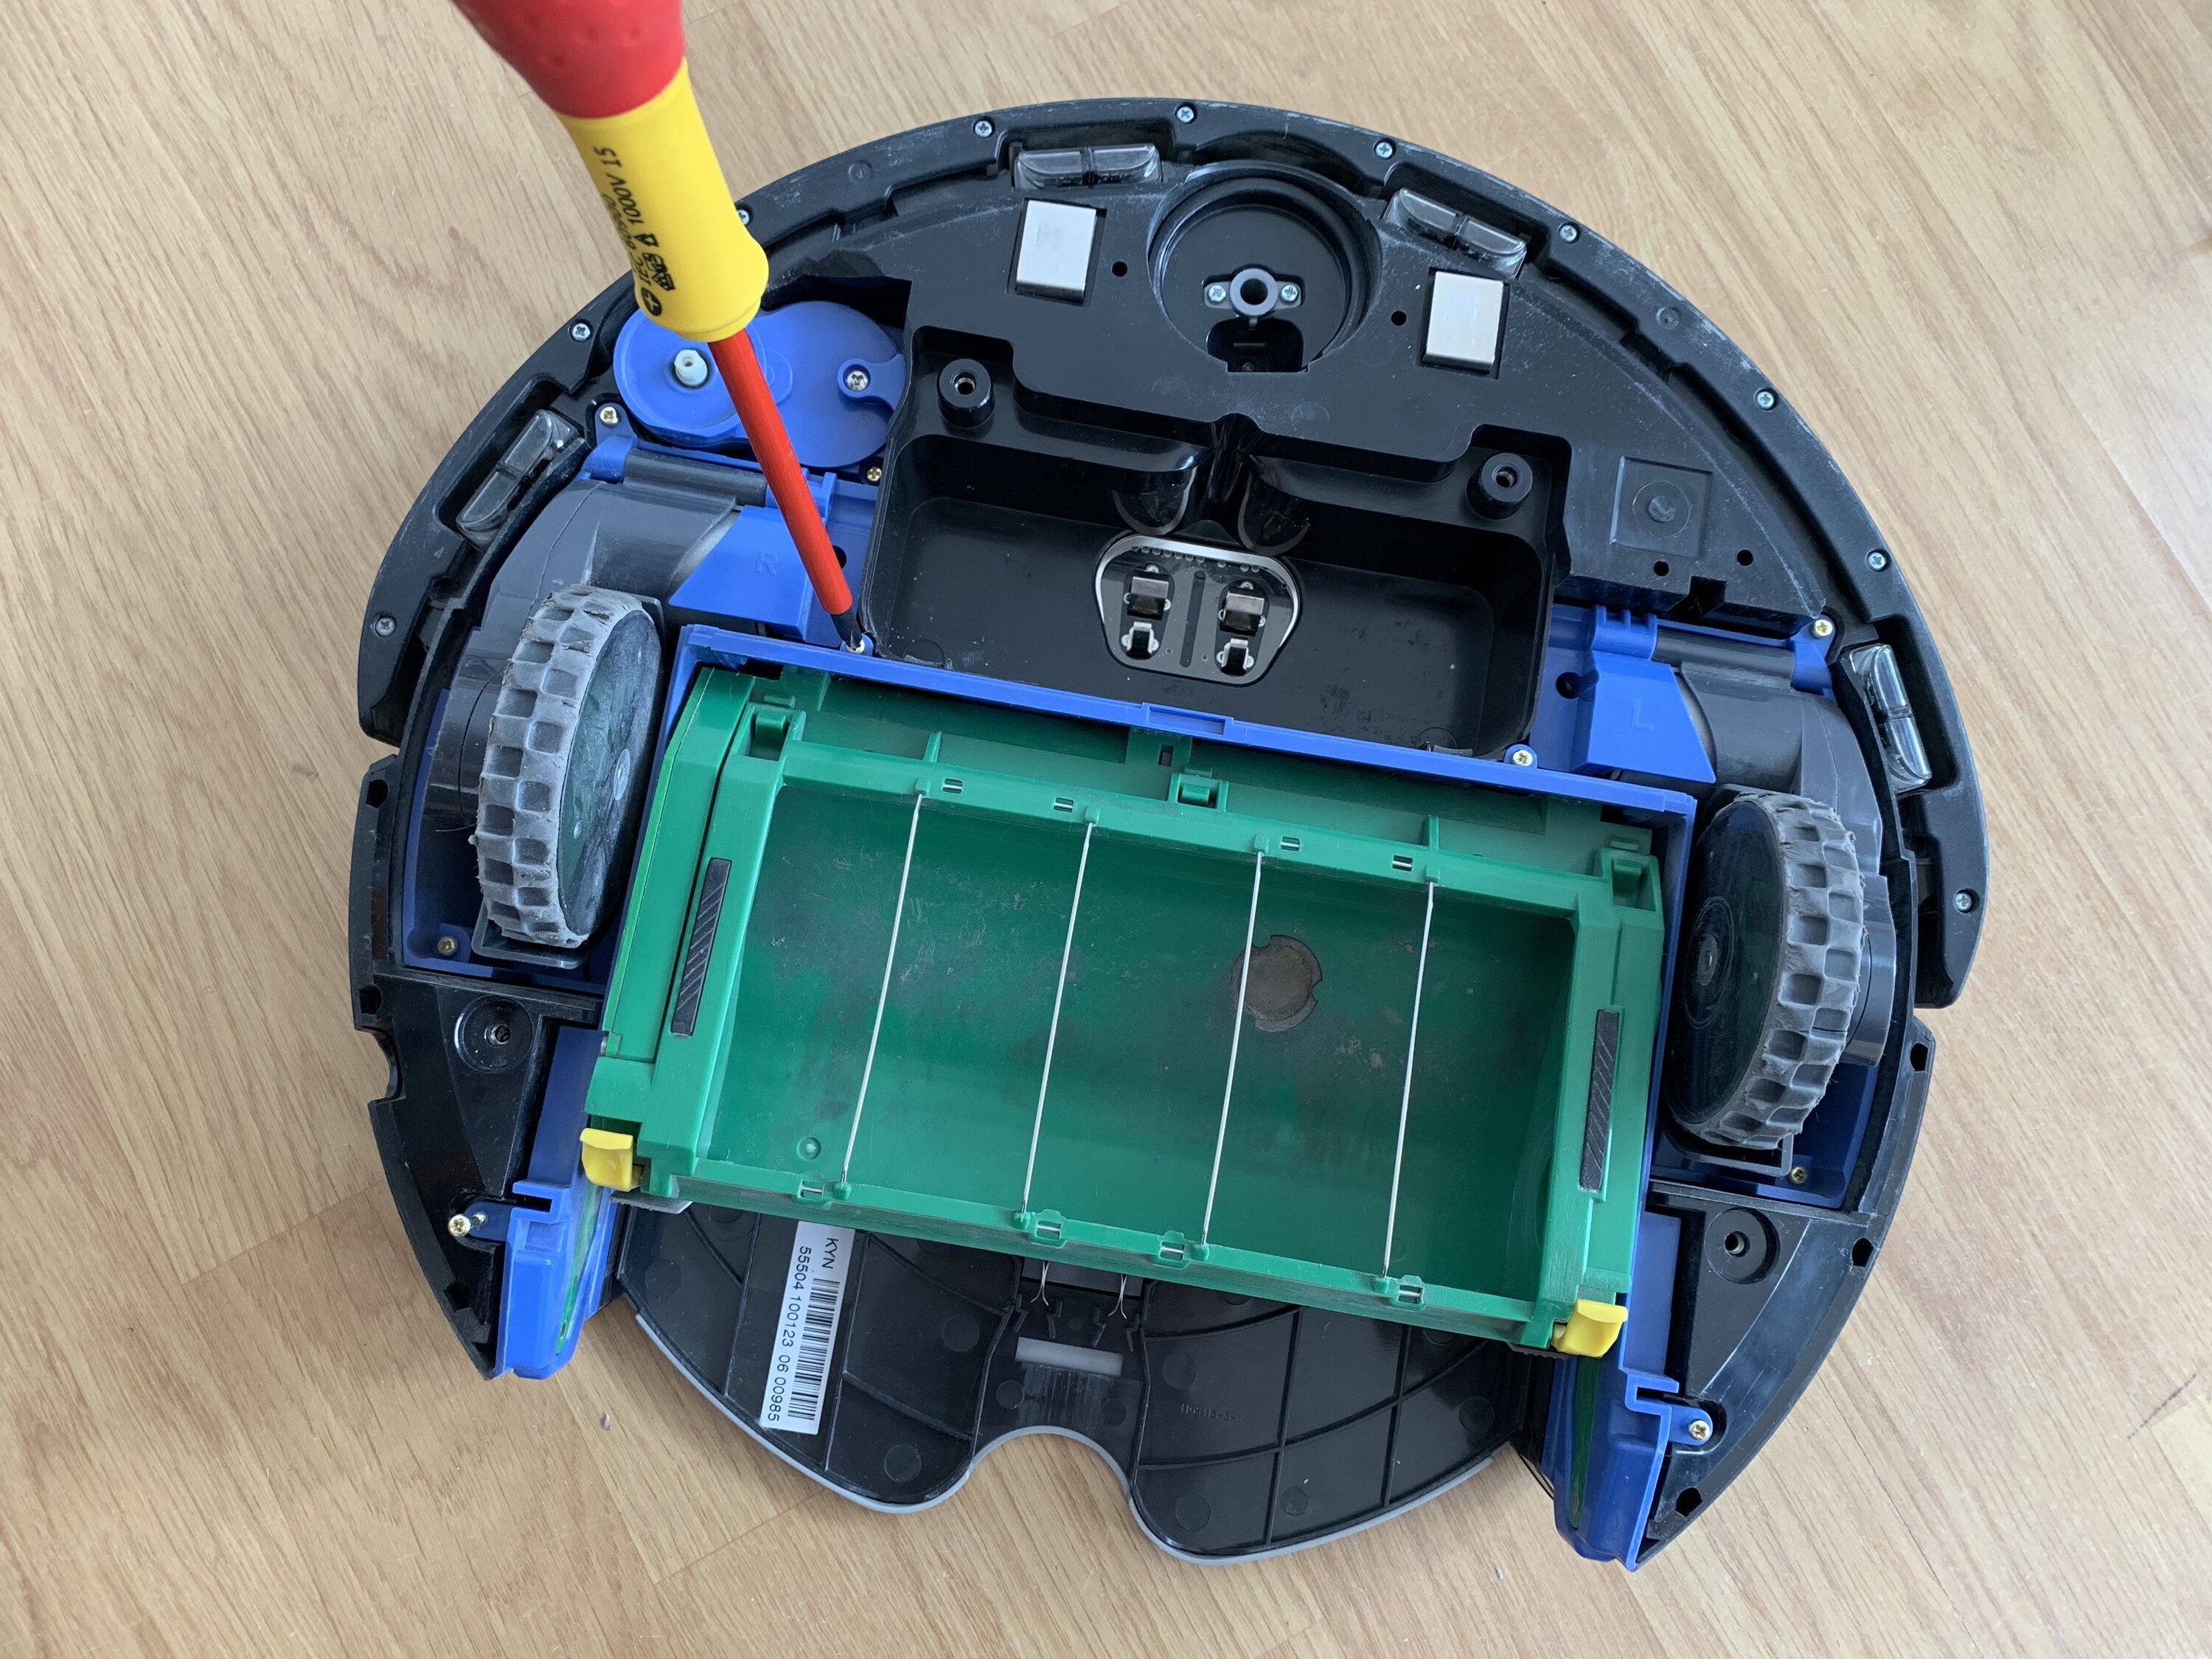
During vacuum cleaning the robot collects fine grained dust on the inside. Every now and then I remove bottom cover to have the inside thoroughly cleaned. The Roomba is a maintenance friendly robot, the screws required to remove the bottom cover are clearly marked with a triangle.
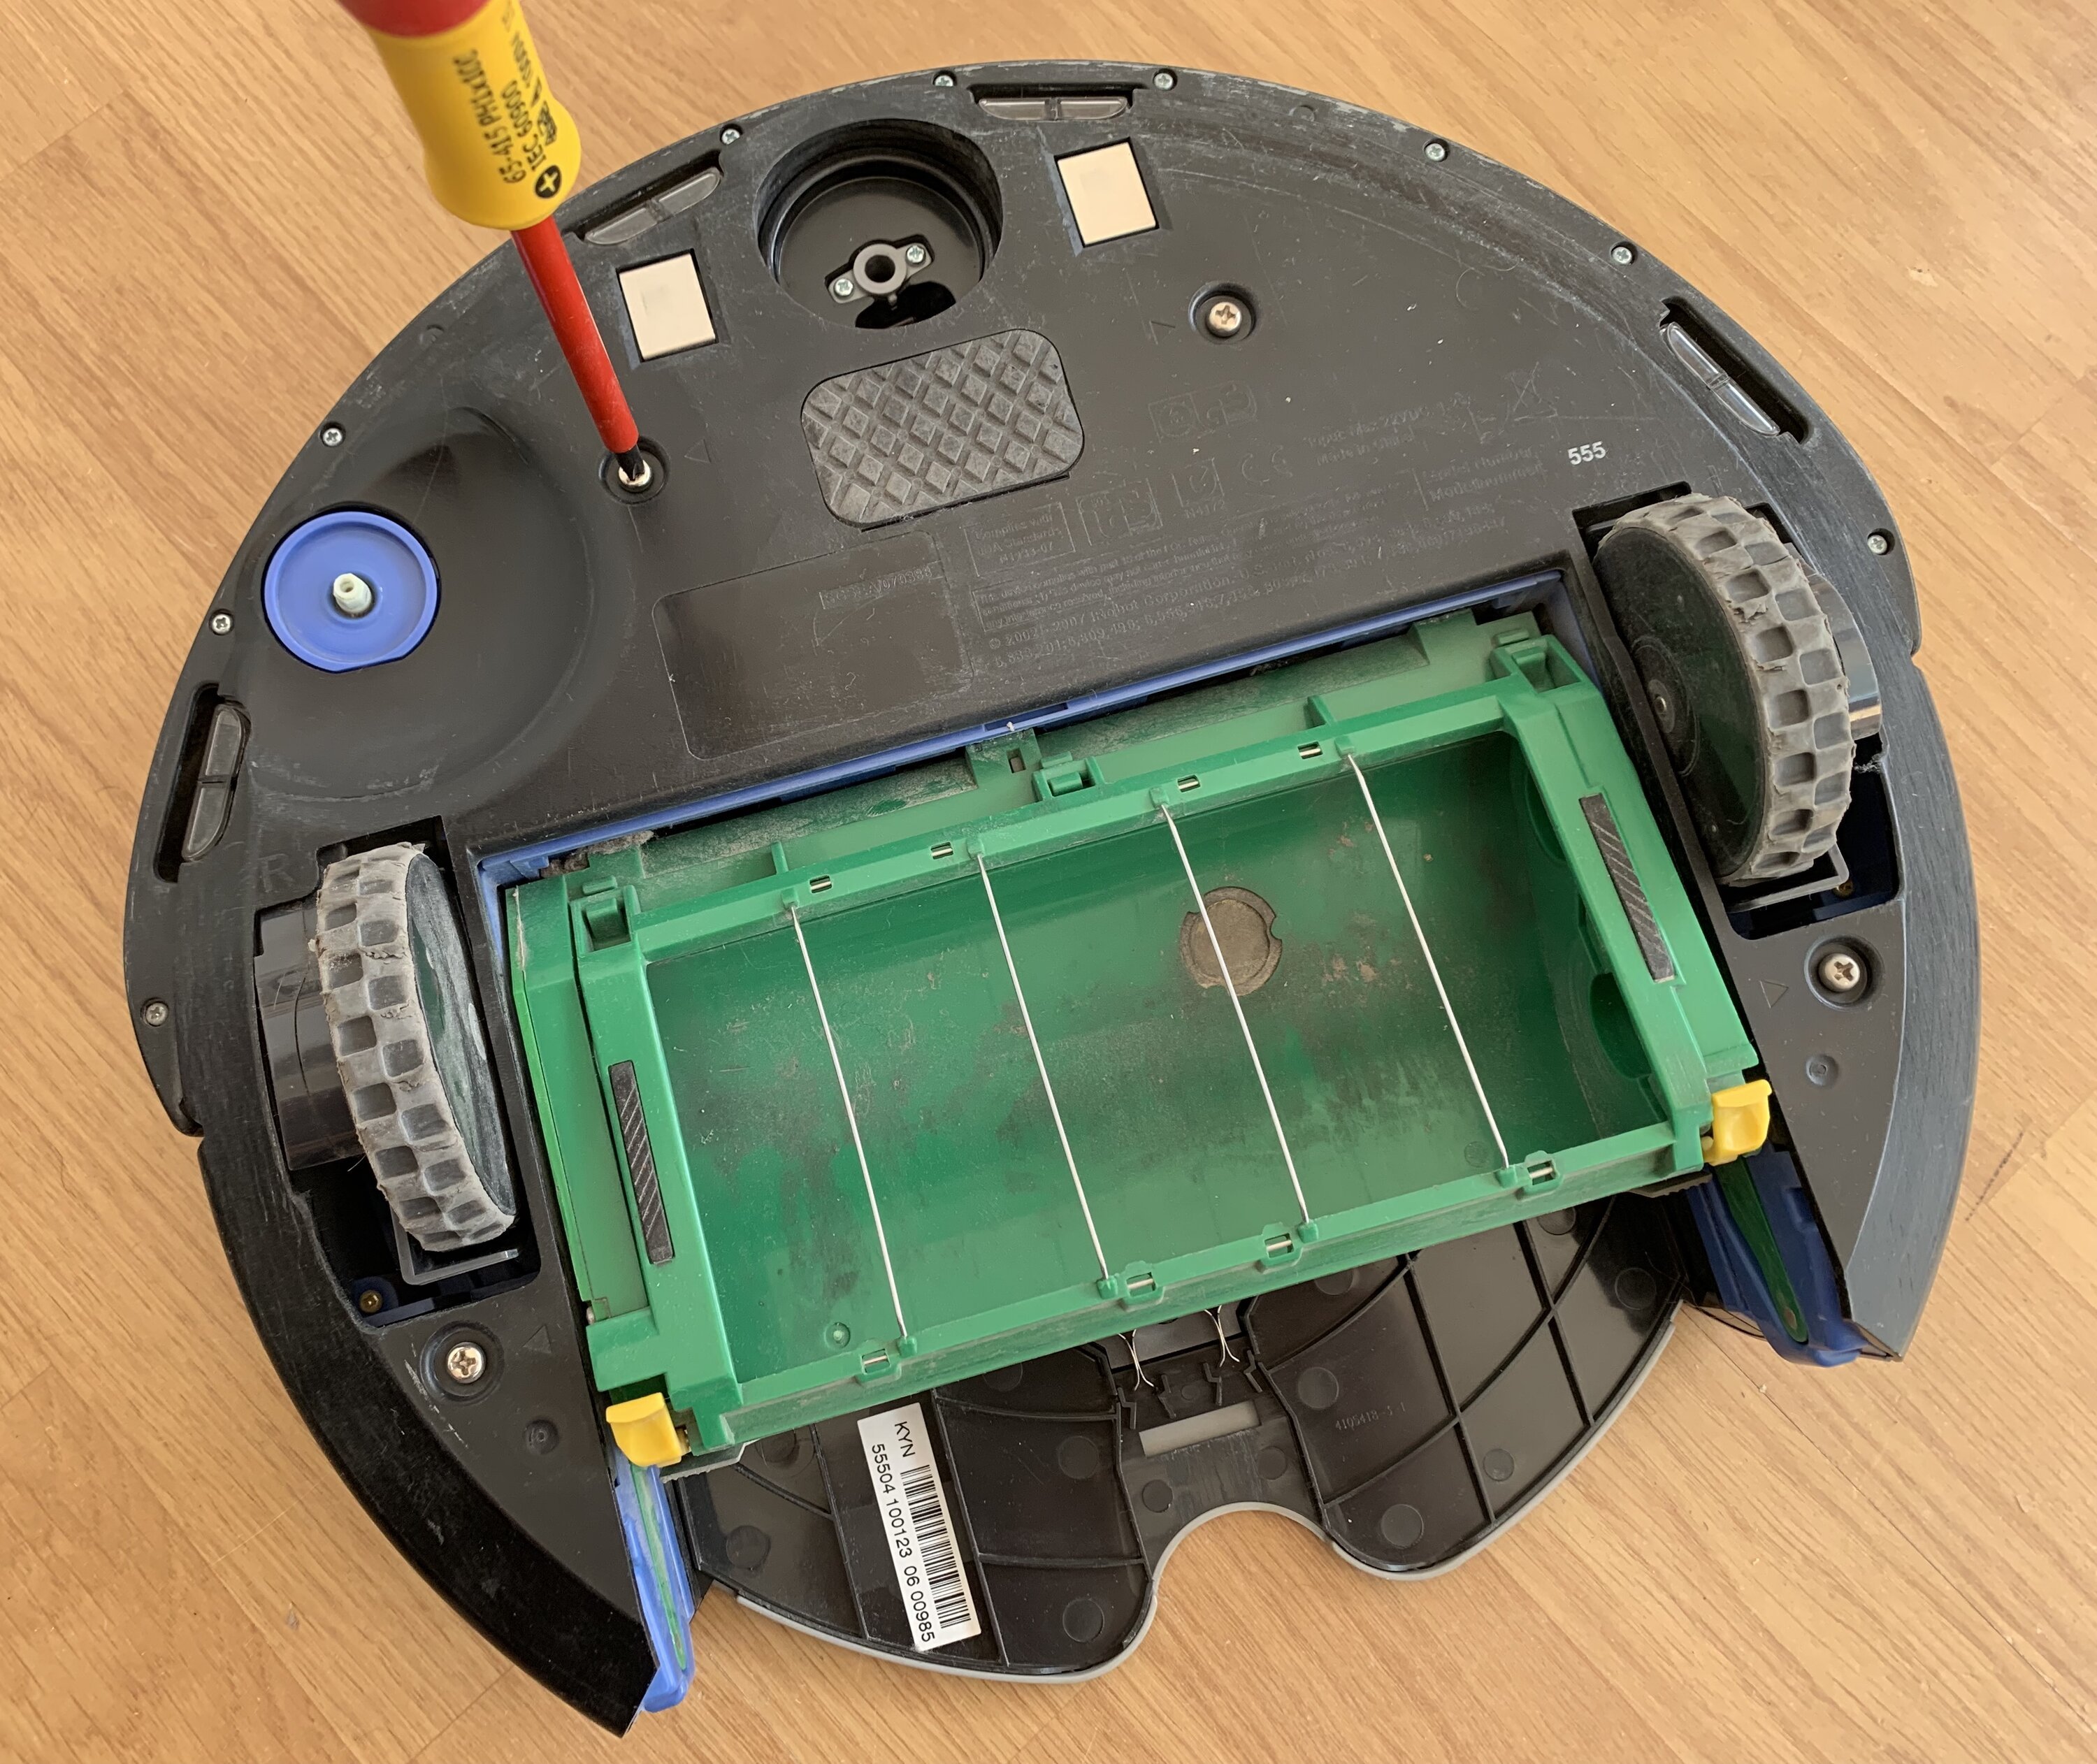
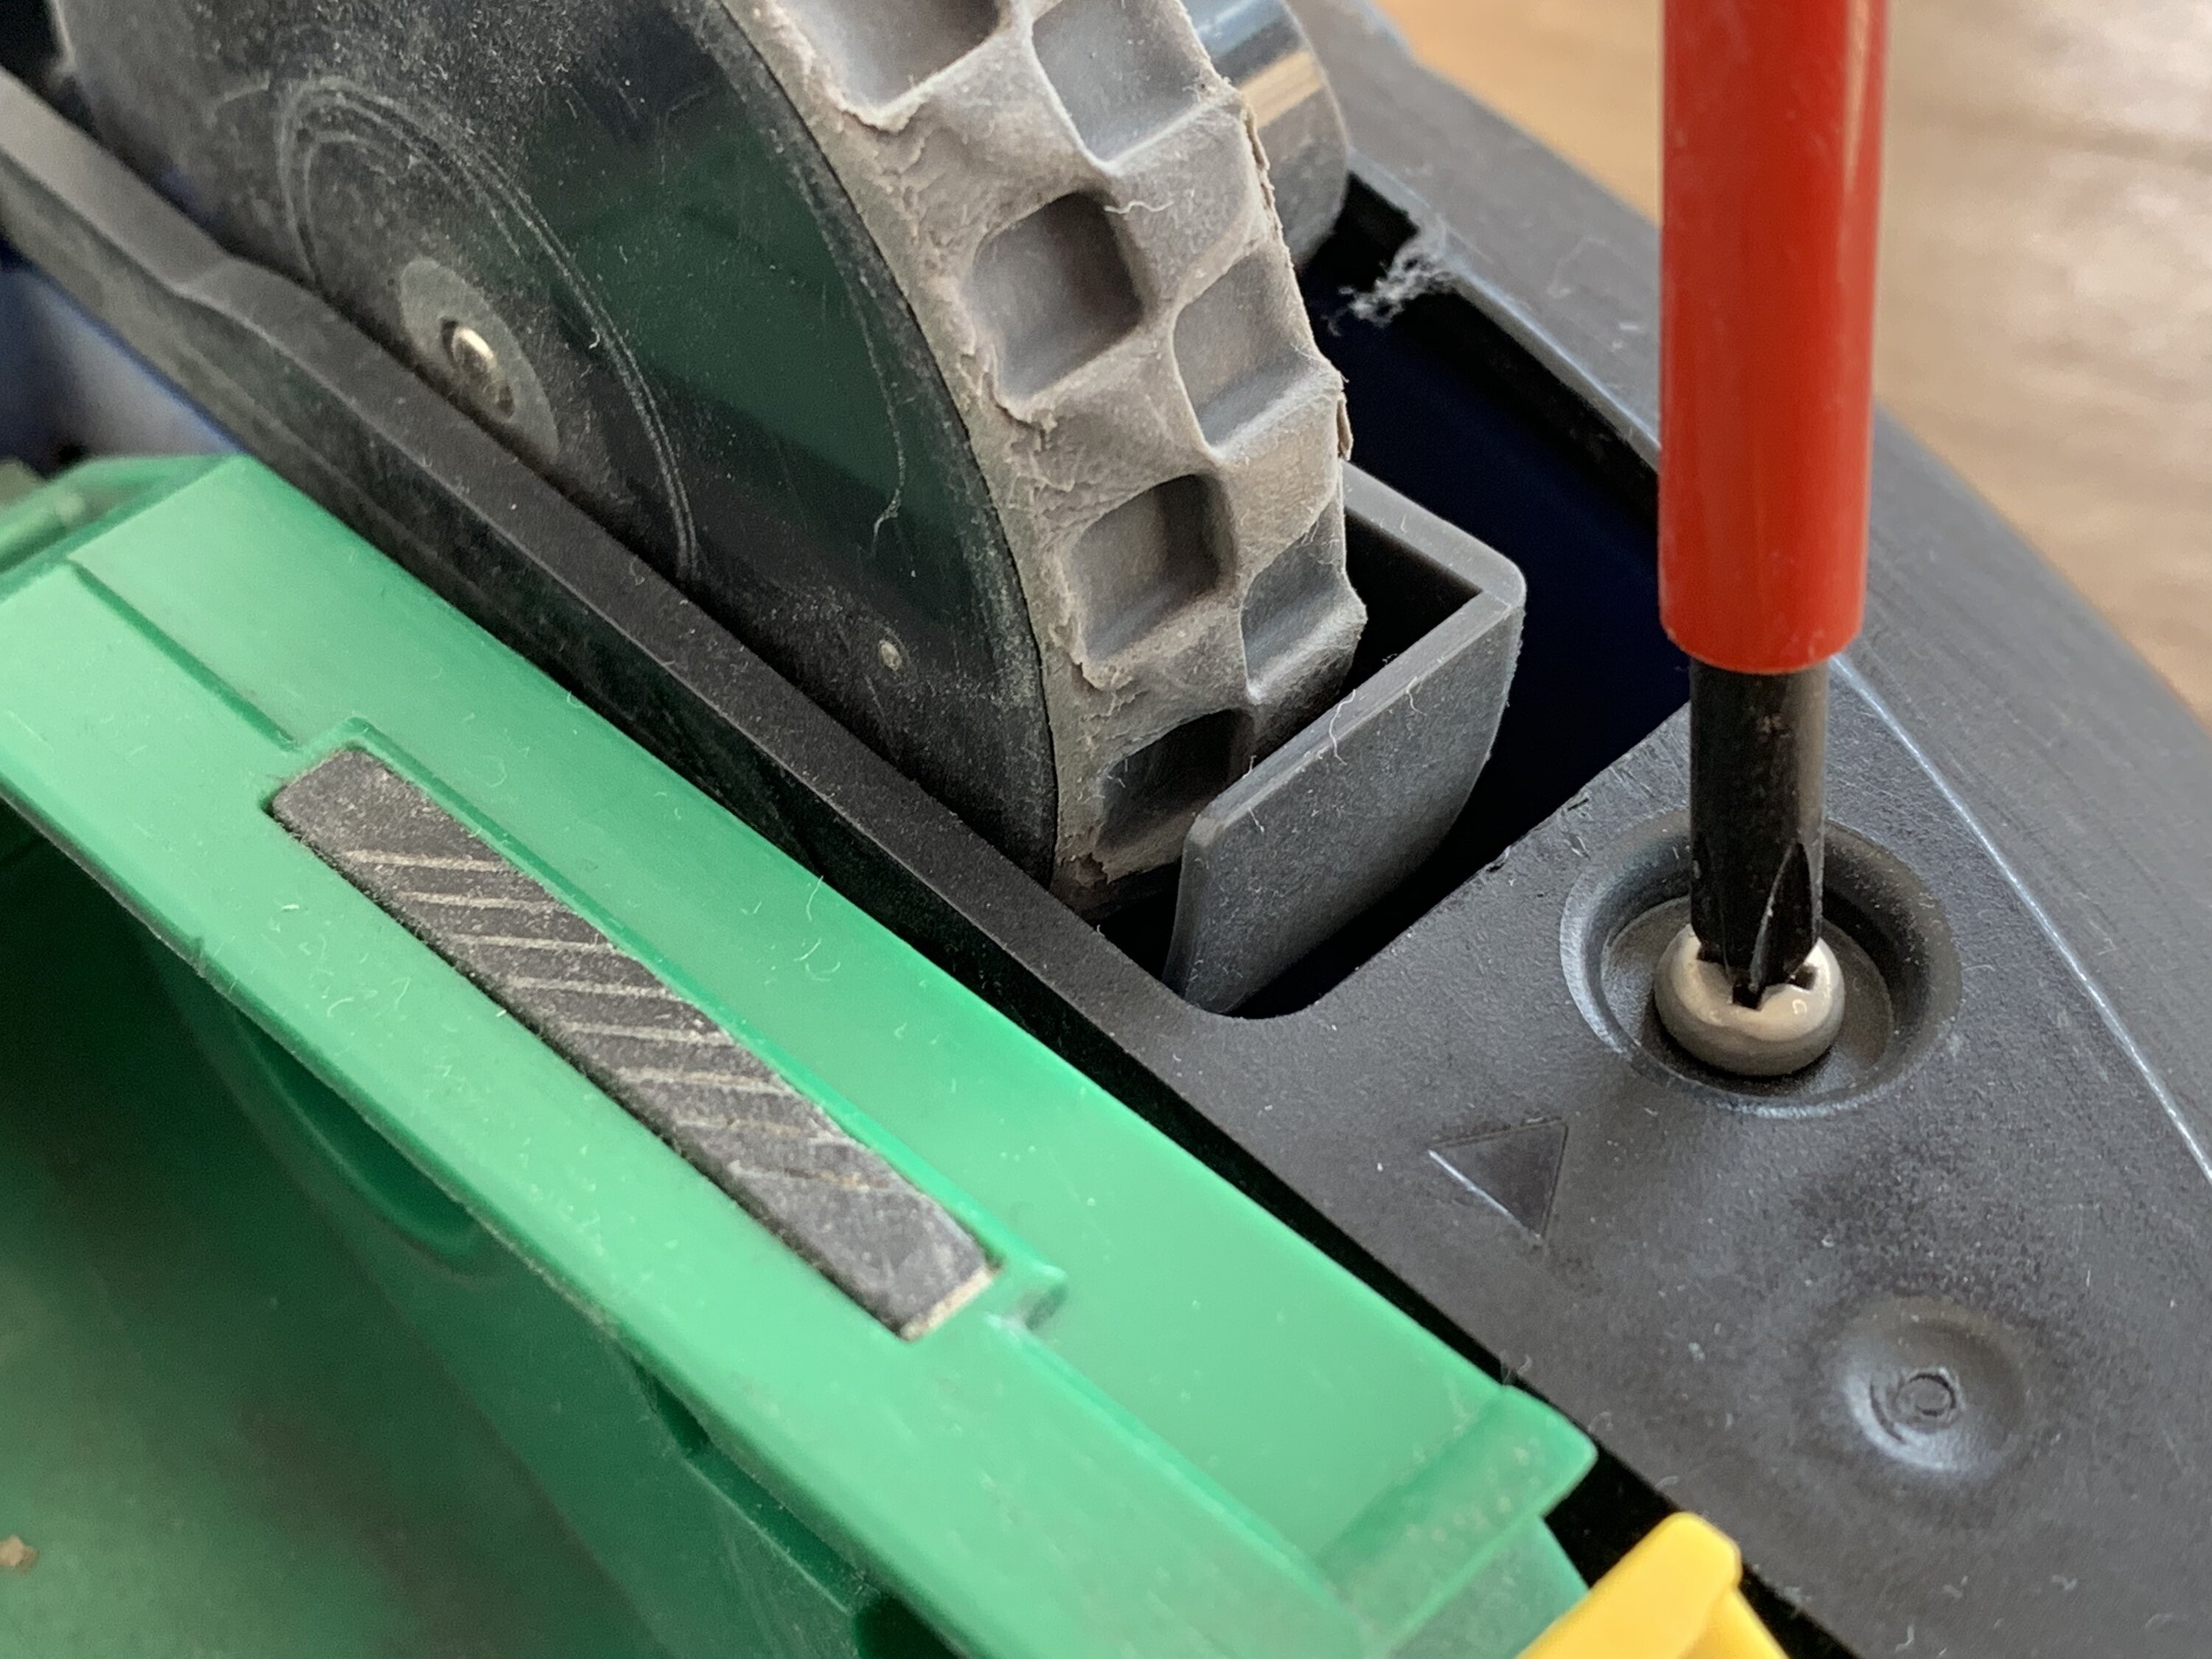
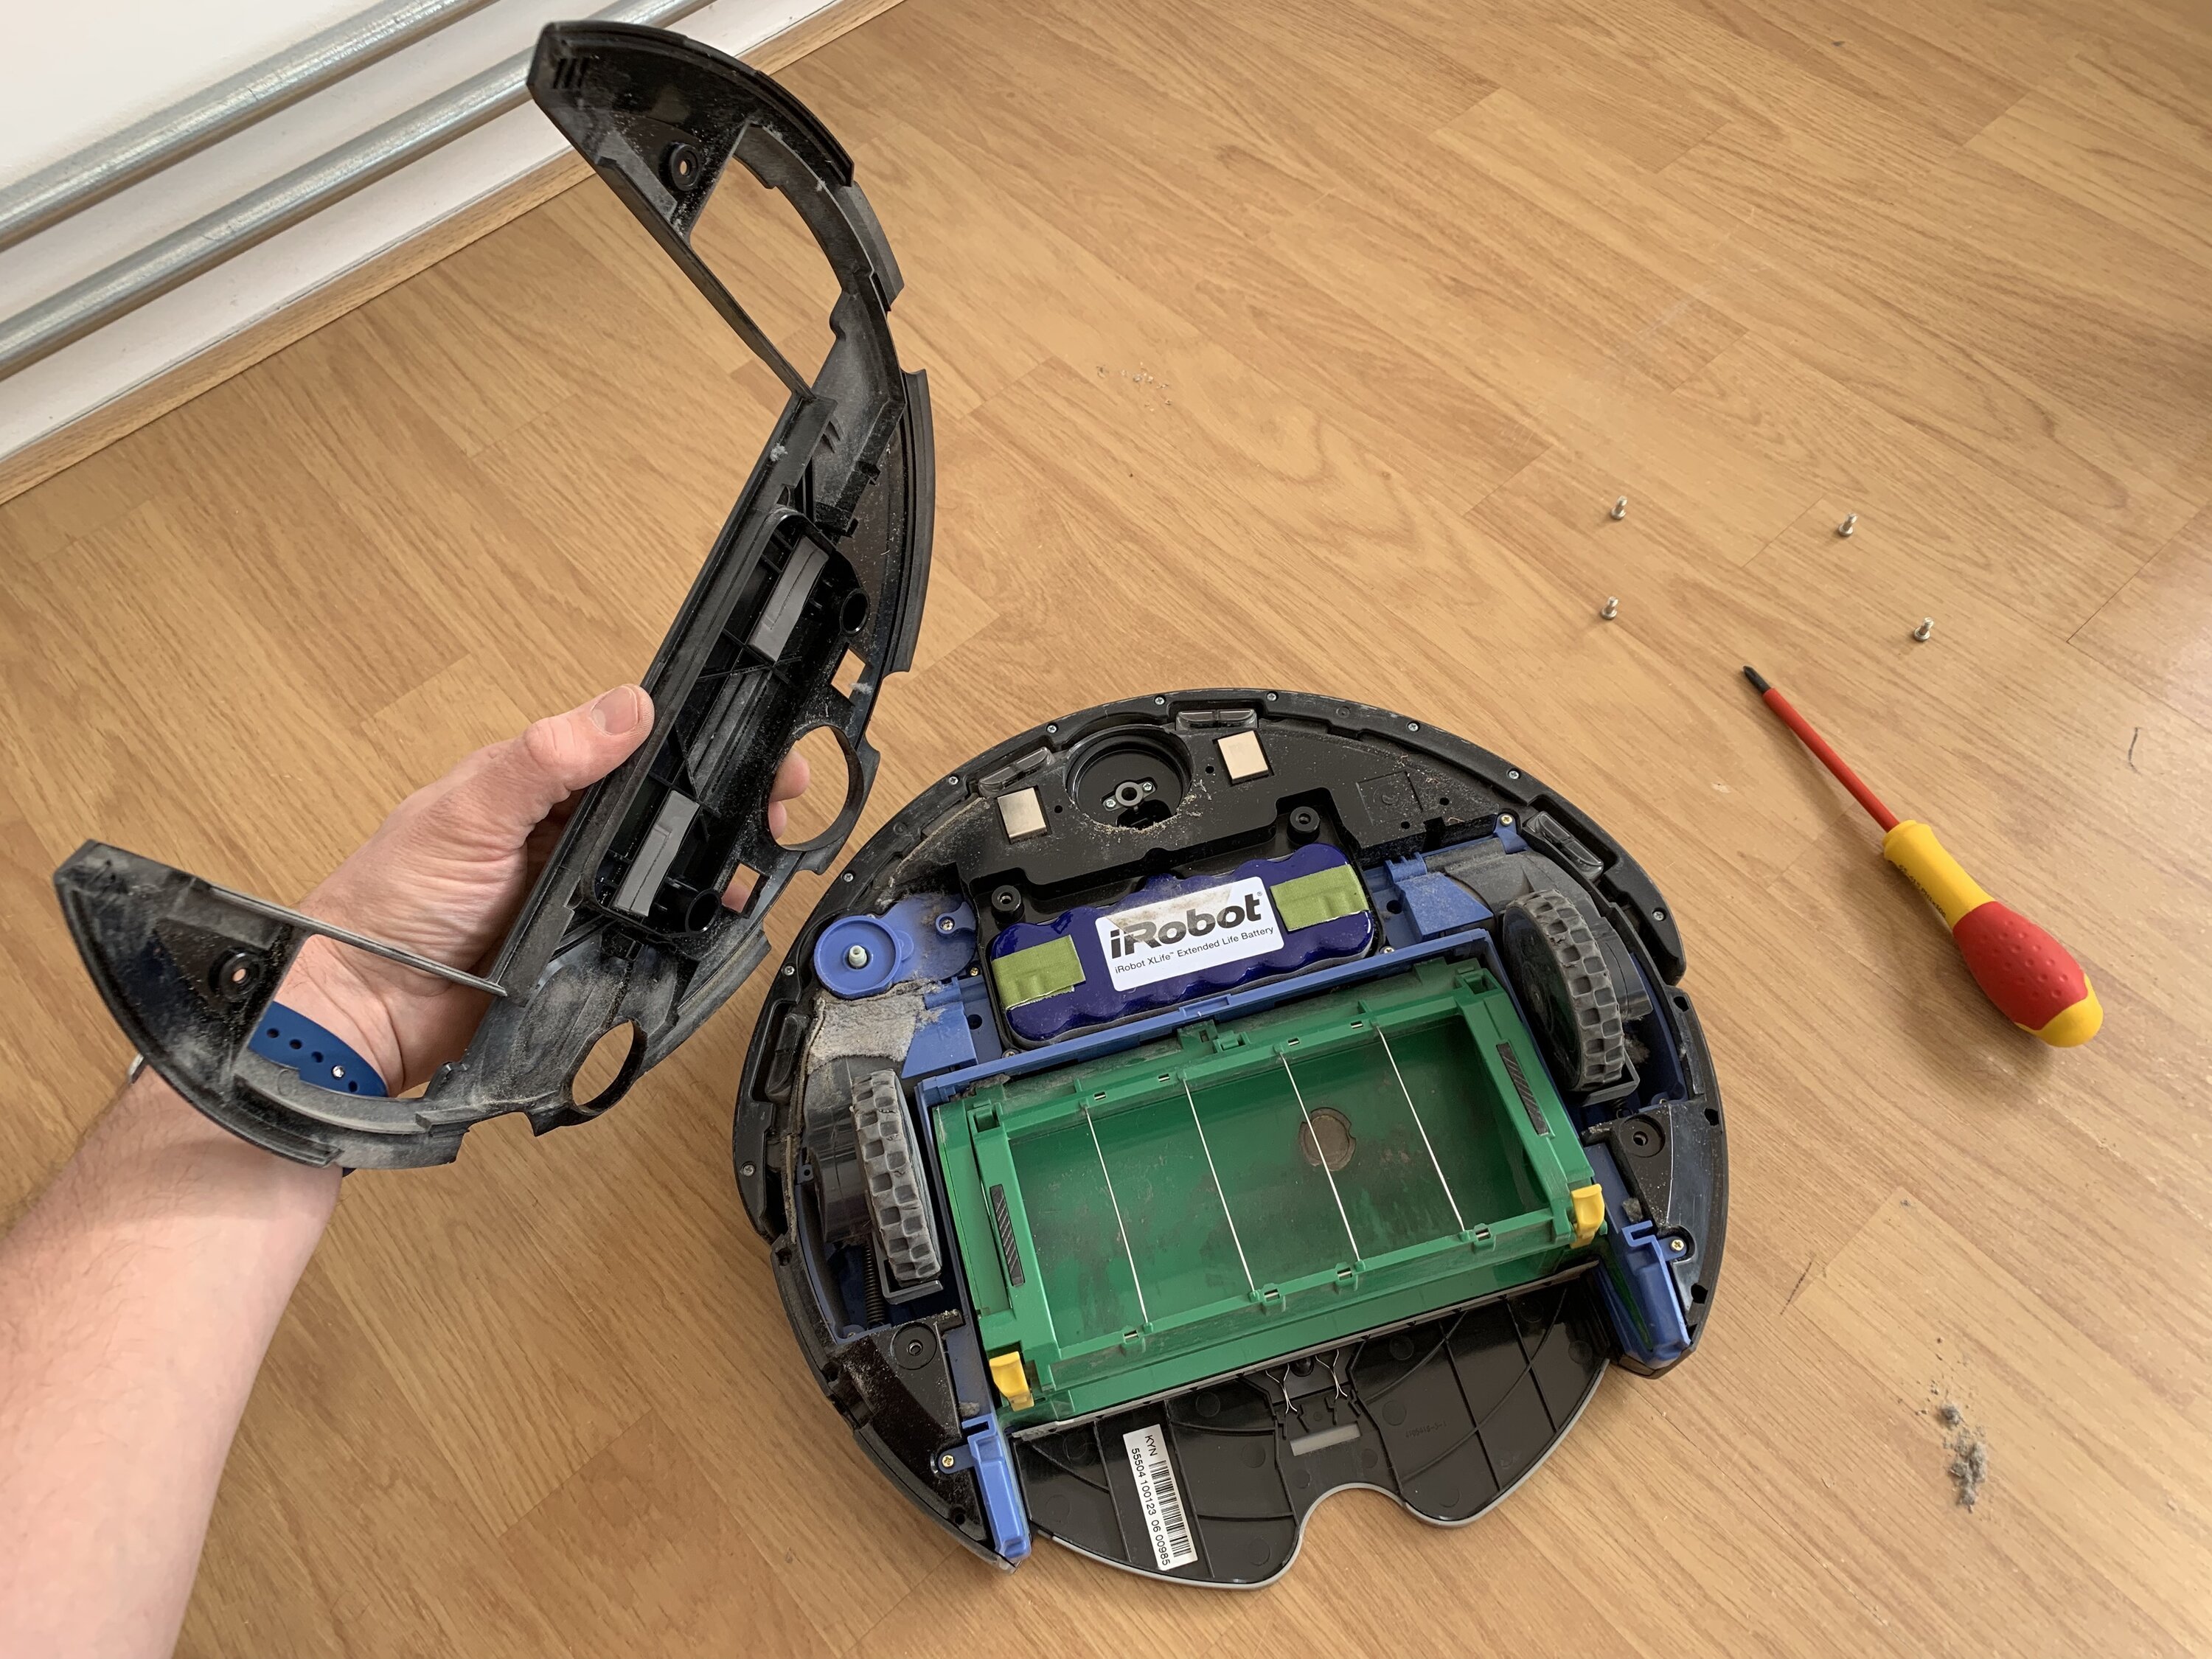
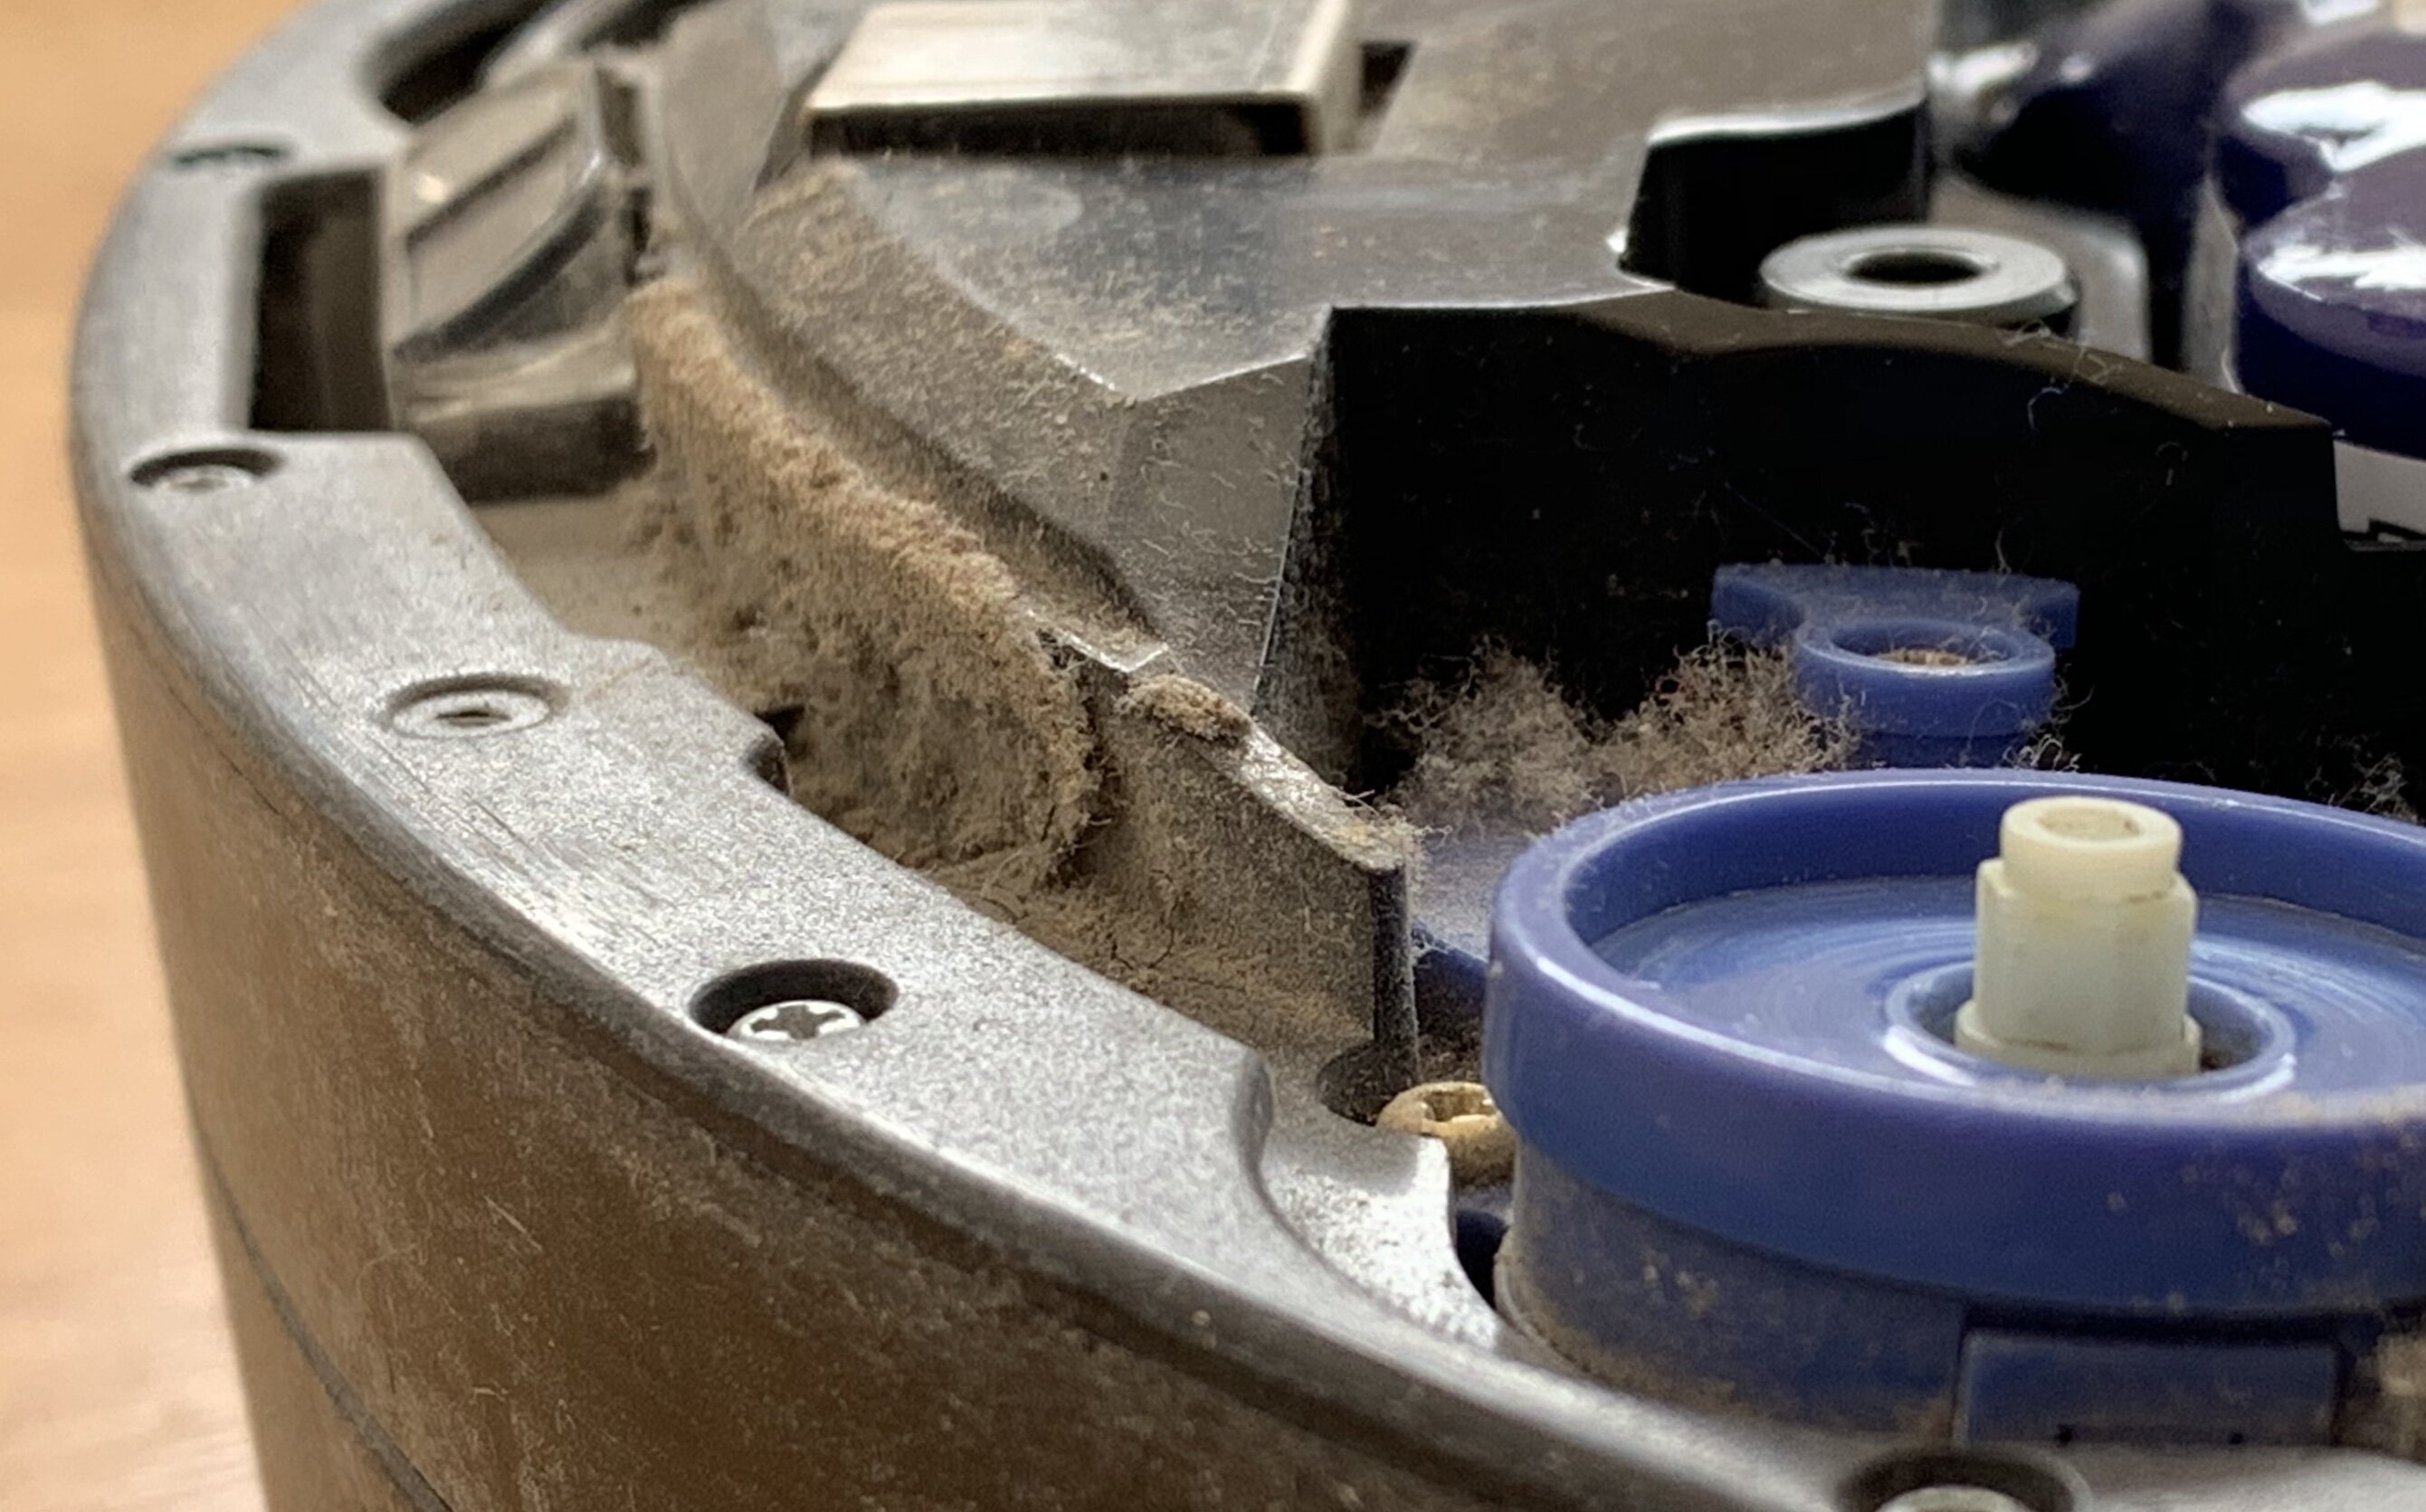
Once you have removed the bottom cover you'll find more dust and dirt. Depending how long your Roomba has been in service this can be quite the amount! Check around corners and near the wheel bases.

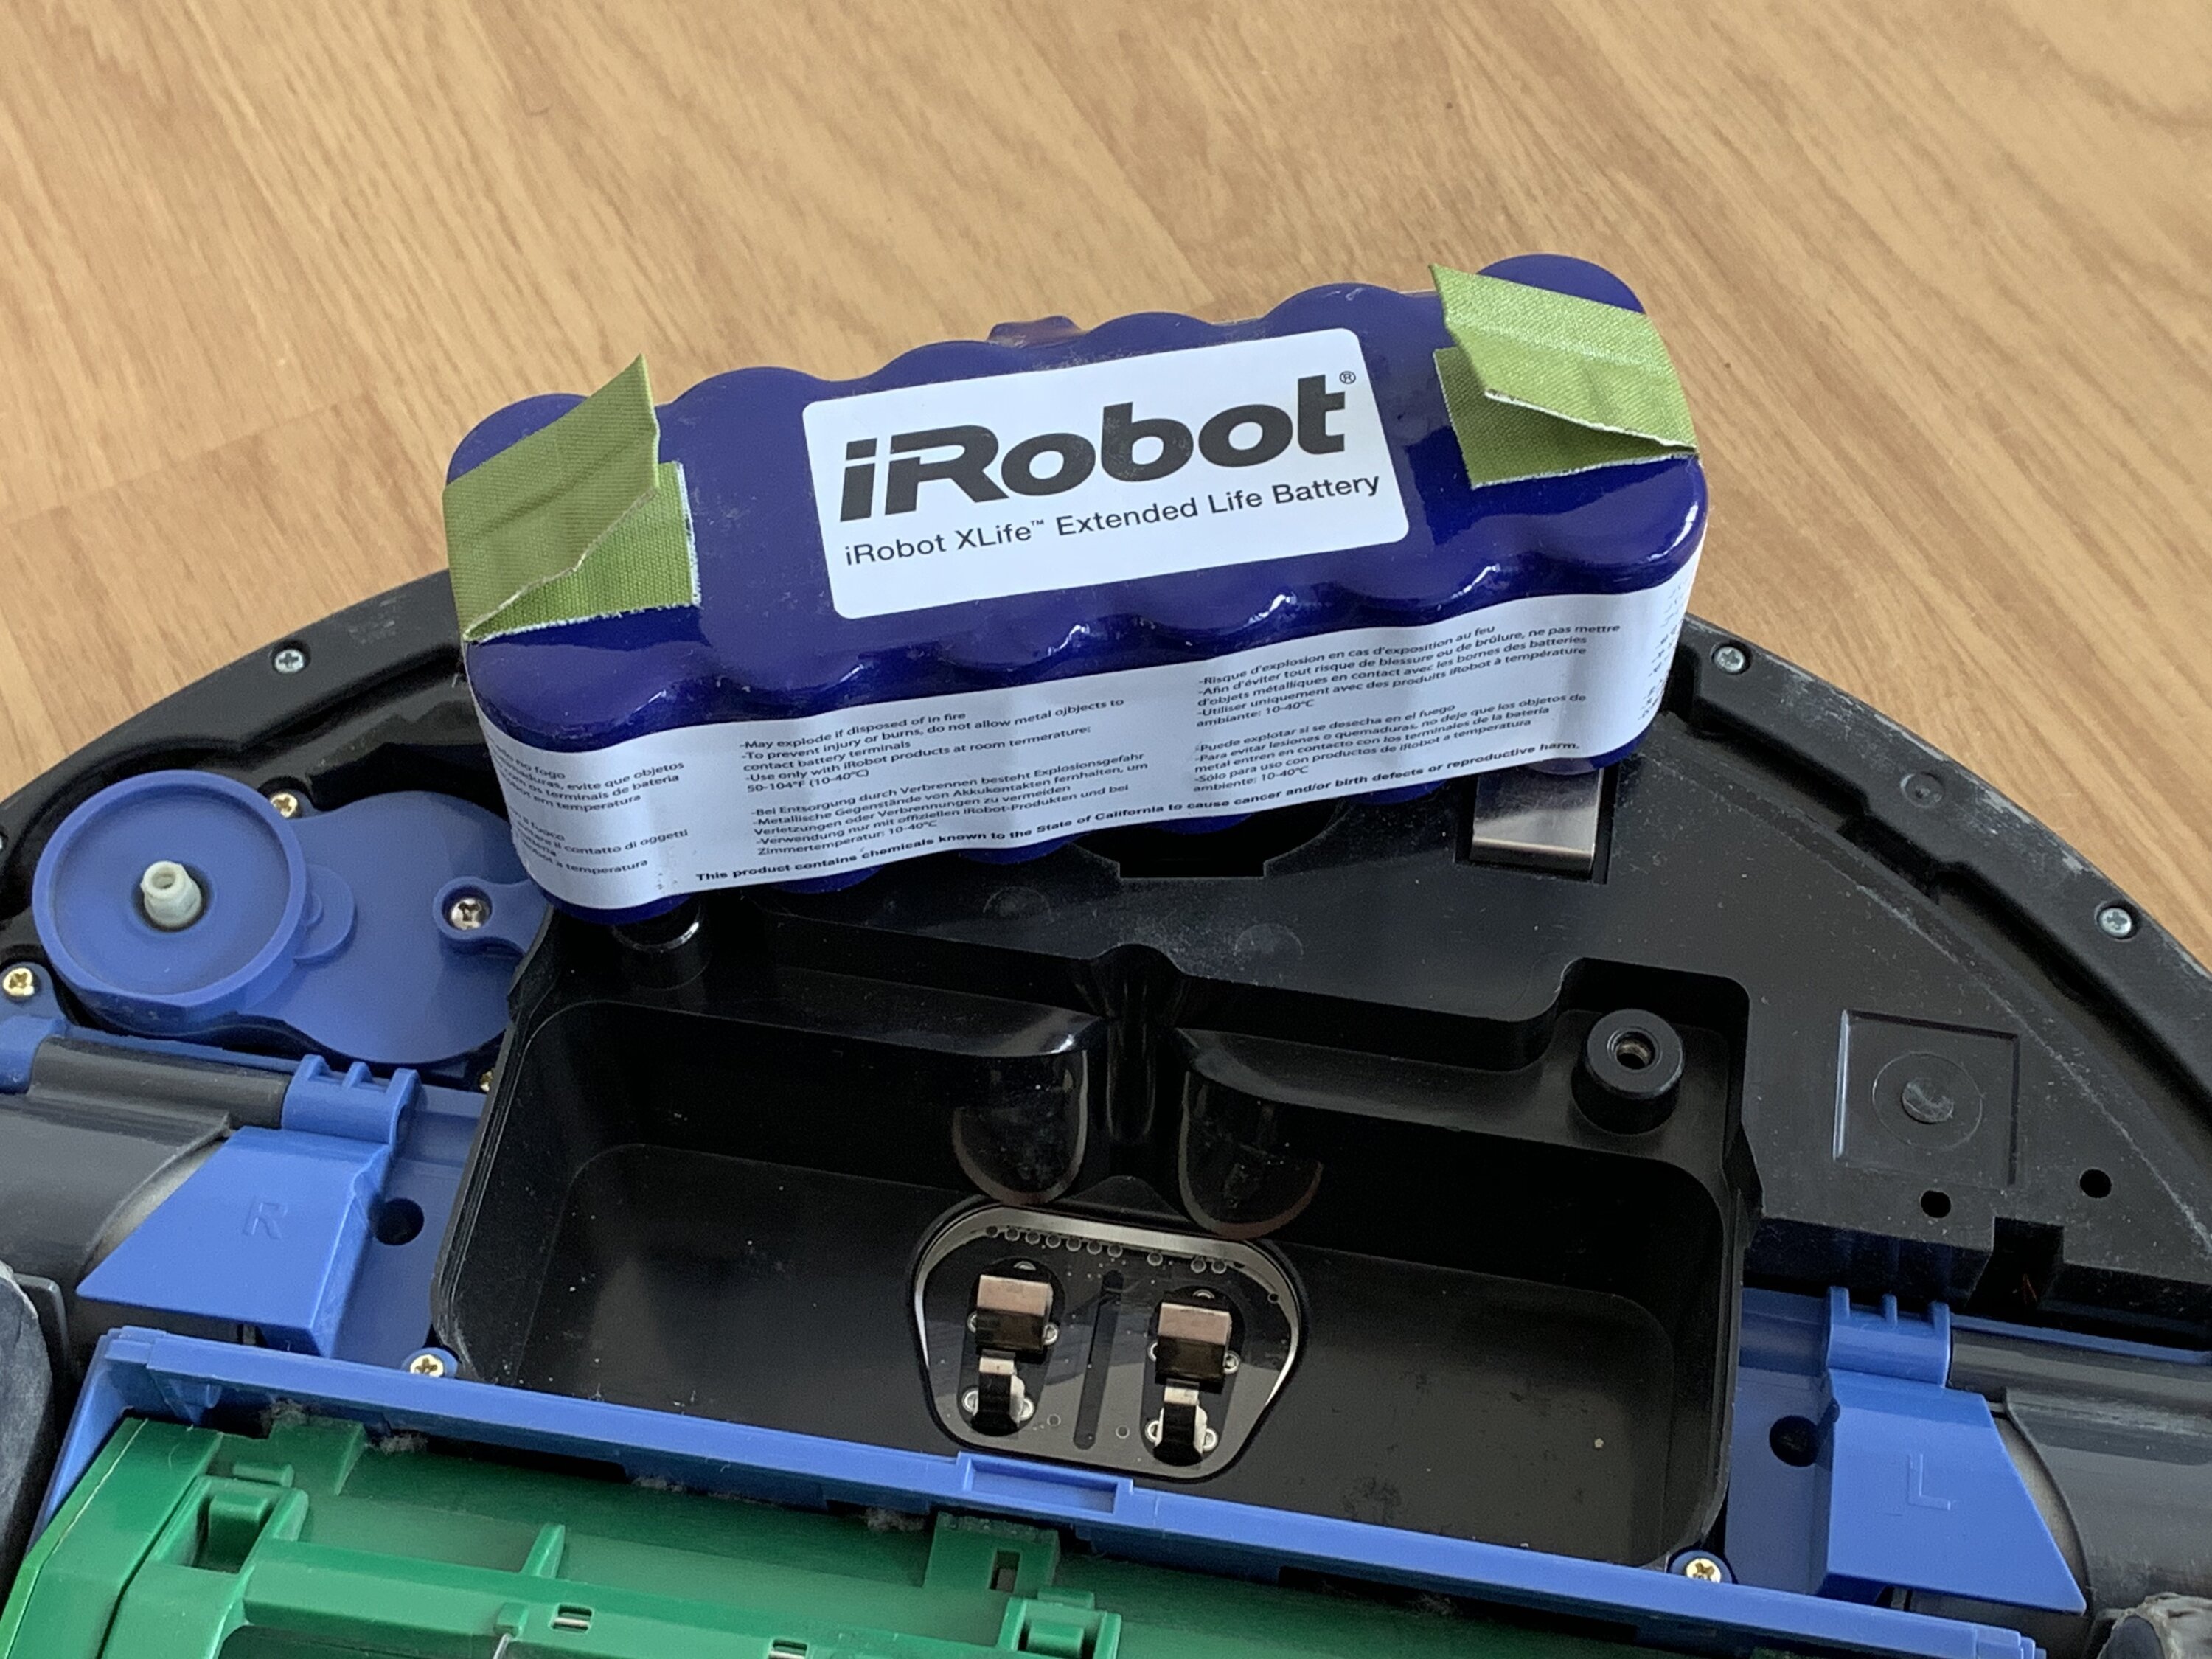
After many years of faithful service, you can expect the battery to loose its capacity. Eventually this causes the robot to run out of juice very quickly. It's absolutely worth it to get a replacement battery. I got an original iRobot XLife Extended Life Battery.
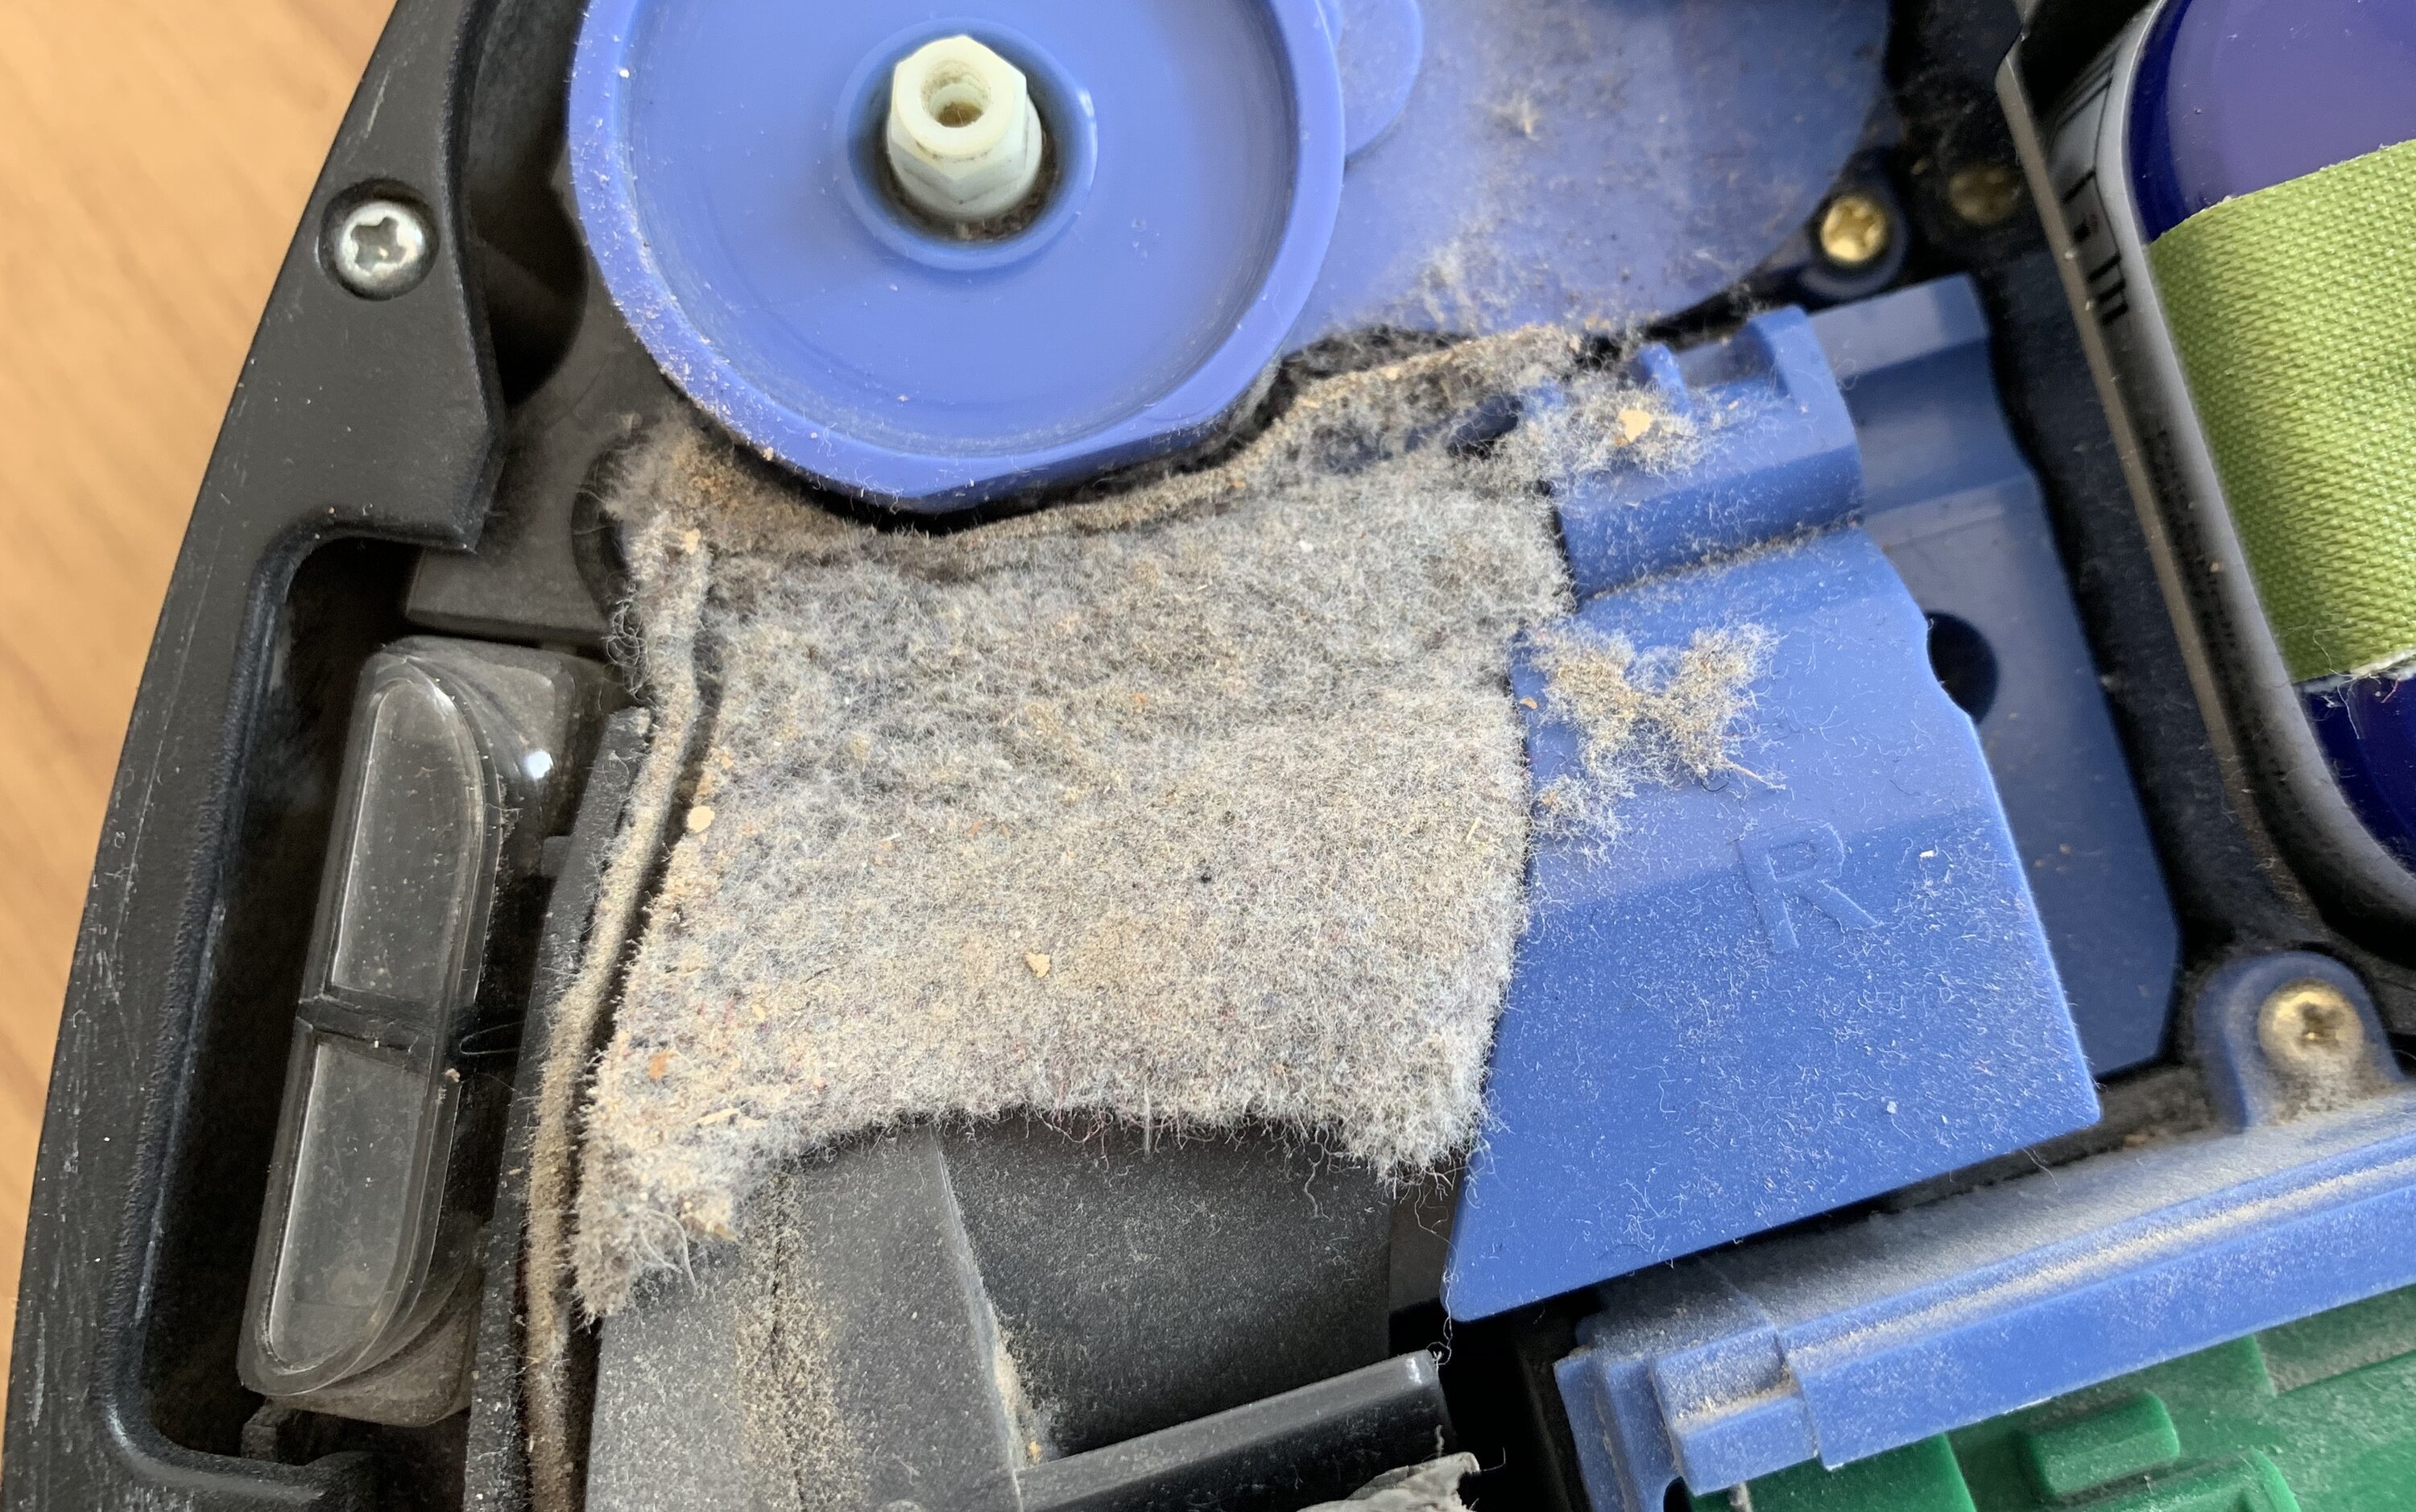
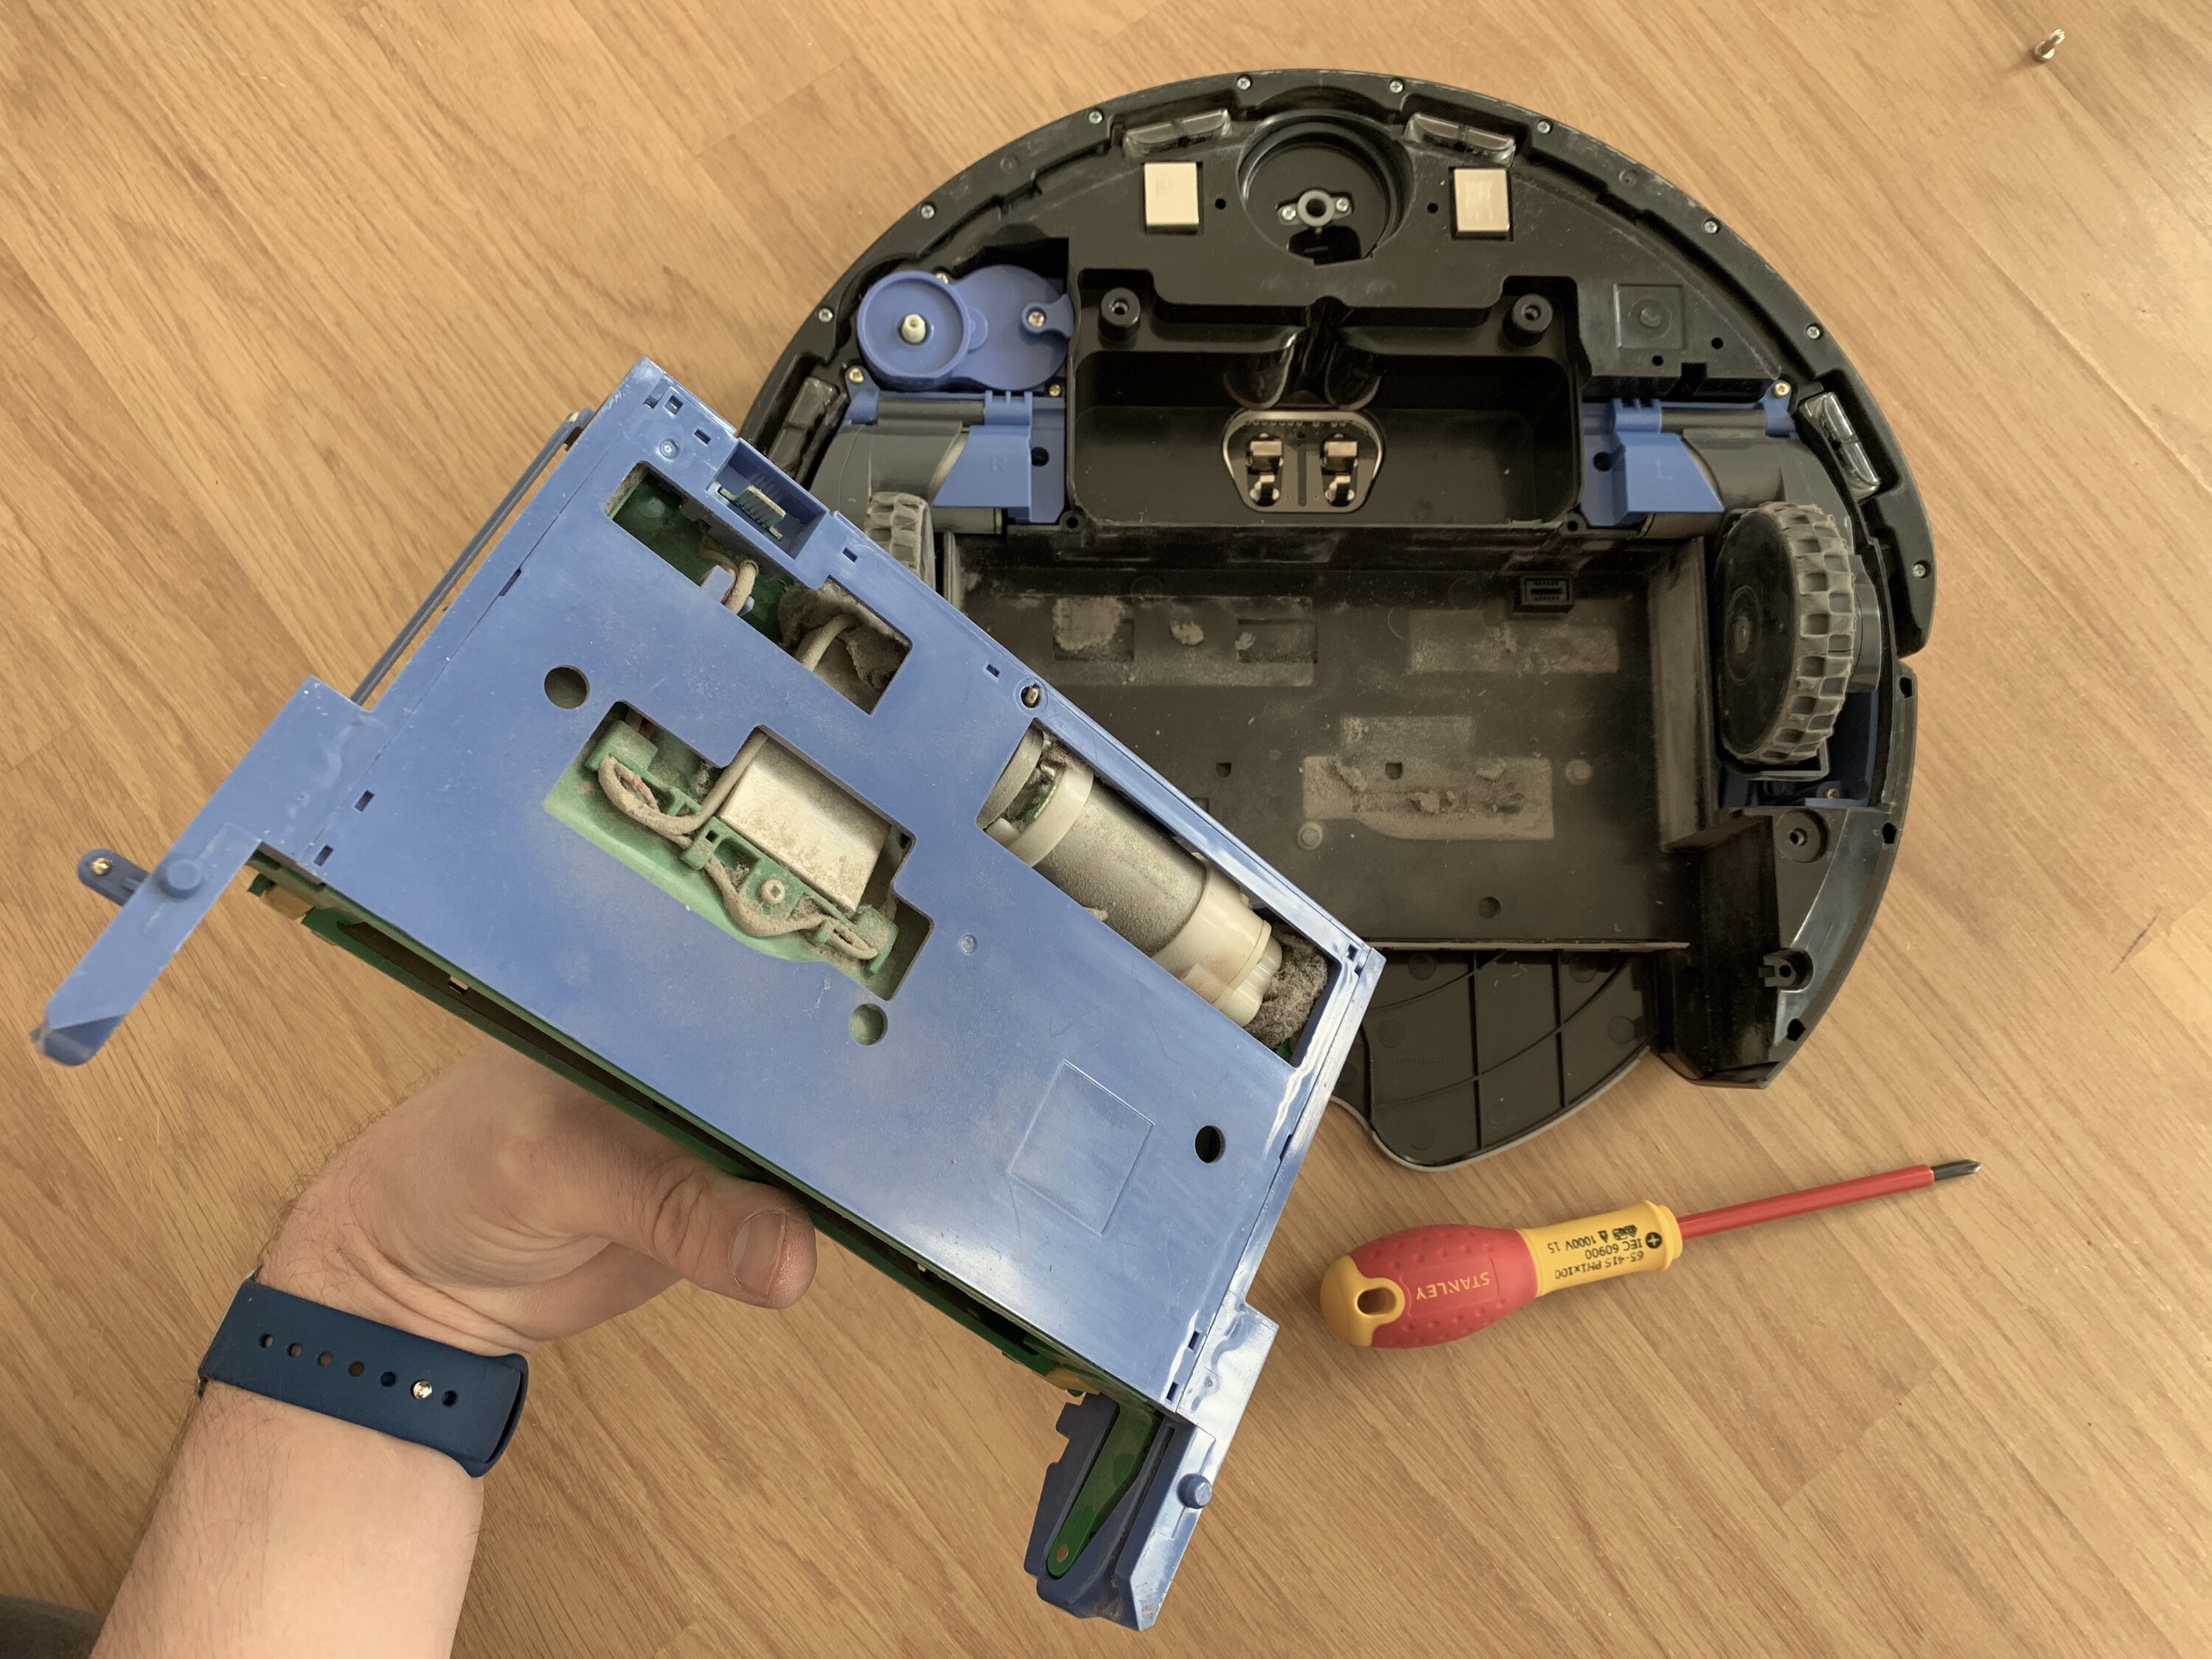
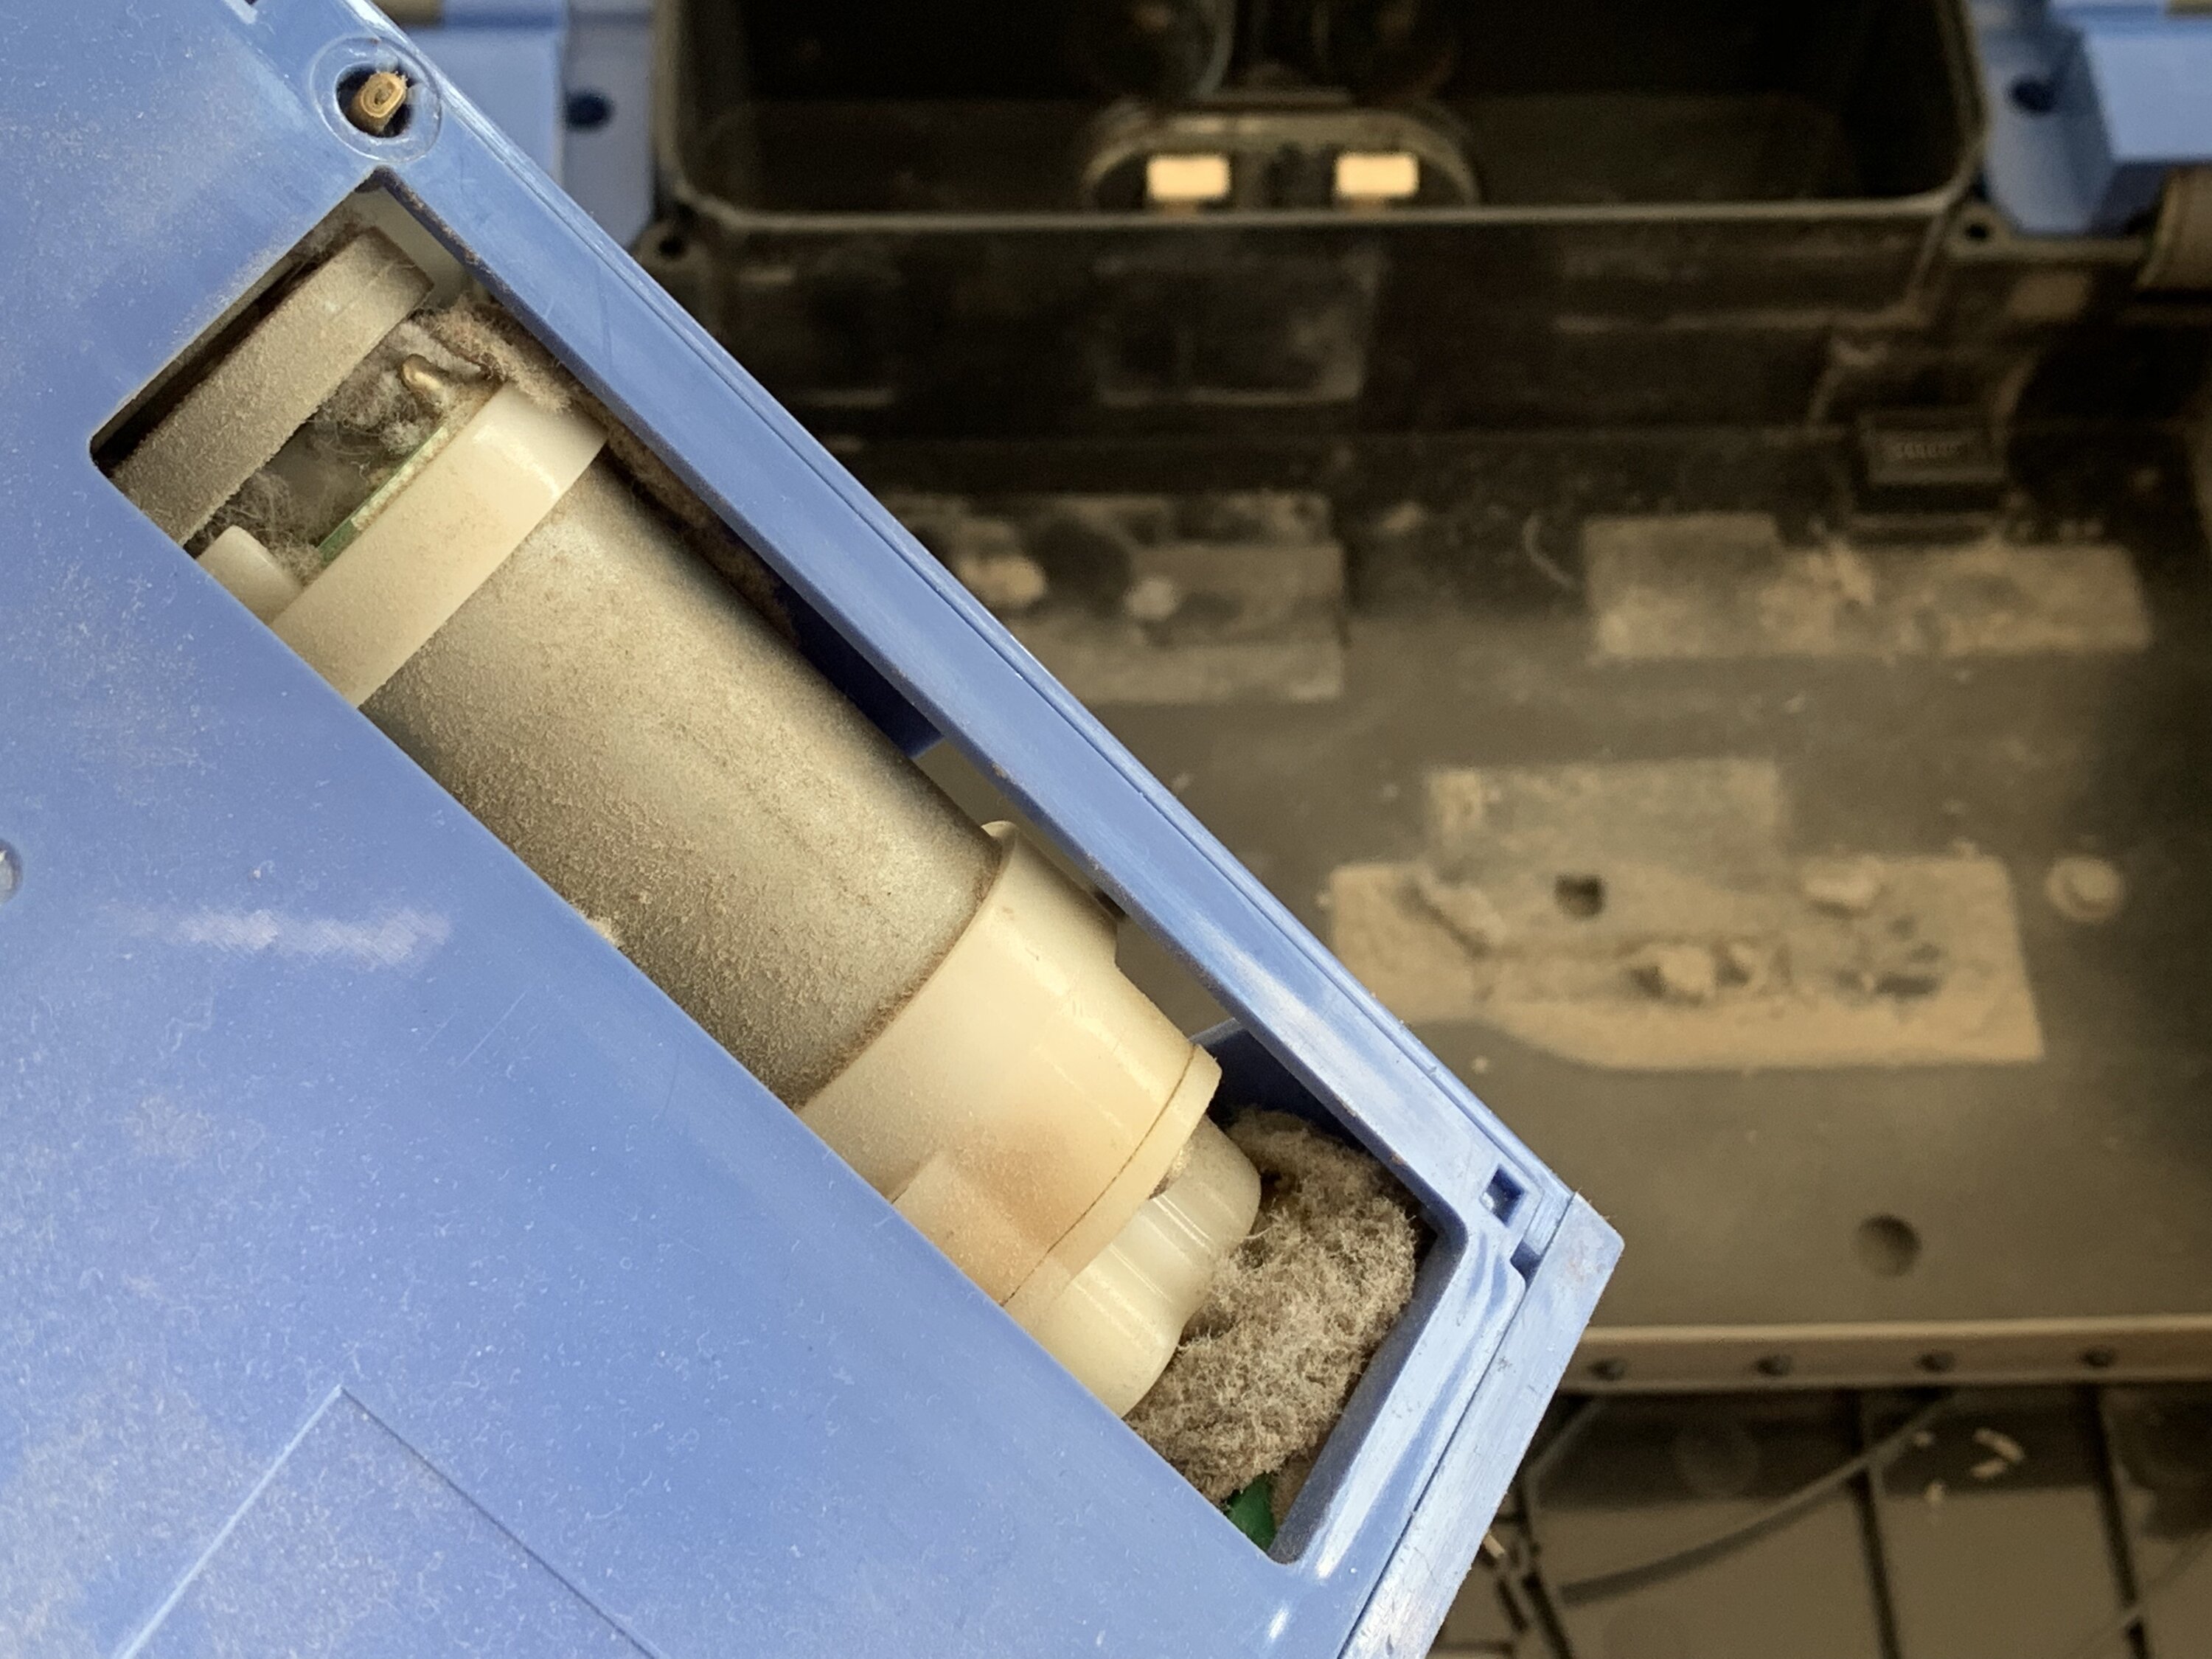
Another part that needs incidental servicing is the cleaning head. You can access it by removing the entire case containing the brushes. Dust can collect near the motor causing possible heat problems. Once removed, flip it around and fight the dust bunnies you'll encounter!
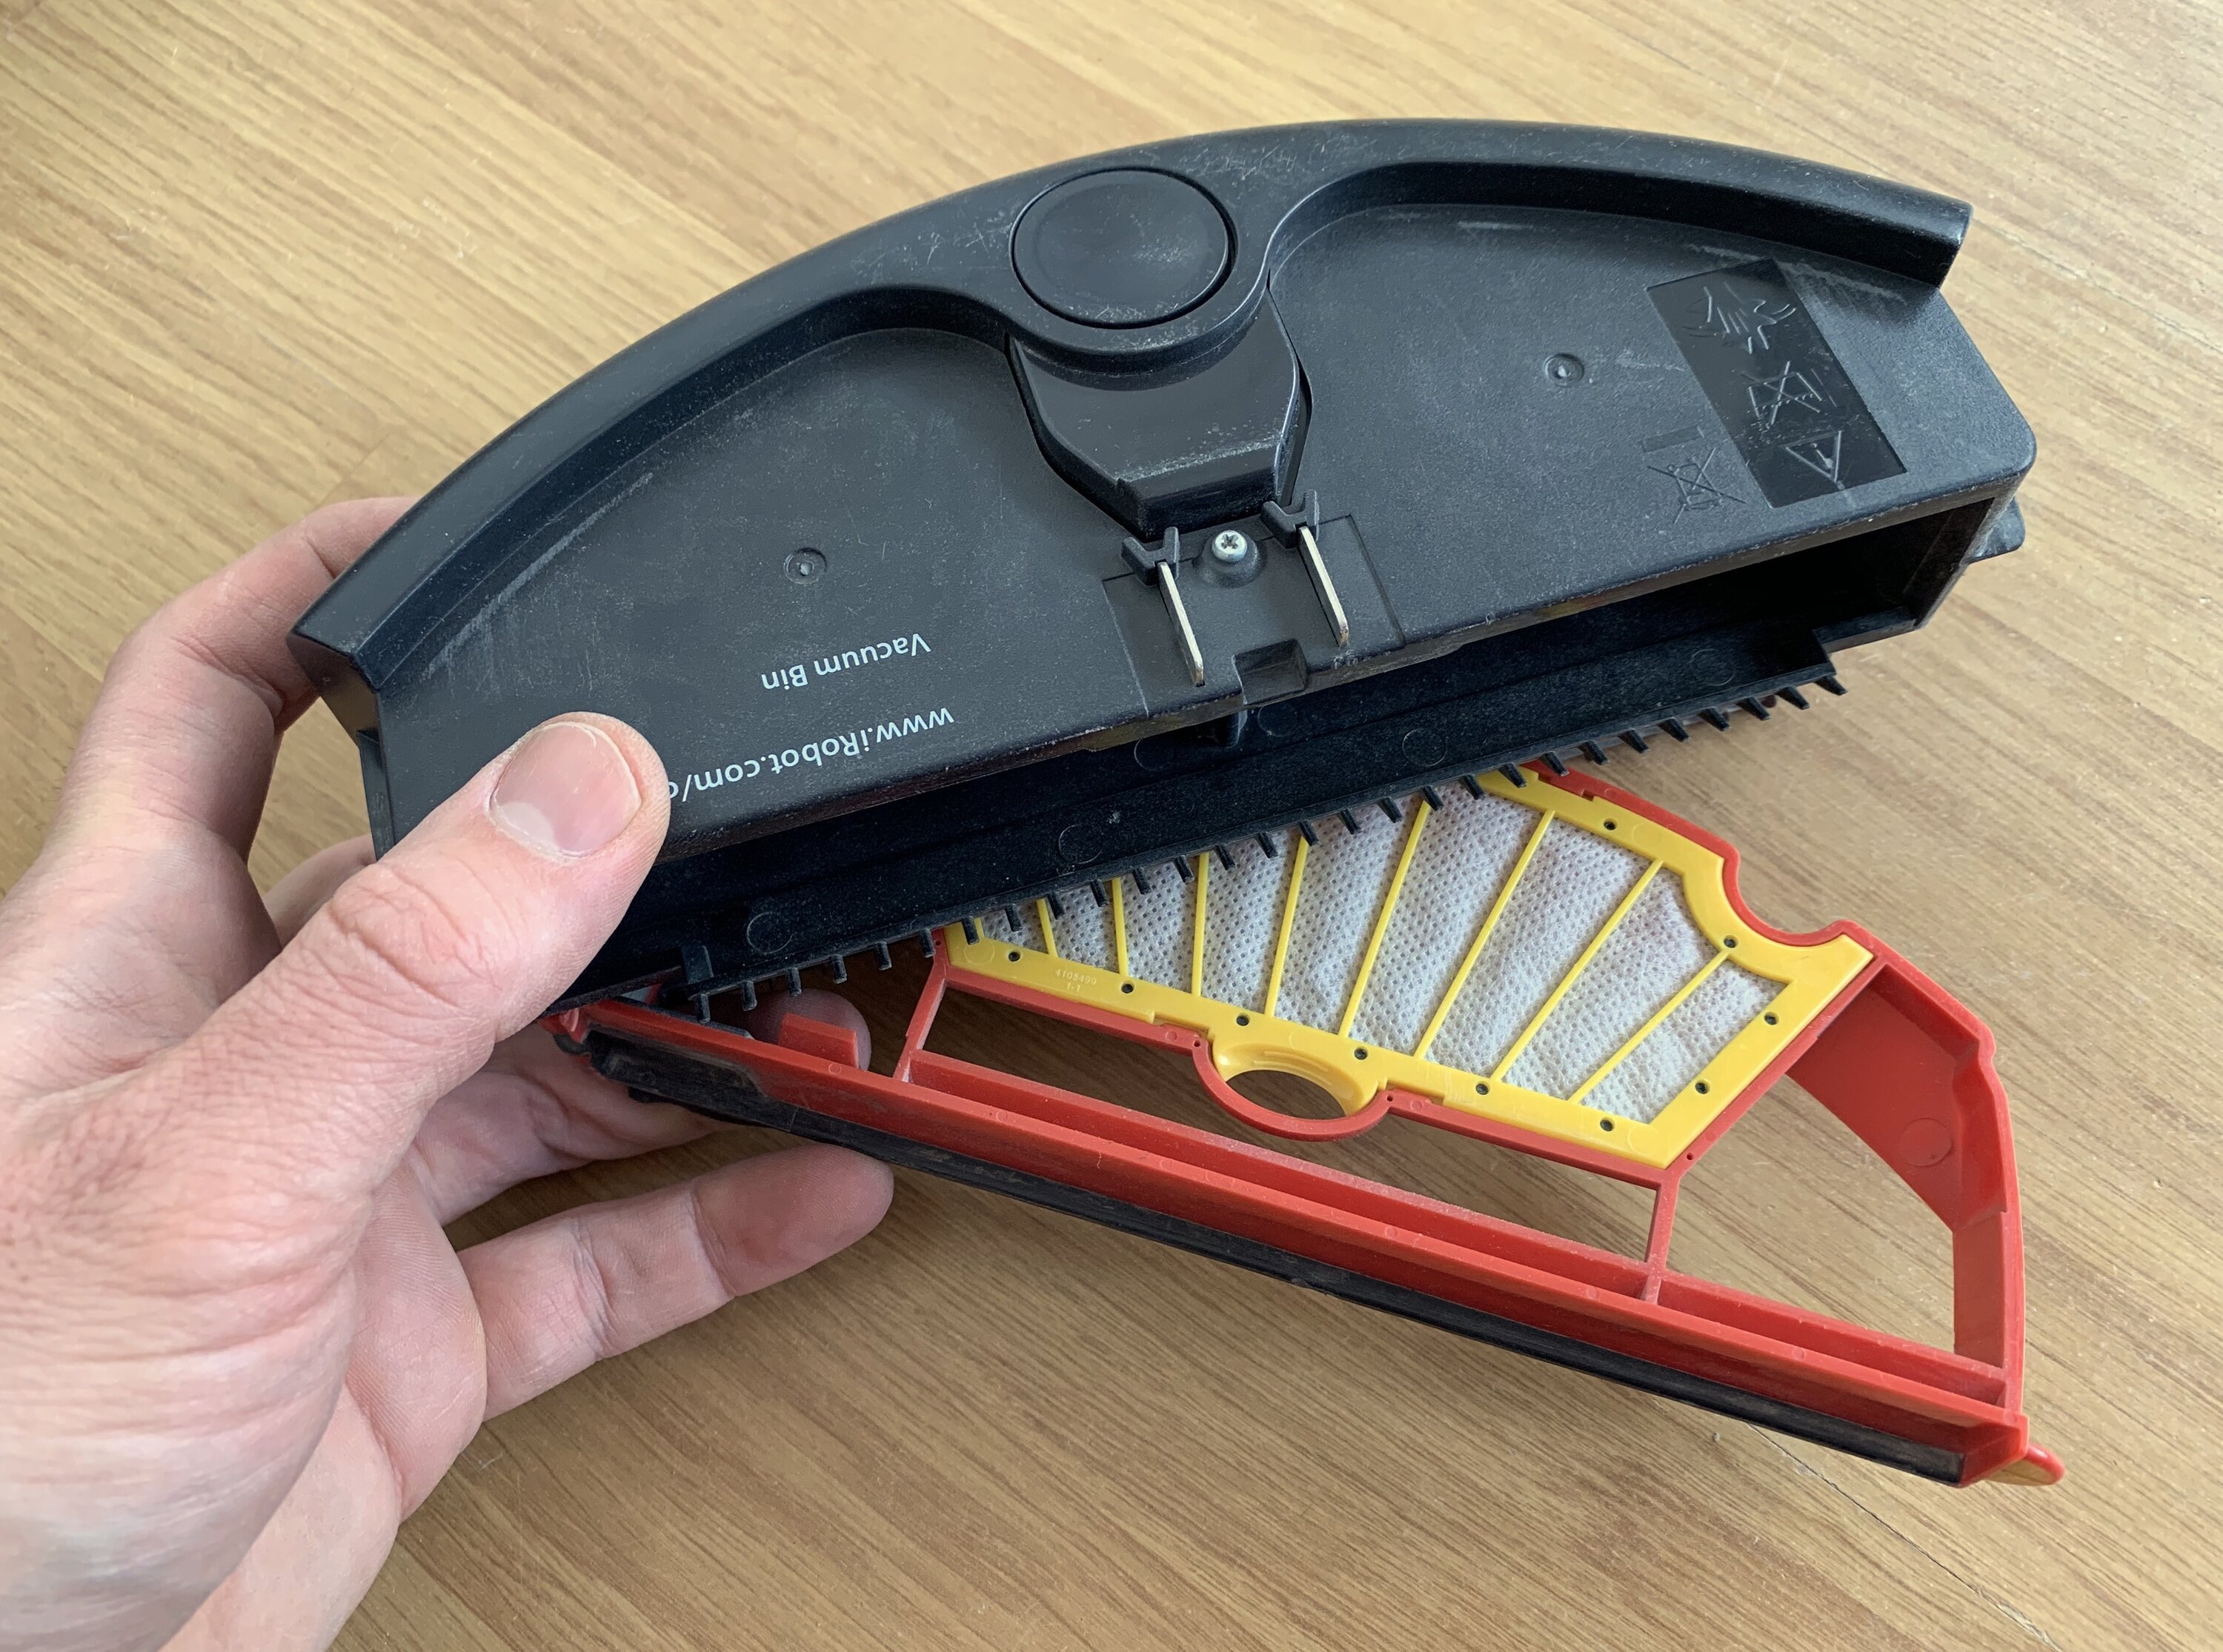
Last but not least is the dust bin and filter. Being Dutch (and kinda cheap-ish a.k.a. 'ons bent zuunig') I don't replace the filter but rather clean it. You won't believe it, but this is the original filter - in service since 2011. Alternatively, iRobot will happily sell you replacement filters for $40.


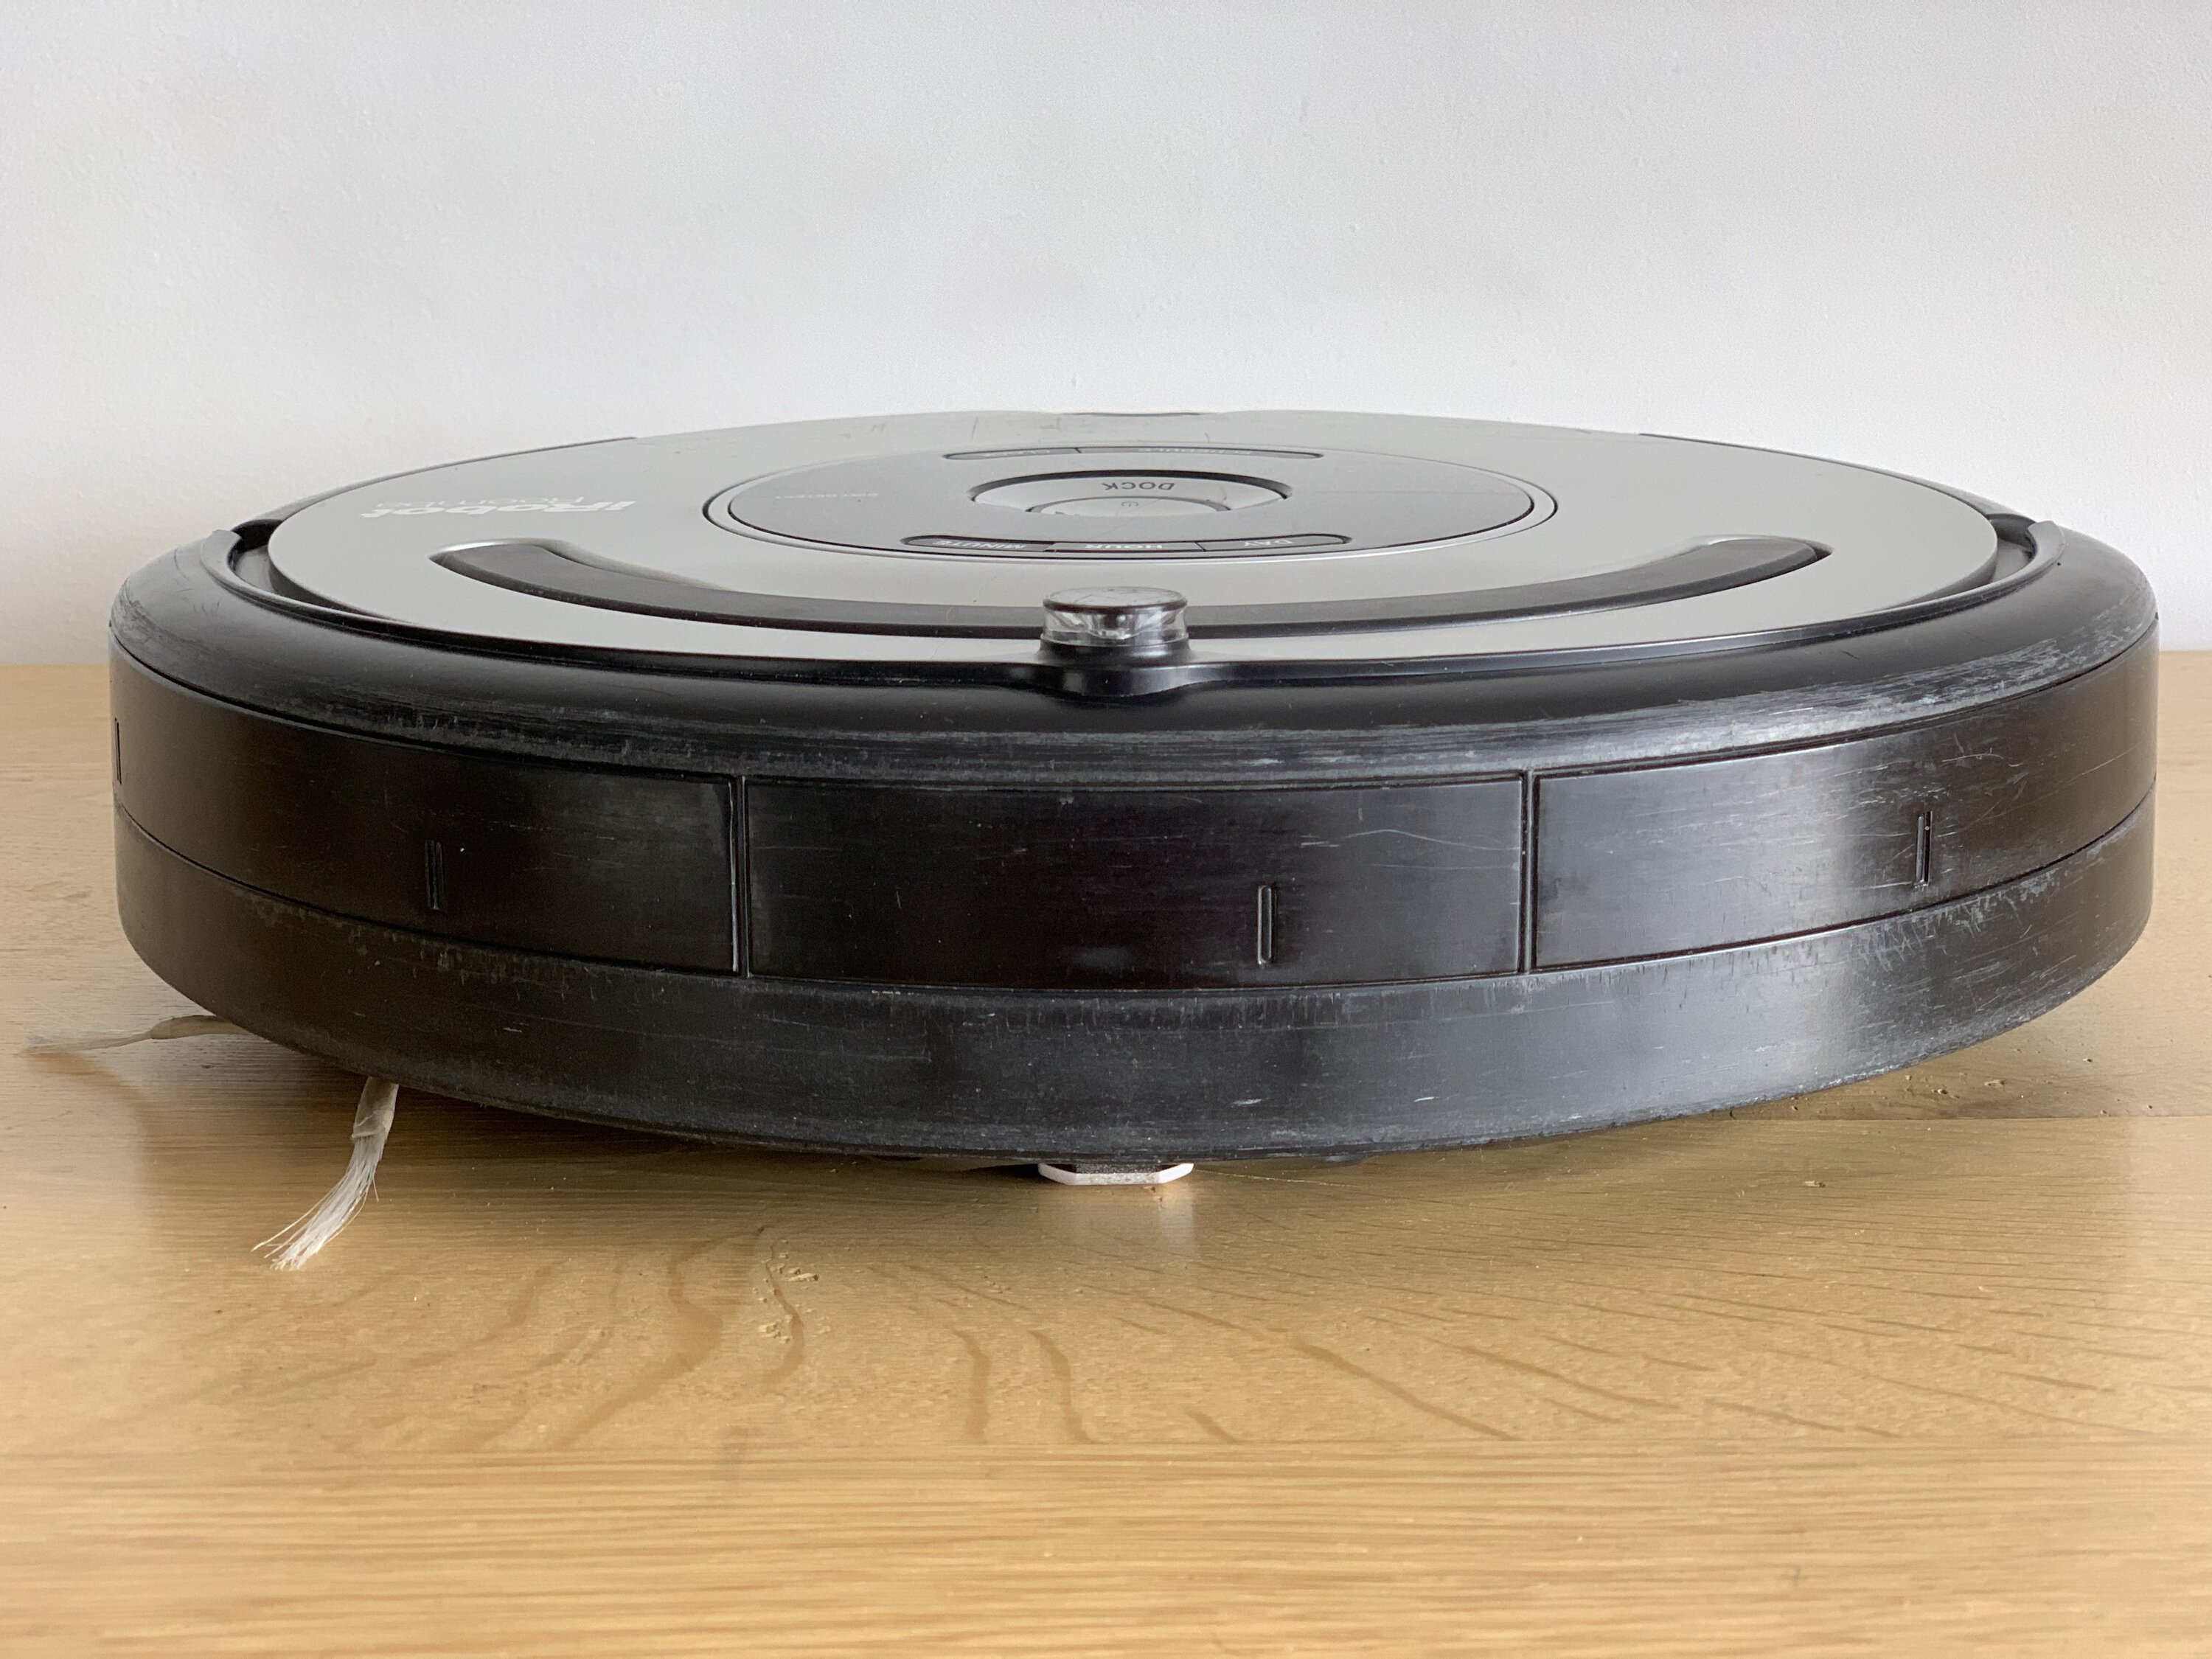
Put everything back together and check if the wheels and brushes are not obstructed. Flip it around, your Roomba is ready for action again!
Conclusion
While it may take some time and energy, it's not all that hard to service your vacuum cleaning robot. Once you've done it for the first time, its very easy to do it again. Your robotic friend will be grateful!
Download
If you enjoy reading offline, this article is available for download:
Translations
This article is available in the following languages:
RSS / Atom
Grab one of the feeds to stay up to date, the feeds contain the full posts: